Welcome to San Antonio!
San Antonio warmly welcomes visitors with open arms, offering a unique blend of rich history, vibrant culture, and modern attractions. Prepare for an unforgettable journey!
About This Guide

This guide, crafted with a local’s perspective, unveils hidden gems and essential experiences beyond the typical tourist spots. Discover the true heart of San Antonio!
San Antonio, a city steeped in history and brimming with Texan charm, extends a heartfelt bienvenido to all who venture within its borders. More than just the Alamo and the River Walk, this destination offers a captivating tapestry of experiences waiting to be uncovered. As a local, I’m thrilled to share insights that will transform your visit from a typical tourist trip into an immersive cultural adventure.
Forget the fleeting impressions; we’re diving deep into the soul of San Antonio. This isn’t about checking off landmarks, but about feeling the city’s pulse – savoring authentic flavors, discovering hidden artistic enclaves, and connecting with the warm hospitality that defines our community. From the meticulously preserved historic districts to the burgeoning culinary scene, San Antonio is a city of delightful contrasts.
Prepare to be enchanted by the echoes of the past, invigorated by the energy of the present, and inspired by the promise of the future. This guide is your key to unlocking the authentic San Antonio, a city that will undoubtedly leave an indelible mark on your heart. Let’s begin exploring!
This isn’t your typical travel brochure. San Antonio: A Local’s Guide is meticulously curated to offer an insider’s perspective, steering you away from overcrowded tourist traps and towards the genuine heart of our city. Forget generic recommendations; we’re focusing on experiences cherished by those who call San Antonio home.
I’ve poured my local knowledge into these pages, highlighting hidden gems – the quaint cafes, the vibrant art galleries, the historical pockets often overlooked by visitors. You’ll find practical advice on navigating the city, discovering authentic cuisine, and immersing yourself in the local culture. This guide prioritizes experiences that foster connection and understanding.
Consider this your personal companion, offering a blend of historical context, practical tips, and passionate recommendations. It’s designed to empower you to explore San Antonio with confidence, to venture beyond the well-trodden path, and to create memories that will last a lifetime. Let’s uncover the magic together!

Exploring Historic Neighborhoods
San Antonio’s historic neighborhoods are brimming with character, each offering a unique glimpse into the city’s past. Prepare to wander charming streets and discover hidden stories!
The Alamo & River Walk Area
The Alamo, a UNESCO World Heritage site, stands as a powerful symbol of Texan courage and independence. Beyond its historical significance, the surrounding area buzzes with activity. Expect crowds, especially during peak season, but don’t let that deter you from experiencing this iconic landmark.
Adjacent to the Alamo, the River Walk offers a completely different, yet equally captivating, experience. This network of walkways along the San Antonio River is lined with restaurants, shops, and lush greenery. Locals recommend taking a leisurely boat tour to fully appreciate the ambiance and learn about the city’s history from a unique perspective.
While the River Walk can be touristy, it’s undeniably a must-see. Venture off the main path to discover quieter sections and hidden cafes. Consider visiting during the evening when the River Walk is beautifully illuminated, creating a magical atmosphere. Don’t miss the opportunity to enjoy a riverside meal and soak in the vibrant energy of this iconic San Antonio destination. It’s a perfect blend of history and modern entertainment.
King William Historic District
King William, San Antonio’s first historic district, is a captivating neighborhood showcasing stunning 19th-century architecture. Stroll along tree-lined streets and admire the beautifully restored Victorian homes, German-influenced designs, and Italianate mansions. It’s a visual feast for architecture enthusiasts and history buffs alike.
Locals cherish this district for its peaceful atmosphere and artistic vibe. Unlike the bustling River Walk, King William offers a more relaxed and intimate experience. Take your time exploring the neighborhood on foot, appreciating the intricate details of each building and the meticulously maintained gardens.
Don’t miss a visit to the Guenther House, a local favorite known for its delicious buttermilk biscuits and charming ambiance. It’s a perfect spot for breakfast, lunch, or a sweet treat. The district also boasts art galleries, antique shops, and cozy cafes, making it an ideal destination for a leisurely afternoon. It truly embodies San Antonio’s rich cultural heritage and offers a glimpse into its past.
Pearl District: From Brewery to Culinary Hub
The Pearl District represents a remarkable transformation from a historic brewery into a vibrant culinary and cultural destination. Once home to the Pearl Brewery, this area has been meticulously revitalized, retaining its industrial charm while embracing modern innovation.
Locals flock to Pearl for its diverse array of restaurants, ranging from upscale dining experiences to casual eateries. The Culinary Institute of America (CIA), San Antonio, adds to the district’s gastronomic appeal, attracting talented chefs and innovative concepts. Explore the weekend farmers market, showcasing local produce, artisanal goods, and delicious food vendors.
Beyond the food scene, Pearl offers unique shops, art installations, and event spaces. The Hotel Emma, a beautifully restored brewery hotel, is a landmark destination. Enjoy live music, outdoor concerts, and community events throughout the year. It’s a place where history, flavor, and community converge, making it a must-visit for anyone seeking an authentic San Antonio experience.
Southtown Arts District
Southtown, just south of the River Walk, is San Antonio’s vibrant arts district, brimming with creativity and a distinctly local vibe. This historically residential area has blossomed into a haven for artists, galleries, and unique boutiques.
Stroll along South Flores Street and explore the numerous art galleries showcasing diverse mediums, from contemporary paintings to handcrafted sculptures. First Fridays events transform the district into a lively street party, with gallery openings, live music, and food trucks. Discover hidden courtyards, colorful murals, and quirky shops offering one-of-a-kind treasures.
Southtown’s culinary scene is equally eclectic, featuring trendy restaurants, cozy cafes, and lively bars. It’s a place where you can enjoy a sophisticated dinner, grab a casual bite, or sip craft cocktails. The district’s walkable streets and artistic atmosphere make it a favorite among locals seeking a creative and authentic San Antonio experience.
San Antonio’s Culinary Scene
San Antonio boasts a diverse and delicious culinary landscape, blending Tex-Mex traditions with innovative flavors. Prepare your palate for an unforgettable gastronomic adventure!
Tex-Mex & Authentic Mexican Cuisine
San Antonio’s culinary identity is deeply rooted in its Tex-Mex and authentic Mexican heritage, offering a vibrant tapestry of flavors that tantalize the taste buds. Forget everything you think you know about Tex-Mex; here, it’s an art form perfected over generations.
For a truly authentic experience, venture beyond the River Walk and explore family-owned restaurants in the West and South sides. These establishments serve up time-honored recipes passed down through countless generations, showcasing the true essence of Mexican cuisine. Think slow-cooked meats, handmade tortillas, and vibrant salsas bursting with fresh ingredients.
Don’t miss the opportunity to sample regional specialties like puffy tacos (a San Antonio original!), barbacoa (slow-cooked meat traditionally prepared in a pit), and enchiladas with creamy, flavorful sauces. Local favorites include Ray’s Drive Inn for classic Tex-Mex and Mi Tierra Café y Panadería for a festive atmosphere and delicious pastries. Be sure to pair your meal with a refreshing agua fresca or a locally brewed cerveza!
Exploring these culinary gems isn’t just about the food; it’s about immersing yourself in the culture and traditions that make San Antonio so unique.
The Pearl District’s Restaurants
The Pearl District, once a dilapidated brewery, has blossomed into a culinary destination, boasting a diverse array of restaurants that cater to every palate. This revitalized area offers a sophisticated dining experience, blending innovative cuisine with a historic ambiance.
Cured, renowned for its charcuterie and inventive dishes, is a must-visit for meat lovers. For a taste of upscale Mexican, try La Gloria, offering street food-inspired delights in a vibrant setting; Bakery Lorraine provides exquisite pastries and light fare, perfect for a leisurely brunch or afternoon treat.
Beyond these staples, the Pearl hosts rotating pop-ups and seasonal restaurants, ensuring a constantly evolving culinary landscape. The Hotel Emma’s Supper offers refined dining, while the food hall provides a casual, communal experience with diverse vendors.
Don’t overlook the weekend farmers market, where you can sample local produce and artisanal goods. The Pearl’s restaurants aren’t just about eating; they’re about experiencing the heart of San Antonio’s culinary renaissance.
Local Breweries & Distilleries
San Antonio’s craft beverage scene is thriving, offering a delightful escape for beer and spirit enthusiasts. Beyond the River Walk’s tourist traps, a wave of local breweries and distilleries are crafting unique and flavorful concoctions.
Freetail Brewing Co., a San Antonio staple, offers a wide range of beers, from classic lagers to experimental ales. Alamo Beer Company celebrates the city’s heritage with traditional brews and a lively atmosphere. For whiskey lovers, Ranger Creek Brewing & Distilling combines brewing and distilling under one roof, producing both exceptional beers and Texas-style whiskey.
Dorćol Distilling + Brewing offers a unique blend of Balkan-inspired spirits and craft beers. Numerous smaller taprooms and distilleries are scattered throughout the city, each with its own distinct character.
Many offer tours and tastings, providing an immersive experience into the art of brewing and distilling. Explore these local gems and discover the spirited side of San Antonio!
Food Trucks & Markets
San Antonio’s culinary landscape extends far beyond traditional restaurants, boasting a vibrant and diverse food truck scene and bustling public markets. These offer a casual, affordable, and incredibly flavorful way to experience the city’s gastronomic delights.
The Street Food Finder website and app are invaluable resources for locating food trucks throughout the city, showcasing everything from gourmet tacos and Korean BBQ to wood-fired pizzas and artisanal desserts. Many trucks gather in designated “food truck parks,” creating lively social hubs.
The Pearl District Farmers Market is a must-visit, offering fresh produce, local artisan goods, and prepared foods. Other markets, like the First Tuesday Trading Post, provide unique shopping experiences and a glimpse into local craftsmanship.
Exploring these options allows visitors to sample a wide array of cuisines and support local entrepreneurs. Don’t miss the opportunity to indulge in San Antonio’s thriving street food culture!
Beyond the Tourist Trail
Venture off the beaten path to uncover San Antonio’s hidden treasures! Explore lesser-known missions, serene gardens, and expansive parks for a truly local experience.
Mission San Jose
Mission San Jose, often hailed as the “Queen of the Missions,” stands as a testament to San Antonio’s rich colonial past and is a must-visit for those seeking a deeper understanding of the city’s history. Unlike the more frequently visited Alamo, Mission San Jose offers a more immersive and tranquil experience, allowing visitors to truly connect with the spirit of the past.
Established in 1718, this magnificent mission boasts remarkably preserved architecture, including its iconic rose window and impressive stone arches. Wander through the grounds and imagine life as it was for the indigenous people and Spanish missionaries who once called this place home. The visitor center provides insightful exhibits detailing the mission’s history and cultural significance.
Locals recommend dedicating at least a couple of hours to fully explore the mission complex. Don’t miss the opportunity to attend a living history demonstration, where skilled artisans showcase traditional crafts like stone masonry and blacksmithing. The surrounding parkland offers scenic walking trails and picnic spots, making it a perfect destination for a relaxing afternoon. It’s a powerful reminder of a pivotal era in Texas history, offering a profound and moving experience.
Japanese Tea Garden
Escape the bustling city and find serenity within the enchanting Japanese Tea Garden, a hidden oasis nestled in Brackenridge Park. Originally conceived for the 1918 Texas Centennial Exposition, this garden has evolved into a beloved San Antonio landmark, offering a tranquil retreat for locals and visitors alike.
Wander along winding stone pathways, crossing arched bridges over koi-filled ponds, and admire the meticulously landscaped gardens. The garden features a stunning waterfall cascading into a serene pond, surrounded by lush greenery and vibrant flowers. Discover hidden pagodas, stone lanterns, and meticulously pruned bonsai trees.
Locals cherish this space for its peaceful atmosphere and beauty. The Tea Garden is a perfect spot for quiet contemplation, a leisurely stroll, or a relaxing picnic. The Jingu House, a traditional Japanese tea house, offers a selection of teas and light refreshments. It’s a truly unique and restorative experience, offering a glimpse into Japanese culture and design, and a welcome respite from the Texas heat.
Brackenridge Park
Brackenridge Park, a sprawling 343-acre urban oasis, is the green heart of San Antonio, beloved by locals for its diverse attractions and natural beauty. Established in 1899, it offers a respite from the city’s hustle and bustle, providing a space for recreation, relaxation, and connection with nature.
Beyond the famed Japanese Tea Garden, the park boasts the San Antonio Zoo, a popular destination for families, and the historic Witte Museum, showcasing natural history and science exhibits. Miles of walking and biking trails meander through the park’s lush landscapes, perfect for an active afternoon.
Locals enjoy picnics by the San Antonio River, kayaking or paddle boating on the waterways, and attending outdoor events held throughout the year. The park’s mature trees provide ample shade, making it a comfortable escape even during the hot summer months. Brackenridge Park truly embodies the spirit of San Antonio – a blend of history, culture, and natural beauty.
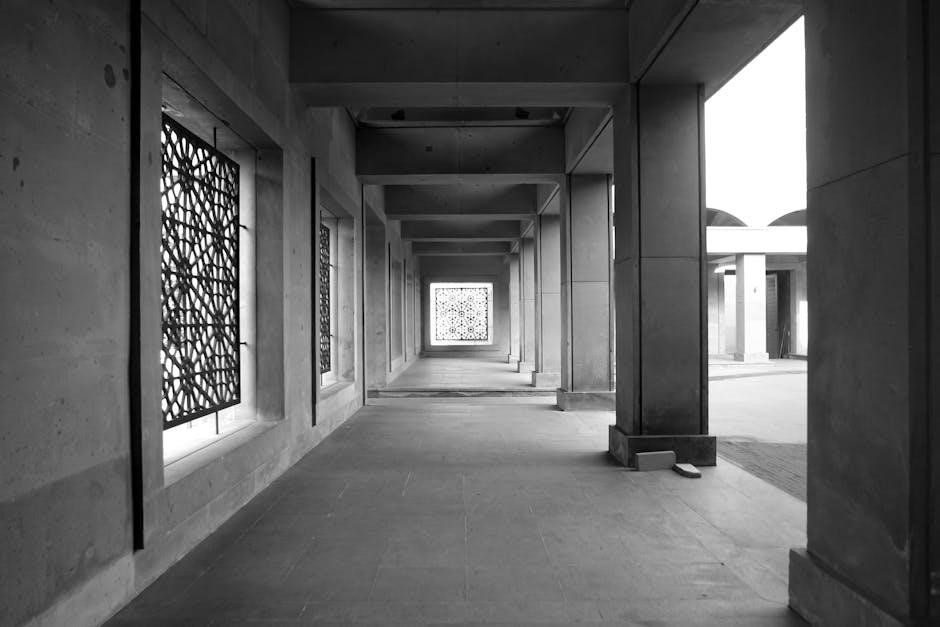
The San Antonio Missions National Historical Park
The San Antonio Missions National Historical Park, a UNESCO World Heritage site, offers a profound journey through the region’s colonial past. Comprising four historic missions – Concepción, San José, San Juan, and Espada – along with the Alamo, the park showcases the Spanish influence on Texas and the lives of the indigenous people who inhabited the area.
Mission San José, the largest, is particularly impressive, offering a glimpse into the daily life of mission residents. Locals appreciate the park not just for its historical significance, but also for its peaceful atmosphere and well-maintained grounds. A 15-mile trail connects the missions, perfect for biking or hiking, allowing visitors to experience the landscape as early settlers did.
Exploring these missions provides a unique perspective on San Antonio’s cultural heritage, offering a deeper understanding of the city’s complex history. It’s a must-visit for anyone seeking to connect with the soul of San Antonio.

Practical Information for Visitors
Planning your trip? San Antonio offers diverse transport, accommodation, and experiences. Knowing key details ensures a smooth, enjoyable visit to our beautiful city!

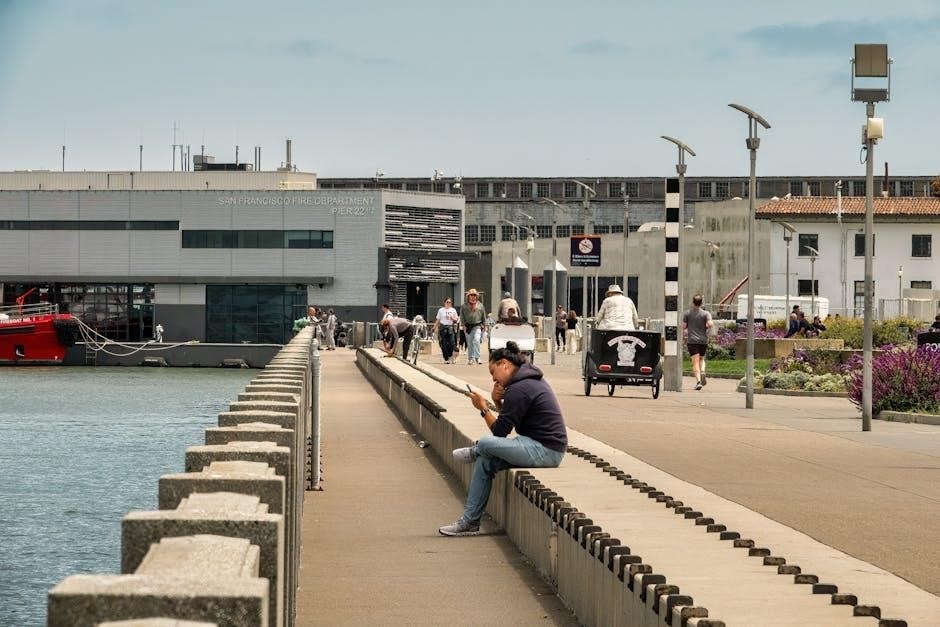
Getting Around San Antonio
Navigating San Antonio is surprisingly easy, offering a variety of options to suit every preference and budget. While having a car provides flexibility for exploring areas outside the city center, it’s not essential for experiencing the main attractions. Downtown is very walkable, especially along the famed River Walk, and many hotels are conveniently located within strolling distance of key sites like the Alamo and Market Square.
For longer distances, consider utilizing the VIA Metropolitan Transit system. Their bus network covers a wide area, and the fare is quite reasonable. Ride-sharing services like Uber and Lyft are also readily available and provide a convenient point-to-point transportation solution. The city also boasts a bike-sharing program, B-cycle, perfect for leisurely exploration of the River Walk and parks.
Don’t overlook the River Walk barges! These offer a unique and scenic way to travel between certain points along the river, providing a relaxing alternative to walking. Finally, San Antonio International Airport (SAN) is easily accessible by taxi, ride-sharing, or the Flyer bus service connecting to the Old Town Transit Center.
San Antonio International Airport (SAN)
San Antonio International Airport (SAN) serves as the primary air gateway to the city, efficiently connecting travelers to destinations across the globe. Originally established in 1928 as Lindbergh Field, honoring Charles Lindbergh’s pioneering flight, SAN has continually evolved to meet the demands of modern aviation. Despite being one of the busiest single-runway airports in the United States, it maintains a manageable and user-friendly atmosphere.
The airport is operated by the San Antonio Airport System and offers a comprehensive range of services and amenities. Rental car facilities are conveniently located at the Rental Car Center, accessible via frequent and complimentary shuttle buses from the terminals. Passengers will find a variety of dining options, shops, and comfortable waiting areas throughout the airport.
For quick access to downtown, taxis, ride-sharing services, and public transportation are readily available. SAN prioritizes a seamless travel experience, ensuring a smooth start or end to your San Antonio adventure. Check the airport’s website for real-time flight information and security updates.
Accommodation Options

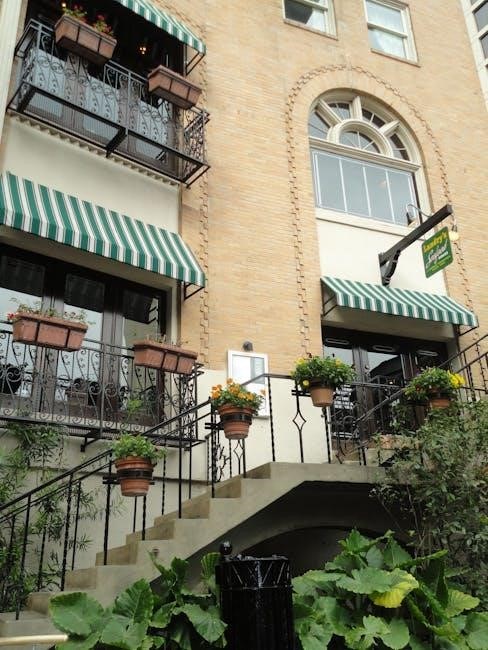
San Antonio presents a diverse array of lodging choices, catering to every preference and budget. From luxurious historic hotels lining the River Walk to charming boutique inns tucked away in quiet neighborhoods, you’ll find the perfect base for your exploration. For a truly immersive experience, consider staying in a renovated historic building in the King William District, offering a glimpse into the city’s elegant past.
The downtown area boasts numerous well-known hotel chains, providing convenience and familiar comforts. The Pearl District offers upscale accommodations with a modern aesthetic, close to culinary delights and cultural attractions. Budget-conscious travelers will discover a range of affordable hotels and motels slightly outside the city center, with easy access via public transportation;
Airbnb and VRBO provide options for unique stays, including apartments, casitas, and entire homes, allowing you to experience San Antonio like a local. Booking in advance, especially during peak season, is highly recommended to secure your preferred accommodation.
Best Time to Visit
San Antonio enjoys a subtropical climate, making it a pleasant destination year-round, but the “best” time depends on your priorities. Spring (March-May) and Fall (September-November) offer the most comfortable temperatures, ideal for exploring outdoor attractions like the Missions and Brackenridge Park. These seasons also boast fewer crowds than the peak summer months.
Summer (June-August) is hot and humid, with temperatures often exceeding 90°F. While the River Walk provides some respite, be prepared for intense heat. However, summer is also when many festivals and events take place. Winter (December-February) is mild, with occasional cool spells, and offers a festive atmosphere, particularly during the holidays.
Consider Fiesta San Antonio in April, a ten-day celebration of the city’s culture, or the River Walk’s holiday lighting spectacular in December. Shoulder seasons provide a balance of pleasant weather and fewer tourists, offering a more relaxed experience.