guided surgery dental implant

Guided surgery revolutionizes dental implant placement, offering enhanced precision and predictability. Modern techniques leverage 3D imaging and digital planning for optimal outcomes.

What are Dental Implants?

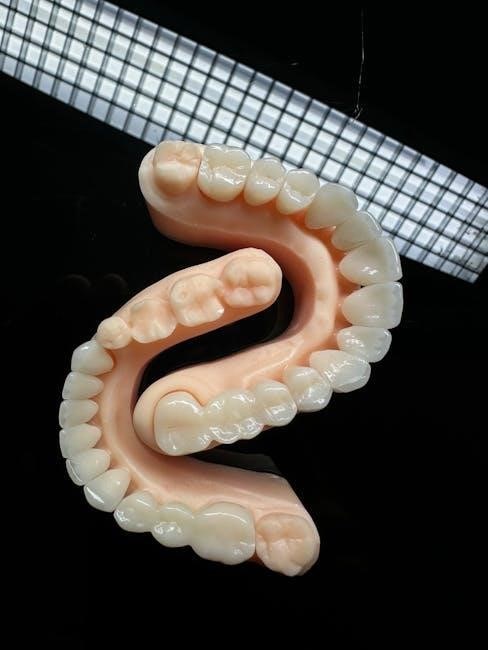
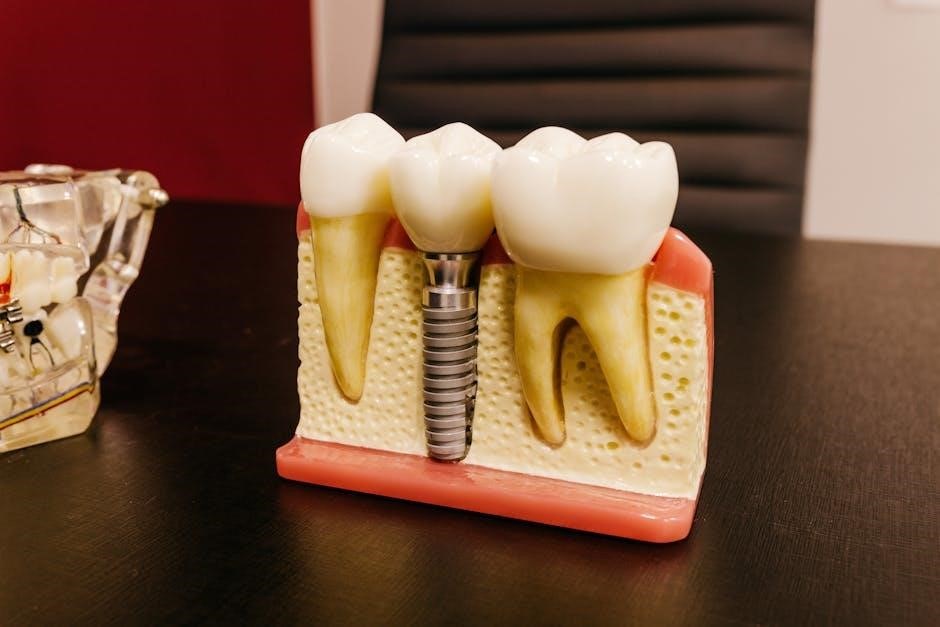
Dental implants are artificial tooth roots, typically made of biocompatible titanium, surgically placed into the jawbone. They serve as a foundation for replacement teeth, offering a durable and aesthetically pleasing solution for missing teeth. Unlike dentures or bridges, implants fuse with the bone through a process called osseointegration, providing stability and function akin to natural teeth.

This innovative approach supports individual crowns, bridges, or even full dentures. Modern advancements, like computer-guided surgery, enhance implant placement accuracy, ensuring optimal long-term success and patient satisfaction.

The Evolution of Implant Dentistry

Implant dentistry has dramatically evolved from early, less predictable methods. Initially, implant placement relied heavily on tactile feel and visual assessment. The introduction of computer-guided surgery marked a significant leap forward, utilizing 3D imaging – like CBCT scans – for precise planning.

This digital workflow minimizes surgical risks and improves accuracy. Today, technologies like CAD/CAM and intraoral scanners further refine the process, leading to more efficient, comfortable, and successful implant restorations for patients seeking lasting tooth replacement solutions.

Understanding Computer-Guided Implant Surgery

Computer-guided surgery utilizes advanced 3D technology to plan and execute dental implant procedures with remarkable accuracy, enhancing predictability and safety.

What is Computer-Guided Surgery?

Computer-guided surgery represents a significant advancement in dental implant dentistry. It involves utilizing 3D imaging – typically Cone Beam Computed Tomography (CBCT) scans – and specialized software to create a detailed, virtual treatment plan. This plan precisely maps the ideal position, angle, and depth for each implant.

A physical surgical guide, fabricated based on this digital plan, is then used during the actual surgery. This guide fits securely over the patient’s jaw, directing the drill and ensuring the implants are placed exactly as planned, minimizing deviations and maximizing precision. It’s a proactive approach to implant placement.

The Role of 3D Imaging (CBCT)

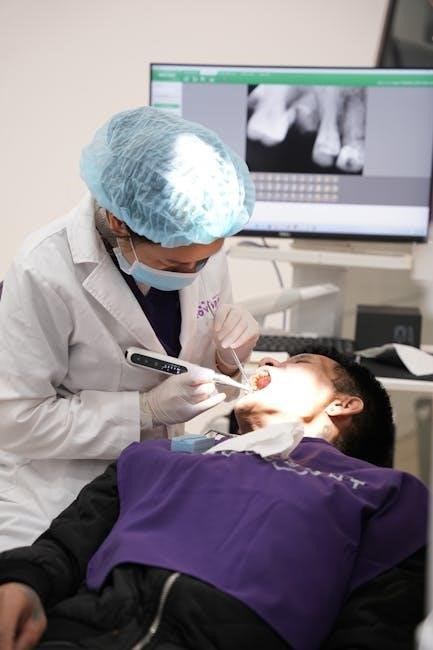
Cone Beam Computed Tomography (CBCT) is fundamental to computer-guided implant surgery. Unlike traditional X-rays, CBCT provides a three-dimensional representation of the patient’s jawbone, teeth, and surrounding structures. This detailed imaging allows clinicians to accurately assess bone volume, identify critical anatomical landmarks like nerves and sinuses, and plan implant placement with exceptional precision.

CBCT scans eliminate guesswork, revealing the ideal implant sites and minimizing the risk of complications. The data acquired forms the basis for the digital treatment planning process, ensuring a predictable and successful outcome.

Digital Treatment Planning Software

Digital treatment planning software utilizes the CBCT data to create a virtual environment for implant placement. Dentists can virtually position implants, assessing factors like angulation, depth, and proximity to vital structures. This allows for optimal prosthetic outcomes and minimizes potential surgical risks.

Sophisticated algorithms simulate bone density and stress distribution, aiding in implant selection and ensuring long-term stability. The software facilitates collaboration and communication, enhancing treatment predictability and patient satisfaction.

Benefits of Guided Surgery

Guided surgery delivers superior accuracy, reduced risks, and improved comfort for patients receiving dental implants. It minimizes invasiveness and optimizes outcomes.

Increased Precision and Accuracy

Guided surgery significantly enhances the precision of dental implant placement. Utilizing pre-operative 3D imaging, like CBCT scans, and digital treatment planning software, surgeons can visualize the ideal implant position with remarkable accuracy. This minimizes deviations from the planned placement, reducing the potential for errors.

Surgical guides, fabricated from these digital plans, act as a stencil, directing drill placement. This leads to more predictable outcomes, especially in areas with limited bone volume or critical anatomical structures, ultimately improving long-term implant success rates.

Reduced Surgical Risks

Guided surgery for dental implants demonstrably lowers several surgical risks. Precise planning minimizes the chance of damaging vital structures like nerves and sinuses. The use of surgical guides restricts drill depth and angle, preventing perforation or impingement.

Furthermore, the less invasive nature of guided procedures often results in reduced bleeding and swelling. This is particularly beneficial for patients with systemic conditions or those on anticoagulant medications, contributing to a safer and more predictable surgical experience.

Minimized Invasive Procedures

Guided surgery in dental implant dentistry facilitates significantly less invasive procedures. Pre-surgical planning allows for flapless techniques, eliminating the need for extensive gum incisions and subsequent suturing. This approach preserves more natural tissue, promoting faster healing and reduced post-operative discomfort.

Smaller incisions also translate to a decreased risk of infection and improved aesthetic outcomes. The precision offered by surgical guides allows for targeted bone preparation, minimizing trauma to surrounding tissues.

Improved Patient Comfort

Guided surgery for dental implants demonstrably enhances patient comfort throughout the entire process. The precision of pre-planned implant placement reduces surgical time and trauma, leading to less post-operative pain and swelling. Minimally invasive techniques, often utilizing flapless approaches, further contribute to a gentler experience.

Patients often report quicker recovery times and reduced reliance on pain medication. The predictability of the procedure also alleviates anxiety associated with traditional implant surgery.

The Guided Surgery Process: A Step-by-Step Guide

Guided implant surgery involves detailed planning, CBCT scans, virtual placement, surgical guide creation, and precise implant delivery for optimal results.

Initial Consultation and Assessment

The first step involves a comprehensive evaluation of your oral health, including a review of your medical history and a thorough clinical examination. This assessment determines your suitability for dental implants and guided surgery. Dentists will discuss your goals, expectations, and any concerns you may have regarding the procedure. A detailed examination assesses bone density and volume, crucial for implant stability. Digital impressions or traditional molds capture your jaw’s structure, initiating the planning phase. This initial phase is vital for creating a personalized treatment plan tailored to your specific needs, ensuring a successful outcome with guided implant placement.

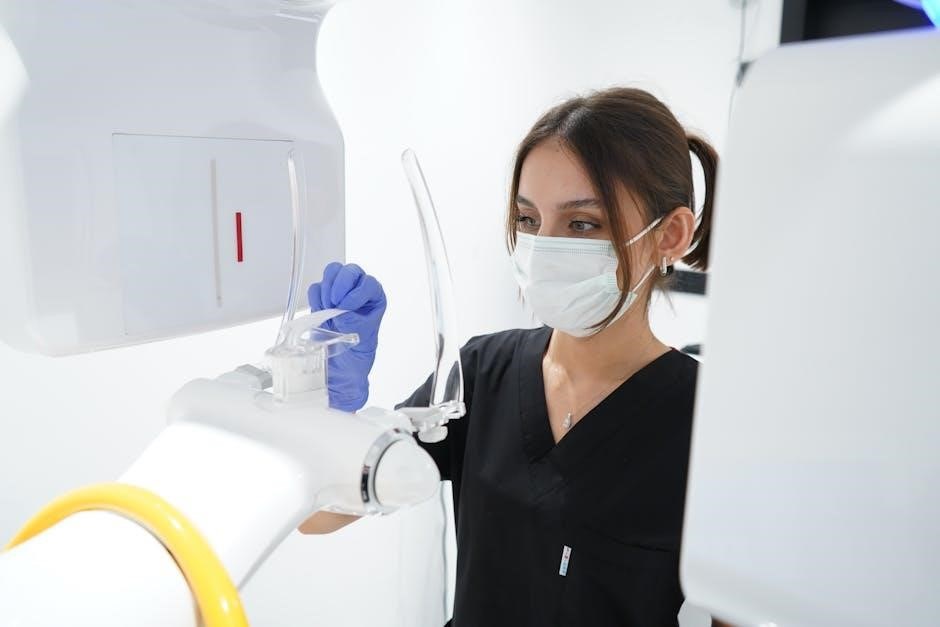
CBCT Scan and Data Acquisition

A Cone Beam Computed Tomography (CBCT) scan is paramount in guided surgery, providing a detailed three-dimensional image of your jawbone. This scan accurately maps bone density, nerve locations, and existing anatomical structures. The acquired data is then digitally imported into specialized planning software. Precise measurements are taken to determine optimal implant placement positions, avoiding vital structures. High-resolution imaging ensures accurate virtual implant planning, minimizing surgical risks. Data acquisition forms the foundation for creating a patient-specific surgical guide, enhancing precision and predictability throughout the implant process.

Treatment Planning and Virtual Implant Placement

Utilizing specialized software, clinicians meticulously plan implant placement in a virtual environment. This digital workflow allows for precise angulation, depth, and positioning of each implant. The software integrates CBCT data, enabling visualization of critical anatomical structures. Virtual implants are strategically placed to optimize function and aesthetics. Potential risks are identified and mitigated during this planning phase. Treatment planning ensures optimal prosthetic outcomes and minimizes post-operative complications. This step is crucial for creating a customized surgical guide tailored to the patient’s unique anatomy.

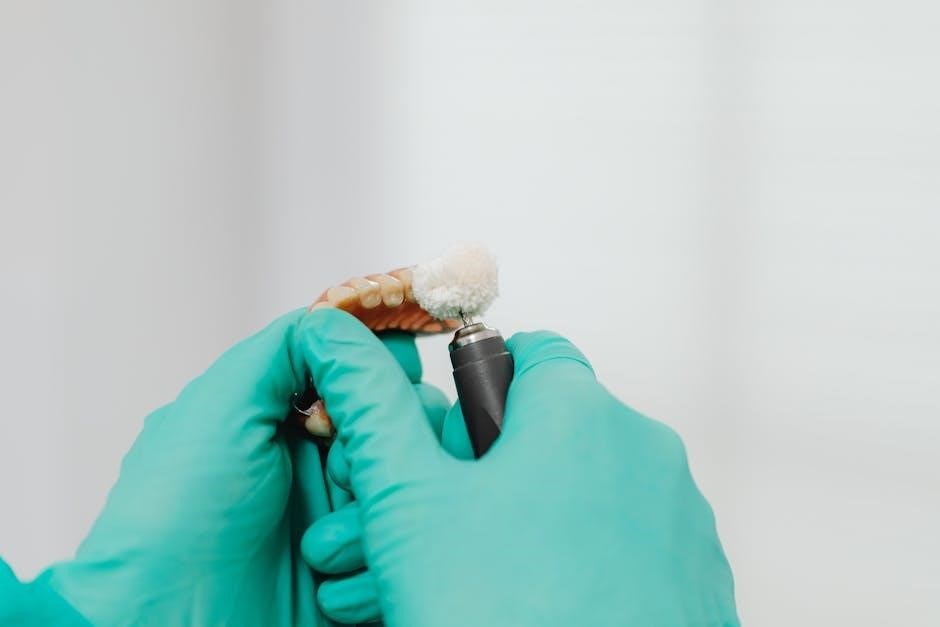
Surgical Guide Design and Fabrication

Based on the virtual plan, a surgical guide is designed with precision. CAD/CAM technology is employed to create a highly accurate physical guide. The guide features sleeves that dictate drill direction and depth, ensuring accurate implant placement. Material selection is crucial, with options ranging from biocompatible resins to metals. Fabrication involves 3D printing or milling processes. The final guide precisely fits the patient’s mouth, guiding instruments during surgery. Accuracy is paramount, guaranteeing predictable results and minimizing deviations from the planned treatment.

Implant Placement Using the Surgical Guide

With the guide securely seated, the dentist initiates the implant placement. Drills are guided through the sleeves, establishing the precise osteotomy. This ensures accurate depth and angulation, mirroring the virtual plan. The implant is then carefully inserted, benefiting from the guide’s stability. Guided surgery minimizes bone trauma and soft tissue damage. Real-time adjustments are possible, though typically unnecessary with a well-designed guide. The process is efficient and predictable, leading to improved clinical outcomes and enhanced patient satisfaction.

Components of a Surgical Guide

Surgical guides feature biocompatible materials and precisely designed sleeves. These sleeves dictate drill angulation and depth, ensuring accurate implant placement during procedures.

Guide Material Options

Surgical guide materials vary, impacting precision and cost. Polyether ether ketone (PEEK) is popular for its biocompatibility and radiolucency, allowing clear visualization during CBCT scans. Acrylic resins offer affordability and ease of fabrication, suitable for simpler cases. Titanium provides exceptional stability and durability, ideal for complex, full-arch reconstructions. Resorbable materials are emerging, eliminating the need for a second surgery to remove the guide. Material selection depends on the complexity of the case, desired accuracy, and the clinician’s preference, balancing functionality with budgetary considerations.

Sleeve Design and Function

Surgical guide sleeves are crucial for accurate implant angulation and depth. These precisely engineered channels accommodate the drill, ensuring it enters the bone at the pre-planned position. Sleeve designs range from simple, single-use options to more complex, multi-unit sleeves for multiple implants. Their length dictates drill stability, while internal diameter matches the drill size. Proper sleeve fit minimizes play, maximizing precision. Sleeves act as a physical barrier, preventing deviations during osteotomy preparation, ultimately guiding the implant placement.

Pilot Drill Compatibility

Pilot drill compatibility is paramount for successful guided surgery. Surgical guides must precisely accommodate the manufacturer’s specified drill diameter and length. Incorrect matching leads to binding, inaccurate osteotomies, and potential guide fracture. Implant systems often utilize unique drill designs, demanding corresponding sleeve internal diameters. Dentists must verify drill-to-sleeve fit before commencing the procedure. Utilizing the correct pilot drill ensures smooth, controlled bone preparation, maintaining the planned implant position and minimizing surgical risks.

Advanced Technologies in Guided Surgery

Intraoral scanners, CAD/CAM, and navigation systems elevate guided surgery. These innovations enhance precision, streamline workflows, and improve dental implant outcomes.

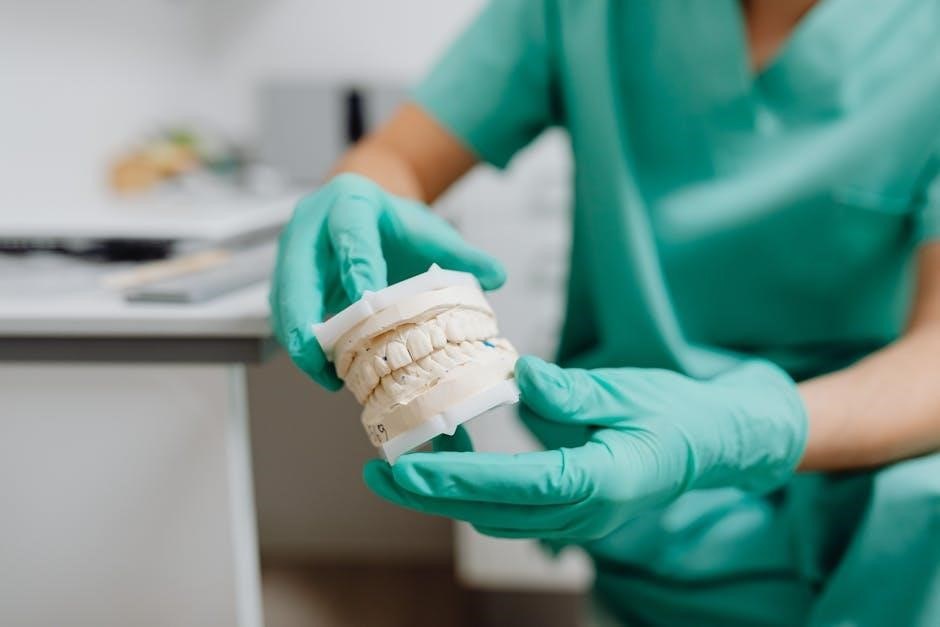
Intraoral Scanners for Digital Impressions

Intraoral scanners represent a significant leap forward in guided surgery for dental implants, replacing traditional, often messy, impression materials. These handheld devices capture highly accurate digital models of the patient’s mouth directly, eliminating the need for physical impressions. This digital workflow enhances comfort for the patient and streamlines the process for the dental team.

The resulting digital impressions are then seamlessly integrated into CAD/CAM software for treatment planning and surgical guide design. This technology minimizes distortion and allows for precise visualization of the oral anatomy, crucial for accurate implant placement. Ultimately, intraoral scanning contributes to improved predictability and successful outcomes.

CAD/CAM Technology in Guide Fabrication

CAD/CAM (Computer-Aided Design/Computer-Aided Manufacturing) technology is central to fabricating precise surgical guides for guided dental implant procedures. After digital treatment planning, the designed guide is milled or 3D-printed from biocompatible materials with exceptional accuracy. This automated process minimizes human error and ensures a perfect fit, crucial for guiding the implant drill.

CAD/CAM allows for the creation of complex guide designs, accommodating various clinical scenarios. The resulting guides ensure implant placement aligns perfectly with the pre-operative plan, enhancing predictability and reducing surgical risks. This technology is a cornerstone of modern guided surgery.

Navigation Systems for Real-Time Guidance

Navigation systems elevate guided dental implant surgery by providing real-time feedback during the procedure. These systems utilize optical or electromagnetic tracking to display the drill’s position relative to the planned implant site on a computer screen. This dynamic guidance ensures adherence to the digital treatment plan, even with unforeseen anatomical variations.

Navigation enhances accuracy and safety, allowing surgeons to make adjustments during surgery. It’s particularly valuable in complex cases or when immediate implant placement is performed, offering a higher degree of control and predictability throughout the entire process.

Applications of Guided Surgery

Guided surgery suits diverse dental implant cases – from single tooth replacement to full-arch reconstructions and immediate implant procedures, ensuring precision.

Single Tooth Implants

Guided surgery excels in single tooth implant scenarios, providing unparalleled accuracy for optimal aesthetic and functional results. Utilizing precise surgical guides, dentists can meticulously place the implant, avoiding vital anatomical structures like nerves and sinuses. This minimizes risks and promotes faster healing. The digital workflow ensures the final restoration seamlessly integrates with surrounding teeth, offering a natural-looking and long-lasting solution. Computer-aided planning allows for customized implant positioning, maximizing bone support and achieving predictable outcomes, even in challenging cases where bone volume is limited.

Multiple Tooth Implants

Guided surgery significantly benefits multiple tooth implant cases, streamlining complex procedures and enhancing predictability. Digital planning allows for precise angulation and depth control for each implant, ensuring optimal prosthetic support. Surgical guides facilitate accurate placement, minimizing the risk of cross-arch interference and maximizing bone utilization. This approach reduces surgical time and post-operative complications. The ability to visualize the final restoration pre-operatively ensures a functional and aesthetically pleasing outcome, restoring a confident smile and chewing efficiency.

Full-Arch Implant Reconstruction

Guided surgery is transformative for full-arch implant reconstruction, offering unparalleled precision in complex cases. Utilizing 3D imaging and digital planning, dentists can meticulously plan implant placement to support a full set of prosthetic teeth. Surgical guides ensure accurate angulation and depth, vital for optimal load distribution and long-term stability. This minimizes surgical risks and reduces recovery time, leading to predictable, functional, and aesthetically superior results. It’s a pathway to restoring complete smiles and oral function.

Immediate Implant Placement

Guided surgery significantly enhances the success rate of immediate implant placement, where implants are placed simultaneously with tooth extraction. Precise surgical guides, designed from CBCT scans, ensure accurate implant positioning in fresh extraction sockets. This minimizes bone resorption and preserves soft tissue contours, leading to improved aesthetics and faster healing. The technique reduces the number of surgical procedures, offering patients a more efficient and comfortable experience, ultimately optimizing functional and cosmetic outcomes.

Comparing Guided Surgery to Conventional Implant Surgery

Guided surgery demonstrates superior accuracy and potentially reduced surgical times compared to conventional methods. Post-operative complications may also be minimized with precise planning.

Accuracy Comparison

Numerous studies highlight the increased accuracy of computer-guided implant surgery. Conventional methods rely heavily on the surgeon’s experience and visual assessment, introducing potential for deviation. Guided surgery, utilizing pre-operative 3D imaging like CBCT scans, allows for virtual planning and the creation of surgical guides.

These guides ensure the implant is placed at the precisely planned angle and depth, minimizing discrepancies. Research indicates significantly smaller deviations from the planned position with guided surgery, leading to more predictable and aesthetically pleasing results. This enhanced precision is particularly crucial in areas with limited bone volume or anatomical complexities.

Surgical Time Comparison

Initial surgical time can sometimes be longer with guided surgery due to the planning and guide fabrication phases. However, the actual implant placement phase often proves more efficient. The surgical guide streamlines the procedure, reducing the need for extensive osteotomies and adjustments during surgery.

Conventional methods may require more intraoperative decision-making and potentially longer drilling sequences. Ultimately, guided surgery can lead to a reduction in overall treatment time, especially in complex cases, by minimizing complications and the need for corrective measures.

Post-Operative Complications

Guided surgery generally demonstrates a lower incidence of post-operative complications compared to conventional implant surgery. Precise implant placement minimizes trauma to surrounding tissues, reducing swelling, bruising, and pain. The use of surgical guides also lessens the risk of nerve damage or sinus perforation.

However, complications can still occur, such as infection or implant failure. Careful patient selection, meticulous surgical technique, and adherence to post-operative instructions are crucial for optimal healing and long-term success.

Potential Limitations and Considerations

Guided surgery requires significant upfront investment in technology and dentist training. Accurate imaging is vital; deviations can compromise precision and treatment planning.

Cost of Technology

The initial investment for implementing guided surgery is substantial. This encompasses the cost of a Cone Beam Computed Tomography (CBCT) scanner, essential for detailed 3D imaging of the jawbone. Furthermore, specialized digital treatment planning software licenses represent a significant expense.

Fabricating surgical guides themselves also adds to the overall cost, varying based on material and complexity. While the long-term benefits often outweigh these expenses, patients should be aware of the higher upfront financial commitment compared to conventional implant procedures.

Learning Curve for Dentists

Adopting guided surgery requires a dedicated learning commitment from dentists. Mastering the intricacies of 3D imaging interpretation, digital treatment planning software, and surgical guide utilization demands specialized training and continuing education.

Proficiency isn’t immediate; a gradual build-up of experience is crucial for predictable results. Dentists must become comfortable integrating this technology into their existing surgical workflows, potentially requiring mentorship and hands-on courses.

Dependence on Accurate Imaging

Guided surgery’s success hinges on the quality of initial 3D imaging, specifically Cone Beam Computed Tomography (CBCT) scans. Inaccurate scans, due to patient movement or insufficient resolution, directly translate to poorly fitting surgical guides and compromised implant placement.

Precise bone density assessment and anatomical landmark identification are vital. Any discrepancies in the imaging data cascade through the entire process, potentially negating the benefits of guided techniques.

The Future of Guided Surgery

Future advancements include AI integration for enhanced planning, robotic assistance for precise execution, and personalized guides tailored to individual anatomy for dental implants.

Integration with Artificial Intelligence

Artificial intelligence (AI) is poised to dramatically reshape guided surgery for dental implants. AI algorithms can analyze vast datasets of CBCT scans and patient data to predict optimal implant placement with unprecedented accuracy. This includes identifying critical anatomical structures and potential risks, automating treatment planning, and even customizing surgical guide designs.

Furthermore, AI can assist in real-time during surgery, providing surgeons with dynamic guidance and feedback. Machine learning models can continuously refine their predictions based on intraoperative data, leading to even more precise and predictable outcomes. This integration promises to minimize surgical errors and improve long-term implant success rates;

Robotic-Assisted Implant Surgery

Robotic-assisted implant surgery represents the next frontier in precision dentistry, building upon the foundation of guided surgery. These systems utilize robotic arms controlled by surgeons to execute pre-planned implant placements with exceptional accuracy and stability. Robots can overcome limitations in human dexterity and access challenging anatomical locations.

The integration of robotics with guided surgery enhances safety by minimizing the risk of deviation from the planned trajectory. This technology allows for consistent and repeatable procedures, potentially reducing surgical time and improving patient outcomes. Expect increased adoption as robotic systems become more refined and accessible.

Personalized Surgical Guides

Personalized surgical guides are evolving beyond standardized designs, leveraging advanced materials and manufacturing techniques. Future guides will incorporate patient-specific anatomical variations with greater detail, optimizing implant placement for individual bone density and soft tissue contours. This customization extends to guide flexibility and adaptation to complex surgical sites.

Artificial intelligence will play a crucial role in designing these guides, analyzing vast datasets to predict optimal implant positions and guide designs. Expect guides tailored to specific implant systems and surgical protocols, maximizing precision and minimizing potential complications for each patient.

Choosing a Qualified Provider

Selecting an experienced provider is crucial for successful guided implant surgery. Look for extensive training, advanced technology, and positive patient testimonials for optimal results.

Experience and Training

Prioritize dentists with significant experience specifically in computer-guided implant surgery. This isn’t simply about implant placement generally, but mastery of the digital workflow. Look for post-graduate training and continuing education focused on 3D imaging, treatment planning software, and surgical guide fabrication.

A qualified provider should demonstrate a deep understanding of the technology and its nuances. Inquire about the number of guided cases they’ve performed and their success rates. Certification or affiliation with leading implant organizations can also indicate a commitment to excellence and ongoing professional development.

Technology and Equipment

Essential technology includes a CBCT scanner for detailed 3D imaging, and sophisticated digital treatment planning software. The practice must also have the capability to fabricate or outsource high-quality surgical guides, ideally utilizing CAD/CAM technology.

Furthermore, assess if the practice offers intraoral scanners for digital impressions, enhancing precision and patient comfort. A well-equipped office demonstrates a commitment to utilizing cutting-edge tools for predictable and successful guided implant procedures, ensuring optimal outcomes.

Patient Reviews and Testimonials

Positive patient experiences are crucial when evaluating a provider for guided surgery. Seek out detailed reviews highlighting successful implant placements, minimal discomfort, and clear communication throughout the process.

Look for testimonials specifically mentioning the benefits of the guided approach – increased accuracy, reduced healing time, and improved aesthetic results. Authentic feedback provides valuable insight into the provider’s skill and commitment to patient satisfaction, building confidence in your decision.

wow sod molten core guide

WoW Season of Discovery Molten Core Guide

Welcome, adventurers! This comprehensive guide details the revamped 20-player Molten Core raid in Season of Discovery, featuring updated loot,
new bosses, and challenging Heat Mechanics.

Prepare to conquer this iconic raid with expert strategies, attunement steps, and detailed loot information, ensuring a successful and rewarding experience!

Season of Discovery (SoD) dramatically reimagines the classic World of Warcraft experience, and the reintroduction of Molten Core is a cornerstone of Phase 4. This isn’t simply a nostalgic trip; Blizzard has infused the raid with significant changes, most notably the “Heat” mechanic, which dynamically increases raid difficulty and rewards. Expect familiar encounters to feel surprisingly fresh, demanding adaptability and strategic prowess from your raid team.

Molten Core in SoD is designed for a 20-player raid size, emphasizing coordinated teamwork. The revamped loot tables offer a compelling incentive, featuring updated Tier sets and unique items. This guide will navigate you through the attunement process, raid preparation, and detailed boss strategies, ensuring you’re equipped to tackle the challenges within Blackrock Mountain. Prepare for a thrilling journey into the heart of fire!

What is Molten Core in Season of Discovery?

Molten Core, originally a defining raid of Vanilla WoW, returns in Season of Discovery as a 20-player experience. However, it’s been substantially altered. The core premise remains – venturing into the fiery depths of Blackrock Mountain to confront Ragnaros – but the execution is vastly different. The introduction of the “Heat” system is pivotal; increasing raid difficulty with each successful boss kill, and correspondingly boosting loot quality.

This iteration isn’t a simple stat-squish of the original. New mechanics, a secret boss, and adjusted boss abilities demand a fresh approach. It’s a test of skill, coordination, and adaptability. Expect to utilize strategies beyond those employed in classic Molten Core, making it a rewarding challenge for both veterans and newcomers alike. Prepare for a truly revamped raid experience!

Phase 4 Changes & New Mechanics

Phase 4 dramatically alters the Molten Core experience with the introduction of the “Heat” mechanic. Each boss defeated increases raid difficulty, modifying boss abilities and adding new challenges. This scaling difficulty directly impacts loot quality, incentivizing pushing further into the raid. Beyond Heat, a new secret boss awaits discovery, adding an element of exploration and surprise.

Expect adjusted boss encounters; abilities have been tweaked, and some bosses feature entirely new phases. The raid emphasizes coordinated movement and quick reactions. Players must adapt to the escalating Heat levels and master the updated mechanics to succeed. This isn’t a simple rehash of the classic raid; it’s a dynamic, evolving challenge demanding strategic thinking and skillful execution.

Attunement Process

Embark on a quest! Completing the initial questline and subsequent elemental attunements are crucial steps before gaining access to the fiery depths of Molten Core.

Initial Questline ⸺ The Molten Core Attunement

Beginning your journey into Molten Core requires initiating the attunement questline. Players must first complete a series of quests started in Orgrimmar or Stormwind, depending on their faction. This initial quest, typically obtained from a specific NPC, will send you on a path to prove your worthiness to enter the Blackrock Depths and ultimately, Molten Core.

The questline involves gathering items from various zones and completing tasks that demonstrate your understanding of the threats within the raid. It’s not overly difficult, but requires some travel and completion of moderately challenging content. Successfully finishing this initial quest unlocks the subsequent elemental attunement stages, paving the way for access to the raid itself. Remember to check online resources for detailed step-by-step instructions!

Completing the Elemental Attunements

Following the initial quest, you’ll embark on the elemental attunements – Fire, Water, Air, and Earth. Each attunement requires venturing into specific areas of the Blackrock Depths and completing unique challenges. These involve defeating elemental bosses and collecting specific items related to each element.

The Fire attunement is often considered the most straightforward, while others may require more coordination and preparation. Completing each attunement grants a unique seal, and collecting all four is crucial. These seals are combined to create the “Key to Molten Core,” the final requirement for accessing the raid. Remember to group up for these attunements, as some challenges are significantly easier with a team!

Gaining Access to the Raid

Once the elemental attunements are complete, possessing the “Key to Molten Core” isn’t quite enough! You must then complete a short questline initiated by a character within the Blackrock Depths. This quest involves delivering the key and undertaking a final, relatively simple task to prove your worthiness to enter the Molten Core.

After completing this final step, a portal to Molten Core will become available in the Depths. Ensure you have a group of at least 20 players ready to go, as the raid is designed for that size. Remember to coordinate roles and strategies beforehand for a smoother experience. Prepare for intense battles and fiery challenges within!

Raid Overview & Preparation

Molten Core is a 20-player raid demanding strategic coordination and optimized gear. Thorough preparation, including consumables and profession support, is crucial for success!

Raid Size & Composition (20-Player)

Molten Core in Season of Discovery is specifically tuned for a 20-player raid composition. While flexibility exists, optimal performance relies on a balanced group. A typical setup includes 3-4 tanks, strategically rotating engagements to manage boss mechanics and sustained damage.

Healing is paramount, requiring 6-8 dedicated healers capable of handling raid-wide damage and tank stabilization. The remaining 8-10 slots are filled with damage dealers (DPS), a mix of melee and ranged, prioritizing classes with strong burst and sustained damage output.

Consider bringing utility classes for crucial buffs, debuffs, and crowd control. Raid leaders should carefully consider class synergy and individual player skill when assembling the team, ensuring a cohesive and adaptable force ready to face the challenges within the Molten Core.

Recommended Gear Level

Entering Molten Core in Season of Discovery demands thoughtful preparation regarding gear. While a precise item level isn’t rigidly defined, players should aim for a baseline of well-geared characters from Phase 3 content. Expect a minimum of item level 120-130 for most roles, though higher is always beneficial.

Prioritize gear with stats that enhance survivability – stamina, health, and resistances – alongside damage output. Tanks require substantial armor and threat generation, while healers need mana regeneration and spell power. DPS should focus on maximizing their primary stat and critical strike chance.

Don’t underestimate the power of consumables; flasks, potions, and food will bridge gear gaps. Remember, skillful play and raid coordination often outweigh raw gear score!

Consumables & Professions

Success in Molten Core heavily relies on strategic consumable usage and leveraging professions. Flasks providing stat boosts (like Flask of Stoneblood for physical resistance) are essential. Potions – Super Healing, Super Mana, and damage-enhancing varieties – offer crucial emergency support and DPS amplification. Food providing stamina regeneration is also vital for sustained encounters.

Professions play a key role. Alchemy provides flasks and potions, while Enchanting offers gear enhancements. Tailoring creates bags for increased inventory space, and Engineering provides gadgets for utility. Herbalism and Mining support Alchemy and Engineering, respectively.

Don’t neglect resistance potions; fire resistance is particularly valuable within Molten Core!

Boss Strategies

Prepare for intense encounters! This section details strategies for each boss – Lucifron, Magmadar, Gehennas, and Ragnaros – to maximize your raid’s success.

Lucifron

Lucifron, the first boss of Molten Core, presents a unique challenge in Season of Discovery. The encounter revolves around managing the Stone Lords, who empower Lucifron with different abilities. Prioritize quickly eliminating these Stone Lords to reduce Lucifron’s damage output and complexity.

Tanks should be prepared for frequent position swaps due to Lucifron’s rotating fire aura. Raid members must effectively manage the Infernal spawn, focusing them down swiftly to prevent overwhelming the raid. Pay close attention to the timing of Shadow Flame, a dangerous spell requiring quick reaction and dispersion.

With the introduction of Heat Mechanics, Lucifron’s abilities may be further modified, demanding adaptability and precise execution. Proper coordination and understanding of Stone Lord priorities are crucial for a smooth and efficient kill.

Magmadar

Magmadar is a multi-phase encounter demanding strong raid coordination and damage output. The fight begins with Magmadar himself, utilizing powerful fire-based attacks. Players must quickly adapt to his shifting abilities and maintain consistent damage while avoiding area-of-effect spells like Molten Blast.

The key mechanic involves dealing with the four Elemental Golems that Magmadar summons. These golems buff Magmadar with significant power, so prioritizing their destruction is vital. Each golem requires a specific strategy, often involving kiting and focused damage.

Season of Discovery’s Heat Mechanics may introduce new twists to this encounter, potentially altering golem abilities or Magmadar’s damage profile. Successful completion relies on swift golem handling and sustained raid damage.

Gehennas

Gehennas presents a challenging encounter focused on controlling adds and managing raid positioning. The boss summons waves of Infernal adds that relentlessly pursue and damage players. Effective crowd control – utilizing stuns, slows, and knockbacks – is crucial for survival.

Raid members must strategically position themselves to minimize cleave damage from Gehennas and avoid being overwhelmed by the Infernal adds. Tanks need to maintain firm control of Gehennas, while DPS focuses on quickly eliminating the summoned enemies.

Season of Discovery’s modifications may amplify the add spawn rate or introduce new abilities to Gehennas, demanding even tighter coordination. Mastering add control and optimizing raid positioning are key to victory.

Garr

Garr is a mechanically demanding fight requiring precise raid coordination and awareness. The encounter revolves around interrupting Garr’s Magma Spit casts, which inflict significant raid-wide damage. Failing to interrupt consistently will quickly lead to wipes.

Additionally, Garr summons Stone Guardians that must be quickly dispatched to prevent them from overwhelming the raid. Tanks should be prepared to taunt swap frequently to manage the boss’s threat and mitigate damage.

Season of Discovery may introduce new twists to Garr’s abilities or add mechanics, potentially increasing the difficulty. Mastering the interrupt rotation and efficiently dealing with Stone Guardians are vital for success.

Baron Geddon

Baron Geddon presents a classic test of raid positioning and quick reaction times. The primary mechanic involves Geddon periodically casting Pyroblast, requiring the raid to spread out to avoid overlapping damage. He also summons Living Bomb adds that must be quickly focused down before they reach the boss and explode, inflicting massive raid damage.

Tanks need to manage Geddon’s threat while avoiding stacking, and healers must be prepared for burst damage from both the boss and the adds. Season of Discovery’s changes might introduce new abilities or modify existing ones, potentially altering the fight’s dynamic.

Successful completion relies on disciplined spreading and efficient add control.

Shazzrah

Shazzrah is a multi-phase encounter demanding strong coordination and understanding of her shifting abilities. The fight begins with Shazzrah summoning waves of elementals – Earth, Fire, Water, and Air. These must be quickly dispatched, as they empower Shazzrah for subsequent phases.

As the fight progresses, Shazzrah cycles through elemental forms, gaining new abilities and resistances associated with each element. Players must adapt their strategies accordingly, focusing on interrupting key casts and mitigating the corresponding damage types.

Season of Discovery may introduce alterations to these phases, potentially adding new mechanics or modifying existing ones, requiring a flexible approach to overcome this challenging boss.

Sulfuron Harbinger

Sulfuron Harbinger presents a challenging fight centered around managing adds and avoiding devastating fire damage. The encounter begins with Harbinger protected by Stone Guards, which must be eliminated to expose him. Following this, Harbinger summons waves of Infernos, requiring swift focus fire to prevent overwhelming the raid.

A key mechanic involves Harbinger’s “Living Bomb” cast, inflicting significant damage and requiring immediate dispelling. Players must also be mindful of his area-of-effect abilities, strategically positioning themselves to minimize damage intake.

Season of Discovery’s changes may introduce new abilities or modify existing ones, demanding adaptability and precise execution to defeat this fiery guardian.

Ragnaros

Ragnaros, the Firelord, remains the ultimate challenge of Molten Core, demanding impeccable raid coordination and execution. The fight revolves around managing his devastating abilities, including “Sulfuric Smash,” which knocks players back, and “Pyroclastic Eruption,” causing widespread fire damage.

Crucially, players must control the elementals summoned during the encounter – Fire, Water, and Air – to mitigate Ragnaros’ damage output. Properly utilizing these elementals is paramount to survival. Season of Discovery may introduce alterations to these mechanics, potentially increasing the fight’s complexity.

Expect a prolonged and intense battle requiring constant vigilance and precise positioning to overcome the Firelord’s fiery wrath and claim victory!

Loot & Rewards

Molten Core offers coveted Tier 2 sets, unique weapons, and updated loot tables specific to Season of Discovery, providing substantial gear upgrades for your characters.

Tier Sets Available in Molten Core

Tier 2 remains a highly sought-after reward within Molten Core during Season of Discovery, offering significant power boosts to classes capable of completing the raid. Expect to find pieces for Warriors, Rogues, Hunters, Mages, Warlocks, and Priests, each set providing unique bonuses enhancing their respective roles.

These sets aren’t simply rehashes of the original Classic versions; Season of Discovery introduces modifications and potential enhancements to the Tier 2 set bonuses, making them even more valuable. Players should prioritize collecting full sets to maximize their character’s potential. The availability of these sets will be a key driver for raid attendance and progression throughout the phase, offering a tangible reward for dedicated players.

Completing the Tier 2 set is a significant achievement, demonstrating mastery of the Molten Core and a commitment to character optimization;

Unique Items & Weapons

Beyond the coveted Tier 2 sets, Molten Core offers a wealth of unique items and powerful weapons that cater to a diverse range of classes and playstyles. Notable weapons include Sulfuras, Hand of Ragnaros, a legendary hammer for Warriors, and Core Hound Tooth, a sought-after weapon for Hunters. These items aren’t merely stat upgrades; they often possess unique properties and effects that can significantly impact gameplay.

Season of Discovery may introduce alterations to these iconic items, potentially enhancing their abilities or adding new functionalities. Expect to find off-hand items, trinkets, and other gear pieces that provide specialized bonuses, catering to niche builds and strategies. These unique drops add an element of excitement and unpredictability to the raid, encouraging players to continue pushing for better gear.

The pursuit of these unique items is a core component of the Molten Core experience.

Updated Loot Tables (SoD Specific)

Season of Discovery brings significant changes to Molten Core’s loot tables, moving beyond the static drops of Classic WoW. Expect adjustments to drop rates, potentially increasing the availability of highly sought-after items. Blizzard has hinted at incorporating new itemization, introducing gear with unique stat combinations and effects not previously available in the original raid.

The introduction of Runes and their impact on gear will be a key factor. Existing items may receive Rune slots, allowing for customization and build diversity. Furthermore, entirely new items specifically designed for SoD’s mechanics could be added, offering powerful bonuses tailored to the current phase’s challenges.

Detailed loot tables are continuously updated by the community; stay informed for optimal farming!

Hidden Content & Secrets

Dare to explore! Season of Discovery’s Molten Core harbors a new secret boss, rare spawn opportunities, and intriguing exploration elements awaiting discovery by intrepid adventurers.

The New Secret Boss

Prepare for the unexpected! Molten Core in Season of Discovery introduces a completely new secret boss encounter, adding a layer of mystery and challenge for seasoned raiders. Details surrounding this boss remain shrouded in secrecy, encouraging thorough exploration and community collaboration to uncover its location and mechanics.

Initial reports suggest the boss is intricately tied to existing raid elements, requiring players to interact with the environment in unique ways to trigger its appearance. Expect a demanding fight that tests coordination, adaptability, and a deep understanding of the raid’s intricacies. Successfully defeating this hidden adversary will undoubtedly yield exclusive rewards, further incentivizing its discovery and conquest. Keep an eye on community resources and dedicated dataminers for emerging clues!

Rare Spawn Opportunities

Beyond the main encounters, Molten Core in Season of Discovery features intriguing rare spawn opportunities, offering unique challenges and rewards for diligent raiders. These aren’t guaranteed encounters, demanding persistence and a bit of luck to uncover. Expect these spawns to be tied to specific conditions or timers within the raid instance, encouraging repeated attempts and thorough exploration.

While specific details are scarce, community speculation points towards enhanced versions of existing creatures or entirely new, limited-time adversaries. Successfully overcoming these rare spawns will likely grant access to exclusive cosmetic items, powerful consumables, or even unique crafting materials. Prepare to dedicate time and effort to maximize your chances of encountering these hidden treasures!

Exploration & Easter Eggs

Molten Core, even in its revamped Season of Discovery form, retains a sense of mystery and encourages thorough exploration. Blizzard has a history of embedding Easter eggs within classic raid environments, and SoD’s Molten Core is no exception. Expect to find hidden areas, interactive objects, and subtle references to World of Warcraft lore scattered throughout the instance.

These discoveries may not always lead to tangible rewards, but they contribute to the immersive experience and offer a delightful diversion for curious players. Keep an eye out for unusual environmental details, investigate seemingly innocuous objects, and share your findings with the community. The thrill of uncovering a hidden secret is a reward in itself!

resto druid guide cata

Restoration Druids excel in Cataclysm Classic’s PvE healing, offering versatile builds for dedicated healing or hybrid dungeon/questing playstyles.

This guide details everything needed to master the class.

Overview of Restoration Druid in Cataclysm Classic

Restoration Druids in Cataclysm Classic stand out as potent healers, renowned for their HoT (Heal over Time) focused gameplay. Unlike direct, burst healers, Druids specialize in proactively applying regenerative effects, making them exceptionally strong in prolonged engagements and raid environments.

They offer excellent mobility thanks to shapeshifting, allowing for quick reactions to changing battlefield dynamics; The class presents build diversity; players can choose a pure Restoration path for maximized healing output or a hybrid Restoration/Feral build (HOTW/NS) for increased self-sufficiency and damage potential during downtime. This flexibility makes them adaptable to various content, from five-man dungeons to large-scale raids, and even solo questing.

Strengths and Weaknesses

Restoration Druids shine with exceptional sustained healing through HoTs, excelling in raid encounters with predictable damage. Their mobility, granted by shapeshifting, allows for quick positioning and reaction to mechanics. A key strength lies in build versatility – pure healing or hybrid options cater to different playstyles.

However, they can struggle with burst damage scenarios requiring immediate, large heals. Reliance on HoTs means ramp-up time is needed, and healing output isn’t instant. Managing multiple HoTs effectively requires practice. Furthermore, mana management can be challenging, demanding careful spell usage and cooldown optimization.

Builds, Talents, Glyphs

Restoration Druids have diverse build options, including pure healing and hybrid Restoration/Feral (HOTW/NS) builds, each with unique talent allocations and glyph choices.

Pure Restoration Build

This Pure Restoration talent build maximizes healing output, focusing entirely on enhancing restorative abilities; It’s ideal for players dedicated solely to healing dungeons and raids. Prioritize talents that boost Rejuvenation, Lifebloom, and Wild Growth effectiveness.

Key talents include Improved Healing Touch, Swiftmend, and those reducing mana costs. This build sacrifices damage potential for unparalleled healing prowess. Consider investing in talents that improve your HoT (Heal over Time) effects, as they form the core of a Restoration Druid’s toolkit. This specialization is straightforward, making it excellent for newcomers focused on mastering the healing role.

Hybrid Restoration/Feral (HOTW/NS) Build

The Hybrid Restoration/Feral build, utilizing HOTW (Heart of the Wild) and NS (Nature’s Swiftness), offers versatility. It allows for effective healing while enabling damage dealing during downtime or when healing demands are low. This build is perfect for solo content and players wanting to contribute outside of healing.

Talent points are allocated to both Restoration and Feral trees, balancing healing potency with damage capabilities. Switching between gear sets – intellect for healing, agility for damage – is crucial. This build is beginner-friendly, offering a taste of both specializations.

Talent Point Allocation ‒ Core Healing

For a dedicated healing focus, prioritize talents enhancing Rejuvenation, Lifebloom, and Wild Growth. Maximize Swiftmend for burst healing and efficient mana usage. Invest in talents like Improved Healing Touch and Nature’s Focus to reduce casting interruptions.

Essential talents include those reducing the cooldown of key spells and increasing healing output. Focus on talents that improve HoT (Heal over Time) effectiveness, as Restoration Druids excel at sustained healing. Consider Tranquility for raid-wide emergencies, allocating points to its supporting talents.

Talent Point Allocation ─ Utility & DPS

For hybrid builds aiming for dungeon questing versatility, invest in talents boosting Wrath damage and efficiency. Feral Instinct and related talents enhance shapeshifting capabilities, improving mobility and off-healing potential. Prioritize talents like Improved Moonfire for consistent damage over time.

Allocate points into talents offering utility, such as Entangling Roots or Hibernate for crowd control. A small investment in talents improving Insect Swarm can provide supplemental damage. Remember, this allocation balances healing prowess with the ability to contribute during downtime.

Glyph Selection ‒ Major Glyphs

Glyph of Rejuvenation is crucial, extending the duration of your primary HoT, enhancing sustained healing. Glyph of Lifebloom improves its effectiveness, increasing the amount healed over time. Glyph of Regrowth reduces its cast time, allowing for quicker reactive healing in emergencies.

Consider Glyph of Swiftmend for reduced mana cost, vital for prolonged encounters. For hybrid builds, Glyph of Wrath boosts damage, increasing DPS output during downtime. Prioritize glyphs that directly improve core healing spells, maximizing your effectiveness in raid or dungeon content.

Glyph Selection ─ Minor Glyphs

Glyph of Mark of the Wild removes the mana cost, allowing for frequent application of this useful buff. Glyph of Travel Form increases your movement speed in Travel Form, improving travel time between objectives. Glyph of Aquatic Form boosts underwater speed, beneficial for specific content.

Glyph of Remove Curse reduces its cast time, enabling faster dispels. Glyph of Scent of Rain provides a minor movement speed increase while in Rain Form. These minor glyphs offer quality-of-life improvements, enhancing your overall gameplay experience without impacting core healing capabilities.

Rotation and Cooldowns

Druids prioritize Rejuvenation and Lifebloom, utilizing Wild Growth for burst healing, and strategically deploying cooldowns during critical moments.

Core Healing Rotation

The foundation of a Restoration Druid’s healing lies in maintaining a consistent flow of HoTs (Heal over Time) effects. Begin by applying Rejuvenation to all raid members anticipating incoming damage. Follow this with Lifebloom on primary targets, ensuring it’s refreshed before expiring to maximize its value.

Utilize Wild Growth proactively during periods of sustained damage, spreading HoTs across multiple allies. Prioritize targets already benefiting from Lifebloom for increased effectiveness. Regrowth serves as your direct healing tool, used to quickly address immediate health deficits or to top off individuals.

Continuously monitor HoT uptime and reactively cast Nourish to extend durations or provide additional healing when necessary. Remember to weave in Swiftmend when available, capitalizing on its instant cast and HoT application.

Cooldown Usage ‒ Emergency Situations

When facing raid-wide emergencies, Tranquility is your primary cooldown. Coordinate its use with other raid healers to maximize its impact, focusing on mitigating burst damage. For targeted emergencies, Rebirth offers a crucial second chance, prioritizing key raid members or healers.

Barkskin provides a significant damage reduction for a single target, ideal for tanks absorbing heavy blows. Utilize Ironbark proactively during predictable damage spikes to further enhance tank survivability.

Don’t hesitate to use Soulbind to reduce incoming damage on a critical target, and remember Overgrowth can provide a burst of healing during chaotic moments. Effective cooldown management is vital for navigating challenging encounters.

Cooldown Usage ‒ Raid Buffs

Tree of Life is your primary raid buff cooldown, granting a substantial healing increase and reducing the cooldown of Rejuvenation. Time it strategically with periods of sustained raid damage to amplify healing output. Swiftmend, while not a traditional raid buff, provides a significant burst heal and reduces the cast time of your next direct heal.

Utilize Wild Growth proactively during phases with predictable raid-wide damage to pre-hot the raid, reducing the strain on reactive healing. Remember to coordinate with other healers to avoid overlapping buffs.

Effective use of these cooldowns maximizes raid survivability and allows for efficient healing throughout the encounter.

Spell Summary

Restoration Druids utilize a diverse toolkit of healing, utility, and damage spells. Mastering these is crucial for effective raid and dungeon performance.

Essential Healing Spells

Rejuvenation is your bread-and-butter heal, applying a potent heal-over-time effect, crucial for sustained healing during raid encounters and dungeon pulls. Regrowth provides a strong, direct heal, excellent for quickly bringing targets up to full health, especially when combined with talents.

Lifebloom is a unique heal that consumes itself to provide a burst of healing, synergizing well with other HoTs. Wild Growth offers a powerful AoE heal, effective for groups taking consistent damage. Healing Touch delivers a focused, instant heal, valuable for reactive situations and topping off allies. Finally, Efflorescence creates a ground-based healing effect, providing sustained healing in a localized area.

Utility Spells

Rebirth is your crucial combat resurrection, offering a second chance to fallen allies, a vital tool in challenging encounters. Remove Curse dispels harmful curses affecting your raid members, mitigating significant damage and control effects. Entangling Roots provides crowd control, immobilizing enemies for strategic advantages during combat.

Cyclone offers a more versatile form of crowd control, incapacitating targets for a longer duration. Faerie Fire reduces enemy spell resistance, increasing raid damage output. Thorns reflects damage back to attackers, providing a defensive benefit. Mark of the Wild grants a temporary stat boost to a friendly target.

Damage Spells (for Hybrid Builds)

For HOTW/NS hybrid builds, Wrath becomes your primary damage spell, benefiting from talents enhancing its casting speed and damage output. Moonfire provides a consistent damage-over-time effect, useful for applying damage while maintaining healing responsibilities. Starfire offers a burst damage option, though mana intensive, for quickly eliminating priority targets.

Utilize Insect Swarm as a supplemental damage source, applying a damage-over-time effect to enemies. Remember, the goal isn’t to top DPS charts, but to contribute meaningfully during downtime. Efficient mana management is crucial when balancing healing and damage.

Stat Priority

Intellect is paramount for Restoration Druids, increasing spell power and mana pool. Following this, prioritize Haste, then Crit, and finally Mastery for optimal healing.

Primary Stat ‒ Intellect

Intellect reigns supreme for Restoration Druids in Cataclysm Classic, serving as the bedrock of your healing prowess. It directly boosts your spell power, amplifying the effectiveness of all your healing spells, ensuring larger heals and more efficient mana usage.

Furthermore, Intellect significantly expands your mana pool, a crucial resource for sustained healing throughout lengthy encounters. A larger mana pool translates to fewer interruptions for mana regeneration, allowing you to maintain consistent healing output. Prioritizing Intellect on all gear choices is non-negotiable; every point contributes to a stronger, more reliable Restoration Druid. Seek it relentlessly!

Secondary Stats ─ Haste, Crit, Mastery

Beyond Intellect, secondary stats refine a Restoration Druid’s performance. Haste reduces cast times and increases the rate of HoT (Heal over Time) ticks, leading to more frequent healing output. Critical Strike chance provides a chance for spells to heal for double the amount, offering burst healing potential.

Mastery: Harmony enhances your direct healing and HoT effects, making them more potent. While stat weights can shift, generally, Haste and Crit are prioritized over Mastery. Strive for a balance, ensuring smooth casting speeds and impactful critical heals, maximizing your overall healing effectiveness in raids and dungeons.

Stat Weights and Optimization

Stat weights fluctuate based on gear and encounter specifics, but a general guideline helps optimize your Restoration Druid. Intellect remains paramount, followed by Haste and Critical Strike, often trading off based on personal preference and gear availability. Mastery, while valuable, typically falls slightly behind.

Simulations using tools like Raidbots are crucial for precise weight calculations. Prioritize gear upgrades offering the highest Intellect, then assess secondary stat contributions. Aim for a Haste level enabling comfortable casting, balanced with Crit for impactful heals. Regularly re-evaluate weights as your gear improves.

Enchants, Consumables

Enchants and consumables significantly boost Restoration Druid performance. Utilize best-in-slot enchants on gear, alongside potions and food buffs for raid encounters.

Best in Slot Enchants

Head: Consider enchantments providing Intellect or Hit Rating, crucial for spellcasting and ensuring heals land consistently. Prioritize Hit until the cap is reached, then focus on Intellect.

Shoulders: Greater Mana Spring enchantments are valuable, offering a small but consistent mana return, aiding sustain during prolonged encounters. Mana efficiency is key for Restoration Druids.

Cloak: Enchantments boosting spell power or providing a defensive benefit like resistance are excellent choices. Adapt to encounter needs.

Chest: Exceptional Stats enchantments are generally preferred, providing a balanced increase to primary and secondary stats. This offers overall improvement.

Bracers: Pure Spellpower enchants are highly effective, directly increasing healing output. Maximize your healing potential with these.

Gloves: Hand Motoring provides a Haste bonus, reducing cast times and improving responsiveness. Faster heals are always beneficial.

Legs: Spellweave enchantments offer a small amount of spellpower and mana regeneration. A solid all-around choice.

Boots: Surefooted enchantments provide movement speed, enhancing positioning and reaction time. Mobility is important for healers.

Weapon: Enchantments focusing on spellpower or Intellect are ideal for your off-hand staff. Maximize your healing capabilities.

Potions and Flasks

Flasks: Flask of the Stoneblood is the premier choice, providing a substantial increase to health, bolstering survivability during challenging encounters. Prioritize this for raid content.

Potions: Potion of Swift Restoration offers immediate healing, crucial for recovering from sudden damage spikes. Keep several readily available.

Mana Potions: Super Mana Potions are essential for maintaining mana levels during prolonged healing phases. Manage your mana effectively.

Utility Potions: Potion of Speed can be useful for quickly repositioning during encounters, enhancing your responsiveness and survivability.

Defensive Potions: Potion of Thick Skin provides a temporary armor increase, mitigating incoming physical damage. Useful in specific situations.

Consider: Potion of Wild Magic for a chance at a beneficial effect, though its randomness makes it less reliable than other options.

Remember: Proper potion usage is key to maximizing your healing output and survivability. Plan ahead and anticipate needs.

Food Buffs

Raid Food: Fish Feast is the gold standard, providing a significant Intellect boost, directly increasing spell power and mana pool. It’s a raid staple for all casters.

Alternative: If Fish Feast is unavailable, consider Rainbow Fin Tuna, offering a substantial Intellect bonus. It’s a reliable substitute.

Stat Focus: Prioritize food that boosts Intellect, as it’s your primary stat. Avoid foods with secondary stat benefits that don’t align with your build.

Buff Duration: Ensure your food buff is active before engaging in any challenging content. Reapply as needed to maintain the benefit.

Cost Efficiency: Fish Feast can be expensive. Consider farming or purchasing in bulk to reduce costs over time.

Preparation: Always have a stack of raid food prepared before a raid or dungeon session. Don’t get caught unprepared!

Remember: Consistent Intellect buffs from food significantly enhance your healing capabilities.

Gear and Best in Slot

Gear progression focuses on item level, prioritizing Intellect, then Haste/Crit/Mastery. BiS gear comes from raids, dungeons, and crafted items.

Early Gear Progression

Initially, focus on acquiring gear from quest rewards and normal dungeons. Prioritize items with Intellect, as it directly boosts your healing output. Don’t overlook the value of stamina for survivability, especially during extended encounters. Look for pieces offering Haste, as it reduces cast times and increases healing throughput.

Early dungeon drops from Stonecore, Lost City of the Tol’vir, and Throne of the Tides provide a solid foundation. Supplement this with crafted items from professions like tailoring and enchanting. Remember to utilize reforging to optimize stats, converting unwanted stats into Intellect or Haste. Gradually replace these pieces with heroic dungeon gear as your item level increases, continually refining your stat distribution.

Mid-Tier Gear

As you progress, focus on obtaining gear from heroic dungeons and early raid content. Blackrock Caverns, Throne of the Tides (10-man), and Baradin Hold provide accessible options. Prioritize items with a good balance of Intellect, Haste, and Crit. Seek out set bonuses from raid tiers, as they offer significant healing enhancements.

Consider utilizing the Valor Point system to purchase gear from vendors. Crafted gear, particularly from jewelcrafting and enchanting, can fill gaps in your equipment. Reforging remains crucial for optimizing stats, ensuring you maximize Intellect and Haste. Continue upgrading gear as you gain access to higher difficulty content.

End-Game Best in Slot

Reaching the pinnacle of gearing involves obtaining items from the hardest raid content, such as Firelands and Dragon Soul (25-man heroic). Prioritize pieces with Intellect, Haste, and Mastery, carefully weighing stat weights. Legendary items, like the Dragon Soul trinkets, offer substantial power boosts.

Aim for full tier sets, maximizing set bonuses for increased healing output. Utilize Valor Points to acquire desirable pieces. Reforging remains essential for fine-tuning stats. Remember that BiS lists evolve with patch changes and player discoveries, so stay informed through community resources.

Leveling

For efficient leveling, embrace the Feral spec, utilizing HOTW/NS talents for questing and dungeon content, then swiftly swap to Restoration for healing.

Leveling Spec

Initially, Feral Combat is highly recommended for its superior leveling speed. The HOTW (Heart of the Wild) / NS (Nature’s Swiftness) build provides excellent mobility and damage output, allowing for efficient quest completion and swift dungeon runs.

However, seamlessly transition to Restoration when focusing on dungeon healing. This involves swapping gear from agility-focused to intellect-based, optimizing for spell power and healing effectiveness. Don’t hesitate to respec as needed, balancing questing prowess with healing capabilities.

Prioritize talents that enhance your damage while leveling, but keep in mind the eventual shift towards a dedicated Restoration build for end-game content. This hybrid approach maximizes efficiency throughout the leveling process.

Efficient Leveling Zones

Mount Hyjal (82-85) offers a streamlined leveling experience with focused questlines and manageable enemy density, ideal for quickly gaining levels. Deepholm (82-85) provides a unique environment and rewarding quests, though it can be more crowded.

For a change of pace, Uldum (82-85) presents engaging archaeology quests alongside traditional content. Prioritize zones with plentiful beasts for efficient skinning and herbalism, supplementing your income.

Remember to utilize dungeon finder for bonus experience and gear upgrades, complementing your outdoor questing efforts. Efficient route planning and quest completion are key to maximizing leveling speed.

Pre-Raid Gear

Dungeons and crafted items provide a solid foundation. Reputation rewards also offer viable gear options before engaging in raid content, boosting your stats.

Dungeon Gear

Heroic dungeons are your primary source of pre-raid gearing as a Restoration Druid. Focus on items offering Intellect and Haste, as these stats significantly impact your healing output. Prioritize pieces from Stonecore, Throne of the Tides, and Blackrock Caverns.

Specifically, look for gear with a good balance of these stats, avoiding excessive Stamina at the expense of healing power. Trinkets from dungeons can provide substantial benefits, such as increased healing or mana regeneration. Don’t underestimate the value of off-hand items, as they often contribute to Intellect and Haste. Remember to regularly run these dungeons to acquire upgrades and improve your overall gear score.

Crafted Gear

Profession-crafted gear offers a viable alternative and supplement to dungeon drops during the pre-raid phase. Tailoring, Blacksmithing, and Jewelcrafting are particularly useful for Restoration Druids. Look for crafted items with Intellect and Haste, mirroring the stat priority for dungeon gear.

Specifically, crafted cloaks, boots, and rings can fill gaps in your gear set. Jewelcrafting provides powerful gems to further enhance your stats. While crafted gear may not always be Best in Slot, it provides readily available upgrades and allows you to customize your stat distribution. Don’t overlook the potential of enchanting crafted items for an additional boost.

Reputation Rewards

Faction reputations offer access to gear and items beneficial for Restoration Druids gearing up for raids. Several factions provide rewards with Intellect and Haste stats, aligning with the class’s stat priority. Prioritize factions offering gear upgrades for your head, shoulders, or chest slots.

Consider reputations like the Argent Tournament, as they offer valuable gear and benefits. Additionally, some factions provide useful consumables or enchants. Reaching Exalted with these factions unlocks the best rewards, providing a significant power boost before engaging in end-game content. Consistent reputation farming is a worthwhile investment.

flight suit size guide

Flight Suit Size Guide: A Comprehensive Overview (Updated 02/05/2026)

Navigating flight suit sizing requires understanding chest measurements, inseam lengths, and proportional increases in waist and sleeve dimensions for optimal fit and comfort․

Understanding Flight Suit Sizing Basics

Flight suit sizing isn’t simply about choosing Small, Medium, or Large; it’s a nuanced process centered around accurate body measurements․ The foundation of finding the right fit lies in understanding that the designated size – like Large/XL – primarily correlates to chest circumference․ As the chest size increases, the waist, torso, and sleeve lengths are expected to increase proportionally, though variations can occur between brands․

Many manufacturers utilize chest measurements expressed in inches rather than standard size labels․ For instance, a “Medium Regular” typically corresponds to a chest size of approximately 38 to 40 inches․ Adjustments for crotch and waist fit are then made based on individual body proportions․ Furthermore, the “Regular,” “Short,” and “Long” designations refer exclusively to inseam length, independent of torso fit, functioning much like a hem alteration․

The Importance of Accurate Measurements

Precise measurements are paramount when selecting a flight suit, as an ill-fitting garment can compromise comfort, mobility, and even safety․ Relying on assumed sizes or previous clothing purchases is often unreliable due to variations in manufacturing and individual body shapes․ A chest measurement is the critical starting point, dictating the overall size category․

However, it’s equally vital to consider waist and torso length, as these influence the suit’s overall fit and range of motion․ Sleeve length is also crucial for unrestricted arm movement․ Taking these measurements yourself, or ideally with assistance, ensures a more accurate assessment than relying on estimations․ Remember that flight suits are often designed with a slightly looser fit for comfort and layering, but excessive bagginess can hinder performance․

Chest Measurement: The Primary Sizing Factor

The chest measurement serves as the foundational element for determining the correct flight suit size․ Most manufacturers base their sizing scales directly on chest circumference, using increments like Small, Medium, Large, and Extra Large, each corresponding to a specific range of inches․ A Medium Regular, for instance, typically aligns with a chest measurement of approximately 38 to 40 inches․

It’s crucial to measure around the fullest part of the chest, keeping the tape measure level and comfortably snug – not too tight, nor too loose․ Once the chest size is established, the waist, torso, and sleeve lengths generally increase proportionally․ Some brands directly utilize chest size in inches (e․g․, a size 42), simplifying the selection process․ Accurate chest measurement minimizes the need for extensive alterations and ensures a better initial fit․

Waist and Torso Proportionality

While chest measurement initiates the sizing process, understanding the proportional relationship between waist and torso is vital for a comfortable and functional fit․ As the size increases – moving from Medium to Large, for example – the waist and torso measurements also expand, though not always linearly․ This proportionality is designed to accommodate varying body builds within each size category․

However, individual body shapes differ․ If your waist or torso deviates significantly from the standard proportions associated with your chest size, adjustments may be necessary․ This is where considering the overall fit and potential alterations becomes important․ The torso length impacts overall comfort and range of motion, while waist fit affects ease of movement and layering options․ Prioritizing these proportional considerations ensures optimal performance and wearability․

Sleeve Length Considerations

Accurate sleeve length is crucial for unrestricted movement and comfort while wearing a flight suit, impacting everything from reaching controls to performing maintenance tasks․ Sleeve length generally increases proportionally with overall size, mirroring the chest measurement․ However, individual arm length variations exist, making it a key area to assess during sizing․

Pay attention to how the sleeve falls when your arms are relaxed and extended․ A sleeve that’s too short restricts movement, while one that’s excessively long can be cumbersome and potentially hazardous․ Consider the type of layering you anticipate – wearing undergarments or additional layers beneath the suit will affect the required sleeve length․ If you find yourself between sizes, prioritizing a slightly longer sleeve is often preferable, as it can be easily adjusted or rolled up․

Specific Flight Suit Types & Sizing

Different flight suit designs—CWU-27/P, Nomex, Metasco, and others—each possess unique sizing charts and fit characteristics, demanding careful attention to detail․

CWU-27/P Flight Suit Size Chart

The CWU-27/P flight suit, a popular choice for aviators, utilizes a sizing system primarily based on chest measurements․ Determining the correct size begins with accurately measuring your chest circumference․ Generally, sizes range from 36R to 50R, with the letter indicating a ‘Regular’ inseam; However, ‘S’ (Short) and ‘L’ (Long) inseam options are also available to accommodate varying leg lengths․

It’s crucial to remember that the waist, torso, and sleeve lengths increase proportionally with the chest size․ A Medium Regular, for instance, typically corresponds to a chest measurement of around 38-40 inches․ If your chest measurement falls between sizes, it’s often recommended to size up for a more comfortable fit, as these suits are often worn with layers underneath․

Many sellers on platforms like eBay offer CWU-27/P suits, and referencing multiple sizing charts is advisable due to potential variations between manufacturers․ Remember that a slightly baggy fit is common and historically accurate for flight suits, allowing for freedom of movement and layering․

Nomex Flight Suit Size Chart

Nomex flight suits prioritize fire resistance, and accurate sizing is vital for both protection and comfort․ Like the CWU-27/P, Nomex suit sizing centers around chest measurements, typically ranging from 36 to 52 inches, denoted with Regular, Short, or Long inseam options․ A 42L, for example, indicates a 42-inch chest and a Long inseam․

Consider your build when selecting a size․ Nomex suits often have a more tailored fit than some other flight suit styles․ If you’re between sizes, opting for the larger size is generally recommended, especially if you anticipate wearing undergarments or layers․ Remember that these suits can appear somewhat baggy, mirroring the aesthetic seen in aviation films․

Finding affordable Nomex suits is often possible through online marketplaces like eBay․ Be sure to consult specific seller charts, as sizing can vary․ A slightly looser fit is acceptable, as Nomex suits are designed to allow for movement and accommodate potential weight fluctuations․

Metasco Flight Suit Size Chart

Metasco specializes in flight suits, offering a range of sizes designed for a comfortable and functional fit․ Their sizing, like many flight suit manufacturers, primarily revolves around chest measurements․ Expect to find sizes correlating to inch measurements (e․g․, 40, 42, 44) rather than simply Small, Medium, or Large, providing a more precise starting point․

When determining your Metasco size, remember that waist, torso, and sleeve lengths increase proportionally with the chest size․ Consider your overall body shape; if you have a longer torso or arms, you might need to adjust accordingly, potentially opting for a ‘Tall’ or ‘Long’ option if available․

Always refer to Metasco’s specific size chart for the most accurate measurements, as variations can occur between different models and materials․ A well-fitted Metasco flight suit should allow for a full range of motion without being overly restrictive, ensuring both safety and comfort during use․

Air Force Flight Suit Sizes

Air Force flight suit sizing follows a similar principle to other flight suit manufacturers, prioritizing chest measurement as the primary determinant․ However, the Air Force often incorporates specific sizing standards to accommodate a diverse range of body types within the service․ Expect to encounter both alpha-numeric sizing (e;g․, 38R, 40L) and direct inch measurements․

Understanding the ‘Regular,’ ‘Short,’ and ‘Long’ designations is crucial․ These refer to inseam length, impacting the overall fit and proportion․ Air Force regulations may dictate specific fit requirements, emphasizing a balance between comfort and functionality for pilots and aircrew․

Female Air Force personnel have distinct sizing charts, accounting for anatomical differences․ When purchasing, always consult the official Air Force uniform sizing guides to ensure compliance with regulations and a proper, professional fit․ Remember that slight bagginess is often preferred, allowing for layering and freedom of movement․

Pilot Coveralls Size Chart (Flyers)

Pilot coveralls, often referred to as “flyers,” generally adhere to a sizing system centered around chest circumference, with waist, torso, and sleeve lengths increasing proportionally with larger sizes․ A Medium Regular, for instance, typically corresponds to a chest measurement of around 38-40 inches․ However, variations exist between brands, necessitating careful chart review․

The “Regular” designation indicates a 32-inch inseam, while “Short” and “Long” denote 30 and 34 inches, respectively․ These inseam options allow for adjustments based on individual leg length, independent of torso fit․ It’s important to note that flyers often have a slightly looser fit, mirroring the aesthetic seen in aviation films․

When selecting a size, consider potential layering underneath the coveralls․ Many pilots prefer a slightly baggier fit for enhanced comfort and mobility․ Online marketplaces like eBay frequently offer a wide range of sizes and brands at competitive prices․

Sizing Details & Variations

Inseam lengths—short (30”), regular (32”), and long (34”)—are independent of torso fit, functioning like hem alterations to adjust leg ending points․

Short, Regular, and Long Inseam Lengths

Understanding inseam lengths is crucial for achieving a proper flight suit fit․ These lengths – short, regular, and long – dictate where the suit’s leg terminates and are independent of the overall torso fit․ Think of inseam selection as a simple hem adjustment; it doesn’t alter the body of the suit, only the length of the legs․

The standard, or “Regular” inseam, measures 32 inches․ This is often the most commonly available and suitable length for individuals of average height․ A “Short” inseam is 30 inches, ideal for those with shorter legs or who prefer a slightly cropped look․ Conversely, a “Long” inseam extends to 34 inches, catering to taller individuals who require extra length․

When selecting an inseam, consider your height and leg length relative to the suit’s overall size․ It’s better to err on the side of slightly longer, as a suit can be hemmed, but adding length is considerably more difficult․ Accurate inseam selection ensures both comfort and a professional appearance․

Understanding Regular (32″) Inseam

The 32-inch inseam, designated as “Regular,” represents the most common and widely available length in flight suit sizing․ It’s designed to comfortably accommodate individuals of average height, typically falling within the 5’8” to 5’10” range, though this can vary based on individual proportions․ Choosing a regular inseam simplifies the fitting process, as it’s the standard length used in many sizing charts and readily available across various brands and retailers․

When selecting a Regular inseam, consider your overall body build․ If you’re between sizes or unsure, the 32” length is often a safe starting point․ It allows for minor adjustments if needed, such as a slight hem if the suit proves too long․ However, remember that significantly altering the inseam can affect the suit’s overall balance and appearance․

Prioritize accurate measurement to ensure the best fit․ A properly fitted Regular inseam will allow for comfortable movement and a professional, tailored look, essential for both functionality and appearance․

Understanding Short (30″) Inseam

The 30-inch inseam, categorized as “Short,” is specifically tailored for individuals with a shorter leg length, generally those under 5’8”․ This inseam length prevents excess fabric bunching around the ankles, ensuring a cleaner, more streamlined fit․ Selecting a short inseam is crucial for maintaining both comfort and a professional appearance, particularly important in environments demanding precise movement and a neat uniform․

It’s vital to accurately measure your inseam before opting for a short length․ Incorrect sizing can lead to a suit that feels restrictive or appears disproportionate․ While alterations are possible, choosing the correct inseam from the outset minimizes the need for adjustments․

Remember, the inseam is independent of torso fit․ A short inseam doesn’t affect the overall length of the suit’s body; it solely adjusts where the leg terminates․ This makes it a straightforward adjustment for achieving a perfect fit․

Understanding Long (34″) Inseam

The 34-inch inseam, designated as “Long,” caters to individuals with longer legs, typically those exceeding 6’ in height․ This extended length ensures the flight suit drapes correctly, avoiding a “high-water” effect where the trousers appear too short․ A proper length is essential for unrestricted movement and a professional, well-fitted appearance, crucial for pilots and aviation personnel․

Accurate inseam measurement is paramount when selecting a long inseam․ Incorrect sizing can result in excessive bunching or a tripping hazard․ While tailoring is an option, starting with the correct length streamlines the process and guarantees a superior fit․

Crucially, the inseam length operates independently of the torso fit․ Choosing a long inseam only alters the leg length; it doesn’t impact the overall body length of the flight suit․ It’s essentially a hem adjustment, focused solely on leg proportion․

Uniform & Brand Specific Sizing

Different brands and uniform regulations—like OCP, Air Force, Red Wing, and RAF—employ unique sizing charts, demanding careful attention to detail for a precise fit․

OCP Uniform Size Chart

Understanding the OCP (Operational Camouflage Pattern) uniform sizing is crucial for personnel requiring this specific camouflage․ The OCP uniform size chart differs slightly from traditional sizing, emphasizing accurate chest measurements as the primary determinant․ Waist and torso measurements increase proportionally with the chest size, ensuring a comfortable and functional fit․

Generally, sizes range from Small to Extra Large and beyond, often denoted by numerical chest measurements in inches․ For example, a size Medium typically corresponds to a 38-40 inch chest, while an XL might be 44-46 inches․ It’s vital to consult the official OCP sizing chart, as variations can occur between manufacturers․

Inseam length is also a key factor, available in Short (30”), Regular (32”), and Long (34”) options․ Selecting the correct inseam ensures proper trouser length and mobility․ Remember to account for any layering requirements when determining the appropriate size․ Accurate measurements are paramount to avoid ill-fitting uniforms and maintain a professional appearance․

Air Force Uniform Size Chart

The Air Force uniform size chart presents specific guidelines for both male and female personnel, differing slightly based on gender and uniform type․ Accurate chest measurement remains the foundational element for determining the correct size, with waist, torso, and sleeve lengths increasing proportionally․ Sizes are commonly represented by Small, Medium, Large, and Extra Large, often correlating to specific inch measurements․

For example, a Regular size typically aligns with a 38-40 inch chest, while a Long size accommodates taller individuals․ Inseam lengths are crucial for proper fit, offered in 30”, 32”, and 34” options․ Female sizing incorporates bust and waist measurements for a tailored fit․

Consulting the official Air Force uniform sizing guide is essential, as variations exist between different uniform components (flight suits, service dress, etc․)․ Proper sizing ensures comfort, functionality, and adherence to Air Force regulations․ Remember to consider layering when selecting a size, and prioritize accurate measurements for a professional appearance․

Red Wing Coverall Size Chart

Red Wing coveralls, favored for their durability and classic style, utilize a sizing system primarily based on chest measurement, similar to many flight suit brands․ The waist and overall length increase proportionally with the chest size, ensuring a comfortable and functional fit․ Sizes typically range from Small to XXL, with corresponding chest measurements provided in inches․

Understanding the inseam options – Short (30”), Regular (32”), and Long (34”) – is crucial for achieving the correct leg length․ Red Wing often provides detailed size charts specifying chest, waist, and inseam measurements for each size․ It’s recommended to measure your chest and inseam accurately before ordering․

Consider the intended use and layering when selecting a size; a slightly looser fit may be preferred for comfort and mobility․ Referencing the official Red Wing size chart guarantees the best possible fit, maximizing both safety and performance․ Don’t hesitate to consult customer reviews for additional sizing insights․

RAF MK 16a Flight Suit Size Chart

The RAF MK 16a flight suit, a staple for Royal Air Force personnel, employs a sizing system centered around chest measurements, typically expressed in inches or using standard sizes like Small, Medium, Large, and Extra Large․ Waist and torso dimensions increase proportionally with the chest size, ensuring a functional and comfortable fit for pilots and crew․

Inseam length is a critical factor, with options generally including Short (30”), Regular (32”), and Long (34”) to accommodate varying leg lengths․ Accurate measurement of both chest and inseam is paramount when selecting the correct size․ The MK 16a often features adjustable waist tabs for a customized fit․

Due to the suit’s intended use within a specific military context, adherence to official RAF sizing charts is highly recommended․ Consider any anticipated layering of undergarments or equipment when determining the appropriate size․ Consulting detailed size guides and potentially seeking advice from experienced wearers can optimize fit and performance․

Sage Green Flight Suits Size Chart

Sage green flight suits, popular for their versatility and modern aesthetic, generally follow standard sizing conventions based on chest measurements․ Sizes typically range from Small to Extra Large, with corresponding inch measurements often provided for clarity․ Accurate chest measurement remains the primary determinant for selecting the correct size, as waist and sleeve lengths increase proportionally․

Like other flight suits, inseam length is crucial for a proper fit, offering Short (30”), Regular (32”), and Long (34”) options․ Consider the intended use – whether for casual wear, airsoft, or professional applications – when choosing an inseam․ Some brands may offer adjustable features like waist tabs or elastic cuffs for a more customized fit․

Always consult the specific size chart provided by the manufacturer, as variations can occur between brands․ Reading customer reviews regarding sizing accuracy can also be beneficial․ Prioritize a comfortable yet functional fit, allowing for freedom of movement and potential layering․

self guided tour du mont blanc

Self-Guided Tour du Mont Blanc: A Comprehensive Plan

Embark on an unforgettable alpine adventure! This guide details planning a spectacular, independent trek around Western Europe’s highest peak, Mont Blanc.

The Tour du Mont Blanc (TMB) is one of Europe’s most iconic long-distance hiking trails. Circling the Mont Blanc massif, this incredible route traverses through three countries: France, Italy, and Switzerland. Typically completed over 10-11 days, the TMB offers breathtaking scenery, challenging ascents, and charming alpine villages.

The trail showcases dramatic landscapes, including glaciers, wildflower meadows, and stunning mountain vistas. It’s a journey that immerses you in the heart of the Alps, providing a unique cultural experience alongside physical exertion. While often undertaken with a guide, the TMB is exceptionally well-suited for independent, self-guided adventures. This allows for a personalized experience, tailored to your pace and preferences. Prepare to be captivated by the raw beauty and invigorating challenge of the Tour du Mont Blanc!

Why Choose a Self-Guided TMB?

Opting for a self-guided Tour du Mont Blanc unlocks a world of benefits for the independent adventurer. Unlike guided tours with fixed schedules, you dictate your own pace, allowing for spontaneous detours and extended stays in picturesque villages. This freedom is invaluable for truly immersing yourself in the alpine environment.

Furthermore, a self-guided trek often proves more economical. Eliminating guide fees and pre-set accommodation packages significantly reduces overall costs. You have complete control over your budget, choosing accommodation and meals that align with your preferences. The challenge of planning and navigating independently adds a rewarding sense of accomplishment. Embrace the spirit of exploration and create a truly personalized TMB experience!

Flexibility and Independence

The cornerstone of a self-guided TMB is unparalleled flexibility. You’re not bound by a group’s pace or a rigid itinerary. Feel like lingering longer in a charming village? Do it! Discover a hidden trail beckoning exploration? Follow it! This freedom allows for a deeply personal connection with the mountains.

Independence extends to daily decisions – where to eat, when to rest, and even which route variations to explore. Embrace spontaneous changes based on weather conditions or your energy levels. This level of control fosters a sense of self-reliance and adventure. A self-guided trek empowers you to craft an experience perfectly tailored to your desires, creating lasting memories forged on your own terms.

Cost Savings Compared to Guided Tours

Opting for a self-guided Tour du Mont Blanc significantly reduces expenses. Guided tours bundle services – accommodation, meals, a guide – adding substantial costs. By arranging these independently, you retain control over your budget.

Accommodation choices range from budget-friendly refuges to comfortable gîtes, allowing you to select options aligning with your financial plan. Similarly, self-catering with packed lunches and grocery shopping minimizes meal costs. While requiring more planning, this approach unlocks considerable savings. Eliminating the guide fee is a major benefit, freeing up funds for other experiences or extending your trip. A self-guided TMB offers adventure without breaking the bank!

Planning & Preparation: The Essentials

Successful completion of the Tour du Mont Blanc demands meticulous planning. Begin well in advance – ideally six to nine months – to secure accommodation, especially refuge bookings which open months prior. Thorough route research is crucial; detailed maps and guidebooks are indispensable tools.

Assess your fitness honestly; the TMB is challenging. A consistent training regime, incorporating hill walking with a weighted pack, is highly recommended. Familiarize yourself with mountain safety protocols and basic first aid. Don’t underestimate the importance of appropriate gear – a comprehensive checklist is vital. Finally, understand the logistical aspects of transportation to and from the trailheads.

Best Time to Hike the TMB

The optimal window for hiking the Tour du Mont Blanc is typically from mid-June to mid-September. July and August offer the warmest temperatures and lowest chance of snow at higher altitudes, but also experience the highest crowds. June and September provide a quieter experience, though you may encounter lingering snow patches or early autumn conditions.

Outside of these months, many refuges are closed, and conditions become increasingly unpredictable. Be prepared for potential snow, ice, and challenging weather even within the core season. Checking weather forecasts daily is essential, and flexibility in your itinerary is recommended to adapt to changing conditions. Consider shoulder season for fewer hikers, but pack accordingly!

Fitness Level Required

The Tour du Mont Blanc is a challenging trek demanding a good level of physical fitness. You should be comfortable hiking for 6-8 hours per day, over varied terrain, with significant elevation gain and loss – often carrying a backpack weighing 8-12kg.

Prior to your trek, regular cardiovascular exercise (running, cycling, swimming) and strength training (legs, core) are highly recommended. Several practice hikes with a loaded backpack are crucial to test your gear and build endurance. A base level of fitness will significantly enhance your enjoyment and reduce the risk of injury. Don’t underestimate the cumulative effect of multiple days on the trail!

Route Options & Variations

While the classic Tour du Mont Blanc is the most popular choice, several variations cater to different fitness levels and time constraints. Experienced hikers might consider tackling the more demanding ‘High Route’, featuring exposed sections and challenging passes, offering breathtaking panoramic views. Alternatively, the ‘Valley Route’ provides a less strenuous option, following lower-altitude paths through charming villages.

Shorter itineraries, typically spanning 7 days, focus on specific sections of the TMB, often concentrating on the French or Italian side. Customization is key; you can combine sections or create loops to tailor the trek to your preferences and available time. Careful planning is essential when deviating from the standard route.

The Classic TMB Route (11 Days/10 Nights)

The quintessential Tour du Mont Blanc experience covers approximately 170 kilometers (106 miles) with around 9,600 meters (31,500 feet) of ascent and descent. This route typically takes 11 days, incorporating 10 nights in mountain refuges, gîtes, or hotels. It circles the entire Mont Blanc massif, traversing through France, Italy, and Switzerland.

Expect diverse terrain, from lush valleys and forests to rocky alpine passes and glacial landscapes. Daily distances vary, averaging 15-20 kilometers, but some stages are more challenging. The route showcases iconic landmarks like the Col de la Croix du Bonhomme, the Grand Col Ferret, and the Fenêtre d’Arpette, offering unparalleled views.

Shorter Variations (7 Days/6 Nights)

For hikers with limited time, several shorter TMB variations offer a taste of the adventure. A popular 7-day itinerary focuses on the most scenic sections, typically starting and ending in Chamonix. This often involves utilizing lifts and buses to bypass some of the longer, less dramatic stages.

Common shortened routes concentrate on the French and Italian sides of Mont Blanc, omitting the Swiss portion to reduce overall distance. These variations still provide challenging ascents and stunning alpine scenery, but require a higher daily mileage. Prioritize booking accommodations well in advance, as popular refuges fill quickly, even on shorter sections. Consider focusing on the core highlights for a fulfilling experience.

High Route vs. Valley Route Considerations

The TMB presents choices beyond the classic path: the High Route and Valley Route. The High Route, as the name suggests, stays consistently at higher altitudes, offering more dramatic views and challenging terrain. It demands excellent fitness and experience with exposed sections. Expect more demanding ascents and descents, and potential for snow even in summer.

The Valley Route, conversely, utilizes lower-altitude paths and villages, providing a less strenuous experience. It’s ideal for those less comfortable with heights or seeking a more relaxed pace. While views may be slightly less expansive, the Valley Route offers charming cultural encounters and easier access to amenities. Carefully assess your abilities and preferences before deciding which route best suits your TMB adventure.

Accommodation: Booking & Types

Securing lodging is crucial for a smooth TMB experience. The most popular option is staying in refuges (mountain huts), offering dormitory-style accommodation and meals. Booking well in advance – often 6-12 months – is essential, especially during peak season (July-August). Online reservation systems are available for many refuges, but some require direct contact.

Alternatively, gîtes (rural guesthouses) and hotels in valley villages provide more privacy and comfort. These are generally easier to book on shorter notice, but may require transportation to/from the trail. Consider a mix of refuge and village stays for variety. Be prepared for basic facilities in refuges; earplugs and a sleep sheet are recommended!

Refuges (Mountain Huts) – Booking Process

Booking refuges requires planning and persistence. Many refuges utilize online reservation platforms like Refuges d’Alpinisme or have their own websites. Start checking availability 6-12 months in advance, particularly for July and August. Be prepared to create accounts and navigate French/Italian websites – translation tools are helpful!

If online booking isn’t available, you’ll need to email or call directly. Response times can be slow. Have alternative dates and refuge options ready. Some refuges require a deposit. Confirm your reservation and understand cancellation policies. Be aware that even with a reservation, beds aren’t guaranteed if you arrive significantly after the stated check-in time.

Gîtes & Hotels in Villages – Alternatives to Refuges

For those preferring more comfort, or facing fully booked refuges, villages along the TMB offer excellent alternatives. Gîtes d’étape are simple, budget-friendly accommodations, often dormitory-style, providing a communal atmosphere. Hotels range from basic to luxurious, catering to various budgets.

Booking.com and other travel websites are useful for finding hotels. Gîtes often require direct contact via phone or email. Staying in villages means potentially longer daily hiking distances to reach the next accommodation, but offers access to restaurants and shops. This can be a welcome change of pace from the more rustic refuge experience, providing a softer landing each night.

Gear Checklist: What to Pack

Packing strategically is crucial for a comfortable TMB experience. Prioritize lightweight, durable gear. A well-fitted backpack (50-70 liters) is essential, alongside sturdy, broken-in hiking boots. Trekking poles significantly reduce strain on knees, especially during descents.

Don’t underestimate the importance of a waterproof jacket and trousers – mountain weather is unpredictable! A headlamp with extra batteries is vital for early starts or late arrivals. A first-aid kit, including blister treatment, is non-negotiable. Remember a reusable water bottle or hydration reservoir, and a quick-drying towel. Careful packing minimizes weight and maximizes enjoyment.

Essential Hiking Equipment

Your core hiking equipment forms the foundation of a successful TMB trek. Invest in a comfortable, supportive backpack (50-65 liters) with a rain cover. Sturdy, waterproof hiking boots, properly broken-in before your trip, are paramount to prevent blisters. Trekking poles are highly recommended for stability and reducing joint impact.

A reliable headlamp with spare batteries is crucial for navigating refuges at night or starting before dawn. Don’t forget a detailed map (1:25,000 scale) and a compass, even if using GPS. A basic repair kit – including duct tape, knife, and cord – can resolve minor gear issues on the trail. Prioritize quality and durability!

Clothing & Layers for Variable Weather

Mountain weather is notoriously unpredictable; layering is key! Start with moisture-wicking base layers (synthetic or merino wool) to keep you dry. Add insulating mid-layers – a fleece or lightweight down jacket – for warmth. A waterproof and windproof outer shell jacket and trousers are essential, even in summer.

Pack hiking trousers (convertible ones are versatile) and several pairs of hiking socks (wool or synthetic blend). A warm hat and gloves are vital, even if the forecast looks good. Don’t underestimate the sun – bring sunglasses and a sun hat. Consider bringing gaiters to keep debris out of your boots.

Navigation Tools (Maps, GPS, Compass)

Reliable navigation is crucial for a self-guided TMB. While the trail is well-marked, conditions can change rapidly. A detailed, waterproof map (1:25,000 scale is recommended) is essential. Complement this with a GPS device or smartphone with offline maps downloaded – ensure sufficient battery life or a power bank!

Don’t rely solely on technology. Knowing how to use a compass and map is a vital skill. Practice before you go! Familiarize yourself with the TMB’s specific signage and trail markings. Carry a whistle for signaling in emergencies. Regularly check your position and be aware of your surroundings – don’t blindly follow a GPS track.

Daily Itinerary Outline (Classic Route)

The classic TMB route typically spans 11 days/10 nights. This is a demanding schedule, requiring good fitness. Days involve 6-8 hours of hiking, with significant elevation gain/loss. This outline provides a general framework; adjust based on your pace and preferences.

Expect varied terrain – from gentle valley walks to challenging mountain passes. Stages often involve transfers between countries (France, Italy, Switzerland). Pre-booking accommodation is essential, especially during peak season. Remember to factor in rest days or shorter stages if needed. Detailed stage descriptions will follow, outlining distances, elevation profiles, and potential challenges for each day of your trek.

Stage 1: Les Houches to Refuge de Bellachat

This initial stage is a challenging ascent, approximately 10km with 900m of elevation gain. Starting in Les Houches, the trail immediately begins climbing through forests, offering glimpses of the Chamonix valley. Expect a steep, sustained climb, testing your initial fitness.

The path winds upwards, eventually emerging above the treeline with increasingly dramatic views of the Mont Blanc massif. The Refuge de Bellachat, perched on a rocky outcrop, provides stunning panoramic vistas. Booking at Bellachat is crucial; it’s a popular refuge. Be prepared for potentially exposed sections and variable weather. Allow 5-7 hours for this demanding first day, rewarding you with incredible scenery.

Stage 2: Refuge de Bellachat to Courmayeur (Italy)

Today’s 15km stage descends into the valley and then climbs towards the Italian border, boasting spectacular views. From Bellachat, the trail initially descends, traversing alpine meadows before a more challenging ascent towards the Col de Balme. This section can be rocky and exposed, requiring careful footing.

Crossing into Italy, the landscape transforms, offering a different perspective of Mont Blanc. A long descent follows, leading into the charming town of Courmayeur. Courmayeur provides a welcome change with plentiful accommodation and dining options. This stage takes approximately 6-8 hours, and remember to carry your passport for border crossing! Enjoy the Italian atmosphere!

Stage 3: Courmayeur to Rifugio Bonatti

This demanding 18km stage ascends through stunning scenery towards Rifugio Bonatti, offering challenging terrain and rewarding panoramas. Leaving Courmayeur, the trail climbs steadily through forests and past alpine pastures, eventually reaching the Val Veny. The path becomes steeper as you approach the refuge, with potential for snow patches even in summer.

Rifugio Bonatti is perched high above the valley, providing breathtaking views of the Grandes Jorasses. This stage typically takes 7-9 hours, demanding good fitness and stamina. Be prepared for a significant elevation gain and potentially challenging weather conditions. Booking at Rifugio Bonatti is essential, as it’s a popular stop!

Food & Water on the Trail

Sustaining energy levels is crucial on the TMB! Refuges generally offer three-course meals (dinner & breakfast) and packed lunches, but availability can vary – pre-booking is highly recommended. Expect hearty, traditional alpine cuisine. Water sources are present, but purification tablets or a filter are essential due to potential contamination from livestock or glacial runoff.

Packing your own snacks is vital. Opt for high-energy foods like nuts, dried fruit, energy bars, and chocolate. Consider electrolyte tablets to replenish lost salts. Refuges sell drinks, but they can be expensive. Plan to carry at least 2-3 liters of water capacity, especially for longer stages with limited water sources.

Refuges Meals & Availability

Refuge meals are a highlight of the TMB experience! Typically, dinner consists of a hearty, multi-course meal – often soup, a main course with pasta or polenta, cheese, and dessert. Breakfast is a simpler affair, usually bread, jam, cheese, and coffee or tea.

Booking is absolutely essential, especially during peak season (July-August). Refuges are small and fill up months in advance. Many now have online booking systems. Availability can be unpredictable, so book as early as possible. Vegetarian and vegan options are increasingly available, but inform the refuge when booking. Packed lunches can also be ordered, providing a convenient trailside meal.

Packing Your Own Food – Energy-Rich Options

Supplementing refuge meals with your own snacks is crucial! Focus on lightweight, calorie-dense foods. Excellent choices include energy bars, trail mix (nuts, seeds, dried fruit), jerky, and chocolate. Consider dehydrated meals for lunch – they’re lightweight and easy to prepare with hot water.

Electrolyte tablets or powders are vital for replenishing salts lost through sweat. Hard candies or gels provide quick energy boosts. Don’t forget to pack enough for unexpected delays. Repackage food into ziplock bags to save space and weight. Remember to carry out all your trash – leave no trace!

Navigation & Safety

Staying safe on the TMB requires diligent preparation and awareness. The trail is generally well-marked, but conditions can change rapidly. Familiarize yourself with trail markings – typically red and white blazes, or paint. A detailed map and compass are essential, even with a GPS device.

Mountain weather is unpredictable; check forecasts daily and be prepared for all conditions. Carry a whistle, first-aid kit, and emergency blanket. Inform someone of your itinerary and check in regularly. Be aware of altitude sickness symptoms and descend if necessary. Know emergency contact numbers for the region.

Understanding Trail Markings

Successfully navigating the TMB relies on recognizing its trail markings. The most common are red and white blazes – horizontal or vertical stripes painted on rocks, trees, or posts. These indicate the official route. Look for them frequently, as sections can be obscured by snow or vegetation.

Occasionally, you’ll encounter small cairns (piles of stones) guiding the way, especially in more exposed areas. Pay attention to variations; a red blaze with a yellow top indicates a variant or alternative path. Be cautious of misleading animal trails; A good map cross-referenced with markings is crucial, and don’t hesitate to backtrack if unsure!

Mountain Weather & Emergency Procedures

Alpine weather is notoriously unpredictable. Conditions can change rapidly, even in summer, bringing rain, snow, or fog. Check the forecast daily before setting off and be prepared for all possibilities. Layering clothing is essential.

In an emergency, the European emergency number is 112. Know your location (GPS coordinates are ideal). Refuges often have emergency phones. Carry a whistle and a fully charged power bank for your phone. Inform someone of your itinerary and expected return. Be aware of altitude sickness symptoms and descend if they appear. Prioritize safety above all else!

Transportation to/from the Trail

Getting to the start and from the finish requires planning. Les Houches, the typical starting point, is easily accessible from Geneva Airport (GVA) via bus (AlpyBus) or train (SNCF, requiring a change in Saint-Gervais-les-Bains). Allow 2-3 hours for travel.

From Chamonix, the finish, options include train to Saint-Gervais and onward to Geneva, or direct bus services to Geneva Airport. Consider pre-booking transport, especially during peak season. Parking in Les Houches is available but can fill quickly. Research and reserve transfers in advance for a smoother journey!

Getting to Les Houches (Starting Point)

Les Houches is conveniently reachable from Geneva Airport (GVA). The most straightforward option is the AlpyBus service, offering direct transfers and taking approximately 2.5 ⎯ 3 hours. Pre-booking is highly recommended, especially during the summer months. Alternatively, take a train from Geneva Airport to Saint-Gervais-les-Bains-Le Fayet, then a local bus or taxi to Les Houches (total travel time around 3-4 hours).

If driving, be aware that parking in Les Houches can be limited and expensive. Consider parking in Chamonix and taking a bus to Les Houches to avoid potential issues. Plan your journey in advance and check timetables for the most up-to-date information.

Returning from Chamonix (Finishing Point)

Chamonix offers excellent transport links for your departure. Geneva Airport (GVA) is the most common exit point, accessible via the AlpyBus service (approximately 3 hours) – again, pre-booking is essential. Train options are also plentiful; a direct train runs from Chamonix-Mont-Blanc station to Saint-Gervais-les-Bains-Le Fayet, connecting to services towards Geneva or Paris.

For those driving, Chamonix has several car parks, but they can fill up quickly, particularly during peak season. Consider pre-booking parking if possible. Allow ample time for your onward journey, factoring in potential traffic delays, especially on weekends. Check train and bus schedules before your final descent.

Budgeting for Your TMB Adventure

A self-guided TMB can range significantly in cost. Expect to spend roughly €80-€120 per day, depending on your choices. Refuges typically cost €60-€80 per night including half-board (dinner & breakfast), while gîtes/hotels will be more expensive (€100+). Food and drinks purchased along the trail add €20-€30 daily.

Transportation (airport transfers, buses) can add another €100-€200. Factor in map/guidebook costs (€30-€50) and potential emergency funds. A reasonable total budget for 11 days is €1100-€1500, excluding flights. Pre-booking refuges and transport can help control costs, and packing your own snacks reduces daily expenses.

Resources & Useful Websites

Planning a self-guided TMB benefits from excellent online resources. The official Tour du Mont Blanc website (tourdumontblanc.com) provides route information and accommodation listings. AllTrails (alltrails.com) offers user reviews, maps, and GPX tracks.

For refuge booking, consider websites like Refuges Info (refugesinfo.com). Outdooractive (outdooractive.com) provides detailed maps and route planning tools. Local tourist office websites (Chamonix, Courmayeur, Les Houches) offer valuable information on transport and local conditions. Don’t forget weather forecasts from MeteoFrance (meteofrance.com) for accurate mountain predictions.

denture tooth shape guide

Denture Tooth Shape Guide: A Comprehensive Overview (Updated 12/16/2025)

This guide explores denture tooth shapes, addressing aesthetics, function, and psychological impact, while considering materials and advancements like implant retention for optimal results.

Dentures, essential for restoring smiles and function after tooth loss, aren’t one-size-fits-all. The shape of denture teeth significantly impacts aesthetics, chewing efficiency, and even speech. Replacing missing teeth with removable false teeth, like dentures, requires careful consideration of tooth morphology.

Various shapes – ovoid, tapered, square, and conical – offer different visual and functional outcomes. Understanding these options is crucial for both dentists and patients. Recent research highlights the emotional toll of tooth loss, emphasizing the importance of restoring not just function, but also confidence. Partial dentures, too, benefit from thoughtful shape selection, harmonizing with existing dentition.

The Importance of Tooth Shape in Denture Aesthetics

Tooth shape profoundly influences the overall aesthetic outcome of dentures, impacting facial harmony and patient self-perception. A natural-looking smile boosts confidence, counteracting feelings of self-consciousness and shame often experienced after tooth loss. The correct shape complements facial features, restoring a youthful appearance.

Incorrect shapes can appear unnatural, detracting from the overall result. Careful consideration of age and gender-specific preferences is vital. Dentists strive to recreate the appearance of natural teeth, enhancing the patient’s quality of life. Aesthetic success directly addresses the psychological impact of tooth loss, fostering a positive self-image.

Understanding Anatomical Tooth Forms

Replicating natural tooth morphology is crucial for successful denture aesthetics and function. Natural teeth exhibit subtle variations in shape, size, and texture, contributing to a realistic appearance. Dentists utilize this as a baseline when selecting or customizing denture teeth. Understanding the anatomical forms of canines, incisors, premolars, and molars is essential.

These forms dictate chewing efficiency and speech clarity. Deviations from natural anatomy can lead to functional issues and an unnatural smile. Careful observation and replication of existing tooth structures, when possible, enhance the overall outcome and patient satisfaction.

Natural Tooth Morphology as a Baseline

Prior to denture fabrication, a thorough understanding of natural tooth morphology is paramount. This involves analyzing the subtle curves, grooves, and variations present in a patient’s remaining teeth, or referencing established dental anatomy standards. The goal is to mimic these natural features as closely as possible.

Using natural tooth forms as a baseline ensures the dentures blend seamlessly with the patient’s existing oral structures, enhancing aesthetics and function. This approach minimizes the artificial appearance and promotes comfortable chewing and clear speech. It’s the foundation for a successful and satisfying denture experience.

Common Denture Tooth Shapes

Several established tooth shapes are frequently utilized in denture construction, each offering distinct aesthetic and functional characteristics. Ovoid shapes present a softer, more rounded appearance, often favored for their natural look. Tapered shapes mimic the gradual narrowing of natural teeth, enhancing realism. Square shapes provide a bolder, more defined aesthetic, while conical shapes offer a pointed, slightly more youthful appearance.

The selection of the appropriate shape depends on individual patient needs, facial features, and desired outcome. Dentists carefully consider these factors to create dentures that are both visually appealing and functionally effective.

Ovoid Tooth Shapes

Ovoid tooth shapes, characterized by their rounded and softly contoured forms, are a popular choice for dentures aiming for a natural and gentle aesthetic. These shapes lack sharp angles, creating a more youthful and approachable appearance. They blend seamlessly with surrounding facial tissues, minimizing a potentially artificial look.

Ovoids are particularly well-suited for individuals with softer facial features or those desiring a less pronounced smile. They often contribute to a more harmonious overall facial balance, enhancing confidence and comfort for the denture wearer.

Tapered Tooth Shapes

Tapered denture teeth feature a gradual narrowing from the incisal edge to the cervical area, mimicking the natural inclination of many individuals’ teeth. This design creates a more dynamic and realistic appearance, particularly when viewed in motion during speech or chewing. They offer a balance between a defined smile and a natural look.

Tapered shapes are often favored for patients seeking a slightly more defined aesthetic without appearing overly aggressive. They can be particularly effective in restoring a youthful vitality to the smile, enhancing facial harmony and overall confidence.

Square Tooth Shapes

Square denture teeth exhibit straight, defined lines and minimal tapering, creating a bolder and more structured appearance. This shape is characterized by flat, broad surfaces and sharp angles, offering a distinctly modern aesthetic. While less common than ovoid or tapered shapes, square teeth can be a suitable choice for specific patients.

Historically, square shapes were more prevalent, but contemporary preferences lean towards more natural forms. However, they can be effective in certain cases, particularly when aiming for a strong, confident look or matching existing dentition with similar characteristics.

Conical Tooth Shapes

Conical denture teeth, as the name suggests, feature a distinct cone-like form, tapering significantly from the base to the incisal edge. This shape creates a youthful and somewhat delicate appearance, often favored for anterior teeth. They mimic the natural shape of younger, developing teeth, offering a softer aesthetic compared to square or even tapered options.

However, conical shapes require careful consideration as excessive tapering can compromise chewing efficiency. They are best suited for patients seeking a very natural, less pronounced tooth form, and often blended with other shapes for functional balance.

Materials Influencing Tooth Shape Options

The material used for denture teeth significantly impacts the achievable shapes and overall aesthetic. Acrylic denture teeth are the most common and versatile, allowing for a wide range of shapes and easy customization during fabrication and adjustments. Porcelain teeth, known for their lifelike appearance and resistance to wear, offer excellent detail but are more brittle and can cause wear on opposing natural teeth.

Composite denture teeth represent a middle ground, providing improved aesthetics and durability compared to acrylic, while being less prone to fracture than porcelain. Material choice dictates the precision and detail possible in replicating natural tooth morphology.

Acrylic Denture Teeth

Acrylic denture teeth remain the most frequently selected option due to their cost-effectiveness and ease of manipulation. They offer a broad spectrum of shapes, from ovoid to tapered, allowing for personalized aesthetics. Dentists can readily adjust acrylic teeth during the try-in phase, ensuring proper bite and comfort. While not as naturally translucent as porcelain, modern acrylics have improved in appearance.

These teeth are relatively soft, making them suitable for patients with limited opposing natural teeth, minimizing wear. However, they are more susceptible to staining and abrasion over time compared to other materials.

Porcelain Denture Teeth

Porcelain denture teeth were historically favored for their exceptional aesthetics and resistance to wear. They closely mimic the translucency and luster of natural teeth, offering a highly realistic appearance. Porcelain allows for detailed anatomical tooth forms, including subtle variations in shape and shade. However, porcelain is a brittle material.

This brittleness can lead to chipping or fracture, particularly if opposing natural teeth are present. Adjustments to porcelain teeth are more difficult and time-consuming than with acrylic, requiring specialized techniques.

Composite Denture Teeth

Composite denture teeth represent a more recent advancement, offering a balance between aesthetics and durability. These teeth are made from a resin material, providing improved impact resistance compared to porcelain, reducing the risk of chipping or fracture. Composite materials allow for a good level of customization in tooth shape and color, though perhaps not quite matching porcelain’s translucency.

They are generally easier to adjust and repair than porcelain teeth, simplifying modifications during the denture fitting process. Composite options are often more cost-effective than porcelain, making them accessible to a wider range of patients.

Shape Considerations for Upper Dentures

Upper denture tooth shapes significantly impact facial aesthetics and speech. Canine and incisor shapes often feature a more pronounced, slightly ovoid form to mimic natural teeth and support lip fullness, counteracting a collapsed facial profile post-tooth loss. A gentle taper is generally preferred for a natural appearance.

Premolars and molars in upper dentures typically exhibit a broader, more rounded shape to facilitate efficient chewing. Careful consideration of occlusal (biting) surfaces is crucial for proper function. The overall goal is to restore both form and function harmoniously.

Canine and Incisor Shapes for Upper Dentures

For upper dentures, canine and incisor shapes are paramount for aesthetics and speech. Ovoid forms are frequently chosen, mimicking natural tooth contours and providing lip support, crucial for a youthful appearance; A slight taper from incisal edge to cervical area enhances realism.

Canines often exhibit a subtle point, while incisors may have rounded or slightly squared edges. These shapes influence phonetics, aiding in clear articulation. Careful attention to shade and translucency further contributes to a natural, confident smile, addressing potential self-consciousness.

Premolar and Molar Shapes for Upper Dentures

Upper denture premolars and molars prioritize chewing efficiency and stability. Typically, these teeth feature broader, more square or tapered shapes compared to anterior teeth. This design maximizes surface area for grinding food effectively. Occlusal morphology—the biting surface—is crucial, mimicking natural cusps and grooves for proper bite alignment.

Slightly conical shapes can also be utilized, particularly for molars, to aid in guiding food during mastication. Proper shape selection contributes to balanced occlusion, preventing undue stress and ensuring long-term denture survival, enhancing overall function.

Shape Considerations for Lower Dentures

Lower denture tooth shape selection demands careful consideration due to limited support and increased functional demands. Generally, lower denture teeth are smaller and narrower than their upper counterparts, accommodating the reduced space within the mouth. A more anatomical approach is often favored, prioritizing natural-looking contours.

Shapes should facilitate proper occlusion and guide food during chewing. Achieving stability is paramount; therefore, designs that promote retention and minimize denture movement are essential. Careful planning ensures both aesthetics and functional success for lower dentures.

Canine and Incisor Shapes for Lower Dentures

For lower dentures, canine and incisor shapes are crucial for both aesthetics and function. Incisors typically exhibit a slightly tapered or ovoid form, avoiding overly square or bulky appearances. Canines should possess a subtle cusp to guide lateral movements during chewing, preventing excessive stress on the denture base.

A natural emergence profile is vital, mimicking the way teeth rise from the gums. These shapes contribute to proper speech and a confident smile. Avoiding exaggerated features ensures a harmonious blend with facial contours and overall denture acceptance.

Premolar and Molar Shapes for Lower Dentures

Lower denture premolars and molars require careful shaping to maximize chewing efficiency. Generally, these teeth feature broader, more robust forms compared to anterior teeth, with well-defined cusps and grooves. The occlusal surfaces should replicate natural tooth anatomy, facilitating effective grinding and crushing of food.

Slight tapering towards the cervical region aids in self-cleansing. Avoiding overly flat or rounded molars prevents premature wear and maintains proper vertical dimension. Accurate shape contributes to stability and minimizes stress on the supporting tissues, enhancing long-term denture success.

The Impact of Tooth Shape on Function

Denture tooth shape profoundly influences both chewing efficiency and speech clarity. Properly shaped teeth with appropriate cusp angles and occlusal surfaces enable effective food breakdown, preventing discomfort and digestive issues. Incorrect shapes can lead to uneven pressure, instability, and reduced chewing force.

Furthermore, tooth shape impacts articulation. Accurate incisal edges and proper tooth positioning facilitate clear pronunciation of sounds like ‘f’ and ‘v’. Poorly designed dentures can cause slurring or difficulty forming certain words, affecting confidence and communication.

Chewing Efficiency and Tooth Shape

Optimal chewing relies heavily on denture tooth shape, specifically cusp form and occlusal surface design. Well-defined cusps guide food into proper position for grinding, maximizing contact and force distribution. A balanced occlusion, achieved through carefully selected shapes, prevents localized stress and ensures efficient breakdown of food particles.

Shapes mimicking natural teeth generally offer superior chewing function. Conversely, flat or poorly contoured teeth diminish chewing effectiveness, potentially leading to discomfort, food impaction, and even temporomandibular joint issues. Proper shape selection is crucial for restoring a functional and comfortable bite.

Speech Clarity and Tooth Shape

Denture tooth shape significantly impacts speech, particularly the articulation of sounds requiring precise tongue-to-tooth contact. Incisal edges – the biting surfaces of front teeth – play a vital role in producing fricative sounds like ‘f’ and ‘v’. Incorrect shaping can lead to slurring or distortion of these sounds, causing frustration and communication difficulties.

Anatomical tooth forms, closely resembling natural dentition, generally promote clearer speech. The positioning and contours of teeth influence airflow and tongue placement. Careful consideration during denture fabrication minimizes speech impediments, restoring natural communication patterns and improving quality of life.

Age and Gender Considerations in Tooth Shape Selection

Tooth shape preferences evolve with age and differ between genders, influencing aesthetic outcomes. Younger patients often prefer brighter, more prominent teeth, while older individuals may opt for a more subdued, natural appearance reflecting wear over time; Gender plays a role too; generally, women favor softer, more rounded shapes, while men sometimes prefer slightly more defined, square forms.

Dentists consider these factors alongside facial features and existing dentition. Addressing self-consciousness related to tooth loss is crucial, tailoring shapes to boost confidence and restore a youthful, natural smile appropriate for each individual.

Tooth Shape Preferences by Age Group

Younger adults (20s-40s) frequently desire brighter, whiter teeth with a more pronounced shape, often leaning towards ovoid or slightly tapered forms for a modern aesthetic. Middle-aged individuals (40s-60s) typically seek a balance – natural-looking shapes with moderate brightness, favoring tapered or gently rounded designs.

Older adults (60+) generally prefer more realistic, worn appearances, often opting for softer, less defined shapes like rounded or slightly square forms to complement age-related facial changes and avoid an unnatural look. These preferences impact denture design significantly.

Gender-Specific Tooth Shape Aesthetics

Generally, women often prefer softer, more rounded tooth shapes for their dentures, with a focus on creating a feminine smile. Slightly ovoid or tapered incisors are common choices, enhancing perceived youthfulness and attractiveness. Men, conversely, tend towards more defined and square tooth shapes, projecting strength and maturity.

However, these are generalizations; individual preferences vary greatly. Dentists consider facial structure and personality when selecting shapes. Subtle variations in canine prominence and incisor width can significantly impact the overall aesthetic outcome, catering to individual gender expression.

Partial Denture Tooth Shape Considerations

When fabricating partial dentures, seamlessly matching the existing tooth morphology is paramount for a natural appearance. Dentists meticulously analyze the shape, size, and shade of remaining teeth to replicate these characteristics in the prosthetic replacements. This ensures harmonious integration and avoids creating an obvious distinction between natural and artificial teeth.

Careful consideration is given to occlusal relationships and ensuring proper bite alignment. The chosen tooth shapes must complement the function of the remaining dentition, preserving chewing efficiency and preventing undue stress on adjacent teeth. Material selection also influences shape options and aesthetics.

Matching Existing Tooth Morphology

Achieving a natural aesthetic with partial dentures hinges on precisely matching the shape of the remaining teeth. This involves a detailed assessment of each tooth’s unique characteristics – its contours, grooves, and overall form. Dentists utilize advanced techniques and materials to replicate these nuances, ensuring a seamless blend between the natural and prosthetic components.

Successful morphological matching minimizes visual discrepancies and enhances the patient’s confidence. It’s not simply about selecting a generic tooth shape; it’s about creating a customized restoration that harmonizes with the individual’s existing dentition, restoring both function and a natural-looking smile.

The Role of the Dentist in Tooth Shape Selection

The dentist plays a pivotal role in guiding tooth shape selection, extending beyond mere functionality to encompass facial aesthetics. A comprehensive evaluation considers the patient’s facial structure, lip support, and overall smile design. Dentists leverage their expertise to recommend shapes that complement these features, restoring a youthful and balanced appearance.

This process involves open communication with the patient, understanding their preferences, and addressing any concerns regarding self-consciousness or shame related to tooth loss. The dentist’s skill ensures the chosen shapes not only look natural but also contribute positively to the patient’s self-esteem and quality of life.

Facial Aesthetics and Tooth Shape

Tooth shape profoundly impacts facial aesthetics, influencing how the lips and cheeks are supported. Properly selected shapes restore lost volume, mitigating the sunken appearance often associated with tooth loss. A dentist considers the patient’s unique facial contours, aiming for harmony between the dentures and existing features.

Specific shapes can address concerns like a collapsed bite or diminished lip support. For instance, fuller shapes may provide better lip projection, while tapered shapes can create a more natural smile line. Ultimately, the goal is to enhance the patient’s overall appearance and confidence, restoring a youthful and vibrant look.

Psychological Impact of Denture Tooth Shape

Tooth loss significantly impacts self-esteem, often leading to feelings of self-consciousness and shame. Recent research highlights the emotional challenges patients face, including fear of social interaction due to altered appearance. Selecting the right denture tooth shape is crucial for addressing these psychological concerns.

Aesthetically pleasing dentures can restore confidence and improve quality of life. Patients report feeling more comfortable smiling, speaking, and engaging socially when they are happy with their dentures’ appearance. Dentists must consider patient preferences and address any anxieties to ensure a positive outcome and emotional well-being.

Addressing Self-Consciousness and Shame

Patients experiencing self-consciousness or shame related to tooth loss require empathetic and comprehensive care. Open communication is vital; dentists should actively listen to patient concerns and validate their feelings. Discussing realistic expectations for denture aesthetics and function can alleviate anxiety.

Careful tooth shape selection plays a key role in restoring confidence. Choosing shapes that complement facial features and resemble natural teeth can significantly improve self-perception. Providing before-and-after visuals and offering try-in dentures allows patients to visualize the potential outcome, fostering a sense of control and reducing apprehension.

New Research on Patient Emotional Challenges

Recent research from the University of Sheffield highlights previously underestimated emotional burdens experienced by individuals following tooth loss. Studies reveal patients often grapple with feelings of self-consciousness, shame, and even fear, impacting their quality of life. These aren’t merely cosmetic concerns; they represent significant psychological distress.

Beyond physical sensations, the research emphasizes the social impact of tooth loss. Patients report avoiding smiling, social interactions, and certain foods due to embarrassment or discomfort. Understanding these emotional challenges is crucial for dentists to provide holistic care, addressing not just the functional aspects of dentures but also the patient’s emotional wellbeing.

Implant-Retained Denture Tooth Shape Options

Implant-retained dentures offer enhanced stability and broadened aesthetic possibilities regarding tooth shape selection. Unlike conventional dentures, implants minimize bone resorption, preserving facial structure and allowing for more natural-looking tooth forms. Dentists can utilize a wider range of shapes – ovoid, tapered, or even more customized designs – with greater confidence in long-term success.

The increased retention also allows for more aggressive shaping of anterior teeth, improving lip support and smile aesthetics. Patients generally report higher satisfaction with implant-supported dentures, appreciating both the functional benefits and the improved confidence stemming from a more natural and secure smile.

Stability and Aesthetics with Implants

Implant-retained dentures dramatically improve both stability and aesthetics compared to traditional options. Implants anchor the denture, eliminating slippage and providing a secure bite, which directly impacts the achievable tooth shapes. Greater stability allows for more natural occlusal (biting) surfaces and realistic tooth contours.

Aesthetically, implants support the lip and cheek structure, preventing the sunken appearance often associated with denture wear. This allows for a wider range of tooth shape choices, enhancing the smile’s natural beauty and restoring facial harmony. Patients experience improved confidence and quality of life with these benefits.

Long-Term Survival Rates of Denture Shapes

Long-term denture survival varies significantly between maxillary (upper) and mandibular (lower) dentures. Research consistently demonstrates that maxillary dentures exhibit higher survival rates due to greater surface area and bone support. Mandibular dentures, facing challenges with stability and bone resorption, often require more frequent replacements or relining.

Tooth shape itself doesn’t directly impact survival, but its influence on function does. Shapes promoting efficient chewing reduce stress on the denture base. Implant-retained dentures show substantially improved longevity compared to conventional options, regardless of tooth shape, offering enhanced stability and support.

Maxillary vs. Mandibular Denture Longevity

Maxillary dentures generally demonstrate superior longevity compared to their mandibular counterparts. This difference stems from the broader surface area and greater bone support available in the maxilla, providing enhanced retention and stability. Mandibular dentures, conversely, are more susceptible to movement and bone resorption, leading to reduced lifespan.

Studies indicate a five-year survival rate of around 60-70% for maxillary dentures, while mandibular dentures typically fall between 40-50%. Implant support dramatically improves mandibular denture longevity, often exceeding 80% over five years, effectively bridging the gap in survival rates.

Future Trends in Denture Tooth Shape Design

The future of denture tooth shape design is rapidly evolving, driven by digital technologies and a deeper understanding of patient-specific needs. Digital denture design and customization are poised to revolutionize the field, allowing for precise tooth placement and morphology tailored to individual facial structures and aesthetic preferences.

Expect to see increased use of CAD/CAM systems for creating highly accurate dentures with optimized tooth shapes. Artificial intelligence (AI) may also play a role, predicting optimal shapes based on facial analysis and biomechanical principles, ultimately enhancing both function and aesthetics.

Digital Denture Design and Customization

Digital denture design represents a paradigm shift, moving away from traditional methods towards precision and personalization. Utilizing intraoral scanners and CAD/CAM software, dentists can create virtual models of the patient’s mouth, enabling accurate tooth positioning and shape customization. This technology allows for previewing the final result before fabrication, ensuring patient satisfaction.

Customization extends beyond aesthetics; digital workflows facilitate optimizing occlusal surfaces for improved chewing efficiency. Furthermore, digital design streamlines the fabrication process, reducing errors and turnaround times, ultimately delivering superior dentures tailored to each individual’s unique anatomy and desires.

alchemy guide ffxi

Alchemy Guide FFXI: A Comprehensive Plan (12/16/2025)

Embark on a transformative journey, mastering the art of substance creation within Vana’diel! This comprehensive guide, updated today, December 16th, 2025, will illuminate your path.

Alchemy empowers creation of vital medicines, dangerous poisons, and substances brimming with ethereal power, offering a unique role within Vana’diel’s intricate ecosystem and economy.

Alchemy’s Role in Vana’diel

Within the expansive world of Vana’diel, Alchemy occupies a crucial niche, extending far beyond simple potion brewing. Alchemists are the architects of essential consumables, directly impacting adventurers’ survivability and effectiveness. They craft potent medicines to restore health, powerful poisons for strategic combat, and specialized items enhancing various skills. This craft isn’t merely supportive; it’s integral to the economic engine, with high demand for crafted goods.

The ability to synthesize items allows players to circumvent reliance on monster drops or expensive merchant purchases; Mastering Alchemy provides self-sufficiency and a lucrative trade skill. Furthermore, advanced alchemists contribute to party dynamics, supplying crucial buffs and debuffs. The demand for paralysis potions, for example, remains consistently high, demonstrating Alchemy’s enduring relevance. Ultimately, an Alchemist’s skill directly translates to power and prosperity within Vana’diel.

Essential Tools and Setup

Beginning your alchemical journey requires minimal initial investment, focusing on accessibility. A crucial starting point is acquiring an Alchemy Guild Certificate, granting access to guild-specific items vital for early skill-ups. Beyond this, a basic toolkit is sufficient: a synthesizer (purchased from Alchemy Guilds), and a readily available supply of crystals – Water, Fire, Light, and Earth – form the foundation.

While not strictly essential initially, investing in a Kitron Macaron early on proves invaluable for guaranteed skill-ups, especially during lower levels. Storage is also key; ample inventory space prevents interruptions during synthesis. As you progress, consider acquiring specialized tools for refining efficiency. Remember, consistent access to guild items and a steady supply of basic crystals are paramount for a smooth start to your alchemical endeavors.

Understanding Skill Ups and Formula Acquisition

Alchemy skill progression in FFXI relies on successful syntheses, with skill-ups becoming increasingly challenging at higher levels. Utilizing Kitron Macaron provides a guaranteed skill-up, crucial for navigating difficult jumps, particularly before level 70. However, relying solely on macarons isn’t cost-effective long-term. Early formulas are automatically learned upon joining the Alchemy Guild, but expanding your repertoire requires diligent effort.

Formulas are primarily obtained through Guild Tests, demanding specific item submissions. Successful completion unlocks new recipes. Experimentation is also key; attempting syntheses, even failures, can occasionally reveal hidden formulas. Remember that pre-level 70 synthesis often guarantees skill-ups, allowing you to efficiently progress with cheaper recipes. Mastering this balance – strategic macaron use and formula acquisition – is vital for alchemical mastery.

II. Leveling Alchemy: Early Stages (Levels 0-30)

Begin your alchemical journey with basic syntheses, progressing through guild items, and ultimately mastering Chunk of Rock Salt and Tsurara combinations efficiently.

Level 0-10: Basic Synthesis

The initial levels of alchemy focus on establishing a foundation through repetitive, yet crucial, basic syntheses. Prioritize crafting items like potions and powders, even if they aren’t immediately profitable. The primary goal here isn’t gil, but consistent skill-ups. Utilize readily available and inexpensive ingredients to minimize costs during this phase.

Remember, every synthesis attempt, successful or not, contributes to your overall skill progression. Don’t shy away from failures; they are a natural part of the learning process. Continuously synthesize the same item until you consistently achieve successful results, indicating a solid grasp of the fundamentals. Always consider using Kitron Macaron to guarantee skill-ups, especially when facing difficult syntheses or aiming for rapid advancement. This early dedication will pave the way for more complex and rewarding alchemical endeavors.

Level 10-20: Utilizing Guild Items

As you progress to levels 10-20, incorporating guild items into your synthesis routine becomes incredibly efficient. Guild test items offer a reliable pathway to skill-ups, often guaranteeing success within this level range. These items are specifically designed to aid in leveling, providing a consistent and predictable outcome. Focus on acquiring and utilizing these resources to accelerate your alchemy progression.

However, be mindful that guild items aren’t a limitless resource. Supplement their use with continued synthesis of basic potions and powders, maintaining a balance between guaranteed skill-ups and practical crafting experience. Remember that synthesizing pre-level 70 often guarantees a skill-up, so cheap synths are valuable. This strategic approach will maximize your efficiency and prepare you for the challenges of mid-level alchemy.

Level 20-30: Chunk of Rock Salt & Tsurara Synthesis

Between levels 20 and 30, the synthesis of Chunk of Rock Salt combined with Tsurara emerges as a pivotal strategy for both skill advancement and modest profit generation. This combination provides a relatively inexpensive and consistently successful synthesis route. Expect an average outcome, with each successful craft yielding a small profit margin, approximately 332 gil per synthesis, based on current market values as of December 16th, 2025.

The total cost for this synthesis is around 1,224 gil for a jar of black, highlighting the accessibility of this method. Prioritize acquiring a steady supply of both Chunk of Rock Salt and Tsurara to maintain a consistent crafting flow. This method is a cornerstone for building momentum during this crucial leveling phase, preparing you for more complex and lucrative formulas.

III. Mid-Level Alchemy (Levels 30-60)

Progressing from 30 to 60 unlocks opportunities for profit and skill refinement, focusing on Flask of Boiling Oil and, crucially, mastering Paralysis Potion synthesis.

Level 30-40: Flask of Boiling Oil & Early Profit Making

The 30-40 level range in FFXI Alchemy presents a fantastic opportunity to establish a consistent income stream through the synthesis of Flask of Boiling Oil. This item enjoys steady demand from various players, particularly those engaging in early-game content and skirmishes. Focus on efficiently acquiring the necessary ingredients – typically Water Crystals and Sulfur – and optimizing your synthesis attempts for HQ (High Quality) results.

While not exceptionally lucrative, the consistent sales of Flask of Boiling Oil provide a reliable foundation for building capital. Remember to monitor market prices and adjust your selling strategy accordingly. This period also serves as excellent practice for refining your synthesis skills and understanding the nuances of ingredient quality. Don’t underestimate the value of consistent, small profits during these formative levels!

Level 40-50: Artificial Lens Synthesis

As you progress from level 40 to 50, the Artificial Lens becomes a key synthesis target for Alchemists. This item, crafted using Fire Crystals and Glass Fiber, is primarily utilized to bridge a nine-level skill gap, making it popular among players rapidly advancing their crafting professions. However, it’s important to note that this synthesis doesn’t stack efficiently, so its primary benefit lies in quickly overcoming that level hurdle.

Consider combining the synthesis with a Light Crystal and two more Glass Fibers for a slightly different approach. While the profit margins aren’t substantial, the consistent demand and relatively straightforward recipe make it a viable option for skill-up experience and modest gil gains. Focus on maximizing HQ rates to increase profitability and maintain a steady supply for the market.

Level 50-60: Focusing on Paralysis Potions

Between levels 50 and 60, the Paralysis Potion emerges as a highly profitable and efficient synthesis option for Alchemists. This potent concoction, requiring Water Crystals, Paralysis Dust, and Mercury, consistently experiences strong market demand due to its utility in various high-level content. While some may anticipate Anima usage at this stage, its effectiveness caps around level 75, making it less crucial during this specific level range.

Prioritize maximizing your HQ rates for Paralysis Potions, as the higher quality versions command significantly better prices. Consistent production and strategic market monitoring will yield substantial gil returns. This period is ideal for establishing a reliable income stream and solidifying your alchemy skills.

IV. Advanced Alchemy (Levels 60-80)

Refine your techniques and embrace complexity; this stage demands precision and strategic resource management for optimal synthesis and substantial profit gains.

Level 60-70: Refining Synthesis Strategies

Reaching levels 60 to 70 in FFXI alchemy necessitates a shift from simple, repetitive syntheses to more nuanced strategies. Focus shifts towards maximizing skill-ups while simultaneously considering potential profit. This is where understanding synthesis rates becomes crucial; consistently aiming for HQ (High Quality) items is paramount, even if it means slightly increased ingredient costs.

During this phase, prioritize refining your understanding of how different crystals and dusts interact. Experimentation is key, but always be mindful of the cost-benefit ratio. While Anima usage begins to become viable, its effectiveness is capped at level 75, so don’t rely on it exclusively. Consider focusing on items with consistent demand, even if the profit margin isn’t exceptionally high, to ensure steady skill progression. Remember to continually evaluate market trends!

Level 70-80: Mastering Paralysis Potions & Anima Usage

The 70-80 level bracket in FFXI alchemy is largely defined by the dominance of Paralysis Potions. This period demands efficient synthesis of these potions, utilizing Water Crystals, Paralysis Dust, and Mercury as core components. Don’t anticipate significant skill-ups from Anima usage at this stage, as its benefits plateau around level 75. However, strategically employing Anima can still contribute to faster progression.

Refine your ingredient sourcing to minimize costs, as the sheer volume of potions synthesized will quickly impact profitability. Focus on consistently producing HQ Paralysis Potions to maximize sales value. Explore alternative synthesis methods and experiment with different crystal combinations to optimize skill-up rates. Remember, consistent practice and market awareness are vital for success during this crucial leveling phase.

V. Alchemy Beyond Level 80

Ascend to the pinnacle of alchemical mastery, crafting high-level potions and refining techniques for ultimate efficiency and maximizing your hard-earned skill!

Level 80-90: High-Level Potion Synthesis

Reaching levels 80 to 90 unlocks the potential for synthesizing truly potent potions, demanding refined skills and strategic ingredient sourcing. Focus shifts towards complex recipes requiring rarer components, offering substantial gil profits if executed efficiently. Expect to heavily utilize Water Crystals, alongside specialized dusts like those for Paralysis or Sleep, depending on current market demands.

This stage necessitates a deep understanding of synthesis checks and the effective use of skill-enhancing items. While Anima becomes increasingly valuable, careful management is crucial. Prioritize potions with consistent demand, such as those used in high-end content or by dedicated job classes. Don’t underestimate the value of HQ (High Quality) items, as they fetch significantly higher prices. Mastering this level range is about maximizing both skill gains and profitability through meticulous planning and execution.

Level 90-100: Maximizing Skill and Efficiency

The final stretch, levels 90 to 100, centers on perfecting alchemy and achieving peak efficiency. Skill-ups become increasingly challenging, demanding consistent HQ synthesis and strategic use of Kitron Macaron – a staple for alchemists throughout their journey. Focus on recipes with minimal skill-up chance, maximizing your return on investment.

At this stage, mastering complex formulas and optimizing ingredient costs are paramount. Explore niche markets and identify opportunities for exclusive potion creation. Refine your understanding of synthesis assistants and utilize them effectively. Remember, consistent practice and meticulous attention to detail are key to reaching and maintaining a perfect alchemy skill. This is where dedication truly translates into substantial gil and mastery of the craft.

VI. Key Alchemy Formulas & Ingredients

Essential components include Water, Fire, Light, and Earth crystals, alongside vital dusts like Paralysis, Poison, and Sleep – foundational for potent concoctions!

Essential Crystals: Water, Fire, Light, Earth

Crystals form the bedrock of nearly all alchemical syntheses, acting as the core energy source for your creations. Water Crystals are frequently utilized in early-to-mid level potions, notably the Paralysis Potion, and are readily available through various means. Fire Crystals are crucial for items requiring heat or explosive properties, like certain oils and powders. Light Crystals contribute to restorative and purifying effects, often found in healing concoctions and antidotes;

Earth Crystals, while less common in basic recipes, become increasingly important in higher-level synthesis, lending stability and potency to complex formulas. Acquiring these crystals efficiently is paramount; consider farming locations, market purchases, and even refining lower-quality crystals to improve your yield. Understanding each crystal’s inherent properties and how they interact with other ingredients is key to mastering alchemy.

Important Dusts: Paralysis, Poison, Sleep

Dusts introduce specialized effects into your alchemical creations, dictating the nature of the potion or substance you produce. Paralysis Dust is arguably the most sought-after, essential for crafting potent Paralysis Potions – a staple for many adventurers. Mastering its acquisition and efficient use is crucial for profit. Poison Dust, while less universally demanded, finds its niche in offensive concoctions and specialized applications.

Sleep Dust offers utility for crowd control and strategic advantages, though its demand fluctuates. Sourcing these dusts often involves defeating specific monsters or purchasing them from other players. Remember that dust quality impacts synthesis success and potency; prioritize higher-quality dusts whenever possible. Careful management of your dust inventory is vital for consistent production.

Utilizing Kitron Macaron for Skill Ups

Kitron Macaron is an alchemist’s best friend, particularly during the leveling process. This readily available item guarantees a skill-up with almost every synthesis attempt, making it invaluable for rapidly increasing your Alchemy skill. Prioritize using Kitron Macaron for lower-level syntheses, effectively “riding” cheap synths as far as possible. This minimizes gil expenditure while maximizing skill gains.

However, be aware that its effectiveness diminishes at higher levels, capping around level 75. Beyond this point, focus shifts to more complex formulas and Anima utilization. Always keep a substantial stock of Kitron Macaron on hand, especially when embarking on extended leveling sessions. It’s a cost-effective method to accelerate your progress and unlock advanced recipes.

VII. Profit Making Strategies for Alchemists

Maximize your gil through astute market analysis, identifying high-demand items and optimizing ingredient sourcing for substantial profit margins within Vana’diel’s economy.

Identifying Market Demand

Successfully navigating the Vana’diel marketplace requires diligent observation and adaptation. Alchemists should consistently monitor auction house trends, paying close attention to frequently purchased items and those with consistently high prices. Paralysis Potions, a staple for many adventurers, often maintain strong demand, particularly during peak playing hours. However, competition can be fierce.

Consider analyzing server-specific needs; some servers may experience shortages of specific items due to player activity or event participation. Utilizing websites and community forums dedicated to FFXI market data can provide valuable insights. Don’t overlook the impact of job-related demands – certain classes consistently require specific consumables. Finally, be prepared to adjust your production focus based on fluctuating prices and emerging opportunities, ensuring consistent profitability.

Optimizing Ingredient Costs

Maximizing profit in FFXI alchemy hinges on securing ingredients at the lowest possible price. Regularly compare prices across auction houses and player shops, factoring in travel costs. Consider gathering your own ingredients when feasible, particularly common items like herbs and ores, though time investment must be weighed.

Bulk purchasing can often yield discounts, but avoid overstocking perishable components; Utilize crafting skills like botany and mining to supplement your supply. Don’t underestimate the value of utilizing guild item provisions when leveling, as they significantly reduce initial costs. Furthermore, explore opportunities to purchase ingredients during off-peak hours when competition is lower. Efficient ingredient management is crucial for sustained profitability.

ez66 guide

EZ66 Guide: Comprehensive Troubleshooting & Recovery

This guide offers detailed steps for resolving boot issues on EZ66 devices, covering hardware, software, and firmware, as of December 16, 2025.

The EZ66 is a versatile computing device, but like all systems, it can encounter boot failures. These issues manifest in various ways, most commonly as a “No Bootable Device” error, or messages indicating an inability to find a valid operating system. This often presents as a black screen upon startup, halting the device before the operating system loads. Several factors can contribute to these problems, ranging from simple connectivity issues with external devices to more complex hardware malfunctions or software corruption.

Understanding the potential causes is crucial for effective troubleshooting. Initial steps involve verifying basic connections and eliminating external interference. However, persistent boot failures often necessitate deeper investigation into the device’s firmware, storage components, and operating system integrity. This guide aims to provide a comprehensive approach to diagnosing and resolving these boot-related challenges on your EZ66.

Understanding the “No Bootable Device” Error

The “No Bootable Device” error signifies that the EZ66’s firmware cannot locate a valid operating system to initiate the startup process. This doesn’t necessarily indicate a catastrophic failure; it simply means the system is unable to find instructions on what to do next. Common causes include a disconnected or faulty SSD, incorrect boot order settings within the UEFI/BIOS, or a corrupted bootloader. External USB devices can also interfere, prompting the system to search for a boot sector on those drives instead of the internal storage.

The error message appears across various EZ66 models (A, B, and C) and similar Surface devices, suggesting a fundamental issue in the boot sequence. Resolving this requires systematically eliminating potential causes, starting with the simplest solutions like disconnecting peripherals and checking power connections, before moving to more advanced troubleshooting steps involving firmware updates and recovery drives.

Identifying the Root Cause

Pinpointing the source of the “No Bootable Device” error requires examining potential hardware failures, software corruption, and underlying firmware problems within the EZ66.

Hardware Failures: SSD, Connectors, and Motherboard

A primary cause of boot failures in the EZ66 stems from hardware malfunctions. The Solid State Drive (SSD) itself could be defective, exhibiting complete failure or intermittent read/write errors preventing system startup. Equally important is inspecting the physical connectors – both within the device and on any external storage – for looseness, corrosion, or damage.

A poorly seated SSD or a damaged connector can interrupt the crucial data pathway needed for booting. Finally, though less common, a failure on the motherboard represents a severe issue. This could involve damaged components related to storage control or the BIOS/UEFI chip itself. Thoroughly check all connections and consider professional diagnostics if SSD or connector issues are ruled out, as motherboard repairs are complex.

Software Corruption: Bootloader and Operating System

Software-related boot failures often involve corruption within the bootloader or the operating system itself. The bootloader, responsible for initiating the OS loading process, can become damaged due to improper shutdowns, malware, or failed updates. This prevents the EZ66 from even beginning to load the operating system.

Operating system corruption can arise from similar causes – sudden power loss during writes, faulty updates, or disk errors. This can manifest as a “No Bootable Device” error even if the hardware is functioning correctly. Attempting a system restore or reinstalling the operating system from a recovery drive are common solutions. Regularly backing up your system can mitigate the impact of such corruption, allowing for a quicker recovery.

Firmware Issues: BIOS/UEFI Problems

The EZ66’s BIOS or UEFI firmware manages the initial hardware initialization and boot process. Corrupted or outdated firmware can lead to boot failures, including the dreaded “No Bootable Device” error. Firmware corruption can occur during an interrupted update or due to a hardware malfunction.

Attempting to reset the UEFI to factory defaults via the setup menu is a first step. If that fails, a firmware recovery process, often involving a specific key combination during startup and a USB drive with the correct firmware image, may be necessary. Always ensure the firmware is specifically designed for your EZ66 model to avoid further complications. Incorrect firmware flashing can render the device unusable.

Preliminary Troubleshooting Steps

Begin with simple checks: disconnect all USB devices, perform a forced shutdown followed by a restart, and verify the power supply connections are secure.

Disconnecting External USB Devices

A frequently overlooked initial step in troubleshooting “No Bootable Device” errors on the EZ66 is to completely disconnect all external USB peripherals. This includes USB mice, keyboards, external hard drives, flash drives, and any other USB-connected devices. The EZ66, like many systems, may attempt to boot from a USB device if one is connected, even if it’s not bootable.

This can lead to the frustrating “No Bootable Device” message, even if the internal SSD is perfectly functional. Carefully unplug each USB device, ensuring a clean disconnection. After disconnecting all external USB devices, attempt to restart the EZ66. This simple action often resolves the issue, allowing the system to boot from its internal storage. Remember to test booting the device without any USB devices connected before proceeding to more complex troubleshooting steps.

Performing a Forced Shutdown and Restart

If a standard shutdown or restart fails to resolve the “No Bootable Device” error on your EZ66, a forced shutdown and restart can sometimes clear temporary glitches. This process involves holding down the power button for an extended period – typically 10-15 seconds – until the device completely powers off.

Avoid simply pressing the power button briefly, as this may not fully interrupt the boot process. Once the EZ66 is completely powered off, wait a few seconds, then press the power button again to restart it. This forces a complete reset of the system’s hardware and can resolve issues caused by software hangs or corrupted temporary files. It’s a basic, yet surprisingly effective, troubleshooting step before attempting more advanced recovery methods.

Checking Power Supply and Connections

A seemingly simple oversight – inadequate power or loose connections – can often be the culprit behind a “No Bootable Device” error on your EZ66. Ensure the power adapter is securely connected to both the device and a functioning wall outlet. Try a different outlet to rule out a power source issue.

Inspect the power cable for any signs of damage, such as fraying or exposed wires. If using a power strip or surge protector, verify it’s switched on and functioning correctly. For desktop EZ66 models, check the internal power supply connections if you’re comfortable doing so. A stable and sufficient power supply is crucial for proper booting and operation; a weak or intermittent connection can prevent the device from recognizing the bootable drive.

Advanced Recovery Methods

When preliminary steps fail, accessing UEFI/BIOS, utilizing diagnostic toolkits, and creating bootable USB recovery drives become essential for EZ66 restoration.

Accessing the UEFI/BIOS Setup

Entering the UEFI/BIOS setup is crucial for advanced troubleshooting and configuration changes on your EZ66 device. The process typically involves pressing a specific key repeatedly during the boot sequence.

Common keys include Delete, F2, F12, or Esc, but the exact key varies depending on the EZ66 model. Watch for a brief message on the screen during startup indicating the correct key to press.

If you miss the window, simply restart your EZ66 and try again. Once in the UEFI/BIOS, you can check boot order, hardware settings, and potentially reset to factory defaults. Be cautious when making changes, as incorrect settings can prevent your device from booting.

Document any alterations made for easy reversion if necessary.

Using the Surface Diagnostic Toolkit

The Surface Diagnostic Toolkit is a valuable resource for identifying and resolving common hardware and software issues on EZ66 devices. This toolkit performs a series of tests to assess the health of your system, including checks for firmware updates, driver compatibility, and hardware failures.

Download the latest version of the toolkit from the official EZ66 support website and run it as an administrator. The toolkit will guide you through the diagnostic process, providing detailed reports on any detected problems.

Follow the recommended solutions provided by the toolkit to address the identified issues. It can automatically fix certain problems or provide links to relevant support articles.

Regularly running the toolkit can help prevent future boot failures.

Creating a Bootable USB Recovery Drive

If preliminary troubleshooting fails, creating a bootable USB recovery drive is a crucial step towards restoring your EZ66 device. This allows you to bypass the corrupted operating system and initiate a system recovery. You’ll need a USB drive with at least 8GB of storage and a working computer with internet access.

Download the EZ66 recovery image from the official support website. Use the EZ66 recovery image tool to format the USB drive and copy the recovery files onto it.

Ensure the USB drive is properly inserted, then power on your EZ66 while holding the designated key (usually Volume Up or a specific power button combination) to boot from the USB drive; Follow the on-screen instructions to begin the recovery process.

Data Recovery Considerations

Prioritize backing up your data before attempting any recovery procedures, as these processes can potentially lead to data loss on your EZ66 device.

Attempting Data Backup Before Recovery

Before initiating any recovery steps on your EZ66, attempting a data backup is paramount, even if the system isn’t fully booting. Data loss is a significant risk during recovery processes, and a recent backup can mitigate this. If possible, try booting into a recovery environment or utilizing another computer to access the EZ66’s storage.

Consider creating a bootable USB drive with data recovery tools. These tools can often access files even when the operating system is inaccessible. If the EZ66 partially boots, immediately copy critical files to an external drive. Prioritize documents, photos, videos, and any irreplaceable data.

If the device won’t boot at all, professional data recovery services might be the only option. They possess specialized equipment and expertise to retrieve data from failing drives, but these services can be costly. Always weigh the value of the data against the recovery expenses.

Professional Data Recovery Services

When DIY recovery attempts fail, or the EZ66 exhibits severe hardware damage, professional data recovery services become essential. These specialized companies possess cleanroom environments and advanced tools to safely access and retrieve data from physically damaged storage devices, like SSDs. They can handle complex issues such as head crashes, platter damage, and controller failures.

Reputable services offer a free diagnostic evaluation to assess the extent of the damage and provide a cost estimate. Be sure to inquire about their success rates, data confidentiality policies, and “no data, no fee” options. Expect these services to be expensive, potentially ranging from several hundred to thousands of dollars, depending on the complexity of the recovery.

Thoroughly research potential providers, reading reviews and verifying their credentials. Prioritize companies with experience specifically with EZ66 devices or similar SSD-based systems for optimal results.

Specific EZ66 Models & Known Issues

Each EZ66 model (A, B, and C) presents unique challenges; firmware updates, SSD compatibility, and common boot failures require tailored troubleshooting approaches.

EZ66 Model A: Common Boot Failures

EZ66 Model A frequently exhibits “No Bootable Device” errors, often stemming from a loose SSD connection or a corrupted bootloader. Users report intermittent failures, particularly after Windows updates or unexpected shutdowns. A common scenario involves the device powering on, displaying the Surface logo, then reverting to a black screen with the error message. Initial troubleshooting should focus on disconnecting all USB peripherals, as the system may attempt to boot from an invalid source. A forced shutdown (holding the power button for 30 seconds) followed by a restart can sometimes resolve temporary glitches. If the issue persists, accessing the UEFI/BIOS setup is crucial to verify SSD detection and boot order. Furthermore, attempting a system restore from a USB recovery drive is often necessary to repair the bootloader or revert to a previous working state. In some cases, a complete Windows reinstallation may be required, emphasizing the importance of data backups.

EZ66 Model B: Specific Firmware Updates

EZ66 Model B has experienced boot failures specifically linked to firmware updates released between October and November 2025. Several users reported a “No Bootable Device” error immediately after installing update version 3.14.2. The issue appears to be related to an incompatibility between the updated UEFI/BIOS and certain SSD configurations. Microsoft released a hotfix (version 3.14.3) addressing this problem, but applying it requires a functional USB recovery drive. If the device is bricked after the failed update, attempting a forced shutdown and repeated power cycles may allow access to the recovery environment. It’s crucial to download the latest firmware from the official Surface website and verify its checksum before installation. Users are advised to avoid automatic updates and manually install firmware updates to mitigate potential issues. Data backup before any firmware update is strongly recommended.

EZ66 Model C: SSD Compatibility Concerns

EZ66 Model C exhibits a higher sensitivity to SSD compatibility compared to other models, leading to frequent “No Bootable Device” errors. Specifically, certain NVMe SSDs from lesser-known manufacturers have demonstrated instability, particularly those utilizing older firmware revisions. The issue isn’t a complete failure to recognize the drive, but intermittent boot failures and data corruption. Users upgrading the SSD should consult the official Surface compatibility list before purchasing. If an incompatible SSD is suspected, attempting a BIOS/UEFI reset to default settings may temporarily resolve the issue. However, a full recovery using a bootable USB drive is often necessary. Regularly checking for SSD firmware updates is also crucial for maintaining system stability and preventing boot failures.

the vintage rolex field guide

The Vintage Rolex Field Guide: An Overview

This comprehensive guide delves into the captivating world of vintage Rolex, exploring iconic models like the Submariner and GMT-Master, a collector’s pursuit.

It offers insights into authenticity, condition assessment, and the crucial role of provenance, enhancing your collecting journey.

Discover the history of waterproof cases and the vibrant Rolex collecting community, including events like Rolliefest.

Understanding the Allure of Vintage Rolex

Vintage Rolex watches possess a unique magnetism, transcending mere timekeeping; they represent a legacy of precision, innovation, and enduring style. Their appeal stems from a rich history, meticulously crafted movements, and the stories embedded within each timepiece.

Collectors are drawn to the rarity and character of these watches, appreciating the patina developed over decades. The pursuit isn’t simply about ownership, but about connecting with a heritage of horological excellence. Each Rolex embodies a bygone era, offering a tangible link to the past, and a testament to timeless design.

This enduring quality, combined with increasing scarcity, fuels the passion of collectors worldwide, making vintage Rolex a captivating and rewarding field.

The Core Models: A Collector’s Focus

For vintage Rolex enthusiasts, certain models consistently command attention and investment. The Submariner, with its robust design and diving heritage, remains incredibly popular, alongside the GMT-Master, celebrated for its functionality and travel-oriented appeal.

The Daytona, a chronograph steeped in motorsport history, is also highly sought after. These core models represent the pinnacle of Rolex’s craftsmanship and design. Collectors often specialize in one reference, meticulously researching variations and seeking pristine examples.

Understanding these key models is fundamental to navigating the vintage Rolex market and appreciating their enduring value.

Key Vintage Rolex References

Explore iconic references like the Submariner (5512, 5513, 6538), GMT-Master (6542, 1675), and Daytona (6239, 6263, 6265) – cornerstones of collecting.

Rolex Submariner (References 5512, 5513, 6538)

The Rolex Submariner stands as perhaps the most recognizable and coveted vintage sports watch. References 5512, 5513, and 6538 represent pivotal moments in its evolution. The 6538, with its distinctive gilt dial and chapter ring, is particularly sought after by collectors.

Later models, like the 5512 and 5513, introduced variations in dial design and movement caliber. Understanding these nuances is crucial for authentication. A collector’s guide emphasizes the importance of originality, examining details like the crown, bezel insert, and bracelet. The classic Submariner remains a cornerstone of any serious vintage Rolex collection.

Rolex GMT-Master (References 6542, 1675)

The Rolex GMT-Master, designed for Pan Am pilots, quickly became an icon of adventure and functionality. Early references like the 6542, featuring a Bakelite bezel, are exceptionally rare and valuable. The subsequent 1675 introduced a more durable acrylic bezel insert, available in various color combinations.

A vintage GMT-Master guide highlights the importance of verifying dial originality and the condition of the rotating bezel. Collectors prize examples with well-preserved patina and complete sets of original components. The GMT-Master represents a compelling blend of history and horological excellence.

Rolex Daytona (References 6239, 6263, 6265)

The Rolex Daytona, synonymous with motorsports, is arguably the most coveted chronograph in the vintage market. References 6239, 6263, and 6265 showcase the evolution of this iconic timepiece, with variations in bezel types and dial configurations. Paul Newman’s association significantly boosted the Daytona’s desirability.

A vintage Daytona field guide emphasizes scrutinizing dial originality, case integrity, and bracelet authenticity. These watches command substantial premiums, making expert verification crucial. Collectors seek examples with a clear history and minimal restoration, appreciating the Daytona’s racing heritage.

Authenticity and Verification

Genuine components are paramount; redials and refinishing impact value. Serial and reference numbers are key identifiers, demanding careful scrutiny for a trustworthy vintage Rolex.

Identifying Genuine Components

Ensuring originality is crucial when verifying a vintage Rolex. Focus on details – the crown, hands, dial, and bezel must align with the reference period. Examine the Rolex logo; inconsistencies suggest tampering.

Inspect the movement, often a telltale sign of authenticity, seeking correct markings and caliber. Beware of replaced parts, as they diminish value. Originality extends to the bracelet and clasp, verifying codes and styles. A keen eye and research are essential for discerning genuine components from replacements.

Recognizing Redials and Refinishing

Redials – repainted dials – significantly impact a vintage Rolex’s value. Look for inconsistencies in font, printing quality, and lume application. Sharpness and alignment of text are key indicators; original dials exhibit subtle imperfections. Refinishing the case removes original factory markings, diminishing collectibility.

Examine lug holes for evidence of polishing, and check for softened edges. Over-polishing alters the case’s profile. A genuine, untouched dial and case command a premium, highlighting the importance of careful inspection.

The Importance of Serial and Reference Numbers

Serial and reference numbers are vital for verifying a vintage Rolex’s authenticity and history. The reference number identifies the model, while the serial number indicates the year of production. Cross-referencing these numbers with Rolex archives confirms originality.

Beware of altered or mismatched numbers, a red flag for fakes. Location is crucial – between the lugs, or engraved on the caseback (though less common). Documenting these numbers is essential for provenance and insurance purposes, safeguarding your investment.

Assessing Condition and Value

Evaluating a vintage Rolex requires scrutinizing case integrity, dial patina, and movement functionality. Originality significantly impacts value, alongside box and paper presence.

Case Condition: Lugs, Bezel, and Caseback

The case’s condition is paramount when assessing a vintage Rolex. Lugs should retain their original shape, exhibiting even wear without excessive polishing, which diminishes value. Bezel integrity is crucial; check for correct rotation, original markings, and absence of significant damage.

Caseback markings should be clear and consistent with the reference number. Look for signs of over-polishing, which can distort the case lines and reduce metal thickness. Sharpness of the case edges indicates less intervention, while rounded edges suggest frequent polishing. Dings and scratches are acceptable, reflecting age, but deep gouges detract from the overall condition and value.

Dial and Hands: Patina and Originality

Originality is key when evaluating a vintage Rolex dial and hands. Patina, the natural aging of the dial, is often desirable, indicating authenticity, but should appear even and consistent. Beware of repainted or refinished dials, as they significantly reduce value.

Hands should match the dial’s patina and be free from corrosion or damage. Check for correct hand styles for the specific reference. Lume plots should be intact and exhibit consistent aging. Any discrepancies – mismatched hands, uneven patina – raise red flags, suggesting potential non-original components.

Movement Examination: A Key Indicator

The movement is the heart of a vintage Rolex, and its condition is paramount. A qualified watchmaker’s assessment is crucial, verifying the caliber matches the reference and that all components are original. Look for signs of excessive wear, poor servicing, or replaced parts.

Serial numbers on the movement should correspond with the case. Cleanliness and proper lubrication indicate careful maintenance. A well-maintained movement suggests a history of responsible ownership, bolstering value and confirming authenticity. Movement examination is a definitive test.

The Rolex Oyster Bracelet

Rolex Oyster bracelets evolved significantly, with early variations differing from later designs. Bracelet codes reveal manufacturing dates, aiding in authentication and complementing your vintage Rolex research.

Early Bracelet Variations

Early Rolex Oyster bracelets showcased a fascinating evolution, differing considerably from modern iterations. Initially, bracelets featured riveted links, offering robust durability but requiring periodic maintenance. These early bracelets, often found on Submariners and GMT-Masters, utilized a unique clasp design.

Later variations transitioned to folded links, providing a more comfortable fit but potentially exhibiting stretch over time. Identifying these early bracelet types—like the riveted Oyster bracelet (Ref. 7206) or the early folded link bracelets—is crucial for collectors. Understanding these nuances contributes to accurate dating and assessing originality, enhancing the value of a vintage timepiece.

Bracelet Codes and Dating

Decoding bracelet codes is essential for establishing a vintage Rolex bracelet’s production period; These codes, stamped on the clasp or end links, provide valuable clues about the bracelet’s age and compatibility with specific watch references. Understanding these markings allows collectors to verify originality and assess the bracelet’s historical context.

Common codes include the year of manufacture and the bracelet’s specific design. Careful examination of these codes, combined with knowledge of Rolex’s bracelet evolution, helps determine if the bracelet is period-correct for the watch, significantly impacting its value.

Provenance and Documentation

Original boxes and papers dramatically increase a vintage Rolex’s value, confirming authenticity. Tracing ownership history adds another layer, enhancing collectibility.

Detailed records and previous owner information provide valuable context, strengthening the watch’s story;

The Value of Original Box and Papers

The presence of the original box and accompanying papers significantly elevates a vintage Rolex’s desirability and market value. These items serve as crucial corroborating evidence, bolstering the watch’s authenticity and confirming its lineage. A complete set demonstrates careful ownership and preservation, reassuring potential buyers.

Original boxes, often specific to the reference and period, offer a tangible connection to the watch’s history. Papers, including the original warranty certificate, provide documented proof of purchase and service records. Their absence doesn’t necessarily invalidate a watch, but it invariably impacts its price, often substantially.

Collectors actively seek complete sets, willing to pay a premium for the added assurance and historical context they provide. The condition of both the box and papers also plays a role, with well-preserved examples commanding higher prices.

Tracing Ownership History

Uncovering a vintage Rolex’s ownership history, or provenance, adds a compelling narrative and can significantly enhance its value. While often challenging, diligent research can reveal fascinating details about the watch’s past life and previous custodians. This detective work often involves contacting previous owners, researching auction records, and examining service documentation.

A well-documented ownership trail can authenticate a watch’s story, confirming its originality and potentially linking it to notable figures or events. This historical context appeals to collectors seeking more than just a timepiece; they desire a piece of history.

Establishing provenance requires patience and persistence, but the rewards – both in terms of knowledge and potential value – can be substantial. A compelling story elevates a vintage Rolex beyond a mere investment.

The History of Waterproof Rolex Cases

Rolex pioneered waterproof watch cases, beginning with early innovations in the 19th century and culminating in the revolutionary Oyster case, a design marvel.

Early Waterproofing Innovations

The quest for a waterproof watch began long before Rolex, tracing back to the era of pocket watches in the 19th century. Dennison, a British firm, secured a patent in 1872 for a waterproof case in the UK, marking an initial step. However, these early attempts often involved complex sealing mechanisms that proved unreliable in practical use.

Early innovations focused on creating tight seals around the case back and winding crown, but maintaining consistent waterproofing remained a significant challenge. These initial designs often lacked the robustness needed for everyday wear and were prone to failure with even minor impacts or exposure to moisture. Rolex would later revolutionize this field with a more integrated and durable approach.

The Oyster Case: A Revolutionary Design

Rolex’s Oyster case, introduced in 1926, represented a paradigm shift in watchmaking, addressing the limitations of earlier waterproofing attempts. This innovative design featured a screw-down case back and winding crown, creating a hermetically sealed environment protecting the movement from dust and water.

The Oyster case wasn’t merely about waterproofing; it was about creating a robust and reliable enclosure. Its construction minimized points of entry for contaminants, significantly enhancing the watch’s durability. This revolutionary design quickly became synonymous with Rolex, establishing the brand’s reputation for quality and innovation.

The Vintage Rolex Collecting Community

A passionate global network connects Rolex enthusiasts, fueled by events like Rolliefest. Collectors share knowledge, experiences, and a deep appreciation for these iconic timepieces, fostering a vibrant culture.

Key Events and Gatherings (Rolliefest)

Rolliefest stands as a premier, invitation-only biennial event for serious vintage Rolex collectors, founded in 2019 by Geoff Hess, a prominent figure at Sotheby’s. This exclusive gathering provides a unique platform for enthusiasts to connect, share their prized possessions, and deepen their understanding of these iconic watches.

Originally planned as a regular occurrence, the event faced a pause due to the global pandemic, but successfully resumed, reigniting the passion within the community. Rolliefest isn’t merely a display of watches; it’s a celebration of horological history, craftsmanship, and the enduring allure of Rolex. It’s a place where stories are exchanged, friendships are forged, and the collective knowledge of the vintage Rolex world is advanced.

Resources for Collectors

Navigating the vintage Rolex world requires access to reliable information and a supportive network. Numerous online forums and communities cater specifically to Rolex enthusiasts, offering platforms for discussion, identification assistance, and trade opportunities. Dedicated websites provide detailed reference guides, historical articles, and market analysis.

Auction houses like Sotheby’s and Christie’s frequently feature vintage Rolexes, offering both opportunities to acquire pieces and insights into current market values. Connecting with reputable dealers and watchmakers specializing in vintage Rolex is also crucial for authentication, restoration, and ongoing maintenance.

Investing in Vintage Rolex

Vintage Rolex watches represent a compelling investment, driven by market trends and iconic status. Understanding risks and rewards is vital for collectors, requiring careful research.

Price guides and expert analysis aid informed decisions, maximizing potential returns.

Market Trends and Price Guides

Navigating the vintage Rolex market demands awareness of current trends; four-digit references are now highly sought after, commanding significant premiums. Price fluctuations are influenced by rarity, condition, and historical significance, making diligent research essential.

Several reputable price guides, alongside auction results from houses like Sotheby’s, provide valuable benchmarks. However, these are merely indicators; expert appraisals offer tailored assessments. Market analysis reveals consistent demand for iconic models like the Submariner and GMT-Master, driving sustained value.

Staying informed about collector preferences and emerging trends is crucial for successful investment, ensuring optimal returns.

Risks and Rewards of Collecting

Vintage Rolex collecting presents both enticing rewards and inherent risks. Potential rewards include significant financial appreciation, the joy of ownership, and participation in a passionate community. However, counterfeiting and misrepresented watches pose substantial threats, demanding careful scrutiny.

Restoration and refinishing can impact value if not executed correctly. Market volatility also introduces risk; prices can fluctuate based on economic conditions and collector sentiment. Due diligence – authenticity verification and condition assessment – is paramount.

Informed collecting mitigates risks, maximizing the potential for long-term enjoyment and investment gains.

cataclysm alchemy leveling guide

Cataclysm Alchemy Leveling Guide: An Overview

Embark on a journey to master Cataclysm Alchemy! This guide details efficient 1-525 leveling, optimal material choices, and specialization paths for profit.

Discover the fastest routes, key recipes, and strategies to maximize your skill and earnings in this revamped classic profession.

Cataclysm Alchemy introduces a revitalized profession, brimming with new potions, flasks, and transmutations for Azeroth. This revamped system offers exciting opportunities for both casual players and dedicated gold-makers. The core of Cataclysm Alchemy revolves around efficiently leveling from 1 to 525, a process detailed within this guide.

Players will encounter a wealth of recipes, requiring strategic material gathering or shrewd Auction House purchases. Mastering the profession unlocks specializations – Potion, Elixir, and Transmutation – each offering unique benefits and profit potential. Prepare to delve into the magical science and unlock Alchemy’s full potential!

Why Choose Alchemy in Cataclysm Classic?

Alchemy in Cataclysm Classic presents a compelling profession choice due to its consistent demand and lucrative potential. Players consistently require potions and flasks for raiding, dungeons, and PvP, ensuring a steady market for crafted goods. Furthermore, Alchemy offers unique transmutation opportunities, allowing players to convert materials into valuable commodities for substantial gold gains.

Unlike some professions, Alchemy remains relevant throughout all stages of the game, providing consistent value. The ability to self-sufficiency with consumables also reduces reliance on external purchases, saving gold in the long run. It’s a rewarding path for those seeking both profit and utility!

Leveling Alchemy 1-525

Progress from novice to master! This section outlines the optimal leveling path, covering early potions, mid-range elixirs, and late-game transmutations to reach 525.

Early Leveling (1-75): Basic Potions & Recipes

Begin your alchemical journey with simple, readily available recipes. Focus on crafting Minor Healing Potions, Minor Mana Potions, and Swiftness Potions – these are inexpensive and provide consistent skill gains. Gathering common herbs like Peacebloom, Silverleaf, and Earthroot is crucial during this phase.

Prioritize volume over profit initially; the goal is rapid skill progression. Utilize Auction House purchases if gathering proves too time-consuming, but monitor prices carefully. Remember to complete any introductory alchemy quests for bonus experience and potential recipe unlocks. This initial stage establishes a foundation for more complex concoctions later on.

Mid-Leveling (75-225): Expanding Your Repertoire

As your skill grows, introduce more complex potions like Lesser Healing Potions, Lesser Mana Potions, and potions offering temporary stat boosts. This phase requires gathering herbs like Goldclover, Liferoot, and Gromsblood. Experiment with Volatile Mixtures when available, as they can significantly increase your skill-up rate.

Consider branching into elixirs, starting with Lesser Stamina Elixirs and Lesser Intellect Elixirs. Monitor Auction House prices for profitable opportunities, and begin to specialize your material gathering. Focus on recipes that offer a good balance between cost and skill gain, optimizing for efficiency.

Late-Leveling (225-375): Focusing on Efficiency

This stage demands a focus on maximizing skill gains per material spent. Prioritize recipes utilizing readily available and affordable herbs like Whiperweed, Frost Lotus, and Icethorn. Transmutations become increasingly valuable for skill-ups, particularly those with lower reagent costs.

Begin to specialize towards your chosen Alchemy path – Potion Mastery, Elixir Mastery, or Transmutation Mastery – as quests become available at skill 475. Efficiently manage your Volatile Mixtures and carefully analyze Auction House trends to identify profitable crafting opportunities.

Reaching 375-525: The Final Push

The final stretch requires dedication and strategic crafting. Focus almost exclusively on recipes that grant multiple skill points per craft, even if material costs are slightly higher. Utilize daily quests and reputation rewards that offer Alchemy-related recipes or materials.

Flasks and high-end potions become crucial for efficient leveling. Continuously monitor Auction House prices to ensure profitability while leveling. Mastering your chosen specialization will unlock further benefits and recipes, accelerating your progress to 525.

Cataclysm Alchemy Specializations

Choose wisely! Potion Mastery, Elixir Mastery, or Transmutation Mastery offer unique benefits. Specializations unlock at 475 skill, enhancing crafting efficiency and profits.

Potion Mastery: A Deep Dive

Potion Mastery focuses on enhancing potion effects and reducing their cooldowns, making you a vital asset in raids and PvP. This specialization is easily acquired through a questline, offering immediate benefits. Mastering potions allows for crafting powerful healing and utility options, consistently in high demand on the Auction House.

Switching to other specializations requires a gold cost, making Potion Mastery a solid initial choice. It provides a stable income stream while you explore other crafting avenues. Expect to create flasks, health potions, and mana potions frequently, catering to a broad player base seeking consumables.

Elixir Mastery: Benefits and Recipes

Elixir Mastery centers around creating powerful elixirs that grant temporary stat boosts, crucial for challenging content. This specialization enhances elixir potency and reduces reagent costs, maximizing profitability. Key recipes include Elixir of the Mongoose, Elixir of Greater Firepower, and various stat-boosting draughts.

While potentially lucrative, elixir demand can be more volatile than potions. Success relies on understanding raid compositions and PvP meta. Mastering elixir crafting requires careful market analysis and efficient material sourcing to maintain a competitive edge and consistent sales.

Transmutation Mastery: Optimizing for Profit

Transmutation Mastery focuses on converting cheaper materials into more valuable ones, offering substantial profit margins. Key transmutations include transforming ores into gems and creating Primal Might/Life. This specialization reduces transmutation costs and increases yield, boosting overall earnings.

However, transmutation profitability is heavily reliant on Auction House prices and material availability. Constant monitoring and quick adaptation to market fluctuations are essential. Successful transmutation requires a keen understanding of supply and demand, alongside efficient material gathering or purchasing strategies.

Essential Materials for Cataclysm Alchemy

Gathering herbs or utilizing the Auction House are key choices. Core herbs include Twilight Jasmine, Goldclover, and Frost Lotus, alongside Volatile mixtures for crafting.

Gathering vs. Auction House: A Cost Analysis

Deciding between gathering your own materials and purchasing them from the Auction House is crucial for efficient leveling. Gathering offers long-term savings, but requires significant time investment and knowledge of herb locations.

Auction House purchases provide immediate access to needed ingredients, bypassing travel time and farming efforts, but can be considerably more expensive, especially during peak demand.

Consider your server’s economy; volatile prices fluctuate. Early levels favor gathering due to lower herb costs, while later stages might benefit from Auction House convenience, depending on market conditions.

Ultimately, a hybrid approach – gathering common herbs and buying rarer ones – often strikes the best balance between cost and efficiency.

Key Herbs for Leveling

Throughout your Cataclysm Alchemy journey, certain herbs become invaluable. Early leveling (1-75) relies heavily on Peacebloom, Silverleaf, and Earthroot, readily available in starting zones.

As you progress (75-225), focus on gathering Grave Moss, Kingsblood, and Lichbloom, found in more challenging areas. Later stages (225-375) demand Twilight Jasmine, Frost Lotus, and Icethorn, often requiring travel to specific zones.

Golden Lotus, though expensive, is essential for high-level recipes. Prioritize efficient farming routes and consider utilizing tracking abilities to maximize herb acquisition.

Stockpiling these key herbs ensures smooth progression and minimizes Auction House dependency.

Utilizing Volatile Mixtures

Volatile mixtures are a cornerstone of Cataclysm Alchemy leveling, offering efficient skill gains and often cheaper alternatives to direct recipe crafting. These unstable compounds require specific primary herbs and a Volatile element – Earth, Fire, Water, or Air.

Experimenting with different volatile combinations unlocks numerous recipes, providing diverse leveling options. Focus on acquiring the necessary volatile reagents through quests, daily tasks, or the Auction House.

Mastering volatile mixtures reduces reliance on expensive, single-herb recipes, accelerating your progress towards 525 skill. They are particularly useful during mid-leveling phases.

Remember to check current market prices to determine the most cost-effective volatile strategy.

Maximizing Profit with Cataclysm Alchemy

Unlock substantial gold through flasks, potions, and transmutations! Daily quests and reputation rewards further boost income, making Alchemy a lucrative profession.

Flasks and Potions: High-Demand Items

Flasks and potions consistently represent the most profitable avenues within Cataclysm Alchemy, driven by raiders and PvPers alike. Demand surges during raid progression and arena seasons, creating consistent market opportunities. Focus on crafting Flasks of the Stoneblood and Flasks of Endless Rage, as these are perpetually sought after.

Potions like Potion of Speed and Potion of Stoneform also maintain steady sales. Mastering efficient crafting and sourcing materials affordably is crucial. Regularly monitor Auction House prices to identify optimal selling times and maximize your returns. Consider specializing in Potion Mastery to enhance yields and reduce material costs, further bolstering profitability.

Transmutations for Gold Making

Transmutations offer substantial gold-making potential, though market fluctuations require diligent monitoring. Transmuting Primal Might into Eternal Life and Primal Wisdom into Eternal Fire consistently yields profit, contingent on herb prices. Regularly check Auction House trends to capitalize on price differences between source materials and finished products.

Investing in Transmutation Mastery significantly reduces cooldowns, enabling higher throughput and increased earnings. Experiment with less common transmutations, identifying niche markets with limited competition. Efficient material acquisition and astute pricing strategies are paramount for maximizing profitability in the transmutation arena.

Daily Quests and Reputation Rewards

Daily quests offered by Alchemy trainers provide consistent gold and valuable reputation with associated factions. These quests often require crafting specific potions or elixirs, accelerating skill progression alongside financial gain. Prioritize completing these dailies, as reputation unlocks exclusive recipes and discounts on essential materials.

Reputation rewards frequently include potent transmutes or unique potion formulas unavailable elsewhere. Building rapport with relevant factions enhances access to profitable crafting opportunities. Consistent participation in daily quests and reputation farming represents a sustainable income stream for dedicated alchemists.

Alchemy Leveling Locations

Orgrimmar and Stormwind serve as central hubs, offering convenient access to trainers and auction houses. Specific zones provide abundant herb gathering opportunities for efficient leveling.

Orgrimmar & Stormwind: Central Hubs

Both Orgrimmar and Stormwind function as crucial central hubs for Cataclysm Alchemy leveling, providing immediate access to essential profession trainers. These cities streamline the learning of new recipes and facilitate quick skill upgrades. Furthermore, their bustling auction houses are invaluable for both acquiring necessary materials and selling crafted goods.

The proximity to vendors offering daily cooldown reduction items, like Volatile Mixtures, is another significant advantage. Regularly utilizing these items dramatically speeds up the leveling process. Conveniently located flight paths also enable swift travel to various herb-rich zones, optimizing gathering efficiency and minimizing downtime.

Specific Zone Recommendations

Mount Hyjal offers a fantastic starting point, boasting plentiful herbs like Whippersnap and Goldclover, ideal for early-level potions. Deepholm becomes increasingly valuable as you progress, providing access to herbs like Lichbloom and Frost Lotus, crucial for mid-range recipes.

Uldum is excellent for gathering herbs needed for higher-level transmutations and potions, while Twilight Highlands provides a steady supply of herbs required for end-game flasks and elixirs. Remember to check auction house prices before committing to extensive gathering, optimizing for profit.

Advanced Alchemy Techniques

Master critical yield for increased potion output and leverage Alchemy Stone bonuses to enhance your crafting efficiency and maximize potential profits.

Understanding Critical Yield

Critical yield in Cataclysm Alchemy represents the chance to create two potions or elixirs instead of the standard one during crafting. This mechanic significantly boosts your output and profitability, especially when dealing with expensive or time-consuming recipes.

Several factors influence your critical yield chance, including your Alchemy skill level, the specific recipe being used, and any applicable bonuses from gear or consumables. Increasing your skill and utilizing items that enhance critical strike chance are crucial for maximizing this benefit.

Understanding and optimizing critical yield is a cornerstone of advanced Alchemy, allowing you to generate more products from the same materials, ultimately leading to greater gold-making potential.

Alchemy Stone Bonuses

Alchemy stones offer a valuable, often overlooked, boost to your profession. These socketable gems provide various benefits, most notably increasing your critical yield chance when crafting potions and elixirs. Selecting the correct stone can dramatically improve your output and profitability.

Different stones offer varying levels of bonus, so researching the best options for your current skill level and crafting goals is essential. Consider stones that also provide secondary stats beneficial to your character, maximizing their overall value.

Investing in a quality Alchemy stone is a relatively inexpensive way to significantly enhance your crafting efficiency.

Troubleshooting Common Issues

Encountering recipe acquisition problems or material shortages? This section provides solutions for common Cataclysm Alchemy leveling roadblocks, ensuring a smoother progression.

Recipe Acquisition Problems

Struggling to find specific Cataclysm Alchemy recipes? Many are learned from trainers, requiring reaching certain skill levels and completing associated quests. Others drop from creatures or are purchased from vendors, often with limited stock.

Check auction houses frequently, as players often resell recipes. Utilize online databases like Wowhead to pinpoint drop locations and vendor availability. Remember that some recipes are reputation-locked, demanding faction standing. Don’t hesitate to explore profession-specific daily quests, as they occasionally reward rare recipes, accelerating your leveling journey.

Material Shortages

Facing scarcity with essential Cataclysm Alchemy ingredients? Popular herbs like Twilight Jasmine and Frost Lotus can experience price spikes due to high demand. Consider diversifying your sourcing – combine gathering with Auction House purchases.

Explore alternative herbs with similar properties, and monitor auction house trends for optimal buying times. Utilizing Volatile Mixtures efficiently can reduce reliance on specific materials. Farming zones strategically and establishing alt characters dedicated to herbalism can mitigate shortages, ensuring a smoother leveling experience.

Resources and Tools

Leverage websites and databases for recipes and pricing. Utilize addons to streamline ingredient tracking, manage costs, and optimize your Cataclysm Alchemy workflow.

Useful Websites and Databases

Navigating the world of Cataclysm Alchemy requires access to comprehensive data. Websites like Wowhead and Allakhazam offer extensive databases detailing every recipe, ingredient, and associated quest. These platforms are invaluable for confirming recipe acquisition, checking current material costs, and understanding potential profit margins.

Auction House data tracking sites, such as The Undermine Journal, provide real-time pricing information for potions, flasks, and transmutations, enabling informed decisions about what to craft and sell. Regularly consulting these resources will significantly enhance your efficiency and profitability as you level your Alchemy skill.

Addons for Alchemy Management

Streamlining your Cataclysm Alchemy leveling experience is achievable with helpful addons. TradeSkillMaster (TSM) is a powerful tool for managing materials, tracking auction house prices, and automating crafting operations. It allows for efficient profit calculations and minimizes wasted time.

Alchemy specific addons, like PotionLab, can assist with recipe tracking and ingredient management. These addons provide quick access to crucial information, reducing the need to constantly consult external websites. Utilizing these tools will optimize your workflow and maximize your gold-making potential throughout the leveling process.

Suitability for Alts

Alchemy is excellent for alts, providing self-sufficiency and gold generation. Leveling on multiple characters boosts material access and crafting opportunities for profit.

Leveling Alchemy on Multiple Characters

Duplicating Alchemy across alts significantly accelerates progress and wealth accumulation. Each character contributes to gathering diverse herbs, reducing Auction House dependency. This approach unlocks multiple crafting slots, boosting potion, flask, and transmutation output.

Consider focusing different specializations on each alt – Potion Mastery on one, Elixir Mastery on another, and Transmutation on a third – to maximize crafting versatility. Cross-realm characters can pool resources, but logistical coordination is essential. This strategy is particularly effective for players aiming to dominate the market with a wide range of alchemical products.

Cross-Realm Considerations

Cross-realm Alchemy leveling presents unique challenges and opportunities. While accessing wider herb markets is beneficial, transferring materials between realms incurs significant costs. Auction House prices fluctuate wildly across servers, demanding careful market analysis.

Guild coordination becomes crucial for resource sharing and recipe acquisition. Consider establishing a network of alchemists across multiple realms to streamline material procurement. Be mindful of realm-specific economies and adjust crafting strategies accordingly. Efficient cross-realm play requires diligent planning and a strong understanding of server dynamics.