makai moon guide’s fingerless gloves

Makai Moon Guides Fingerless Gloves: A Comprehensive Overview

Makai Moon Guides crafts unique fingerless gloves‚ gaining traction due to dexterity needs and fashion trends since the 1980s‚
especially within gaming communities like Final Fantasy XIV.

Makai Moon Guides emerged as a distinctive brand catering to a niche market – enthusiasts seeking functional and aesthetically pleasing fingerless gloves. While the concept of fingerless gloves dates back decades‚ gaining initial popularity in the 1980s and serving practical purposes for activities like cycling and music performance‚ Makai Moon Guides has successfully blended utility with a strong design sensibility.

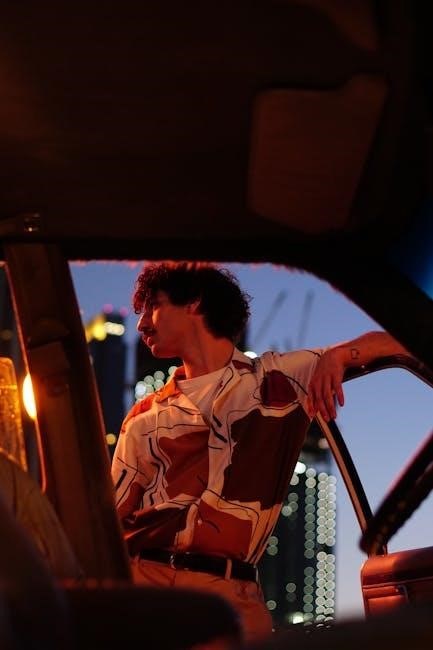
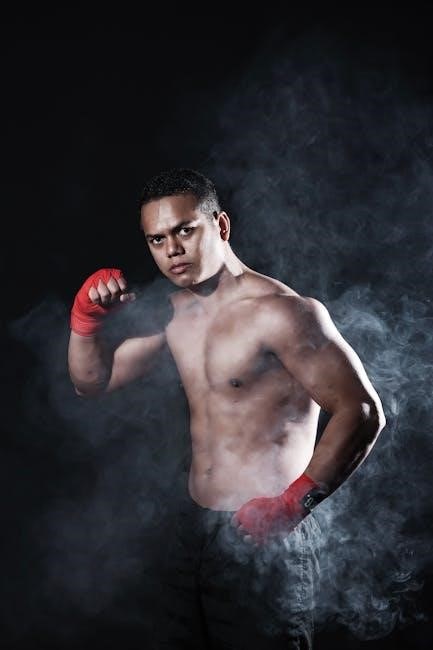
The brand’s rise is intrinsically linked to the growing popularity of online gaming‚ particularly Final Fantasy XIV (FFXIV). Makai Moon Guides quickly became recognized for creating gloves inspired by in-game designs‚ most notably the Makai Markswoman’s Fingerless Gloves. This connection to the FFXIV community propelled the brand into the spotlight‚ attracting a dedicated following of cosplayers and gamers.

However‚ Makai Moon Guides isn’t solely defined by its gaming association. The brand appeals to a broader audience valuing both practicality and style‚ offering gloves suitable for various activities where dexterity and hand protection are essential. They represent a fusion of fashion‚ function‚ and fandom‚ establishing a unique position within the accessories market.

The Rise of Fingerless Gloves in Fashion

The journey of fingerless gloves from practical necessity to fashion statement is a fascinating one. Initially adopted for tasks demanding dexterity – think cigarette smokers‚ church organists‚ or cyclists – their appeal broadened significantly during the mid-1980s. This era saw fingerless gloves explode in popularity‚ becoming a defining accessory of the decade’s bold aesthetic.

This initial surge wasn’t merely functional; it was about making a statement. The gloves offered a rebellious edge‚ often associated with subcultures and a desire for individuality. While trends evolved‚ the core appeal of fingerless gloves – a balance between protection and freedom of movement – remained.

More recently‚ the resurgence of interest in Y2K fashion has further fueled their comeback. Makai Moon Guides capitalized on this renewed interest‚ cleverly merging nostalgic aesthetics with modern designs. The brand’s success demonstrates how a seemingly niche item can experience a revival when aligned with current cultural trends and a dedicated community‚ proving their enduring appeal in the fashion landscape.

Makai Moon Guides: Brand Philosophy and Aesthetic

Makai Moon Guides isn’t simply a glove manufacturer; it’s a creator of wearable art deeply embedded within gaming and cosplay communities. The brand’s philosophy centers around empowering self-expression and enhancing the immersive experience for its customers. They aim to bridge the gap between virtual aesthetics and tangible accessories.

Aesthetically‚ Makai Moon Guides leans towards a blend of fantasy‚ practicality‚ and a touch of edgy sophistication. Designs often incorporate intricate detailing‚ inspired by popular MMORPGs like Final Fantasy XIV‚ but are versatile enough for everyday wear. The brand avoids mass-produced uniformity‚ prioritizing unique designs and quality craftsmanship.

Their commitment extends beyond mere aesthetics. Makai Moon Guides fosters a strong community‚ actively engaging with customers and incorporating feedback into their designs. This collaborative approach ensures their products resonate with the passions and preferences of their target audience‚ solidifying their position as a beloved brand within niche communities.

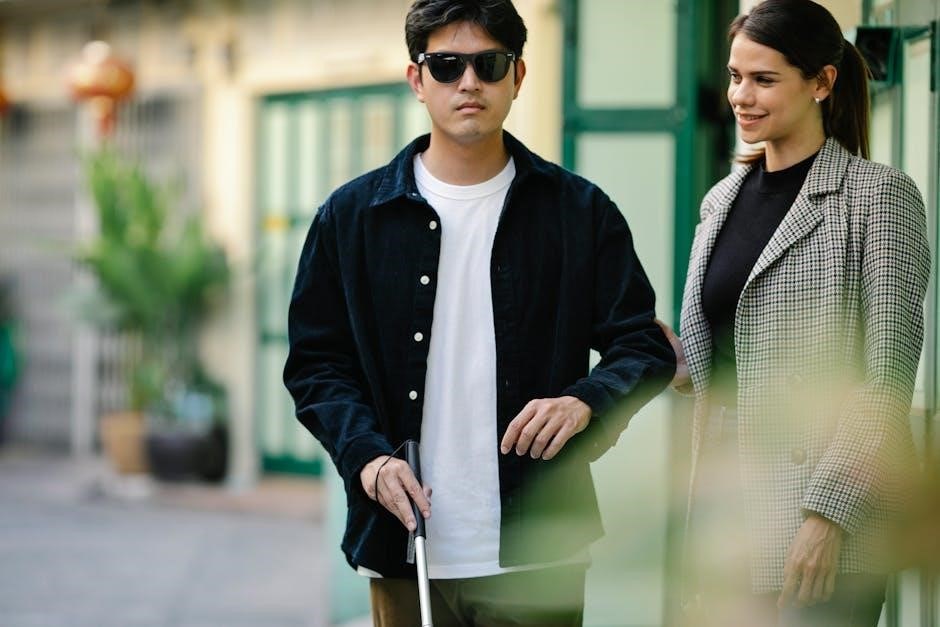
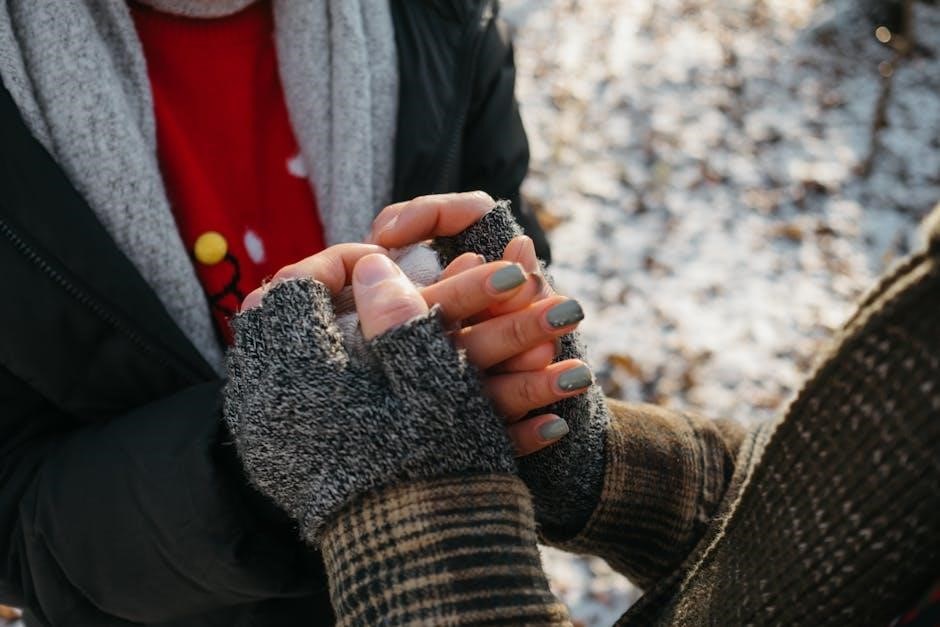
Fingerless Glove Functionality and Dexterity

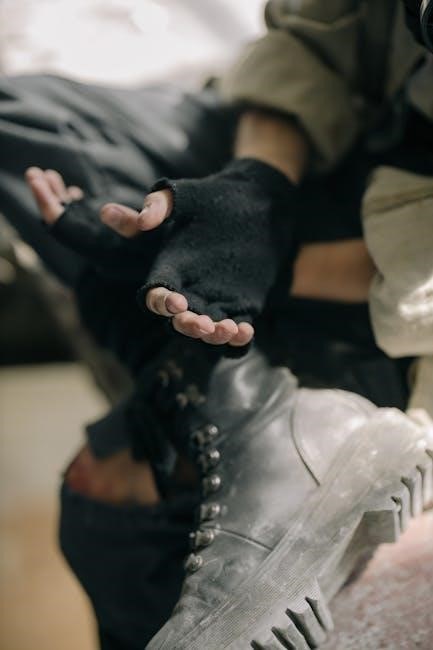
The core appeal of fingerless gloves‚ and particularly those from Makai Moon Guides‚ lies in their unique balance of protection and dexterity. Unlike full gloves‚ the open-finger design allows for unhindered movement and tactile sensitivity – crucial for activities requiring fine motor skills.

This functionality makes them ideal for a diverse range of applications. Gamers benefit from precise control over keyboards and controllers‚ while cosplayers appreciate the ability to manipulate props and accessories with ease. Even outside of these realms‚ tasks like cycling‚ playing musical instruments (like a church organ)‚ or even simply texting become more comfortable and efficient.

Makai Moon Guides specifically emphasizes this aspect in their designs‚ utilizing materials and construction techniques that maximize flexibility and grip. The gloves aren’t merely fashionable accessories; they are tools that enhance performance and comfort‚ catering to users who demand both style and practicality.

Materials Used in Makai Moon Guides Gloves

Makai Moon Guides prioritizes both comfort and durability in their fingerless glove construction‚ carefully selecting materials to meet diverse user needs. While specific compositions vary between models‚ common elements include high-quality knit fabrics‚ often incorporating blends of cotton‚ nylon‚ and spandex. These blends provide a balance of softness‚ stretch‚ and resilience.

The choice of materials isn’t solely about feel; it’s also about functionality. The stretch allows for a snug‚ secure fit without restricting movement‚ essential for dexterity-focused activities. Durability is enhanced through reinforced stitching and the use of abrasion-resistant yarns in high-wear areas.

Furthermore‚ Makai Moon Guides often incorporates specialized materials for specific glove lines. This might include moisture-wicking fabrics for enhanced comfort during extended use‚ or textured palms for improved grip. The brand’s commitment to quality materials ensures that their gloves are not only stylish but also built to last.

Design Features of Makai Moon Guides Fingerless Gloves

Makai Moon Guides distinguishes itself through thoughtfully considered design elements‚ blending aesthetic appeal with practical functionality. A core feature is the variety of lengths available‚ ranging from wrist-length to mid-forearm‚ catering to different preferences and activity requirements. The finger cut is also a key design aspect‚ often featuring a precise shape to maximize dexterity while maintaining a comfortable fit.

Beyond basic functionality‚ the brand incorporates stylistic details that set their gloves apart. These include intricate knit patterns‚ unique color combinations‚ and subtle branding elements. Many designs draw inspiration from fantasy and gaming aesthetics‚ reflecting the brand’s strong connection to those communities.

Furthermore‚ Makai Moon Guides frequently utilizes ergonomic design principles‚ shaping the gloves to conform naturally to the hand. Reinforced palms and strategic stitching contribute to both durability and comfort. The overall design philosophy emphasizes a balance between form and function‚ creating gloves that are both visually appealing and highly practical.

Popular Makai Moon Guides Fingerless Glove Models

Makai Moon Guides boasts a diverse catalog‚ but several models consistently stand out in popularity. The “Arcana” series‚ known for its intricate celestial-themed knit patterns‚ is a perennial favorite‚ often featuring deep blues and silvers. The “Shadow Walker” gloves‚ typically in black or dark grey‚ appeal to those seeking a more understated‚ tactical aesthetic.

Notably‚ the “Markswoman” model gained significant recognition due to its resemblance to the fingerless gloves featured in Final Fantasy XIV. This design‚ while not officially affiliated‚ resonated strongly with the game’s player base. The “Emberglow” gloves‚ with their warm‚ autumnal color palette and comfortable knit‚ are popular for cooler weather.

Beyond these‚ limited-edition collaborations and seasonal releases frequently generate buzz. Makai Moon Guides often engages with its community to gauge interest in new designs‚ ensuring a steady stream of sought-after models. Each model prioritizes dexterity and comfort‚ catering to a wide range of activities and personal styles;

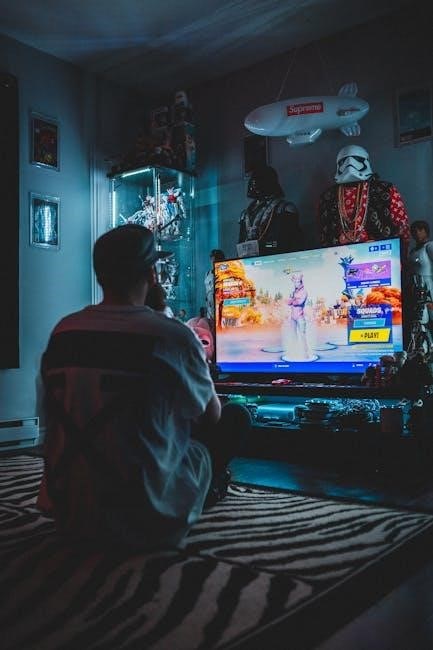
Makai Moon Guides Gloves in Gaming and Cosplay

Makai Moon Guides fingerless gloves have cultivated a strong presence within the gaming and cosplay communities. Their appeal stems from a blend of practicality and aesthetic versatility. Gamers appreciate the enhanced dexterity for precise keyboard and controller movements‚ avoiding the restrictions of full gloves.

The brand’s designs frequently inspire cosplay creations‚ particularly within the Final Fantasy XIV fandom‚ where the “Markswoman” style glove is highly sought after for character accuracy. Cosplayers value the gloves’ ability to complete a look without hindering prop handling or posing.

Beyond FFXIV‚ Makai Moon Guides gloves are seen in cosplays spanning various genres‚ from fantasy to sci-fi. The availability of diverse colors and patterns allows for customization to match specific character designs. The gloves are often featured in streams and online gaming events‚ further solidifying their popularity within these niches. They offer both function and a stylish accessory for dedicated fans.

The FFXIV Connection: Makai Markswoman’s Fingerless Gloves

The connection between Makai Moon Guides and Final Fantasy XIV (FFXIV) is particularly strong‚ revolving around the iconic “Makai Markswoman’s Fingerless Gloves.” These gloves‚ originating as an in-game item‚ have become a symbol of the game’s aesthetic and a highly desired accessory for players.

Originally a UNIQUE‚ UNTRADABLE‚ UNSELLABLE item requiring specific job classes (ARC‚ BRD‚ MCH‚ DNC)‚ the in-game gloves sparked demand for real-life replicas. Makai Moon Guides quickly responded‚ creating gloves that closely mirror the in-game design‚ fulfilling a significant niche within the FFXIV community.

The popularity isn’t merely about aesthetics; it’s about embodying a character and connecting with the game on a deeper level. Players often wear these gloves during in-game events‚ screenshots‚ and conventions. The gloves represent dedication to the game and a shared appreciation for its detailed design. This strong link has cemented Makai Moon Guides’ reputation within the FFXIV fanbase.

Fingerless Gloves for Specific Activities (Cycling‚ Music‚ etc.)

Makai Moon Guides fingerless gloves aren’t solely for fashion or gaming; their design lends itself well to a variety of practical applications where dexterity is paramount. Historically‚ fingerless gloves have been favored by those needing precise hand movements‚ such as church organists and cigarette smokers‚ highlighting their functional benefits.

Cycling is a key area where Makai Moon Guides gloves excel. They provide grip and protection without compromising brake and gear shifting control. Musicians‚ particularly guitarists and bassists‚ also benefit from the enhanced tactile feedback and freedom of movement. The gloves allow for intricate fingerwork while offering a degree of hand protection.

Beyond these‚ activities like rock climbing‚ weightlifting‚ and even certain types of crafting can benefit from the dexterity offered by fingerless gloves. Makai Moon Guides caters to this diverse range of needs with designs prioritizing both functionality and style‚ making them a versatile accessory for active individuals.

Caring for Your Makai Moon Guides Fingerless Gloves

To ensure the longevity and maintain the aesthetic appeal of your Makai Moon Guides fingerless gloves‚ proper care is essential. Given the diverse materials used – details explored elsewhere – cleaning methods will vary. However‚ a general rule is to avoid harsh chemicals and abrasive cleaners.

For most Makai Moon Guides gloves‚ hand washing is recommended. Use cool water and a mild detergent‚ gently agitating to remove dirt. Avoid vigorous scrubbing‚ which could damage delicate stitching or embellishments. Rinse thoroughly and lay flat to dry‚ away from direct sunlight or heat sources.

Leather components‚ if present‚ may benefit from occasional conditioning with a leather-specific product. This helps maintain suppleness and prevent cracking. Regularly inspect your gloves for any signs of wear and tear‚ addressing minor repairs promptly to prevent further damage. Proper storage‚ away from extreme temperatures and humidity‚ will also contribute to their lifespan.

Where to Purchase Makai Moon Guides Fingerless Gloves

Currently‚ acquiring Makai Moon Guides fingerless gloves primarily involves navigating online marketplaces and dedicated fan communities. The brand doesn’t maintain a singular‚ centralized retail location. Etsy serves as a prominent platform‚ hosting numerous independent sellers who create and offer various Makai Moon Guides-inspired designs‚ and occasionally‚ authentic pieces.

Social media platforms‚ particularly Twitter and Instagram‚ are valuable resources for discovering sellers and staying updated on restocks or custom order availability. Dedicated Final Fantasy XIV (FFXIV) online forums and Discord servers often feature buy/sell threads where community members trade gloves.

Be cautious when purchasing from unverified sources. Authenticity can be a concern‚ especially given the popularity of the Makai Markswoman’s design. Always review seller ratings and product descriptions carefully. Direct communication with the seller to confirm details and materials is highly recommended before completing a purchase.

Price Range and Value Proposition

The price of Makai Moon Guides fingerless gloves varies considerably‚ influenced by factors like materials‚ craftsmanship‚ and whether they are officially licensed or fan-made reproductions. Generally‚ expect to find prices ranging from $25 to $80 USD‚ with more elaborate or custom designs exceeding $100.

The value proposition extends beyond mere handwear. For FFXIV players‚ particularly those embodying ranged DPS classes like Machinist or Dancer‚ these gloves represent a tangible connection to their in-game aesthetic‚ specifically the coveted Makai Markswoman’s look. This aspirational element drives demand and justifies a premium.

Beyond the gaming community‚ the appeal lies in the unique style and functionality. High-quality materials like leather or durable knits contribute to longevity and comfort. Considering the craftsmanship involved‚ especially for handmade options‚ the price reflects a blend of fashion‚ fandom‚ and functional utility. The perceived value is high for those seeking a distinctive accessory.

Customer Reviews and Feedback

Makai Moon Guides fingerless gloves consistently receive positive feedback regarding their aesthetic appeal and comfortable fit. Many customers highlight the gloves’ accuracy to the Final Fantasy XIV in-game designs‚ particularly the Makai Markswoman’s variant‚ expressing satisfaction with the attention to detail.

A recurring theme in reviews centers on the gloves’ versatility. Users appreciate their suitability for gaming‚ cosplay‚ and everyday wear. Several reviewers mention improved dexterity compared to full gloves‚ benefiting activities like typing‚ crafting‚ or playing musical instruments.

However‚ some feedback notes variations in sizing‚ advising potential buyers to carefully consult size charts. A small number of customers have reported minor durability concerns with certain materials‚ suggesting a need for gentle care. Overall‚ the overwhelmingly positive sentiment indicates a strong customer base valuing both style and functionality‚ with many willing to recommend the brand to fellow enthusiasts.

Future Trends in Fingerless Glove Design

Makai Moon Guides‚ and the fingerless glove market generally‚ are poised for innovation. Expect increased integration of smart textiles – incorporating touch-sensitive materials for enhanced device interaction and biometric sensors for health tracking. Sustainable materials‚ like recycled fibers and plant-based leathers‚ will likely gain prominence‚ appealing to eco-conscious consumers.

Customization options will expand beyond color choices. 3D printing could enable bespoke designs tailored to individual hand shapes and preferences. We may see modular designs‚ allowing users to swap out components for different functionalities – perhaps interchangeable palm grips for gaming or reinforced knuckles for cycling.

Drawing inspiration from gaming and cosplay‚ expect bolder aesthetics and collaborations with artists and designers. The demand for gloves mirroring in-game items‚ like the Makai Markswoman’s‚ will continue‚ driving demand for high-fidelity replicas. Ultimately‚ future designs will prioritize both form and function‚ blending cutting-edge technology with stylish expression.

free fresno tv guide

Fresno TV Guide: A Comprehensive Overview (December 17, 2025)

Today’s date is December 17, 2025․ Fresno viewers can access free TV guides online, detailing sports like college football and basketball schedules․

Fresno’s television landscape offers a diverse range of viewing options, from traditional broadcast channels to burgeoning streaming services․ Accessing a free Fresno TV guide is crucial for navigating this complexity, especially with exciting college football matchups featuring Fresno State dominating the airwaves․

Currently, on December 17, 2025, viewers can find schedules for games against Utah State on CBS Sports Network, San Diego State and Boise State on FS1, and Oregon State on The CW․ These free guides, available online, help fans pinpoint kickoff times and channel listings․ Beyond sports, local channels provide news and entertainment, while streaming platforms offer alternatives to cable;

Upcoming Fresno State Football Games on TV

Find free TV guides listing Fresno State’s games: Utah State (CBS Sports Network), San Diego State, Oregon State (The CW), and Boise State (FS1)․

Fresno State vs․ Utah State ⏤ CBS Sports Network

Don’t miss the Fresno State vs․ Utah State game! Utilizing a free Fresno TV guide, fans can confirm the broadcast on CBS Sports Network, scheduled for 7:30 p․m․ on Saturday from Valley Childrens Stadium․ These guides provide essential details, ensuring you don’t miss a single play of this Mountain West Conference matchup․

The Bulldogs (7-3 overall, 4-2 Mountain West) will face a tough opponent․ Free online TV listings will help you set reminders and plan your viewing․ Check local listings for channel availability, as CBS Sports Network requires a subscription through most providers․ Several websites offer free, searchable TV schedules for Fresno․

Fresno State vs․ San Diego State — FS1

Catch Fresno State battling San Diego State on FS1! A free Fresno TV guide is your resource for confirming the 12:30 p․m․ Saturday kickoff․ Bulldogs (5-2 overall, 2-1 Mountain West) face the Aztecs (5-1, 2-0)․ These free online guides offer a convenient way to verify channel listings and set reminders, preventing you from missing any action․

FS1 typically requires a cable or streaming subscription․ Utilize a free TV schedule website to pinpoint the exact channel number on your provider․ Remember to check listings closer to game time for potential changes․ Several free Fresno TV listings are available online for easy access!

Fresno State vs․ Oregon State ⏤ The CW

Don’t miss Fresno State take on Oregon State, airing on The CW! A free Fresno TV guide will confirm the game time․ Head Coach Matt Entz leads the Bulldogs into this exciting matchup․ Utilize free online TV listings to verify The CW channel number in your area, as it can vary․

The CW is often available over-the-air with an antenna, offering a free viewing option․ A free TV schedule will detail local broadcast times․ Remember to consult a Fresno TV guide closer to game day for any potential schedule adjustments․ Several websites provide free, comprehensive listings!

Fresno State vs․ San José State ⏤ FS1

Catch the Fresno State versus San José State game live on FS1! A free Fresno TV guide is essential for confirming the 7:30 p․m․ kickoff time․ The game takes place at CEFCU Stadium in San Jose․ Access a free online TV listing to pinpoint the FS1 channel number on your cable or satellite provider․

For a free viewing experience, explore streaming options with trial periods․ A local Fresno TV guide will also display FS1’s channel․ Remember, both teams recently experienced losses – Fresno State to Utah State and San José State to San Diego State – making this a crucial contest․ Utilize free TV schedule websites!

Fresno State vs․ Wyoming — FS1

Don’t miss the Fresno State and Wyoming college football showdown, airing live on FS1! A free Fresno TV guide is your best resource for confirming the 7:30 p․m․ kickoff from Valley Childrens Stadium․ Utilize free online TV listings to locate the FS1 channel on your specific cable or satellite package․

For a free viewing option, investigate streaming services offering trial periods․ A local Fresno TV guide will also provide FS1’s channel number․ Both the Bulldogs and Cowboys benefited from a bye week, suggesting a refreshed and competitive match․ Consult a free TV schedule website for accurate details!

Fresno State vs․ Boise State — FS1

Catch the Fresno State versus Boise State college football game, broadcast live on FS1! A free Fresno TV guide confirms the 12:30 p․m․ kickoff from Albertsons Stadium in Boise, Idaho․ Access free online TV listings to pinpoint the FS1 channel within your cable or satellite provider’s lineup․

Explore free trial periods offered by streaming services for an alternative viewing experience․ A local Fresno TV guide will display FS1’s channel number․ The Bulldogs are rebounding from a tough 23-0 loss, making this a crucial contest․ Consult a free TV schedule for precise game details and channel information!

Navigating Fresno TV Listings

Free Fresno TV guides are readily available online, offering comprehensive schedules for local channels and streaming options for easy access․

Online TV Guides for Fresno

Numerous websites provide free Fresno TV guides, offering detailed listings for all local channels – ABC, NBC, CBS, and FOX – as well as cable and streaming services․ These guides typically allow users to search by channel, time, or program title, making it simple to find specific shows or movies․

Many sites also feature interactive elements, such as the ability to set reminders or create personalized watchlists․ Popular options include TVGuide․com, Zap2it, and local news station websites, which often maintain up-to-date schedules․ Utilizing these resources ensures Fresno residents stay informed about their favorite programs and upcoming sports events, including Fresno State football games broadcast on CBS Sports Network and FS1․

Using Cable and Satellite TV Guides

Cable and satellite providers in Fresno offer built-in TV guides as part of their service packages․ These guides typically display program listings directly on your television screen, allowing for easy browsing and channel selection․ Many providers also offer interactive program guides (IPGs) with features like on-screen search, program information, and parental controls․

While these guides are convenient, accessing detailed sports schedules – such as Fresno State football games on CBS Sports Network or FS1 – may require navigating through multiple menus․ Some providers offer companion apps for smartphones and tablets, providing remote access to the TV guide and scheduling features․

Digital Over-the-Air TV Schedules

For Fresno viewers relying on an antenna, digital over-the-air (OTA) TV schedules are readily available online․ Websites like TitanTV and TVGuide․com provide comprehensive listings for local channels – ABC, NBC, CBS, and FOX – broadcasting in the Fresno area․ These schedules detail program times, descriptions, and HD availability․

However, OTA guides typically don’t include specific sports broadcasts on cable-exclusive channels like CBS Sports Network or FS1․ To find Fresno State game times, viewers must consult the team’s official website or sports news outlets․ Regularly scanning for updated channel lineups is also recommended․

Popular Fresno TV Channels

Fresno viewers enjoy local channels like ABC, NBC, CBS, and FOX, alongside sports networks like FS1 broadcasting Fresno State games, accessible via free guides․

Local Fresno Channels (ABC, NBC, CBS, FOX)

Fresno’s core television experience revolves around its established network affiliates: ABC, NBC, CBS, and FOX․ These channels deliver a broad spectrum of programming, from local news and weather updates crucial for Valley residents, to nationally syndicated entertainment shows and blockbuster movie premieres․

Finding schedules for these channels is easily achievable through numerous free TV guide websites and apps․ Many offer searchable listings, allowing viewers to pinpoint specific programs or browse by time slot․ Cable and satellite providers also furnish digital guides, though online options often provide greater flexibility and accessibility without subscription costs․ Don’t forget over-the-air options!

Sports Channels Available in Fresno

For Fresno sports enthusiasts, several channels are essential․ CBS Sports Network broadcasts Fresno State football, including the upcoming game against Utah State on December 17th at 7:30 PM․ FS1 features multiple Bulldog games – San Diego State, San José State, Wyoming, and Boise State – offering extensive college football coverage․

Free TV guides readily display schedules for these channels․ Websites and apps allow filtering by sport, ensuring you don’t miss crucial matchups․ While premium sports packages exist, many key games are accessible through basic cable or antenna, and free guides help maximize viewing options․

News Channels in the Fresno Area

Staying informed in Fresno is readily achievable with local news channels․ ABC, NBC, CBS, and FOX affiliates provide comprehensive coverage of regional events and national headlines․ Free TV guides are invaluable for tracking local news broadcasts and breaking news alerts․

These guides often integrate with channel apps, offering on-demand news clips and live streams․ Utilizing these resources ensures access to timely information without subscription costs․ Regularly updated listings help viewers navigate programming and stay connected to the Fresno community, enhancing civic engagement․

Entertainment Channels in Fresno

Fresno offers a diverse range of entertainment channels accessible through free TV guides․ Viewers can discover schedules for popular networks featuring movies, sitcoms, and reality shows․ These guides often highlight on-demand options, providing access to a vast library of content without subscription fees․

Utilizing channel apps alongside free TV guide websites enhances the viewing experience, offering personalized recommendations and convenient program discovery․ Staying updated with these resources ensures you never miss your favorite shows or new releases in the Fresno area․

Streaming Services in Fresno

Explore alternatives to traditional TV! Free Fresno TV guides list streaming options, including those offering Fresno State game access, alongside cost comparisons․

Alternatives to Traditional TV

Cutting the cord is increasingly popular in Fresno! Numerous streaming services now provide access to local channels, sports, and on-demand entertainment, often at a lower monthly cost than cable or satellite․ Free Fresno TV guides are invaluable for navigating these options, highlighting services that carry key channels like ABC, NBC, CBS, and FOX․

Many services offer free trials, allowing viewers to test drive before committing․ Consider factors like live TV access, DVR capabilities, and the availability of Fresno State football broadcasts; Utilizing a free TV guide helps compare channel lineups and pricing, ensuring you find the perfect streaming solution to fit your viewing habits and budget․

Streaming Fresno State Games

Bulldog fans in Fresno have several streaming options! A free Fresno TV guide is essential for pinpointing where to watch upcoming games․ CBS Sports Network, FS1, and The CW are key channels broadcasting Fresno State football․ Streaming services carrying these channels – like YouTube TV, Hulu + Live TV, or Sling TV – offer convenient access․

Check the guide for specific game times and channel listings․ Some games may require subscriptions to specific streaming packages․ Utilizing a free TV guide ensures you don’t miss a single play, providing a comprehensive overview of available streaming options for every Fresno State matchup․

Cost Comparison of Streaming Services

For Fresno viewers, a free TV guide helps navigate streaming costs․ Services like YouTube TV typically range from $65-$75/month, offering a broad channel selection including CBS Sports Network and FS1․ Hulu + Live TV is similarly priced, while Sling TV provides a more budget-friendly option starting around $40/month, though channel packages vary․

Consider which channels – like those broadcasting Fresno State games – are essential․ A free Fresno TV guide aids in identifying the most cost-effective service based on your viewing habits, ensuring you get the best value for your entertainment dollar․

Specific Sports Coverage in Fresno

A free Fresno TV guide highlights college football, basketball, and baseball broadcasts on channels like CBS Sports Network and FS1, crucial for local fans․

College Football on Fresno TV

Accessing a free Fresno TV guide is essential for following the Bulldogs! Several upcoming games are slated for broadcast on major networks․ The Fresno State versus Utah State matchup airs on CBS Sports Network, kicking off at 7:30 p․m․ from Valley Childrens Stadium․

FS1 will showcase Fresno State against San Diego State at 12:30 p․m․, and later, the game against San José State at 7:30 p․m․ Don’t miss the contests against Wyoming and Boise State, also on FS1․ The Oregon State game will be available on The CW․ Utilizing a free guide ensures you don’t miss any action!

Basketball on Fresno TV

Finding a free Fresno TV guide is key to staying updated on Bulldog basketball! While the provided information focuses heavily on football, local listings and streaming services will broadcast Fresno State basketball games throughout the season․ Check online TV guide websites for specific channel assignments and game times․

Many games may appear on Mountain West Network streaming platforms, accessible with a free account․ Cable and satellite providers also list basketball schedules within their on-screen guides․ Regularly consult your free TV guide to catch all the exciting action!

Baseball on Fresno TV

Utilizing a free Fresno TV guide is essential for following Bulldog baseball! While current data prioritizes football, local channels and streaming options will broadcast Fresno State baseball games during the spring season․ Online TV guide websites are your best bet for finding specific channel listings and game times․

Mountain West Network often streams baseball games, potentially requiring a free account for access․ Don’t forget to check your cable or satellite provider’s guide too! Regularly consulting a free TV guide ensures you won’t miss any exciting plays․

Finding Specific Shows and Movies

Free Fresno TV guides and channel apps help locate desired programs․ Online TV guide websites offer comprehensive listings for easy show and movie discovery․

Using TV Guide Websites

Numerous free TV guide websites cater specifically to the Fresno viewing area, offering detailed schedules for local and national channels․ These platforms allow users to search by channel, time, or program title, simplifying the process of finding what to watch․ Many sites feature advanced filtering options, enabling viewers to pinpoint specific genres, like sports or movies․

Furthermore, these websites often provide episode descriptions, cast information, and user reviews, enhancing the viewing experience․ Regularly updated listings ensure accuracy, reflecting last-minute schedule changes․ Websites are particularly useful for discovering upcoming Fresno State football games, broadcast on channels like CBS Sports Network and FS1, as well as other college sports events․

Utilizing Channel Apps

Many television channels now offer free dedicated apps for smartphones, tablets, and smart TVs, functioning as dynamic TV guides for Fresno viewers․ These apps often mirror the channel’s broadcast schedule, providing real-time program listings and alerts for upcoming shows․ Beyond basic scheduling, channel apps frequently include on-demand content, allowing access to previously aired programs․

Specifically, apps for CBS Sports Network and FS1 are invaluable for tracking Fresno State football games․ Users can set reminders for kickoff times and receive notifications about schedule changes․ These apps also offer personalized recommendations based on viewing history, enhancing content discovery within the Fresno market․

On-Demand Options in Fresno

Fresno viewers have increasing access to free on-demand content through various platforms, supplementing traditional TV guides․ Many local channels – ABC, NBC, CBS, and FOX – offer free episodes and clips of their programs via their websites or dedicated apps․ Streaming services, while often subscription-based, frequently provide limited free content or trial periods․

For sports fans, on-demand options are growing, though access to Fresno State games may be limited without a subscription․ Checking the apps for CBS Sports Network and FS1 can reveal replays or highlights․ Utilizing these resources provides a flexible alternative to live TV scheduling․

Troubleshooting TV Guide Issues

For free Fresno TV guides, ensure your internet connection is stable․ Clear browser cache and update the guide website for accurate listings․

Updating Your TV Guide

Maintaining an accurate free Fresno TV guide requires regular updates․ Online guides often refresh automatically, but occasionally, a manual refresh is needed․ Clear your browser’s cache and cookies to ensure you’re receiving the latest data․ If using a TV guide app, check for updates within your app store․

Sometimes, discrepancies arise due to network issues or changes in broadcasting schedules․ Verify the information against official channel websites or the streaming service’s guide․ For over-the-air signals, rescan your TV periodically to pick up updated channel lineups․ Consistent updates guarantee you won’t miss Fresno State games or other local programming․

Checking Your Cable/Satellite Connection

A reliable connection is crucial for accessing a free Fresno TV guide through your provider․ First, ensure all cables are securely connected to your set-top box and television․ Check the signal strength indicator on your box; a weak signal can cause guide inaccuracies․

If the signal is weak, try resetting your cable or satellite receiver by unplugging it for 30 seconds․ Contact your provider if the problem persists, as there might be an outage or equipment malfunction affecting guide data․ A stable connection ensures accurate listings for Fresno State football and other local broadcasts․

Resolving Streaming Problems

Buffering or errors accessing a free Fresno TV guide via streaming require troubleshooting․ First, check your internet speed; a minimum speed is needed for smooth streaming․ Restart your modem and router to refresh the connection․ Clear your streaming device’s cache and cookies, as these can cause conflicts․

Ensure your streaming app is updated to the latest version․ If issues persist, try a different device or browser․ Remember, streaming Fresno State games or accessing on-demand content relies on a stable internet connection for optimal viewing and guide access․

Advanced TV Guide Features

Digital guides offer features like setting reminders for Fresno State games, creating personalized watchlists, and receiving AI-powered show recommendations for free․

Setting Reminders

Free Fresno TV guides, both online and through channel apps, frequently offer a ‘set reminder’ function․ This invaluable tool ensures you won’t miss crucial moments of Fresno State football, basketball, or baseball games․ Users can typically set reminders for specific start times, or even a buffer beforehand, guaranteeing you’re tuned in․

Many platforms allow multiple reminders, perfect for overlapping events․ Utilizing these features is especially helpful when tracking games broadcast across various channels like CBS Sports Network, FS1, and The CW․ Don’t rely on memory – leverage the reminder capabilities within your chosen free TV guide to stay informed and engaged with Fresno’s local programming!

Creating Watchlists

Free Fresno TV guides empower viewers to curate personalized watchlists, streamlining their viewing experience․ This feature allows you to easily track upcoming Fresno State football games – against Utah State, San Diego State, Oregon State, and others – as well as basketball and baseball broadcasts․

By adding shows and sporting events to your watchlist, you receive notifications about air dates and times on channels like FS1, CBS Sports Network, and The CW․ This eliminates the need to constantly scan listings․ Watchlists are particularly useful for following specific teams or programs, ensuring you never miss a moment of Fresno’s local entertainment!

Personalized Recommendations

Free Fresno TV guides are increasingly incorporating personalized recommendation engines․ These systems analyze your viewing habits – tracking watched games like Fresno State versus San Diego State on FS1, or college football on CBS Sports Network – to suggest similar content․

If you frequently watch sports, the guide will prioritize upcoming basketball or baseball games․ Enjoying Fresno State football? Expect recommendations for other Mountain West Conference matchups․ These features enhance discovery, helping you find new shows and events aligned with your interests, moving beyond basic listings and offering a tailored TV experience․

Future of Fresno TV Guides

Free Fresno TV guides will likely integrate with smart TVs and utilize AI for personalized suggestions, creating interactive viewing experiences․

Integration with Smart TVs

Free Fresno TV guide access is rapidly evolving through smart TV integration․ Users will experience seamless program discovery directly on their television screens, eliminating the need for separate devices or apps․ This integration allows for personalized recommendations based on viewing habits, enhancing the user experience․

Smart TVs will dynamically update free Fresno TV guide information, ensuring accuracy and reflecting real-time schedule changes․ Voice control functionality will further simplify navigation, allowing viewers to search for programs and channels effortlessly․ Expect deeper linking to streaming services, providing a unified platform for all entertainment options․ This convergence promises a more intuitive and convenient television experience for Fresno residents․

AI-Powered TV Guide Suggestions

Free Fresno TV guide services are poised for a revolution with Artificial Intelligence․ AI algorithms will analyze viewing patterns, preferences, and even social media trends to deliver highly personalized program suggestions․ This goes beyond simple genre recommendations, predicting what viewers will enjoy before they even know it․

AI will curate a free Fresno TV guide experience tailored to individual tastes, highlighting local sports broadcasts like Fresno State football games and relevant news coverage․ Expect intelligent search capabilities, understanding natural language queries and offering nuanced results․ This technology will minimize channel surfing and maximize viewing satisfaction, creating a truly smart TV guide․

Interactive TV Experiences

The future of the free Fresno TV guide isn’t just about seeing what’s on, but interacting with it․ Imagine a guide where you can instantly sample clips of shows, read viewer reviews, or even participate in polls related to the program․ Interactive elements will extend to live sports, offering real-time stats and alternative camera angles directly within the guide․

These experiences will be seamlessly integrated into smart TVs and streaming devices, transforming passive viewing into an engaging activity․ A free Fresno TV guide will become a hub for entertainment discovery, fostering a community around shared viewing experiences and providing deeper insights into the content available․

th8320u1008 installation guide

Welcome! This guide details the Honeywell Th8320U1008, offering remote access and energy saving modes. It’s a smart thermostat for modern HVAC systems, simplifying temperature control.

Flashscore provides live scores for football, tennis, and more, while this manual focuses on your new thermostat’s installation and operation.

What is the Th8320U1008?

The Honeywell Th8320U1008 is a sophisticated, programmable thermostat designed to provide precise temperature control and enhanced energy efficiency within your home. It’s a key component for modern HVAC systems, offering a user-friendly interface and advanced features like remote access via connected platforms.

Unlike traditional thermostats, the Th8320U1008 allows for customized scheduling, adapting to your lifestyle and optimizing energy consumption. Information from sources like Flashscore.info, while focused on sports scores, highlights the importance of real-time updates – a parallel to the Th8320U1008’s responsive temperature adjustments.

This thermostat isn’t just about setting a temperature; it’s about creating a comfortable and cost-effective home environment. Its capabilities extend beyond basic heating and cooling, offering potential integration with smart home ecosystems.

Key Features and Benefits

The Honeywell Th8320U1008 boasts several key features, including a vibrant touchscreen display, programmable 7-day scheduling, and compatibility with various HVAC systems. Remote access, mirroring the real-time updates found on sites like Flashscore.co.uk, allows control from anywhere with an internet connection.

Energy saving modes optimize performance, reducing utility bills. Precise temperature control ensures consistent comfort, while customizable settings cater to individual preferences. The thermostat’s ability to adapt, much like following live football scores, provides a dynamic and responsive experience.

Benefits include increased energy efficiency, enhanced comfort, and convenient control. Installation is straightforward with a detailed manual, ensuring a seamless upgrade to a smarter home.

Pre-Installation Considerations

Before starting, ensure HVAC system compatibility and prioritize safety. Gather necessary tools and review this guide, similar to checking live scores before a match!

Safety Precautions

Crucially, always disconnect power to your HVAC system at the breaker box before beginning any wiring or installation. Failure to do so presents a serious risk of electrical shock. Verify the power is off with a non-contact voltage tester.

Wear appropriate safety glasses to protect your eyes from debris. If you are uncomfortable working with electrical wiring, consult a qualified HVAC technician. Do not attempt repairs beyond your skill level.

Be mindful of potential hazards like sharp edges on the thermostat base or wiring. Handle wiring carefully to avoid damage. Treat all wires as if they are live until confirmed otherwise. Refer to the wiring diagram provided with the Th8320U1008 and this guide for accurate connections, much like referencing live football scores for accuracy.

Tools Required for Installation

Essential tools for a smooth Th8320U1008 installation include a Phillips head screwdriver – both standard and stubby – for accessing and securing screws. A flathead screwdriver may also be needed for certain terminal connections. A wire stripper/cutter is critical for preparing wires for connection, ensuring clean and secure terminations.

A non-contact voltage tester is paramount for verifying power is off. A level will ensure the thermostat base is mounted straight. Pencil for marking screw locations. Consider having needle-nose pliers for manipulating wires in tight spaces.

Similar to tracking live football scores, having the right tools streamlines the process. A digital multimeter can be helpful for troubleshooting, but isn’t strictly required. Finally, a camera or phone to document existing wiring before disconnection is highly recommended.

Compatibility Check: HVAC Systems

Before installing the Th8320U1008, verify compatibility with your HVAC system. This thermostat supports most 24V heating and cooling systems, including furnaces, heat pumps, and central air conditioners. It’s not compatible with line voltage systems (110V/220V).

Check for a common wire (C-wire); it’s often required for consistent power. If you lack a C-wire, a C-wire adapter may be necessary – consult a professional. Ensure your system doesn’t utilize proprietary communication protocols incompatible with standard wiring.

Like following live sports scores, understanding your system is key. Confirm your system isn’t a millivolt system. Consult the Honeywell compatibility checker online or contact support if unsure. Incorrect installation can damage your HVAC equipment.

Installation Process ‒ Step-by-Step

Follow these steps for a successful Th8320U1008 installation: power down, remove the old thermostat, wire the new one, mount the base, and attach the display.

Step 1: Powering Down the HVAC System

Crucially, before commencing any wiring or installation procedures, completely disconnect power to your HVAC system at the breaker box. Safety is paramount; this prevents electrical shock and potential damage to the thermostat or your HVAC equipment. Locate the circuit breaker controlling your furnace and air conditioner – it’s often labeled.

Switch the breaker to the ‘OFF’ position. To verify power is indeed off, use a non-contact voltage tester at the thermostat wires. Confirm no voltage is present before proceeding. Remember, Flashscore provides live sports updates, but this step ensures your safety during installation. Ignoring this step could lead to serious consequences. Double-check before touching any wires!

Step 2: Removing the Old Thermostat

Carefully remove the cover of your existing thermostat. This often involves gently prying it off or releasing clips. Before disconnecting any wires, take a clear photograph of the wiring configuration. This photo will be an invaluable reference during the Th8320U1008 installation process.

Label each wire with the corresponding terminal designation – R, W, Y, G, C, etc. Use the provided wire labels or masking tape and a pen. Loosen the screws holding the wires to the terminals and gently disconnect them. Remember, Flashscore tracks live scores, but you’re now tracking wires! Ensure wires don’t fall back into the wall.

Step 3: Wiring the Th8320U1008

Using the photograph and labels from the previous step, connect the wires to the corresponding terminals on the Th8320U1008 base plate. Ensure a secure connection for each wire – loose connections can cause malfunctions. Refer to the wiring diagram included with your thermostat; it’s crucial for correct installation.

The ‘C’ wire (common wire) is often essential for powering the thermostat. If you don’t have a ‘C’ wire, consult a qualified HVAC technician. Like tracking live football scores on Flashscore, precision is key! Double-check all connections before proceeding. A properly wired thermostat ensures optimal performance and energy savings.

Identifying Terminal Connections

Before connecting any wires, carefully identify each terminal on both your old thermostat and the Th8320U1008 base. Common terminals include R (power), C (common), W (heat), Y (cool), and G (fan). Take a clear photograph of your existing wiring before disconnecting anything – this serves as a vital reference.

Label each wire as you disconnect it from the old thermostat. Like following live tennis scores on Flashscore, accurate identification is paramount. The Th8320U1008’s terminal block will have corresponding labels. If unsure about any wire, consult the Honeywell documentation or a qualified HVAC professional.

Connecting the Wires – Detailed Guide

With wires labeled and terminals identified, carefully insert each wire into the corresponding terminal on the Th8320U1008 base. Ensure a secure connection – gently tug on each wire to confirm it’s firmly seated. Like tracking football live scores on Flashscore, precision matters.

Double-check your wiring against the photograph you took earlier and the Honeywell wiring diagram. Incorrect wiring can damage your HVAC system. If you encounter difficulty, do not force the wires. Consult a professional. Once all wires are connected, proceed to mounting the thermostat base.

Step 4: Mounting the Thermostat Base

With the wires securely connected, carefully align the Th8320U1008 baseplate with the mounting holes on the wall. Use the provided screws and wall anchors (if necessary) to fasten the baseplate firmly to the wall. Ensure the base is level for proper display attachment.

Just as Flashscore delivers real-time updates, a secure base is crucial for reliable operation. Avoid overtightening the screws, which could damage the baseplate or the wall. Once the base is securely mounted, you’re ready to attach the thermostat display unit.

Step 5: Attaching the Thermostat Display

Carefully align the thermostat display with the mounted baseplate. Gently press the display onto the base until it clicks securely into place. Ensure it’s firmly connected to establish a stable electrical connection. Like following live scores on Flashscore, a solid connection is vital for continuous functionality.

Do not force the display; if it doesn’t align easily, double-check the alignment. Once attached, briefly inspect the connection to confirm it’s secure. A properly attached display will sit flush against the baseplate, ready for powering on and initial setup.

Initial Setup and Configuration

Power on your Th8320U1008! Set the date and time, then configure your specific HVAC system type for optimal performance and control.

Powering On and Initial Boot-Up

After completing the wiring and attaching the thermostat display, it’s time to power on your Honeywell Th8320U1008. Ensure the HVAC system’s power is restored at the breaker. The thermostat should initiate a boot-up sequence, displaying the Honeywell logo and beginning its internal checks.

This initial boot-up may take a few moments. During this process, the thermostat calibrates itself and prepares for configuration. Do not interrupt the process. The screen will likely cycle through various displays as it loads.

If the thermostat does not power on, double-check the wiring connections and the breaker switch. Refer to the troubleshooting section for further assistance. Successful boot-up is crucial for proceeding with the setup and enjoying the benefits of your new smart thermostat. Flashscore provides live sports updates, but now focus on your thermostat!

Setting the Date and Time

Following the initial boot-up, the Honeywell Th8320U1008 will prompt you to set the current date and time. Accurate date and time settings are essential for proper scheduling and operation of your thermostat’s programming features. Navigate through the on-screen menu using the thermostat’s touchscreen or buttons.

Typically, you’ll be able to adjust the month, day, and year individually, followed by setting the hour and minute. Ensure you select the correct AM or PM designation. Some models may offer automatic time synchronization via Wi-Fi, simplifying this step.

Confirm your selections to save the date and time. Incorrect settings can affect scheduled programs, so double-check for accuracy. While Flashscore delivers real-time scores, precise time is vital for your thermostat’s functionality.

Configuring HVAC System Type

After setting the date and time, the Th8320U1008 requires configuration of your specific HVAC system type. This ensures optimal performance and compatibility. The thermostat will guide you through a series of questions to identify your heating and cooling setup.

Options typically include forced air, heat pump, radiant heat, and others. You may also need to specify fuel type – gas, oil, or electric. Accurate selection is crucial for correct operation. Incorrect settings can lead to inefficient heating or cooling, or even damage to your system.

Refer to your HVAC system’s documentation if unsure. Like tracking live scores on Flashscore, precise configuration unlocks the full potential of your thermostat.

Programming and Operation

Explore the Th8320U1008’s user interface to create schedules and adjust temperatures. Like following live scores, customize settings for comfort and energy savings!

Understanding the User Interface

Navigating the Honeywell Th8320U1008’s interface is designed for intuitive control. The main screen displays current temperature, setpoint, and operating mode (Heat, Cool, Auto, Off). Touchscreen functionality allows easy adjustments. A menu button accesses scheduling, system settings, and advanced features.

Icons clearly indicate system status – a flame for heating, a snowflake for cooling. Programmable schedules are accessed through the menu, enabling customized temperature settings for different times and days. Similar to tracking live football scores on Flashscore, you can monitor and adjust settings in real-time.

Alerts and notifications provide important system information. The interface also supports remote access, allowing control via a smartphone app. Familiarize yourself with these elements for optimal operation.

Creating and Scheduling Programs

Programming the Th8320U1008 maximizes comfort and energy savings. Access the scheduling menu to create custom programs tailored to your lifestyle. You can define different temperature setpoints for various times of day and days of the week.

Four programmable periods – Wake, Leave, Return, and Sleep – are standard, but can be customized. Like following live scores on Flashscore, you can set it and forget it! The thermostat remembers your preferences.

Override options allow temporary adjustments without disrupting the schedule. Energy saving modes can be integrated into programs. Experiment with different settings to find the optimal balance between comfort and efficiency. Save multiple programs for different seasons or occupancy patterns.

Adjusting Temperature Settings

Adjusting the temperature on your Th8320U1008 is straightforward. Use the up and down arrow buttons on the thermostat display to increase or decrease the setpoint. The current room temperature is prominently displayed for easy reference, much like live scores updating in real-time on Flashscore.

Temporary adjustments override the programmed schedule until the next scheduled period. For permanent changes, modify the program settings directly. Hold options allow maintaining a specific temperature indefinitely.

Remote access via the Honeywell Home app provides control from anywhere. Ensure accurate readings by avoiding direct sunlight or drafts near the thermostat. Fine-tune settings to achieve your desired comfort level and optimize energy efficiency.

Troubleshooting Common Issues

Common problems include power failures, inaccurate readings, and connectivity issues. Like checking football live scores, verify wiring and network connections for quick resolutions.

Thermostat Not Powering On

If your Th8320U1008 fails to power on, begin with the basics. First, confirm the HVAC system’s breaker hasn’t tripped. Second, double-check the thermostat wiring, ensuring all connections are secure and correctly placed according to the wiring diagram. A loose wire is a frequent culprit, much like a missed football score update!

Next, verify the C-wire (common wire) is properly connected. Many smart thermostats, including this Honeywell model, require a C-wire for consistent power. If a C-wire isn’t present, a C-wire adapter might be necessary. Finally, inspect the batteries (if applicable) and replace them with fresh ones. Remember, just as Flashscore needs a stable connection, your thermostat needs power!

Consider consulting a qualified HVAC technician if these steps don’t resolve the issue.

Incorrect Temperature Readings

If the Th8320U1008 displays inaccurate temperatures, several factors could be at play. First, ensure the thermostat isn’t directly exposed to sunlight, drafts, or heat-generating appliances. These external influences can skew readings, similar to how live football scores can change rapidly.

Next, check for proper airflow around the thermostat. Obstructions can prevent accurate temperature sensing. Verify the thermostat is calibrated correctly within the settings menu. Many models allow for temperature offset adjustments; Consider the thermostat’s location; an internal wall is preferable.

If the problem persists, a faulty temperature sensor might be the cause. Contacting Honeywell support or an HVAC professional is recommended for diagnosis and potential replacement.

Connectivity Problems

Experiencing connectivity issues with your Th8320U1008? First, confirm your home Wi-Fi network is functioning correctly – much like ensuring a live football score website is online. Verify the thermostat is within range of your router. Walls and distance can weaken the signal.

Next, double-check the Wi-Fi password entered during setup. An incorrect password is a common culprit. Restart both your router and the thermostat; this often resolves temporary glitches. Ensure your router’s firmware is up-to-date.

If problems continue, consult the Honeywell support website for specific troubleshooting steps or contact their support team for assistance. A weak signal or network congestion may also be factors.

Advanced Features

Unlock the Th8320U1008’s full potential with remote access via smartphone and energy saving modes, mirroring the real-time updates of Flashscore.

Remote Access and Control

The Honeywell Th8320U1008 offers convenient remote access and control of your home’s temperature, mirroring the instant updates provided by services like Flashscore for live sports scores. Using the Honeywell Home app (available for iOS and Android), you can adjust settings from anywhere with an internet connection.

This feature allows you to pre-heat or cool your home before arrival, ensuring optimal comfort and potentially reducing energy consumption. Monitor current temperatures, adjust schedules, and receive alerts – all from your smartphone or tablet. The app provides a user-friendly interface, simplifying thermostat management. Like tracking a football match live, you’re always connected and informed about your home’s climate.

Ensure a stable Wi-Fi connection for seamless remote operation. Detailed instructions for connecting the thermostat to your home network are available within the Honeywell Home app and the full installation manual.

Energy Saving Modes

The Honeywell Th8320U1008 incorporates several energy saving modes designed to reduce your carbon footprint and lower utility bills, much like staying updated on Flashscore helps you efficiently follow your favorite teams. Smart Response learns your heating and cooling patterns, optimizing performance for efficiency.

Geofencing utilizes your smartphone’s location to automatically adjust the temperature when you leave or approach home. Scheduled programs allow you to pre-set temperature changes based on your daily routine. These features minimize energy waste when the house is unoccupied or during periods of low activity.

Customizable settings enable you to tailor these modes to your specific needs and preferences, maximizing savings without sacrificing comfort. Explore these options within the Honeywell Home app for optimal energy management.

Maintenance and Care

Regular cleaning with a soft cloth ensures optimal performance. Battery replacement is needed periodically; refer to the manual for specifics, like checking Flashscore updates!

Cleaning the Thermostat

Maintaining a clean thermostat is crucial for accurate readings and optimal performance of your Honeywell Th8320U1008. Dust and debris can accumulate on the display and vents, potentially interfering with its functionality. Always power down the system before cleaning, just as you would during initial installation.

Use a soft, dry cloth to gently wipe the thermostat’s surface. Avoid using abrasive cleaners, solvents, or excessive moisture, as these can damage the display or internal components. For stubborn dirt, lightly dampen the cloth with water, ensuring it’s wrung out thoroughly to prevent any liquid from entering the unit.

Pay particular attention to the vents, carefully removing any visible dust. Regular cleaning, perhaps monthly, will help ensure your thermostat continues to operate efficiently, much like staying updated with Flashscore for the latest sports results!

Battery Replacement

The Honeywell Th8320U1008 may require battery replacement, even when connected to a power source, to maintain settings during power outages or as a backup. The thermostat will typically display a low battery warning when replacement is needed. Always refer to the thermostat’s display for specific battery type requirements – usually AA alkaline batteries are suitable.

Power down the HVAC system before proceeding. Locate the battery compartment, usually on the side or back of the thermostat. Remove the old batteries and insert new ones, ensuring correct polarity (+ and -).

Like keeping up with live football scores on Flashscore, regular battery checks are proactive. Proper battery maintenance ensures uninterrupted operation and accurate temperature control. Once replaced, power the system back on and verify the thermostat is functioning correctly.

Warranty Information

Honeywell provides a warranty for the Th8320U1008, covering defects in materials and workmanship. Contact Honeywell Support for detailed coverage details and claim procedures.

Coverage Details

Honeywell’s warranty for the Th8320U1008 typically covers defects in materials and workmanship under normal use for a specified period, often one or two years from the date of purchase. This warranty doesn’t cover damage resulting from improper installation – always follow the installation guide carefully!

It also excludes issues caused by misuse, abuse, accidents, or unauthorized modifications. Damage from power surges or acts of nature are generally not covered. Proof of purchase is required for all warranty claims. The warranty is non-transferable and applies only to the original purchaser.

Flashscore provides real-time sports scores, but this warranty ensures your thermostat functions as intended. For complete terms and conditions, refer to the official Honeywell warranty documentation.

Contacting Honeywell Support

Honeywell offers multiple avenues for support regarding your Th8320U1008. Their official website, honeywellhome.com, provides a comprehensive FAQ section, troubleshooting guides, and downloadable resources – including the full installation guide. You can also access their support portal for online chat assistance.

For direct assistance, you can call Honeywell’s customer support line. Phone numbers vary by region, so check the website for the correct contact information. Be prepared to provide your thermostat’s model number and date of purchase.

While Flashscore keeps you updated on sports, Honeywell support is your go-to for thermostat issues. They aim to resolve issues efficiently and ensure your system operates correctly.

hair product guide for men

Hair Product Guide for Men: A Comprehensive Overview (Updated December 16, 2025)

Navigating men’s hair products can be complex! This guide explores various types – pomades, pastes, creams, clays, and gels – offering benefits for all hair types and lengths.

Discover how to choose the right product for your desired style, from classic pompadours to textured crops, and learn about essential hair care considerations.

Understanding Your Hair Type

Determining your hair type is the crucial first step in selecting the right products. Men’s hair isn’t one-size-fits-all; understanding its characteristics unlocks effective styling. Consider both texture and porosity.

Hair texture – fine, medium, or coarse – impacts how well a product holds. Fine hair needs lighter formulas to avoid weighing it down, while coarse hair benefits from stronger holds.

Hair porosity – low, medium, or high – dictates how well your hair absorbs moisture. Low porosity hair resists absorption, needing lightweight products. High porosity hair readily absorbs moisture but can dry out quickly, requiring hydrating formulas.

Knowing these factors allows you to choose products that complement your natural hair, enhancing its appearance and health. A barber can also provide personalized guidance.

Identifying Hair Texture: Fine, Medium, and Coarse

Hair texture refers to the width of individual hair strands. Fine hair feels silky and struggles to hold curls; lighter products are best to avoid flatness. It’s prone to breakage, needing gentle handling.

Medium hair is the most common, offering a balance of thickness and manageability. It holds styles well and responds to a wider range of products. It’s versatile and relatively resilient.

Coarse hair is thick and strong, often feeling rough to the touch. It can be difficult to manage and may require heavier products for hold and definition. Hydration is key to prevent dryness and frizz;

A simple test: take a single strand and compare it to a piece of thread. Thinner than the thread is fine, similar is medium, and thicker is coarse.

Determining Hair Porosity: Low, Medium, and High

Hair porosity indicates how well your hair absorbs and retains moisture. Low porosity hair has tightly bound cuticles, resisting moisture absorption. It benefits from lightweight, water-based products and heat to help open the cuticle;

Medium porosity hair has a looser cuticle structure, allowing for easy moisture absorption and retention. It’s generally healthy and responds well to most products. It’s considered balanced and manageable.

High porosity hair has a very open cuticle, quickly absorbing moisture but also losing it rapidly. It requires heavier products, like oils and butters, to seal in hydration and prevent dryness.

A float test: place a clean strand in water. If it floats, porosity is low; if it sinks slowly, it’s medium; if it sinks quickly, it’s high.

Core Hair Product Categories

Essential men’s hair styling includes pomade for shine, paste for texture, creams for hydration, clay for strong hold, and gel for maximum definition.

Pomade: Classic Styling and Shine

Pomade represents a cornerstone of classic men’s hairstyling, offering versatility for various hair types, including both thin and thick strands. Historically favored, it’s experiencing a resurgence in popularity, often preferred over gels and waxes for its unique properties.

Applying pomade to a finished style imparts a noticeable shine and allows for easy restyling throughout the day. It’s particularly well-suited for achieving slicked-back looks, pompadours, and side parts. Modern pomades come in water-based and oil-based formulations, catering to different hold strengths and washability preferences.

Water-based pomades provide a stronger hold and are easier to rinse out, while oil-based pomades offer a more pliable hold and a classic, glossy finish. Choosing the right pomade depends on your desired style and hair texture.

Paste: Texture and Medium Hold

Hair paste distinguishes itself as a versatile styling aid, delivering a medium hold with a focus on creating textured looks. Unlike pomades that prioritize shine, pastes offer a more matte or natural finish, ideal for contemporary styles. It’s a fantastic option for men seeking a relaxed, effortless aesthetic.

Paste works exceptionally well for shorter to medium-length hair, providing definition and separation without stiffness. It allows for easy manipulation and restyling, making it suitable for dynamic looks that require flexibility throughout the day.

The formulation often includes ingredients that add volume and thickness, benefiting finer hair types. Paste is a go-to for achieving tousled, undone styles and textured crops.

Creams: Natural Look and Hydration

Hair creams are designed for men desiring a natural, understated style coupled with enhanced hair health; Unlike heavier products, creams prioritize hydration and conditioning, making them suitable for all hair types, particularly those prone to dryness or damage. They offer a light to medium hold, focusing on enhancing the hair’s natural texture rather than rigidly styling it.

Creams excel at taming frizz, adding subtle definition, and providing a healthy sheen without appearing greasy. They’re perfect for achieving a polished yet relaxed look.

Look for creams containing beneficial oils and humectants to maximize moisture retention and overall hair care.

Clay: Strong Hold and Matte Finish

Hair clay stands out for men seeking a strong, pliable hold with a distinctly matte finish. This product excels at creating textured styles, offering control without the shine associated with pomades or gels. Clay is particularly effective for shorter to medium-length hair, allowing for sculpting and definition.

The unique texture of clay provides a slightly gritty feel, enabling effortless restyling throughout the day. It’s ideal for looks requiring separation and a natural, undone aesthetic.

Many clays incorporate ingredients that absorb excess oil, making them a good choice for men with oily scalps or hair types.

Gel: Maximum Hold and Definition

Hair gel remains a cornerstone for men desiring maximum hold and sharply defined styles. Offering the strongest level of control among hair products, gel is perfect for slicked-back looks, spikes, or maintaining intricate hairstyles. While often associated with a wet or shiny appearance, modern formulations offer varying levels of sheen.

Gel is versatile, working well on various hair types and lengths, though it’s particularly effective for thicker hair that requires significant control. It’s crucial to apply gel evenly to avoid stiffness or flaking.

Consider gels with added conditioning agents to minimize dryness and maintain hair health.

Specialty Hair Products

Beyond core products, specialty items like texture powder and salt spray enhance styling. These offer unique effects – volume, lift, and beachy waves – for diverse hair types.

Texture Powder: Volume and Lift

Texture powder is a fantastic specialty product designed to instantly add volume and lift to men’s hair. Unlike heavier styling aids, it provides a lightweight feel while creating noticeable texture. This makes it ideal for finer hair types that struggle with flatness, or for adding separation and definition to thicker styles.

Application is key: sprinkle a small amount directly onto the roots of dry hair and work it in with your fingertips. Avoid using too much, as it can create a gritty texture. Texture powders excel at creating a deliberately messy, undone look, perfect for modern, casual styles. They’re also excellent for re-styling throughout the day, refreshing volume without adding weight or stiffness.

Consider texture powder a versatile tool for achieving a fuller, more dynamic hairstyle.

Salt Spray: Beachy Waves and Texture

Salt spray is the go-to product for achieving that coveted “just off the beach” look for men’s hair. Mimicking the effects of seawater, it adds texture, definition, and a relaxed, tousled aesthetic. This product works exceptionally well on medium to long hair lengths, enhancing natural waves and creating a carefree style.

Application is simple: spray onto damp hair, scrunch, and allow to air dry for optimal results. Salt spray is incredibly versatile; it can be used alone for a subtle textured look or combined with other styling products for added hold and definition. It’s perfect for creating a natural, effortless style without stiffness.

Embrace the laid-back vibe with salt spray!

Hair Waxes: Flexible Hold and Sculpting

Hair waxes offer a unique balance between hold and flexibility, making them a popular choice for men seeking sculpted styles with a natural finish. Unlike gels or clays, waxes provide a pliable hold, allowing for easy restyling throughout the day. They are suitable for a wide range of hair types and lengths, particularly short to medium cuts.

Waxes excel at creating textured looks, defined pieces, and adding separation. Application involves warming a small amount between your palms and working it through the hair. They offer a more casual, less polished appearance compared to pomades, ideal for everyday wear.

Experiment with waxes for versatile styling!

Choosing the Right Product for Your Hair Length

Selecting the ideal product depends on your hair length! Shorter styles benefit from waxes and pastes, while medium and long hair thrives with creams and pomades.

Short Hair Styling Products

For shorter hairstyles, control and definition are key. Pomades excel at providing a classic, polished look with varying levels of shine, suitable for slicked-back styles or side parts. Pastes offer a more textured, matte finish, ideal for creating a deliberately messy, yet controlled, appearance.

Waxes provide flexible hold, allowing for sculpting and re-styling throughout the day, perfect for textured crops or faux hawks. Clays are also excellent for short hair, delivering strong hold and a matte look, great for adding volume and definition. Consider a lighter hold gel for a more natural, yet defined, style.

Ultimately, the best product depends on your desired finish – shiny, matte, textured, or sleek – and the level of hold you require for your specific short haircut.

Medium Length Hair Styling Products

Medium-length hair offers versatility, demanding products that provide both hold and texture. Pomades remain a strong choice, delivering shine and control for polished styles like side sweeps or quiffs. Creams are fantastic for a more natural, relaxed look, adding hydration and definition without stiffness.

Pastes excel at creating textured, piecey styles, perfect for a modern, effortless vibe. Clays offer a stronger hold for more structured looks, while gels can define layers and control frizz. Salt sprays are ideal for achieving beachy waves and adding volume.

Experimenting with combinations – a cream for hydration followed by a paste for texture – can unlock your ideal medium-length style.

Long Hair Styling Products

Long hair requires products focused on manageability, hydration, and defining natural movement. Creams and leave-in conditioners are essential for taming frizz and providing moisture, preventing dryness and breakage. Lightweight oils nourish the hair and add shine without weighing it down.

For texture and hold, consider pastes or waxes, applied sparingly to avoid a greasy appearance. Salt sprays can enhance natural waves and create a relaxed, beachy look. Avoid heavy gels, which can make long hair feel stiff and unnatural.

Prioritize products that protect against heat damage if using styling tools, and focus on maintaining overall hair health.

Hair Product Ingredients to Look For

Beneficial oils, humectants, and effective hold polymers are key. Prioritize ingredients that nourish, hydrate, and provide the desired style without damaging your hair.

Beneficial Oils for Hair Health

Incorporating oils into your hair care routine provides substantial benefits. Argan oil, rich in Vitamin E, deeply moisturizes and improves elasticity, combating dryness and breakage. Jojoba oil closely mimics the scalp’s natural sebum, balancing oil production and promoting a healthy scalp environment.

Coconut oil penetrates the hair shaft, reducing protein loss and strengthening strands. Grapeseed oil is lightweight and excellent for fine hair, adding shine without weighing it down. These oils offer protection against environmental stressors and heat damage, contributing to overall hair health.

Look for products featuring these oils to enhance hydration, improve manageability, and restore a natural luster to your hair. They are vital components for maintaining strong, healthy hair.

Humectants for Moisture Retention

Humectants are crucial ingredients in men’s hair products, actively drawing moisture from the atmosphere into the hair shaft. Glycerin is a powerful humectant, effectively hydrating and preventing dryness, especially beneficial for coarse or curly hair types. Hyaluronic acid, known for its exceptional water-holding capacity, provides intense hydration and plumps the hair shaft.

Aloe vera not only soothes the scalp but also acts as a humectant, contributing to overall hair health. These ingredients combat frizz, improve elasticity, and enhance the hair’s natural shine.

Products containing humectants are ideal for maintaining optimal moisture levels, leading to stronger, healthier, and more manageable hair.

Hold Polymers and Their Effects

Hold polymers are the backbone of styling power in men’s hair products, dictating the level of control and longevity of a hairstyle. PVP/VA copolymer offers a strong, flexible hold, commonly found in gels and hairsprays, providing definition without excessive stiffness. Acrylates copolymer provides a medium hold, ideal for pastes and creams, allowing for restyling.

Vinyl pyrrolidone (VP) polymers contribute to film-forming properties, enhancing hold and shine. The concentration and type of polymer significantly impact the product’s performance.

Understanding these polymers helps men choose products that match their desired hold and style versatility.

Hair Care Considerations

Protecting hair from heat and maintaining scalp health are crucial. A quality shampoo and conditioner form the foundation of effective hair care for men.

Protecting Hair from Heat Damage

Frequent use of heat styling tools – like blow dryers, straighteners, and curling irons – can significantly damage men’s hair. Excessive heat strips the hair of its natural oils, leading to dryness, brittleness, and breakage. To mitigate these effects, always apply a heat protectant spray before using any heated device.

These sprays create a barrier between the hair and the heat, minimizing damage. Lower heat settings are also recommended, and avoid prolonged exposure to high temperatures. Consider air-drying your hair whenever possible to reduce heat exposure altogether. Furthermore, deep conditioning treatments can help restore moisture and repair damage caused by heat styling, promoting healthier and stronger hair.

Maintaining Scalp Health

A healthy scalp is fundamental for healthy hair growth in men. Neglecting scalp care can lead to issues like dandruff, dryness, and even hair loss. Regular cleansing with a quality shampoo is crucial to remove dirt, oil, and product buildup. Exfoliating the scalp – either manually or with a specialized scrub – helps remove dead skin cells and promotes circulation.

Consider incorporating a scalp massage into your routine to stimulate blood flow and nourish hair follicles. Avoid harsh chemicals and excessive washing, as these can strip the scalp of its natural oils. Addressing any scalp conditions promptly with appropriate treatments is also essential for maintaining optimal scalp health and encouraging robust hair growth.

The Importance of a Good Shampoo and Conditioner

Selecting the right shampoo and conditioner is paramount for men’s hair health. Shampoos cleanse the scalp and hair, removing dirt and excess oil, while conditioners replenish moisture and improve manageability. Choosing products formulated for your specific hair type – oily, dry, fine, or thick – is key.

Look for shampoos free of harsh sulfates and conditioners containing beneficial oils or humectants. A quality shampoo prepares hair for styling products, while conditioner protects against damage. Consistent use of a good shampoo and conditioner duo maintains hair’s strength, shine, and overall health, creating a solid foundation for any styling routine.

Application Techniques

Proper product distribution is crucial for optimal styling. Start with a small amount, warm it between your palms, and apply evenly throughout your hair for best results.

Proper Product Distribution

Achieving a polished look hinges on mastering product distribution. Begin with a pea-sized amount – you can always add more, but removing excess is trickier! Warm the product thoroughly between your palms; this emulsifies it, making application smoother and preventing clumping.

Start applying at the roots, working your way through the mid-lengths and ends. For shorter hair, focus on the roots for lift and texture. With longer styles, concentrate on the ends to control frizz and define shape.

Use a comb or your fingers to evenly distribute the product, ensuring every strand is coated. Avoid applying too much product in one area, as this can create a greasy or weighed-down appearance. Remember, less is often more!

Styling Tips for Different Looks

For a classic pompadour, use a pomade with strong hold and high shine. Apply liberally, comb upwards and back, creating volume at the front. A fine-tooth comb helps refine the shape.

To achieve a textured crop, opt for a paste or clay. Rub a small amount between your hands and apply to dry hair, creating separation and definition. Use your fingers to tousle and shape.

For a sleek, modern look, a gel or cream provides control and shine. Apply evenly, comb through, and smooth any flyaways. Consider a light-hold gel for a natural finish. Experiment to find what works best!

Re-styling Throughout the Day

Maintaining your style requires minimal effort with the right product. For a quick refresh, lightly mist hair with water to reactivate the product. Avoid over-saturation, which can weigh hair down.

If using pomade or wax, a small amount reapplied to fingertips can redefine shape and control flyaways. Blend carefully to avoid buildup.

Texture powders are excellent for adding volume on-the-go. Sprinkle sparingly at the roots and massage in. For looser styles, a quick tousle with fingers is often sufficient. Carry a small comb for precise adjustments!

Product Recommendations Based on Style

Achieve your desired look with targeted product choices! Explore recommendations for classic pompadours, textured crops, and sleek modern styles, maximizing hold and texture.

Products for a Classic Pompadour

Creating a timeless pompadour requires products offering strong hold and high shine. Pomades are the quintessential choice, providing a pliable yet firm foundation for sculpting and maintaining height. Look for water-based pomades for easy washability and restyling capabilities throughout the day.

Oil-based pomades deliver a superior, glossy finish but require more effort to remove. For added volume and texture, consider layering a texture powder underneath the pomade. This provides grit and lift, enhancing the pompadour’s dramatic silhouette. Experiment with different hold strengths to find the balance between control and natural movement. Remember, proper application and distribution are key to achieving a polished, refined pompadour.

Forté Series offers excellent pomade options for this style.

Products for a Textured Crop

Achieving a modern, textured crop demands products that emphasize piecey definition and a natural, matte finish. Pastes and clays are ideal, offering medium to strong hold without the excessive shine of pomades. These products allow for effortless manipulation and restyling, crucial for creating a deliberately tousled look.

Texture powders can also be incorporated to boost volume at the roots and enhance the overall texture. Avoid products with heavy oils, as they can weigh the hair down and diminish the desired separation. For finer hair, a lightweight cream can provide subtle hold and added thickness. Experiment with layering different products to achieve your preferred level of texture and control.

Forté Series provides excellent options for textured styles.

Products for a Sleek, Modern Look

Creating a polished, sleek hairstyle requires products that offer strong hold and control, minimizing frizz and flyaways. Pomades and gels are excellent choices, providing a smooth, refined finish. Water-based pomades offer a balance of hold and washability, while stronger-hold gels deliver maximum definition.

For a more natural, yet controlled look, consider a cream with a firm hold. Ensure even product distribution to avoid stiffness or a greasy appearance. Heat protectants are vital if using styling tools like flat irons or blow dryers to achieve a perfectly smooth texture. Remember, less is often more – start with a small amount and build up as needed.

Professional stylists often recommend these for a sophisticated finish.

comptia network+ guide to networks 9th edition

CompTIA Network+ (9th Edition), authored by Jill West, provides a comprehensive guide to networking concepts․
It’s available as an eBook, PDF, and with MindTap course lists,
preparing individuals for the industry-recognized Network+ certification․

Overview of the CompTIA Network+ Certification

The CompTIA Network+ certification validates essential skills for establishing, managing, and troubleshooting networks․ It’s a vendor-neutral credential, demonstrating proficiency across various technologies․ The 9th Edition guide by Jill West thoroughly prepares candidates for the N10-008 exam․

This certification covers a broad spectrum of networking knowledge, including network fundamentals, security, and troubleshooting․ Resources like the CompTIA Network Guide to Networks, available as an eBook and with accompanying testbanks, are crucial for success․ Students benefit from digital textbook formats and MindTap course lists, enhancing the learning experience․ Passing the exam signifies a foundational understanding of networking principles, opening doors to entry-level network roles․

Target Audience for the 9th Edition Guide

The 9th Edition of the CompTIA Network Guide to Networks, by Jill West, is designed for a diverse audience․ It’s ideal for students pursuing entry-level IT careers, particularly those aiming for roles like network support specialists or help desk technicians․ Individuals seeking to validate their networking skills and obtain the CompTIA Network+ certification will find it invaluable․

The guide also benefits those with some IT experience looking to formalize their knowledge․ Its comprehensive coverage, available in eBook, PDF, and MindTap formats, caters to various learning styles․ Whether utilizing the textbook directly or leveraging the accompanying testbank, the material is accessible to both beginners and those needing a refresher․

Networking Fundamentals

CompTIA Network+ (9th Edition) delves into core networking principles, including topologies and hardware․ The guide, by Jill West, builds a foundation for understanding network operations․

OSI Model and TCP/IP Model

CompTIA Network+ (9th Edition), as detailed by Jill West’s guide, extensively covers the foundational OSI (Open Systems Interconnection) and TCP/IP (Transmission Control Protocol/Internet Protocol) models․ These models are crucial for understanding how data communication functions across networks․

The guide explains the seven layers of the OSI model – Physical, Data Link, Network, Transport, Session, Presentation, and Application – and their respective roles in data transmission․ It then contrasts this with the TCP/IP model, a more practical four-layer framework used in the internet․

Understanding these models is vital for troubleshooting, network design, and comprehending how different networking technologies interact․ The 9th edition provides a detailed exploration of each layer, ensuring a solid grasp of these core networking concepts․

Encapsulation and De-encapsulation

CompTIA Network+ (9th Edition), guided by Jill West, thoroughly explains encapsulation and de-encapsulation – fundamental processes in network communication․ Encapsulation involves adding headers and trailers to data as it moves down the OSI model layers, preparing it for transmission․

Each layer adds its own control information, creating a layered structure․ Conversely, de-encapsulation occurs at the receiving end, where these headers and trailers are removed layer by layer as the data ascends the model․

The guide emphasizes how these processes enable reliable and organized data transfer․ Understanding encapsulation and de-encapsulation is critical for comprehending data flow, protocol interactions, and troubleshooting network issues, as highlighted in the 9th edition’s comprehensive coverage․

Network Topologies (Physical and Logical)

CompTIA Network+ (9th Edition), authored by Jill West, details both physical and logical network topologies․ Physical topology defines the actual cable layout – like star, bus, ring, and mesh – impacting installation and maintenance․ The guide explains each topology’s advantages and disadvantages․

Logical topology, however, describes how data flows within the network, regardless of the physical arrangement․ Common logical topologies include broadcast and token ring․ The 9th edition emphasizes that a network can have one physical topology and a different logical topology․

Understanding these distinctions is crucial for network design, troubleshooting, and optimizing performance, as covered within the comprehensive materials․

Common Network Cables and Connectors

CompTIA Network+ (9th Edition), by Jill West, thoroughly covers essential network cabling and connectors․ Key cable types include twisted-pair (Cat5e, Cat6, Cat6a) – commonly used for Ethernet – and fiber optic cables, offering higher bandwidth and longer distances․

The guide details various connectors like RJ45 (for twisted-pair), SC and LC (for fiber optic), and their respective applications․ It explains cable standards, limitations, and best practices for installation and termination․

Understanding cable characteristics – like shielding and bandwidth capacity – is vital for optimal network performance, a core focus of the 9th edition’s curriculum․

Network Devices

CompTIA Network+ (9th Edition), by Jill West, details crucial network hardware․ This includes routers, switches, firewalls, and wireless access points (WAPs) for connectivity․

Routers and Their Functions

Routers are fundamental network devices, as detailed in CompTIA Network+ (9th Edition) by Jill West․ They connect multiple networks, forwarding data packets between them based on IP addresses․ This process involves examining the destination IP address of each packet and using routing tables to determine the optimal path․

Routers perform Network Address Translation (NAT), allowing multiple devices on a private network to share a single public IP address․ They also provide security features like firewalls and access control lists (ACLs)․ Modern routers often include wireless capabilities, functioning as both a router and a wireless access point․ Understanding router configuration and troubleshooting is a key component of the Network+ certification․

The 9th edition guide provides in-depth coverage of these functions and more․

Switches and Their Operation

Switches, as covered in CompTIA Network+ (9th Edition) by Jill West, are crucial for local area network (LAN) connectivity․ Unlike hubs, switches intelligently forward data only to the intended destination device, improving network efficiency․ They operate at the Data Link Layer (Layer 2) of the OSI model, utilizing MAC addresses to build a forwarding table․

This table maps MAC addresses to specific ports, enabling direct communication․ Switches support various features like VLANs (Virtual LANs) for network segmentation and Spanning Tree Protocol (STP) to prevent loops․ Understanding switch configuration, including port security and troubleshooting common issues, is vital for Network+ certification preparation․

The 9th edition guide offers detailed explanations and practical examples․

Firewalls and Network Security

Firewalls, a key component of network security detailed in CompTIA Network+ (9th Edition), protect networks from unauthorized access․ The guide by Jill West explains how firewalls examine network traffic based on pre-defined rules, blocking malicious content and controlling inbound/outbound connections․ They can be hardware or software-based, offering varying levels of protection․

Understanding firewall types – packet filtering, stateful inspection, and next-generation firewalls – is crucial․ The book also covers network security concepts like intrusion detection/prevention systems (IDS/IPS) and common network threats․

Securing a network involves implementing robust security policies and regularly updating security measures, as emphasized throughout the 9th edition․

Wireless Access Points (WAPs)

Wireless Access Points (WAPs), thoroughly covered in CompTIA Network+ (9th Edition) by Jill West, enable devices to connect to a network wirelessly․ The guide details how WAPs bridge wired and wireless networks, broadcasting a Wi-Fi signal․ Understanding WAP functionality is vital for network design and troubleshooting․

The 9th edition explains different WAP modes – access point, repeater, and bridge – and their respective uses․ It also emphasizes the importance of secure wireless configuration, including choosing strong passwords and implementing appropriate security protocols like WPA2/WPA3․

Proper WAP placement and channel selection are crucial for optimal performance and minimizing interference, as highlighted in the text․

IP Addressing and Subnetting

CompTIA Network+ (9th Edition) details IPv4 basics, subnet masks, and CIDR notation․ It clarifies private versus public IP addresses, alongside DHCP and DNS concepts․

IPv4 Addressing Basics

IPv4 addressing, a core component covered in CompTIA Network+ (9th Edition), utilizes a 32-bit numerical system to uniquely identify devices on a network․ This system allows for over four billion unique addresses, represented in dotted decimal notation (e․g․, 192․168․1․1)․

The guide explains how IPv4 addresses are structured, including network and host portions, crucial for understanding network segmentation․ It details the concept of address classes (A, B, C, D, and E), though classful networking is largely outdated․

Furthermore, the 9th edition emphasizes the importance of understanding how IPv4 addresses are assigned and managed, laying the groundwork for more advanced topics like subnetting and routing․ It’s a foundational element for network professionals․

Subnet Masks and CIDR Notation

CompTIA Network+ (9th Edition) thoroughly explores subnet masks, essential for dividing a network into smaller, more manageable subnetworks․ These masks, also in dotted decimal format, determine the network and host portions of an IPv4 address․ The guide details how to calculate subnet masks based on network requirements․

Alongside subnet masks, the book introduces CIDR (Classless Inter-Domain Routing) notation, a more concise way to represent networks and subnet masks (e․g․, /24)․ Understanding CIDR is vital for efficient IP address allocation and routing protocols․

The 9th edition emphasizes the practical application of subnetting and CIDR, preparing candidates to analyze network designs and troubleshoot connectivity issues effectively․

Private vs․ Public IP Addresses

CompTIA Network+ (9th Edition) clearly differentiates between private and public IP addresses․ Private IPs, like those in the 192․168․x․x range, are used within local networks and aren’t globally routable on the internet․ They enable multiple devices to share a single public IP address through Network Address Translation (NAT)․

Public IP addresses, assigned by ISPs, are unique identifiers for devices accessible on the internet․ The guide explains how NAT functions to translate private IPs to public IPs for external communication․

Understanding this distinction is crucial for network security and proper network configuration, as detailed within the 9th edition’s comprehensive coverage․

DHCP and DNS Concepts

CompTIA Network+ (9th Edition) dedicates significant coverage to DHCP (Dynamic Host Configuration Protocol) and DNS (Domain Name System)․ DHCP automates IP address assignment, reducing administrative overhead by dynamically leasing IP configurations to network devices․ This eliminates manual configuration and potential IP conflicts․

DNS translates human-readable domain names (like google․com) into IP addresses, enabling users to access websites without memorizing numerical IPs․ The guide explains the DNS resolution process and the hierarchy of DNS servers․

Mastering these concepts, as presented in the 9th edition, is vital for understanding network functionality and troubleshooting connectivity issues․

Network Protocols

CompTIA Network+ (9th Edition) details essential protocols like TCP, UDP, HTTP, HTTPS, FTP, SFTP, SMTP, POP3, and IMAP,
crucial for network communication understanding․

TCP and UDP Protocols

TCP (Transmission Control Protocol) and UDP (User Datagram Protocol) are foundational protocols for data transmission․ CompTIA Network+ (9th Edition) thoroughly explains their differences․ TCP is connection-oriented, ensuring reliable delivery through sequencing, error checking, and acknowledgements – ideal for applications needing guaranteed data integrity, like web browsing (HTTPS)․

Conversely, UDP is connectionless, prioritizing speed over reliability․ It doesn’t guarantee delivery or order, making it suitable for applications like streaming or online gaming where occasional packet loss is tolerable․ Understanding these protocols is vital for network troubleshooting and application performance analysis, as detailed within the guide’s comprehensive coverage․

HTTP and HTTPS Protocols

HTTP (Hypertext Transfer Protocol) is the foundation of data communication on the web, enabling resource retrieval․ CompTIA Network+ (9th Edition) details how it functions, but emphasizes the critical importance of its secure counterpart, HTTPS (HTTP Secure)․

HTTPS encrypts data transmitted between a user’s browser and the web server using TLS/SSL, protecting sensitive information like passwords and credit card details․ The guide explains how HTTPS utilizes port 443, contrasting it with HTTP’s port 80․ Understanding these protocols is crucial for network security, as secure web communication is paramount in today’s digital landscape, a key focus of the certification․

FTP and SFTP Protocols

FTP (File Transfer Protocol), as covered in CompTIA Network+ (9th Edition), is a standard network protocol used for transferring files between a client and server․ It operates on ports 20 and 21, but transmits data, including credentials, in plaintext, making it inherently insecure․

This is where SFTP (Secure File Transfer Protocol) comes in․ SFTP utilizes SSH (Secure Shell) to encrypt both commands and data, providing a much more secure method for file transfer․ The guide highlights the importance of SFTP over FTP for sensitive data․ Understanding the security implications and operational differences between these protocols is vital for network professionals preparing for the certification exam․

Email Protocols (SMTP, POP3, IMAP)

CompTIA Network+ (9th Edition) details the core protocols governing email communication․ SMTP (Simple Mail Transfer Protocol), operating on port 25, is responsible for sending email messages between servers․ However, it doesn’t handle receiving or storing emails․

For receiving emails, POP3 (Post Office Protocol version 3), typically on port 110, downloads emails to a client device, often deleting them from the server․ IMAP (Internet Message Access Protocol), using port 143, allows users to access and manage emails directly on the server, synchronizing across multiple devices․ The guide emphasizes understanding these distinctions for effective network troubleshooting and email system administration․

Network Security

CompTIA Network+ (9th Edition) covers vital security aspects, including threats, wireless protocols (WEP, WPA, WPA2, WPA3), VPNs, and network access control measures․

Common Network Threats

CompTIA Network+ (9th Edition) extensively details prevalent network threats, crucial for robust security implementations․ These encompass malware – viruses, worms, and Trojans – designed to compromise systems and data․

Phishing attacks, utilizing deceptive communications, aim to steal sensitive information․

Denial-of-Service (DoS) and Distributed Denial-of-Service (DDoS) attacks disrupt network services by overwhelming resources․

Man-in-the-Middle (MitM) attacks intercept communications, potentially altering or stealing data․

Ransomware encrypts data, demanding payment for its release․

Understanding these threats, alongside social engineering tactics, is paramount for effective network defense, as emphasized within the guide’s comprehensive coverage․

Wireless Security Protocols (WEP, WPA, WPA2, WPA3)

CompTIA Network+ (9th Edition) thoroughly examines wireless security protocols, detailing their evolution and vulnerabilities․

WEP, the earliest standard, is now considered insecure due to easily cracked encryption․

WPA addressed WEP’s flaws but also proved susceptible to attacks․

WPA2, utilizing AES encryption, offered significant improvements and became widely adopted․

However, WPA3 represents the latest standard, providing enhanced security features like Simultaneous Authentication of Equals (SAE) and improved cryptographic strength․

The guide emphasizes understanding each protocol’s strengths and weaknesses for implementing appropriate wireless security measures, safeguarding networks from unauthorized access․

VPNs and Network Access Control

CompTIA Network+ (9th Edition) details VPNs (Virtual Private Networks) as crucial for secure remote access․ These create encrypted tunnels, protecting data transmitted over public networks like the internet․
The text explains different VPN protocols and their implementations․
Alongside VPNs, Network Access Control (NAC) is covered, focusing on controlling access to network resources․
NAC solutions verify device compliance with security policies before granting network access, mitigating threats․
The guide highlights how these technologies work in tandem to bolster network security, ensuring only authorized users and devices connect, safeguarding sensitive information․

Troubleshooting Networks

CompTIA Network+ (9th Edition) emphasizes systematic troubleshooting, utilizing tools to interpret network logs and diagnose issues efficiently for optimal network performance․

Common Network Troubleshooting Tools

Effective network troubleshooting relies on a diverse toolkit․ The CompTIA Network+ (9th Edition) guide highlights essential utilities for diagnosing connectivity problems; Ping verifies reachability, while traceroute maps the path packets take․ Nslookup and dig assist in DNS resolution issues․

Ipconfig/ifconfig displays network configuration details, crucial for identifying incorrect settings․ Netstat reveals active network connections and listening ports․ Wireshark, a powerful packet analyzer, captures and decodes network traffic for in-depth analysis․ Utilizing these tools, alongside interpreting network logs, forms a systematic approach to resolving network issues efficiently, as detailed within the guide․

Systematic Troubleshooting Approach

The CompTIA Network+ (9th Edition) emphasizes a structured approach to network troubleshooting․ Begin by identifying the problem and gathering information – what’s not working, and for whom? Next, establish a theory of the root cause․ Test the theory using tools like ping or traceroute to confirm or refute your hypothesis․

Implement a solution, carefully documenting each step․ Verify functionality to ensure the issue is resolved and hasn’t created new problems․ Finally, document the entire process for future reference․ This methodical process, detailed in the guide, minimizes downtime and ensures efficient network maintenance․

Interpreting Network Logs

CompTIA Network+ (9th Edition) highlights the critical skill of interpreting network logs for effective troubleshooting․ These logs, generated by devices like routers and firewalls, record events and errors․ Learning to decipher these entries is paramount for identifying security breaches and performance issues․

The guide teaches how to filter logs to focus on relevant information, recognizing timestamps, source/destination IPs, and error messages․ Understanding common log formats and correlating events across multiple devices are key skills․ Analyzing logs allows proactive identification of potential problems before they escalate, ensuring network stability and security․

us history eoc study guide

This comprehensive guide details pivotal moments, from early colonization through the Progressive Era, focusing on key events, influential figures, and transformative periods in American history․

I․ Colonial Period (1607-1775)

The Colonial Period, spanning 1607-1775, witnessed the establishment and development of British colonies in North America․ Jamestown, founded in 1607, marked the beginning of permanent English settlement․ Early colonization faced hardships, including disease and conflict with Native Americans․ Distinct colonial regions emerged: New England, characterized by Puritan settlements and commerce; the Middle Colonies, known for their diversity and agriculture; and the Southern Colonies, reliant on plantation agriculture and enslaved labor․

Growing colonial discontent stemmed from British policies like mercantilism and taxation without representation․ Events like the French and Indian War further strained relations, setting the stage for revolution․

A․ Early Colonization (1607-1660)

The initial phase of colonization (1607-1660) was marked by struggle and adaptation for English settlers․ Jamestown’s success hinged on tobacco cultivation, but early years were plagued by starvation and conflict with the Powhatan Confederacy․ Plymouth Colony, founded by Pilgrims in 1620, sought religious freedom․ Massachusetts Bay Colony followed, establishing a theocratic society․

These colonies developed distinct economic systems – agriculture in the South, commerce in the North․ The headright system and indentured servitude fueled labor needs, eventually leading to the widespread use of enslaved Africans․

B․ Colonial Regions (New England, Middle, Southern)

Colonial America diversified into three distinct regional identities․ New England, with rocky soil, fostered shipbuilding, fishing, and commerce, emphasizing town meetings and Puritan values․ The Middle Colonies – New York, Pennsylvania, New Jersey, and Delaware – became a hub of agriculture and trade, showcasing religious tolerance and diverse populations․

The Southern Colonies, characterized by fertile land, centered on plantation agriculture (tobacco, rice, indigo) reliant on enslaved labor․ Social structures differed greatly; New England prioritized education, while the South developed a hierarchical society based on land ownership and slavery․

C․ Causes of Colonial Discontent

Growing tensions between Great Britain and its American colonies stemmed from economic and political grievances․ Mercantilist policies, like the Navigation Acts, restricted colonial trade, benefiting Britain at colonial expense․ Taxation without representation – exemplified by the Stamp Act and Townshend Acts – ignited widespread protest, fueled by Enlightenment ideals of self-governance․

British attempts to assert greater control, including quartering troops and limiting westward expansion (Proclamation of 1763), further inflamed colonial resentment․ Colonial resistance, initially through boycotts and petitions, escalated towards demands for greater autonomy and ultimately, independence․

II; American Revolution (1775-1783)

The American Revolution was a defining struggle for independence from British rule․ Sparked by escalating colonial discontent, key events like the Battles of Lexington and Concord initiated armed conflict․ The Continental Army, led by George Washington, faced a formidable British force․

The Declaration of Independence, articulating Enlightenment principles, formally declared the colonies’ separation․ Crucial battles – Saratoga and Yorktown – proved pivotal turning points, securing foreign alliances (France) and ultimately leading to British surrender․ The Treaty of Paris (1783) officially recognized American independence, establishing a new nation․

A․ Key Events Leading to Revolution

Growing tensions between Great Britain and its American colonies stemmed from restrictive policies․ The French and Indian War (1754-1763) left Britain deeply in debt, prompting taxation without colonial representation – a core grievance․ Acts like the Stamp Act, Townshend Acts, and Tea Act fueled resentment․

Colonial protests, including boycotts and the Boston Tea Party, escalated the conflict․ British responses, such as the Intolerable Acts, further inflamed passions․ The First Continental Congress convened to address grievances, while skirmishes like Lexington and Concord marked the point of no return, igniting the Revolutionary War․

B․ Declaration of Independence & Enlightenment Ideas

The Declaration of Independence, adopted in 1776, formally announced the colonies’ separation from Great Britain․ Penned primarily by Thomas Jefferson, it articulated a philosophy deeply rooted in Enlightenment thought․

Key Enlightenment ideas, such as John Locke’s concepts of natural rights – life, liberty, and property – profoundly influenced the Declaration․ Jefferson adapted these to “life, liberty, and the pursuit of happiness․” The document also championed popular sovereignty, asserting that governments derive their legitimacy from the consent of the governed․

It justified revolution based on violations of these rights, establishing a foundation for American ideals․

C․ Revolutionary War: Strategies & Turning Points

The Revolutionary War (1775-1783) pitted the Continental Army against the British forces․ British strategies initially focused on suppressing the rebellion through military strength and controlling key cities like Boston and New York․

However, the Continental Army, led by George Washington, employed a strategy of attrition, aiming to prolong the war and exhaust British resources․ A crucial turning point was the Battle of Saratoga (1777), securing vital French support․

Valley Forge represented immense hardship, but Washington’s leadership maintained the army․ The decisive victory at Yorktown (1781), aided by French naval power, effectively ended major combat operations․

III․ Creating a Nation (1783-1800)

Following the Revolutionary War, the newly independent United States faced the challenge of establishing a stable government․ The initial attempt, the Articles of Confederation, proved inadequate due to its weak central authority and inability to effectively regulate commerce or taxation․

Recognizing these flaws, delegates convened the Constitutional Convention in 1787, crafting a new framework based on principles of federalism and separation of powers․

Ratification was fiercely debated between Federalists, who supported the Constitution, and Anti-Federalists, who feared centralized power․ The Bill of Rights ultimately secured its acceptance, laying the foundation for a lasting nation․

A․ Articles of Confederation: Weaknesses & Failures

Adopted in 1781, the Articles of Confederation represented the first attempt to establish a national government after independence․ However, it intentionally created a weak central government, fearing the tyranny of a strong executive, resulting in significant shortcomings․

A major weakness was the lack of power to tax effectively, leaving the national government financially unstable and reliant on voluntary contributions from states․ It also lacked a national currency or the ability to regulate interstate commerce, hindering economic growth․

Furthermore, amendments required unanimous consent, making it nearly impossible to adapt to changing circumstances, ultimately leading to its failure and the call for a Constitutional Convention․

B․ Constitutional Convention & Ratification

In 1787, delegates convened in Philadelphia to address the shortcomings of the Articles of Confederation․ This Constitutional Convention aimed to create a more effective national government, leading to intense debates and compromises․

Key issues included representation in Congress – resolved by the Great Compromise creating a bicameral legislature – and slavery, addressed through the Three-Fifths Compromise․ The resulting Constitution established a federal system with separated powers among the legislative, executive, and judicial branches․

Ratification required approval by at least nine states, sparking fierce debate between Federalists, who supported the Constitution, and Anti-Federalists, who opposed it, ultimately leading to its adoption and a new era for the nation․

C․ Federalist vs․ Anti-Federalist Debate

The ratification of the Constitution ignited a passionate debate between Federalists and Anti-Federalists․ Federalists, like James Madison and Alexander Hamilton, advocated for a strong central government, arguing it was essential for national unity and economic stability․ They penned The Federalist Papers to persuade states to ratify․

Anti-Federalists, including Patrick Henry and George Mason, feared a powerful central government would threaten individual liberties and states’ rights․ They demanded a Bill of Rights to protect citizens from potential government overreach․

This clash of ideologies shaped the early American political landscape, ultimately leading to the inclusion of the Bill of Rights, securing ratification and establishing a balance between federal authority and individual freedoms․

IV․ Early Republic & Expansion (1800-1860)

The era of the Early Republic witnessed significant territorial growth and economic transformation․ The Louisiana Purchase of 1803 doubled the size of the United States, fueling westward expansion and debates over slavery in new territories․ This expansion was driven by Manifest Destiny, the belief in America’s divinely ordained right to expand across the continent․

Simultaneously, the Industrial Revolution spurred economic growth, particularly in the North, creating a market economy and increasing urbanization․ Reform movements emerged, advocating for abolitionism and women’s rights, challenging existing social norms and laying the groundwork for future progress․

A․ Louisiana Purchase & Westward Expansion

In 1803, the United States purchased the Louisiana Territory from France for $15 million, dramatically expanding the nation’s size and opening vast lands for exploration and settlement․ This acquisition, known as the Louisiana Purchase, doubled the country’s territory and provided control of the Mississippi River and the port of New Orleans․

Westward expansion, fueled by Manifest Destiny, led to increased migration, conflicts with Native Americans, and debates over the expansion of slavery․ Explorers like Lewis and Clark mapped the territory, while settlers established farms and communities, shaping the American West and its future development․

B․ Industrial Revolution & Market Economy

The Industrial Revolution, beginning in the early 19th century, transformed the American economy from agrarian to industrial․ New technologies like the cotton gin, steam engine, and power loom spurred mass production and factory systems, particularly in the North․ This shift led to urbanization as people migrated to cities seeking employment․

Simultaneously, a market economy emerged, characterized by increased trade, transportation improvements (canals, railroads), and financial innovations․ This fostered economic growth but also created social problems like poor working conditions and widening wealth inequality, setting the stage for reform movements․

C․ Reform Movements (Abolitionism, Women’s Rights)

The early to mid-19th century witnessed a surge in reform movements driven by ideals of equality and social justice․ Abolitionism, led by figures like Frederick Douglass and William Lloyd Garrison, sought to end slavery through moral persuasion and political action, ultimately contributing to the Civil War․

Concurrently, the women’s rights movement gained momentum, spearheaded by Elizabeth Cady Stanton and Susan B․ Anthony․ The Seneca Falls Convention in 1848 marked a pivotal moment, advocating for women’s suffrage and equal rights․ These movements, often intertwined, challenged existing social norms and laid the groundwork for future progress․

V․ Civil War & Reconstruction (1861-1877)

The Civil War (1861-1865), sparked by long-standing disputes over slavery and states’ rights, pitted the Union against the Confederacy․ Key battles like Gettysburg and Vicksburg proved turning points, ultimately leading to Union victory and the abolition of slavery with the 13th Amendment․

Reconstruction (1865-1877) aimed to rebuild the South and integrate formerly enslaved people into society․ While the 14th and 15th Amendments granted citizenship and voting rights, Reconstruction faced resistance and ultimately fell short of its goals due to political compromises and systemic racism, leaving a legacy of inequality․

A․ Causes of the Civil War

The Civil War stemmed from deeply rooted sectional differences, primarily concerning slavery․ Economic disparities between the industrial North and the agrarian South fueled tensions, as did differing views on states’ rights versus federal authority․ The expansion of slavery into new territories ignited fierce debates, exemplified by events like the Missouri Compromise and the Kansas-Nebraska Act․

Abolitionist movements gained momentum, further polarizing the nation․ Political events, including the Dred Scott decision and John Brown’s raid, heightened anxieties․ Ultimately, Abraham Lincoln’s election in 1860 triggered secession, initiating the conflict․

B․ Key Battles & Leaders of the Civil War

The Civil War witnessed numerous pivotal battles, shaping the conflict’s trajectory․ Early Confederate victories at Bull Run demonstrated the war’s potential length․ The Union’s triumph at Antietam prompted Lincoln’s Emancipation Proclamation, shifting the war’s focus․ Gettysburg marked a turning point, halting Lee’s invasion of the North, while Vicksburg secured Union control of the Mississippi River․

Key leaders included Abraham Lincoln, Ulysses S․ Grant, and William Tecumseh Sherman for the Union, and Jefferson Davis, Robert E․ Lee, and Stonewall Jackson for the Confederacy․ Their strategic decisions and military prowess profoundly impacted the war’s outcome․

C․ Reconstruction: Successes & Failures

Reconstruction (1865-1877) aimed to rebuild the South and integrate formerly enslaved people into society․ Successes included the 13th, 14th, and 15th Amendments, abolishing slavery, granting citizenship, and securing voting rights for African American men․ Public school systems were established in the South, and infrastructure began to rebuild․

However, Reconstruction faced significant failures․ White Southern resistance, including the Ku Klux Klan, employed violence and intimidation to suppress Black rights․ Economic hardship and political corruption hampered progress․ Ultimately, Reconstruction ended with the Compromise of 1877, leaving many gains unrealized and setting the stage for Jim Crow laws․

VI․ The Gilded Age & Progressive Era (1870-1920)

The Gilded Age, marked by rapid industrialization and urbanization, saw immense wealth concentrated in the hands of a few “robber barons․” This era also witnessed significant social problems like poverty, unsafe working conditions, and political corruption․ The rise of big business spurred labor movements seeking better wages and rights․

The Progressive Era (roughly 1890-1920) responded to these issues with reforms․ Progressives aimed to address corruption, regulate monopolies, and improve living conditions․ Key achievements included antitrust legislation, food safety laws, and expanded suffrage, demonstrating a growing role for government regulation․

A․ Industrialization & Urbanization

Following the Civil War, the United States experienced unprecedented industrial growth fueled by technological advancements like steel production, railroads, and electricity․ This led to mass migration to urban centers seeking employment in factories․ Cities swelled in population, creating challenges like overcrowding, sanitation issues, and inadequate housing․

Industrialization fostered a new economic system – the market economy – characterized by competition and innovation․ However, it also resulted in harsh working conditions, long hours, and low wages for many laborers․ The concentration of wealth in the hands of industrialists defined the Gilded Age, sparking social and political tensions․

B․ Rise of Big Business & Labor Movements

The late 19th century witnessed the emergence of powerful corporations and monopolies, led by figures like Rockefeller (oil), Carnegie (steel), and Vanderbilt (railroads)․ These “captains of industry” amassed immense fortunes, often through ruthless business practices and exploitation of workers․ This concentration of economic power fueled public resentment and calls for regulation․

In response to harsh working conditions, laborers organized into unions like the Knights of Labor and the American Federation of Labor (AFL)․ These unions advocated for better wages, shorter hours, and improved safety standards, often resorting to strikes and collective bargaining․ Labor unrest, such as the Haymarket Affair, highlighted the growing conflict between capital and labor․

C․ Progressive Reforms & Government Regulation

The Progressive Era (roughly 1890-1920) saw widespread social activism and political reform aimed at addressing the problems created by industrialization and urbanization․ Progressives sought to curb the power of big business, protect consumers, and improve the lives of the working class;

Key reforms included antitrust legislation like the Sherman Antitrust Act and the Clayton Antitrust Act, designed to break up monopolies․ Government regulation of industries, such as railroads and food production (Pure Food and Drug Act), increased․ Furthermore, initiatives like the 16th Amendment (income tax) and the 17th Amendment (direct election of senators) aimed to make government more democratic and responsive to the people’s needs․

diamond stud earrings size guide

Diamond Stud Earring Size Guide: A Comprehensive Overview (12/17/2025 02:36:43)

Navigating the world of diamond stud earrings requires understanding size nuances; this guide offers clarity on diamond sizes, carat weight, and how they appear on the ear․

We’ll explore charts for various cuts and provide insights into choosing the perfect size for your ear lobes, considering post types and visual perceptions․

Understanding Diamond Earring Size Terminology

Embarking on the journey of selecting diamond stud earrings necessitates a grasp of specific terminology․ When discussing size, it’s crucial to differentiate between diameter – measured in millimeters (mm) – and carat weight․ Diameter refers to the width of the diamond itself, while carat weight indicates the diamond’s actual weight, impacting its price․

The term “size” can be ambiguous; therefore, clarity is paramount․ A diamond described as “small” typically falls within the 3-4mm diameter range (0․10-0․25 carat per stud), offering a subtle and delicate appearance․ “Medium” sizes generally measure 5-6mm (0․30-0․50 carat), providing noticeable sparkle for everyday wear․ Larger diamonds, 7mm and above (0;75+ carat), make a bolder statement․

Understanding these terms empowers you to communicate effectively with jewelers and make informed decisions․ Remember that carat weight doesn’t directly correlate to visual size; different cuts can appear larger or smaller at the same carat weight․

What Does “Size” Mean for Diamond Studs?

Defining “size” when it comes to diamond stud earrings isn’t as straightforward as a single measurement․ It encompasses both the diamond’s physical dimensions – its diameter in millimeters (mm) – and its weight, expressed in carats․ However, perceived size is also influenced by factors like diamond cut and setting style․

Generally, when people refer to size, they’re often thinking about how large the diamond will look on the ear․ A smaller diamond (3-4mm) offers a delicate, understated elegance, ideal for minimalists or second/third piercings․ A medium size (5-6mm) provides a balanced look – noticeable sparkle without being overwhelming․ Larger diamonds (7mm+) create a dramatic, eye-catching effect․

It’s important to remember that size is subjective and depends on individual preference and ear lobe proportions․ A diamond’s carat weight is a precise measurement, but its visual impact varies․ Therefore, considering both diameter and carat weight is crucial for selecting the perfect diamond studs․

Carat Weight vs․ Millimeter Size

Understanding the relationship between carat weight and millimeter (mm) size is fundamental when choosing diamond studs․ Carat refers to the diamond’s weight, not its physical dimensions․ One carat equals 200 milligrams․ However, diamonds of the same carat weight can have different sizes depending on their cut and proportions․

A diamond’s size, measured in millimeters, represents its diameter․ Generally, a 0․10 carat diamond is approximately 3mm, while a 0․25 carat diamond is around 4mm․ Moving up, a 0․30-0․50 carat diamond typically measures 5-6mm․ Larger diamonds, like those weighing 0․75 carats or more, start at 7mm and increase with weight․

It’s crucial to note that these are approximate conversions․ Different diamond cuts (round, princess, etc․) affect how carat weight translates to millimeter size․ A well-cut diamond will appear larger than a poorly cut one of the same weight․ Therefore, prioritize both carat and mm size for informed selection․

Diamond Shape and Size Perception

Diamond shape significantly influences how large a stud earring appears․ While carat weight remains consistent, different shapes distribute that weight differently, impacting perceived size․ Round brilliant cuts, being symmetrical, maximize light return and often look larger for a given carat weight․

Princess cuts, with their square shape, can appear slightly smaller than round diamonds of the same carat․ This is because the weight is spread across a broader surface area, rather than concentrated in a circular form․ Other fancy shapes, like pear or marquise, can create the illusion of greater size due to their elongated forms․

Consider your personal preference and ear lobe shape when choosing․ A princess cut might complement square jawlines, while a round cut offers classic brilliance․ Ultimately, perceived size is subjective; prioritize a shape that flatters your features and delivers the sparkle you desire, understanding how each shape interacts with light and weight distribution․

Diamond Size Charts for Common Cuts

Below, you’ll find detailed diamond size charts for popular cuts – round brilliant and princess – offering millimeter measurements correlated with carat weights for informed selection․

Round Brilliant Cut Diamond Size Chart

The round brilliant cut is a classic choice, celebrated for its exceptional sparkle and versatility․ Understanding its size variations is crucial when selecting diamond studs․ This chart provides approximate millimeter (mm) measurements corresponding to different carat weights, helping you visualize the diamond’s appearance on your ear․

Carat Weight Diameter (mm)
0․10 Carat 3․0 mm
0․20 Carat 3․8 mm
0․25 Carat 4․0 mm
0․30 Carat 4․3 mm
0․40 Carat 4․8 mm
0․50 Carat 5․2 mm
0․60 Carat 5․6 mm
0․70 Carat 6․0 mm
1․00 Carat 6;5 mm

Remember that these are average measurements; slight variations can occur based on the diamond’s specific proportions․ Using this chart as a guide, you can confidently choose round brilliant cut studs that perfectly complement your style and preferences․

Princess Cut Diamond Size Chart

The princess cut, known for its square shape and brilliant sparkle, offers a modern and sophisticated aesthetic․ Its size is typically measured by its length and width in millimeters (mm), rather than diameter like round cuts․ This chart correlates carat weight with approximate dimensions, aiding in visualizing the stone’s appearance on your earlobe․

Carat Weight Length x Width (mm)
0․10 Carat 2․5 x 2․5 mm
0․20 Carat 3․0 x 3․0 mm
0․25 Carat 3․5 x 3;5 mm
0․30 Carat 4․0 x 4․0 mm
0․40 Carat 4․5 x 4․5 mm
0․50 Carat 5․0 x 5․0 mm
0․75 Carat 6․0 x 6․0 mm
1․00 Carat 6․5 x 6․5 mm

Keep in mind that princess cuts can appear slightly larger than round diamonds of the same carat weight due to their shape․ This chart serves as a helpful reference when selecting princess cut diamond studs that suit your desired look․

Comparing Round vs․ Princess Cut Sizes

When deciding between round brilliant and princess cut diamond studs, understanding their size differences is crucial․ For the same carat weight, a princess cut diamond generally appears larger than a round diamond․ This is because the princess cut utilizes more of the diamond’s weight in its surface area, maximizing visual size․

A 0․50 carat round diamond typically measures around 5․2-5․3mm in diameter, while a 0․50 carat princess cut might measure 5․0 x 5․0mm․ Although the carat weight is identical, the princess cut’s square shape distributes the weight differently, creating a broader appearance․

Consider your personal preference and the desired aesthetic․ If maximizing visual size is a priority, a princess cut might be the better choice․ However, the classic brilliance and sparkle of a round diamond remain highly sought after․ Ultimately, both cuts offer stunning beauty, and the “best” choice depends on individual taste․

Carefully compare size charts for both cuts to visualize the difference before making a decision․

Choosing the Right Size for Your Ear Lobe

Selecting the ideal diamond stud size hinges on your ear lobe’s size and personal style; options range from subtle 3-4mm studs to bolder 7mm+ designs․

Consider carat weight and millimeter measurements for a balanced, comfortable, and visually appealing look․

Small Diamond Studs (3-4mm / 0․10-0․25 Carat)

Delicate and understated, small diamond studs – typically ranging from 3 to 4 millimeters in diameter and weighing 0․10 to 0․25 carats per stud – are an excellent choice for several scenarios․

These subtle gems are particularly well-suited for individuals who prefer a minimalist aesthetic or those seeking a first earring, a second, or even a third piercing option․ Their discreet sparkle adds a touch of elegance without being overpowering, making them ideal for everyday wear and professional settings․

Small studs are also a popular choice for children’s earrings due to their comfortable size and secure settings․ While offering a more modest visual impact compared to larger stones, these diamonds still possess a beautiful brilliance and fire․ They represent a classic and timeless style, offering a sophisticated touch to any ensemble․ They are a fantastic entry point into the world of diamond jewelry, providing quality and beauty in a compact form․

Consider these if you want something subtle!

Medium Diamond Studs (5-6mm / 0․30-0․50 Carat)

Striking a perfect balance between subtlety and noticeable sparkle, medium diamond studs – generally measuring 5 to 6 millimeters and weighing 0․30 to 0․50 carats each – represent a versatile and popular choice for diamond earring enthusiasts․

These studs offer “everyday elegance,” providing a significant visual presence without being overly extravagant․ They are suitable for a wide range of occasions, from casual outings to more formal events, seamlessly complementing various outfits and styles․ The size allows for a beautiful display of brilliance and fire, catching the light with every movement․

Medium-sized studs are often considered an ideal starting point for those building their diamond jewelry collection․ They offer a substantial look without the higher price tag associated with larger stones․ They are a classic and timeless option, appealing to a broad spectrum of tastes and preferences․ These studs are a fantastic way to add a touch of sophistication and glamour to your daily look, offering a noticeable yet refined sparkle․

They are a great all-around choice!

Large Diamond Studs (7mm+ / 0․75+ Carat)

Making a bold statement, large diamond studs – those measuring 7 millimeters or greater and boasting a carat weight of 0․75 carats or more per stone – exude luxury and sophistication․ These are for individuals who desire a prominent and eye-catching sparkle․

Such studs command attention and are often reserved for special occasions or as a symbol of significant achievement․ Their substantial size showcases the diamond’s brilliance and fire to its fullest potential, creating a dazzling effect․ They are a true investment piece, representing both beauty and value․

However, it’s crucial to consider ear lobe size and comfort when opting for larger studs․ Larger stones can feel heavier and may require stronger settings to ensure security․ They are best suited for those with larger earlobes that can comfortably support the weight and size․ These studs are a testament to refined taste and a celebration of exquisite craftsmanship․

They are a glamorous and unforgettable addition to any jewelry collection!

Earring Post and Back Considerations

Securing your investment, the earring post and back are vital for comfort and preventing loss; understanding gauge and post types – screw back versus push back – is essential․

Earring Post Gauge Explained

Understanding earring post gauge is crucial for a comfortable and secure fit․ Gauge refers to the thickness of the post, and it’s measured using a numerical system where a higher number indicates a thinner post․ Common gauges for diamond stud earrings range from 20 gauge to 24 gauge․ A 20 gauge post is thicker and more durable, suitable for heavier diamonds or those with larger earlobes․ Conversely, a 24 gauge post is finer and more delicate, often preferred for smaller diamonds and sensitive earlobes․

Choosing the correct gauge depends on several factors, including the weight of the diamond, the size of your earlobe piercing, and your personal preference․ A thicker post provides more support for heavier stones, reducing the risk of bending or breaking․ However, it may also be more noticeable or uncomfortable for those with smaller piercings․ Conversely, a thinner post is more discreet but may not be strong enough to support larger diamonds․ Always measure the widest part of the threaded portion of the earring post to ensure a proper fit․

Proper gauge selection contributes significantly to the overall comfort and security of your diamond studs․

Matching Post and Back Gauge for Security

Ensuring a secure fit for your diamond stud earrings hinges on meticulously matching the gauge of the earring post to the gauge of the ear nut (back)․ A mismatch can lead to loose earrings, increasing the risk of loss and discomfort․ The principle is simple: the post and back must align perfectly to create a snug, reliable connection․

If the back is too small for the post, it won’t grip securely, allowing the earring to wobble and potentially fall out․ Conversely, forcing a back that’s too large onto a post can damage the threading or even bend the post itself․ It’s vital to remember that a higher gauge number signifies a thinner component․ Therefore, a 20 gauge post requires a 20 gauge back, and a 24 gauge post needs a 24 gauge back․

Regularly check the security of your earrings, especially after wear, and replace backs if they become worn or damaged․ Prioritizing this detail safeguards your investment and provides lasting peace of mind․

Screw Back vs․ Push Back Post Types

Diamond stud earrings commonly feature two primary post types: screw backs and push backs․ Understanding their differences is crucial for selecting the best option based on security and convenience․ Push backs, also known as friction posts, are the more traditional and widely used style․ They utilize a straight post that slides through the earlobe and is held in place by a friction-fit clutch․

Screw backs, however, offer a significantly more secure closure․ These feature a threaded post that requires you to screw the back onto the post, creating a tighter, more robust connection․ This makes them ideal for valuable diamonds or for individuals prone to losing earrings․ While screw backs provide superior security, they can be slightly more time-consuming to put on and remove․

Ultimately, the choice between screw backs and push backs depends on your lifestyle and the value of your earrings․ For everyday wear with less expensive studs, push backs are often sufficient, while screw backs are recommended for precious diamonds and added peace of mind․

Factors Influencing Perceived Size

Perceived size isn’t solely about millimeters or carat weight; ear lobe dimensions, setting styles, and even metal color significantly impact how large diamonds appear․

Ear Lobe Size and Shape

The dimensions and form of your ear lobe play a crucial role in how diamond studs appear․ Larger lobes can comfortably accommodate and showcase bigger diamonds – think 7mm or above – without looking disproportionate․ Conversely, smaller lobes are best suited for more delicate studs, generally in the 3-5mm range․

Lobe shape also matters․ Lobes that are more rounded can visually “swallow” smaller diamonds, making them seem less noticeable․ For these, a slightly larger size might be preferable․ Lobes that are longer or more elongated can handle a wider variety of sizes and shapes․

Consider the overall balance; You want the earrings to complement your features, not overwhelm them․ If you’re unsure, it’s always best to start with a smaller size and gradually increase it until you find the perfect look․ Remember, personal preference is key!

Ultimately, assessing your ear lobe’s unique characteristics will guide you toward selecting diamond studs that enhance your natural beauty and style․

Setting Style and its Impact on Size

The setting of a diamond stud significantly influences its perceived size․ Prong settings, with minimal metal covering the diamond, maximize the visible surface area, making the diamond appear larger․ Bezel settings, where a metal rim surrounds the diamond, can make it seem slightly smaller, though they offer enhanced security․

Flush or tension settings, while modern and secure, often showcase less of the diamond, potentially diminishing its visual impact․ The thickness of the metal used in the setting also plays a role; thicker settings can detract from the diamond’s brilliance and apparent size․

Halo settings, though less common in classic studs, surround the center diamond with smaller stones, creating the illusion of a larger overall size․ When comparing diamonds of the same carat weight, always consider the setting style, as it directly affects how large the diamond will look on your ear․

Choosing a setting that complements both the diamond and your personal style is crucial for achieving the desired aesthetic․

Metal Color and Visual Size Perception

The color of the metal used in diamond stud earrings subtly impacts how large the diamond appears․ White metals – platinum and white gold – create a stark contrast, making the diamond stand out and seem brighter, potentially enhancing its perceived size․

Yellow and rose gold, with their warmer tones, offer a softer look․ While beautiful, these metals can slightly diminish the diamond’s brilliance and may make it appear a touch smaller in comparison to white metal settings․ The contrast between the metal and the diamond is key․

Darker metals, like black rhodium plating, can create a dramatic effect, making the diamond appear exceptionally large and brilliant․ However, this is a more contemporary choice․ Consider your skin tone and personal preference when selecting a metal color, as it influences the overall aesthetic and perceived size․

Ultimately, the metal color should complement the diamond and enhance its beauty, contributing to the desired visual impact․

the noma guide to fermentation

The Noma Guide to Fermentation: A Comprehensive Overview

Noma’s revolutionary approach to fermentation, spearheaded by David Zilber, profoundly impacted modern cuisine, emphasizing preservation and unique flavor development through microbial cultures.

This guide explores techniques—lacto-fermentation, koji utilization, and garum creation—inspired by Noma’s innovative practices, alongside health benefits and troubleshooting advice.

The collaboration with Novonesis signifies a future where culinary arts and biosolutions converge, pushing the boundaries of taste and sustainability within fermentation.

Fermentation, an age-old practice of preserving food, has experienced a remarkable resurgence, largely fueled by the groundbreaking work at Noma, the renowned Copenhagen restaurant. Before its closing in 2017, Noma didn’t just utilize fermentation; it elevated it to an art form, meticulously exploring the potential of microbial cultures to unlock complex flavors and textures.

Noma’s influence stems from its dedication to foraging and hyper-local sourcing, necessitating innovative preservation methods. This led to a deep dive into traditional fermentation techniques, alongside the development of entirely new ones, guided by the expertise of fermentation director, David Zilber. He championed the idea that fermentation wasn’t merely about preservation, but about transformation – creating ingredients with unparalleled depth and umami.

The Noma guide to fermentation isn’t a rigid set of rules, but rather a philosophy. It’s about understanding the science behind the process, respecting the microbial world, and embracing experimentation. This approach has inspired chefs and home cooks alike to explore the vast possibilities of fermented foods, from classic kimchi and sauerkraut to innovative creations like garums and koji-infused delicacies.

The History of Fermentation: A Cultural Perspective

Fermentation isn’t a modern invention; it’s a practice deeply interwoven with human history, predating agriculture itself. For millennia, cultures worldwide have harnessed the power of microorganisms to preserve food, enhance flavor, and even create intoxicating beverages. From the ancient Sumerians brewing beer to the Chinese developing soy sauce and miso, fermentation has been fundamental to culinary traditions.

Exploring this history reveals that fermentation wasn’t simply a matter of practicality, but also of cultural significance. Fermented foods often held ritualistic or medicinal value, representing a connection to the natural world and ancestral knowledge. Different regions developed unique fermentation techniques based on locally available ingredients and environmental conditions.

Noma’s approach to fermentation acknowledges this rich heritage, drawing inspiration from diverse culinary traditions while simultaneously pushing boundaries. Understanding the historical context—as highlighted in books like Sandor Katz’s “Our Fermented Lives”—provides a deeper appreciation for the art and science of fermentation, and informs Noma’s innovative spirit.

David Zilber: The Fermentation Director at Noma

David Zilber, as Fermentation Director at the renowned Noma, revolutionized the restaurant’s culinary approach, elevating fermentation from a preservation technique to a central creative force. His dedication transformed Noma’s kitchen into a laboratory of microbial exploration, constantly experimenting with new cultures and fermentation methods.

Zilber’s influence extended beyond Noma’s walls, inspiring a global resurgence of interest in fermentation. He’s known for maintaining a constantly rotating array of ferments in his refrigerator, showcasing the vast possibilities of this ancient practice. His expertise lies in unlocking umami and complex flavors through controlled microbial activity.

His work emphasizes the importance of understanding the science behind fermentation, while also respecting the traditional knowledge passed down through generations. Zilber’s passion and innovative spirit are key to Noma’s groundbreaking fermentation program, and a driving force behind the current fermentation movement.

Core Principles of Fermentation

Fermentation, at its core, is a metabolic process where microorganisms—bacteria, yeast, and molds—transform food substances. This transformation isn’t merely about preservation; it’s about unlocking new flavors, textures, and nutritional benefits. Key principles include controlling the environment – temperature, salinity, and oxygen levels – to favor desired microbial growth.

Understanding the interplay between these factors is crucial. Salt, for example, inhibits undesirable bacteria while allowing salt-tolerant microbes to thrive. Temperature dictates the speed and type of fermentation. Furthermore, the initial quality of ingredients significantly impacts the final product.

Noma’s approach emphasizes meticulous attention to detail and a deep understanding of microbial ecology. Successful fermentation relies on fostering a balanced microbial community, creating a dynamic ecosystem where flavors evolve and deepen over time. It’s a process of guided transformation, not simply leaving food to chance.

Understanding Microbial Cultures

Noma’s fermentation philosophy centers on harnessing the power of microbial cultures. These aren’t simply “good” or “bad” – they’re diverse communities with complex interactions. Lactobacillus bacteria are pivotal in lacto-fermentation, producing lactic acid which preserves food and imparts a tangy flavor. Yeasts drive alcoholic fermentation, crucial for beverages and some vegetable ferments.

However, understanding the nuances is key. Different strains within a species exhibit varying characteristics. Wild fermentation, relying on naturally present microbes, yields unique, terroir-driven results, but requires careful monitoring. Cultured starters offer predictability and consistency.

David Zilber’s work at Noma involved isolating and cultivating specific strains to achieve desired flavor profiles. Recognizing the impact of these microscopic organisms is fundamental to mastering fermentation, transforming ingredients through their metabolic processes.

Essential Equipment for Home Fermentation

Embarking on home fermentation, inspired by Noma’s techniques, doesn’t require extensive investment. Core equipment includes glass jars – wide-mouth options are ideal for easy packing and cleaning. Airtight lids or fermentation weights are crucial to maintain anaerobic conditions, preventing mold growth.

A digital scale ensures accurate ingredient measurements, vital for consistent results. pH strips help monitor acidity levels, particularly important in vegetable ferments. While not essential, a food processor or mandoline simplifies vegetable preparation.

Temperature control is key; a dedicated fermentation chamber isn’t necessary, but a consistent, cool environment is. Cleanliness is paramount – thoroughly sanitize all equipment before use. Investing in quality tools enhances the process, mirroring Noma’s dedication to precision and quality.

Fermentation Techniques: A Deep Dive

Noma’s fermentation philosophy centers on harnessing natural microbial activity to transform ingredients. Lacto-fermentation, a cornerstone technique, utilizes salt to create an environment favoring beneficial bacteria, preserving vegetables and developing complex flavors. Koji fermentation, employing Aspergillus oryzae, unlocks umami, breaking down starches and proteins.

Beyond these, Noma pioneered liquid ferments – garums – extracting savory essences from various ingredients. These techniques demand precise control of temperature, salinity, and oxygen exposure. Understanding the role of different microbial communities is crucial for successful fermentation.

Experimentation is encouraged, mirroring Noma’s innovative spirit. Mastering these core techniques unlocks a world of flavor possibilities, allowing home fermenters to replicate and adapt Noma’s groundbreaking approach to food preservation and enhancement.

Lacto-Fermentation: The Foundation

Lacto-fermentation, central to Noma’s approach, relies on lactic acid bacteria to preserve and transform vegetables; This process doesn’t require vinegar; instead, salt draws out moisture, creating a brine where these beneficial microbes thrive, inhibiting harmful bacteria.

Noma utilizes this technique extensively for creating kimchi, sauerkraut, and pickled vegetables, achieving nuanced flavors beyond simple pickling. Key factors include salt concentration, temperature control, and anaerobic conditions – ensuring vegetables are fully submerged in brine.

Successful lacto-fermentation yields a tangy, complex product rich in probiotics. It’s a relatively simple, yet profoundly impactful technique, forming the bedrock of many Noma-inspired ferments. Mastering this foundation unlocks a gateway to exploring more advanced fermentation methods.

Vinegar Production: Beyond the Basics

Noma’s exploration of vinegar transcends conventional production, viewing it as a fermentation project rather than a simple acidifying agent. They utilize a two-stage fermentation process: first, alcohol is created from fruits or grains, then acetic acid bacteria convert that alcohol into vinegar.

This method allows for control over flavor profiles, resulting in vinegars with unique complexities. Noma experiments with diverse base ingredients – from foraged berries to leftover fruit pulp – to create distinctive vinegars that enhance their dishes.

The process demands patience and careful monitoring of the ‘mother’ – a cellulose-based colony of acetic acid bacteria. Beyond flavor, Noma leverages vinegar’s preservative qualities, extending the shelf life of ingredients and creating innovative condiments.

Koji: The Umami Powerhouse

Noma elevated koji – a mold, Aspergillus oryzae – from a staple in Japanese fermentation to a central element in their culinary philosophy. They recognized koji’s remarkable ability to unlock umami, transforming starches and proteins into intensely flavorful compounds.

Unlike typical fermentation focusing solely on preservation, Noma utilizes koji for enzymatic breakdown, creating building blocks for sauces, marinades, and even aging meats. This process tenderizes and deepens flavors, adding a savory depth previously unattainable.

David Zilber championed koji’s versatility, experimenting with various grains like barley and rice. Noma’s approach isn’t just about the final product; it’s about understanding and harnessing the power of these microscopic organisms to unlock new culinary possibilities.

Garums & Liquid Ferments

Noma reimagined ancient techniques, particularly the production of garum – a fermented fish sauce – moving beyond traditional methods to explore diverse ingredients. They applied the principles of liquid fermentation to vegetables, fruits, and even animal proteins, creating intensely flavorful and complex condiments.

These aren’t simple brines; Noma’s garums involve carefully controlled enzymatic breakdown, utilizing salt and sometimes koji to unlock umami and create unique flavor profiles. The process demands patience, often taking months or even years to develop fully.

David Zilber emphasized the importance of understanding the microbial activity driving these liquid ferments. Noma’s experimentation yielded a spectrum of garums, from delicate floral notes to deeply savory, almost meaty flavors, showcasing the transformative power of fermentation.

Noma-Inspired Fermentation Recipes

Noma’s influence extends beyond technique, inspiring a wave of innovative recipes centered around fermented ingredients. These aren’t merely additions to dishes; fermentation is the core of the flavor building process, transforming simple components into complex culinary experiences.

Recipes often feature garums as foundational elements, lending umami depth to sauces and marinades. Fermented vegetable purees, utilizing lacto-fermentation, become vibrant components in spreads and dressings. Koji-cured meats and fish showcase the power of enzymatic breakdown.

The emphasis is on seasonality and foraging, incorporating wild ingredients into ferments. David Zilber’s approach encourages experimentation, adapting traditional methods to unique local produce. These recipes aren’t about strict adherence, but about understanding the principles and embracing creative exploration.

Vegetable Ferments: Kimchi, Sauerkraut & More

Noma’s exploration of vegetable fermentation transcends traditional recipes, viewing them as starting points for innovation. While kimchi and sauerkraut represent foundational techniques, the restaurant pushes boundaries with unusual vegetable combinations and fermentation durations.

Emphasis is placed on utilizing the entire vegetable – stems, leaves, and roots – minimizing waste and maximizing flavor. Fermentation isn’t solely about preservation; it’s about unlocking hidden tastes and textures. Different brining solutions and spice blends are employed to create diverse flavor profiles.

Lacto-fermentation is central, fostering beneficial microbes that enhance digestibility and nutritional value. Noma often incorporates foraged vegetables, adding a unique terroir to their ferments. These vegetable creations serve as versatile ingredients, enriching sauces, garnishes, and main courses.

Fruit Ferments: Exploring Sweet & Sour

Noma approaches fruit fermentation with the same experimental spirit as vegetable ferments, challenging conventional notions of sweetness and acidity. Beyond simple fruit preserves, they explore nuanced flavor development through controlled microbial activity.

Fermenting fruits allows Noma to capture fleeting seasonal flavors and transform them into complex ingredients. Techniques range from lacto-fermentation of berries to utilizing fruit sugars for alcoholic fermentation, creating vinegars and shrubs. The goal isn’t merely preservation, but flavor transformation.

Unripe fruits are often favored, as their higher acidity provides a more favorable environment for fermentation. Noma frequently pairs fermented fruits with savory dishes, creating unexpected and harmonious flavor combinations. These ferments contribute brightness and depth to sauces, desserts, and even meat preparations.

Dairy Ferments: Yogurt, Kefir & Beyond

Noma’s exploration of dairy fermentation extends far beyond traditional yogurt and kefir, delving into the unique possibilities offered by diverse microbial cultures and milk sources. They treat dairy as a canvas for experimentation, seeking to unlock hidden flavors and textures.

The restaurant utilizes both animal and plant-based milks, experimenting with fermentation times and temperatures to achieve specific flavor profiles. Noma isn’t simply replicating existing dairy ferments; they’re creating entirely new ones, often incorporating koji or other unique starters.

These fermented dairy products aren’t always consumed directly; they frequently serve as ingredients in sauces, dressings, and desserts, adding a subtle tang and complexity. The focus is on utilizing the transformative power of fermentation to elevate the overall dining experience, showcasing the versatility of dairy.

Grain & Bean Ferments: Miso, Tempeh & Sourdough

Noma’s approach to grain and bean fermentation showcases a deep respect for traditional techniques, like miso and tempeh production, while simultaneously pushing boundaries with innovative applications. They view these ferments not just as ingredients, but as foundational building blocks for complex flavors.

Sourdough, a cornerstone of baking, receives particular attention, with Noma cultivating unique starters and experimenting with different grain varieties to achieve distinct acidity and crumb structures. Beyond bread, sourdough discard finds its way into sauces and even desserts.

The team meticulously controls fermentation parameters – temperature, humidity, and time – to optimize flavor development and texture. They also explore lesser-known bean ferments, seeking to unlock umami-rich profiles and create entirely new culinary experiences, demonstrating fermentation’s transformative potential.

The Health Benefits of Fermented Foods

Noma’s emphasis on fermentation isn’t solely driven by flavor; a core tenet is recognizing the profound health benefits inherent in these age-old processes. Fermented foods, like kimchi and sauerkraut, are celebrated for their ability to support a thriving gut microbiome, a crucial element of overall well-being.

The restaurant champions the idea that a diverse gut flora enhances nutrient absorption, strengthens the immune system, and even influences mental health. David Zilber consistently highlights the importance of incorporating fermented foods into daily diets, viewing them as preventative medicine.

Noma’s research delves into the specific microbial strains present in their ferments, aiming to maximize their probiotic potential. They believe that carefully crafted ferments can contribute to a more resilient and balanced internal ecosystem, promoting long-term health and vitality.

Gut Microbiome & Fermentation

Noma’s exploration of fermentation is deeply intertwined with understanding the gut microbiome – the complex community of microorganisms residing in our digestive system. They view fermentation not just as a culinary technique, but as a method of cultivating beneficial bacteria that positively impact gut health.

David Zilber and the Noma team meticulously study how different fermentation processes affect the composition of microbial cultures. They aim to create ferments rich in diverse strains, fostering a balanced and resilient gut environment.

The restaurant’s approach emphasizes that a healthy gut microbiome is foundational for overall well-being, influencing everything from immunity and digestion to mental health. By consuming fermented foods, individuals can actively nourish and diversify their gut flora, promoting a stronger and more balanced internal ecosystem, mirroring Noma’s philosophy.

Boosting Immunity Through Fermented Foods

Noma’s dedication to fermentation extends beyond flavor; it’s rooted in the understanding that fermented foods are potent immune system boosters. The process of fermentation generates probiotics – live microorganisms – which play a crucial role in strengthening the body’s natural defenses.

These probiotics contribute to a healthier gut microbiome, and approximately 70% of the immune system resides within the gut. By regularly incorporating fermented foods, like those inspired by Noma’s techniques, individuals can enhance their immune response and resilience.

David Zilber’s work highlights how specific fermentation methods can cultivate strains of bacteria known to modulate immune function. This proactive approach to health, championed by Noma, emphasizes the power of food as medicine, offering a delicious and natural way to fortify the body’s defenses.

Troubleshooting Common Fermentation Issues

Even with meticulous attention to detail, fermentation can present challenges. Identifying issues early is key, and Noma’s approach emphasizes careful observation. A common concern is differentiating between harmless kahm yeast – a white, film-like growth – and undesirable mold, which can be fuzzy and colored.

Spoilage can occur due to insufficient salt concentration, improper temperature control, or contamination. Maintaining anaerobic conditions is vital, often achieved through using airlocks or submerged weights. Addressing these factors promptly prevents unwanted bacterial growth.

David Zilber’s expertise stresses the importance of understanding the specific microbial environment of each ferment. If off-flavors or unusual textures develop, adjusting salinity, temperature, or fermentation duration can often rectify the problem. Thorough sanitation of equipment remains paramount for successful fermentation.

Mold vs. Kahm Yeast: Identifying the Difference

Distinguishing between kahm yeast and mold is crucial for safe fermentation. Kahm yeast appears as a harmless, white, film-like growth on the surface of ferments, often occurring when exposed to air. It’s generally benign, though it can impart a slightly off-flavor, and can be scraped off.

Mold, conversely, presents a more serious concern. It’s typically fuzzy, and can be various colors – black, green, blue, or pink. Mold indicates contamination and the ferment should be discarded entirely to avoid potential health risks.

Noma’s meticulous standards emphasize preventative measures, like maintaining proper brine levels and anaerobic environments, to minimize mold growth. Careful observation and understanding these visual differences, as championed by David Zilber, are essential skills for any fermenter.

Preventing Spoilage & Ensuring Safety

Maintaining a safe fermentation environment, as practiced at Noma, hinges on several key principles. Strict hygiene is paramount – sterilize equipment thoroughly before use. Maintaining appropriate salt concentrations in brines inhibits undesirable microbial growth, favoring beneficial bacteria.

Anaerobic conditions are vital; submerge vegetables completely in liquid, using weights if necessary, to prevent oxygen exposure and mold development. Regularly “burp” ferments to release built-up gases, preventing pressure build-up and potential explosions.

David Zilber emphasized consistent monitoring for off-odors or unusual textures. Trust your senses – if something seems amiss, discard it. Proper storage, typically refrigeration, slows down fermentation and extends shelf life, ensuring a safe and delicious final product.

The Future of Fermentation: Noma & Novonesis Collaboration

Noma’s partnership with Novonesis, a global biosolutions leader, marks a pivotal moment in fermentation’s evolution. This collaboration isn’t merely about replicating existing techniques; it’s about fundamentally understanding and optimizing the microbial processes at the heart of flavor development.

Novonesis’s expertise in enzyme technology and microbial strain development complements Noma’s culinary innovation, promising breakthroughs in areas like garum production and koji cultivation. The goal is to unlock new flavor profiles and enhance the efficiency of fermentation processes.

This synergy aims to make advanced fermentation accessible beyond high-end restaurants, potentially revolutionizing food production and sustainability. It represents a fusion of culinary artistry and scientific rigor, shaping the future of taste and food systems.

Fermentation in Modern Cuisine

Noma significantly propelled fermentation into the forefront of modern gastronomy, shifting it from a traditional preservation method to a celebrated culinary technique. This influence extends far beyond its Copenhagen kitchen, inspiring chefs globally to explore the depth and complexity of flavor achievable through microbial transformation.

The restaurant’s emphasis on lacto-fermentation, koji, and unique garums demonstrated the potential to create entirely new taste sensations, moving beyond simple sourness or funk. This sparked a wave of experimentation, with chefs incorporating fermented ingredients into diverse dishes.

Today, fermentation is no longer a niche practice but a core element of innovative cuisine, valued for its ability to enhance umami, texture, and nutritional value; Noma’s legacy continues to shape how chefs approach flavor and sustainability.

Resources & Further Reading on Fermentation

For a deeper understanding of Noma’s fermentation philosophy, explore “The Noma Guide to Fermentation” itself – a comprehensive resource detailing their techniques and principles. Sandor Katz’s “The Art of Fermentation” remains a foundational text, offering a broad overview of global fermentation practices.

“Our Fermented Lives: A History of How Fermentation Has Shaped Cultures and Communities” provides valuable cultural context, illuminating the historical significance of fermentation. Online resources, like websites dedicated to fermentation and food preservation, offer practical guidance and troubleshooting tips.

Stay updated with articles from publications like the BBC Food Programme and The Guardian, which frequently feature insights from fermentation experts like David Zilber. Exploring these resources will empower you to confidently embark on your own fermentation journey.

judgement trophy guide

Judgment Trophy Guide: A Comprehensive Roadmap

Judgment’s trophy list presents a 98-hour journey, leaning towards achievable, with 47 trophies—one platinum, four gold, four silver, and thirty-eight bronze awards.

This guide details navigating the story, side cases, mini-games, combat, and exploration for a complete platinum experience on PS5 and PS4.

Judgment’s trophy list comprises 47 trophies, offering a substantial but attainable completion challenge. Players aiming for the platinum will encounter a mix of story-related progression, demanding mini-game mastery, and thorough exploration requirements. The difficulty is generally rated a 6/10, primarily due to the skill needed for Puyo Puyo and Drone Race challenges.

The list includes one coveted platinum trophy, alongside four gold, four silver, and a significant number of thirty-eight bronze awards. Careful attention to missable trophies during story progression is crucial, as replaying sections can be time-consuming. This roadmap will guide you through each trophy, ensuring a smooth path to 100% completion within approximately 98 hours of gameplay.

Estimated Platinum Difficulty & Completion Time

Judgment’s platinum trophy is considered moderately challenging, landing around a 6/10 difficulty rating. The primary hurdles lie within the mini-games, specifically Puyo Puyo and the Drone Races, demanding considerable practice and skill. While combat isn’t overly punishing, mastering fighting styles and Heat Actions adds to the overall challenge.

Expect to dedicate approximately 98 hours to achieve full completion. This estimate accounts for story completion, side case investigations, mini-game mastery, and thorough exploration of Kamurocho. Players prioritizing efficiency can potentially reduce this time, but a relaxed and comprehensive approach is recommended to avoid missing crucial trophies or content.

Trophy Breakdown: Platinum, Gold, Silver, Bronze

Judgment boasts a total of 47 trophies, categorized to reflect the game’s diverse challenges. The coveted Platinum trophy signifies complete mastery. Four Gold trophies are awarded for significant story progression and achievements, representing key milestones in Yagami’s investigation. Four Silver trophies acknowledge substantial accomplishments within side cases and gameplay mechanics.

The bulk of the trophy list comprises 38 Bronze trophies, earned through chapter completions, uncovering secrets, mastering mini-games, and engaging with the intricacies of Kamurocho. These trophies encourage thorough exploration and participation in all aspects of the game, rewarding players for their dedication and attention to detail.

Missable Trophies: Story Progression Focus

Judgment contains several missable trophies, demanding careful attention during story progression. Prioritizing these early on is crucial to avoid repeat playthroughs. Focus on completing all available side cases, as some trophies are tied to specific, time-sensitive investigations. Dialogue choices can also impact trophy eligibility, so consider consulting a guide for optimal outcomes.

Pay close attention to opportunities within chapters 2, 4, 6, and 8, as certain actions or discoveries within these sections are easily overlooked. Thoroughly explore each area and exhaust all conversation options to ensure no opportunities are missed. A strategic approach to the narrative is key to securing all trophies.

Story-Related Trophies

Judgment’s narrative progression unlocks trophies upon completing chapters 2, 4, 6, and 8, alongside key story moments and specific dialogue choices made throughout.

Chapter Completion Trophies (Chapters 2, 4, 6, 8)

Judgment rewards players with bronze trophies for successfully navigating pivotal chapters within its compelling storyline. Specifically, completing Chapter 2, “The Key to the City,” grants the corresponding trophy. Progressing further, finishing Chapter 4, “A Darker Shade of Black,” unlocks another milestone achievement.

The narrative continues to offer recognition; completing Chapter 6, “An Empty Room,” adds to your collection, and finally, reaching the climax with Chapter 8, “Blowing the Lid Off,” secures the final chapter-related trophy. These trophies are automatically earned through natural story progression, ensuring players are acknowledged for their dedication to unraveling the mysteries of Kamurocho.

Key Story Moments & Dialogue Choices

Judgment’s narrative is rich with impactful moments, though most trophies aren’t directly tied to specific dialogue choices. However, paying attention during key scenes is crucial for understanding the story and avoiding potential roadblocks. One notable instance involves obtaining the “Professional Password Presenter” bronze trophy, requiring players to correctly guess the password on the first attempt.

While the game generally allows for flexibility in conversations, being mindful of character interactions and investigation sequences can streamline your progress. Focus on thorough investigations and attentive listening during cutscenes to ensure you don’t miss vital clues or opportunities that could indirectly impact trophy acquisition.

Side Case Trophies

Judgment features numerous side cases; completing specific ones unlocks trophies, while others remain hidden, demanding diligent exploration of Kamurocho to uncover them.

Completing Specific Side Cases

Several side cases directly contribute to trophy progression in Judgment. For instance, retrieving the money from the “Horseplayer Detective” case is a bronze trophy requirement. Successfully navigating and resolving cases like these is crucial for completionists.

Focusing on completing these designated side cases alongside the main story streamlines the platinum run. Remember to thoroughly investigate each case, gather evidence, and make informed decisions during investigations. Don’t overlook seemingly minor details, as they often hold the key to unlocking the associated trophy.

Prioritizing these specific cases ensures efficient trophy hunting, minimizing backtracking and maximizing progress towards the coveted platinum reward. Careful attention to detail and diligent investigation are paramount.

Unlocking Hidden Side Cases

Judgment features hidden side cases that aren’t immediately apparent, requiring specific actions to unlock. These often involve progressing through the main story and interacting with certain NPCs at specific times. Diligent exploration of Kamurocho and attentive listening to character dialogue are key to discovering these opportunities.

Pay close attention to rumors and whispers around town, as they frequently hint at the existence of these concealed cases. Completing these hidden cases contributes significantly to the overall trophy completion rate. Don’t hesitate to revisit locations and speak to characters multiple times, as triggers can be time-sensitive.

Unlocking these adds depth to the experience and provides additional challenges for dedicated players seeking the platinum trophy.

Mini-Game Trophies

Judgment’s mini-games—Drone Races, Puyo Puyo, and Mahjong—present unique trophy challenges demanding skill and patience for dedicated platinum hunters.

Drone Race Challenges

Judgment’s drone races are notoriously challenging, requiring precise control and memorization of each course’s layout. Several trophies are tied directly to completing these races under specific conditions, adding to the difficulty.

Players must master the drone’s handling, utilizing boosts strategically and navigating tight corners effectively. Expect to replay courses multiple times to achieve the necessary times for trophy unlocks. Some races demand flawless execution, while others require collecting all the beacons scattered throughout the course.

Practice is key, and utilizing the practice mode to familiarize yourself with each track is highly recommended. Don’t be discouraged by initial failures; persistence will ultimately lead to success in conquering these aerial challenges.

Puyo Puyo Mastery

Judgment’s inclusion of Puyo Puyo as a fully-fledged mini-game presents a significant hurdle for trophy hunters. Achieving mastery requires understanding the game’s mechanics, including chain building, garbage manipulation, and counter strategies. Several trophies demand proficiency at various Puyo Puyo modes.

Expect a steep learning curve, as Puyo Puyo is a fast-paced and competitive puzzle game. Practice against the AI opponents to hone your skills and learn advanced techniques. Mastering specific challenges, like clearing a certain number of Puyos in a single chain, is crucial for unlocking related trophies.

Patience and dedication are essential for overcoming this challenging aspect of the game.

Mahjong & Other Mini-Games

Beyond Puyo Puyo, Judgment features a variety of mini-games that contribute to trophy completion. Mahjong, in particular, has dedicated trophies requiring specific hands and victories. Understanding the rules and scoring of Mahjong is vital, demanding strategic tile collection and discarding.

Other mini-games, while less demanding, often have associated trophies for simply participating or achieving modest scores. These provide welcome breaks from the main story and more challenging pursuits. Don’t overlook these seemingly simple diversions, as they collectively add to the overall platinum progress.

Consistent engagement with all mini-games is recommended for a smoother trophy hunting experience.

Combat & Skill-Based Trophies

Judgment’s combat trophies demand mastering fighting styles, effectively utilizing Heat Actions, and skillfully executing EX Skills throughout encounters for progression.

Mastering Fighting Styles

Judgment features multiple fighting styles – Crane, Tiger, and Leopard – each crucial for both story progression and trophy acquisition. Players must become proficient with each style, understanding their strengths and weaknesses to effectively counter diverse enemy types.

Experimentation is key; don’t rely solely on one style. Certain encounters demand specific approaches, forcing adaptation. Mastering each style unlocks unique skills and combos, enhancing combat fluidity and efficiency. Focus on learning the timing for perfect blocks and counters, as these are vital for minimizing damage and maximizing offensive opportunities.

Successfully utilizing each style in numerous battles is essential for unlocking related trophies, demanding a comprehensive understanding of Yagami’s martial prowess.

Heat Actions & EX Skills

Judgment’s combat system revolves around building Heat, enabling powerful Heat Actions and EX Skills. Heat accumulates by successfully landing attacks and skillfully dodging enemy strikes. Mastering Heat management is paramount for maximizing damage output and controlling the battlefield.

Heat Actions are context-sensitive, triggered by specific environmental interactions or enemy vulnerabilities. EX Skills are unique, style-specific abilities that consume Heat, offering devastating attacks or tactical advantages. Experiment with different EX Skills to discover those best suited to your playstyle.

Several trophies require utilizing Heat Actions and EX Skills effectively, demanding strategic Heat accumulation and precise execution during combat encounters.

Exploration & Collection Trophies

Judgment rewards thorough exploration of Kamurocho with hidden items to find. Collecting these, alongside diligent searching, unlocks several bronze trophies for completionists.

Finding Hidden Items

Judgment features a wealth of hidden items scattered throughout Kamurocho, contributing significantly to trophy completion. These collectibles aren’t always immediately obvious, often requiring players to meticulously explore every nook and cranny of the city. Look for unusual objects or areas that seem out of place, as these frequently conceal valuable finds.

Many hidden items are tied to specific side cases, incentivizing players to fully engage with the game’s optional content. Others are simply placed in the environment, demanding keen observation skills. Utilizing the game’s detective mode can sometimes highlight interactive elements, hinting at the presence of hidden objects. Remember to check behind buildings, in alleyways, and even on rooftops for these elusive treasures.

Successfully locating and collecting these hidden items unlocks corresponding bronze trophies, adding a rewarding layer to the exploration aspect of Judgment.

Kamurocho Exploration

Judgment’s richly detailed recreation of Kamurocho is a character in itself, and thorough exploration is crucial for trophy hunters. Beyond the main story and side cases, the district is brimming with secrets, mini-games, and opportunities for interaction. Don’t hesitate to deviate from the marked paths and wander through the vibrant streets.

Pay attention to the environment; Kamurocho is filled with quirky details and hidden areas. Talking to NPCs can unlock side content or provide clues to hidden items. Participating in street performers’ acts and engaging with the local businesses adds to the immersive experience and can contribute to trophy progress.

Effective exploration is key to uncovering everything Judgment has to offer, ensuring no collectible or opportunity is missed on your path to platinum.

Useful Tips & Strategies

Judgment benefits from strategic difficulty settings and exploiting game mechanics. Prioritize story-related missables early, and prepare for Puyo Puyo and drone races!

Difficulty Settings & Their Impact

Judgment offers multiple difficulty settings, significantly impacting combat encounters and overall gameplay experience. While the platinum trophy doesn’t inherently require a specific difficulty, playing on easier settings can streamline the combat-focused trophies, allowing players to focus on mastering fighting styles and Heat Actions.

However, choosing a higher difficulty can provide a more challenging and rewarding experience for seasoned players. The game’s combat system is robust, and mastering it on a harder setting can enhance the satisfaction of earning combat-related trophies. Ultimately, selecting a difficulty that aligns with your skill level and preferred playstyle is crucial for an enjoyable trophy hunting journey.

Remember to consider the time investment required for each difficulty level when making your decision.

Exploiting Game Mechanics

Judgment, like many Yakuza titles, offers certain mechanics that can be exploited to ease trophy hunting. While not essential, understanding these can save considerable time and frustration. For instance, certain side cases and mini-games, like Puyo Puyo and Drone Races, can be particularly challenging.

Players have discovered strategies to mitigate difficulty in these areas, such as utilizing specific character builds or exploiting AI patterns. Similarly, understanding the game’s save system allows for strategic reloading to optimize dialogue choices for specific trophy requirements.

However, remember that relying too heavily on exploits can diminish the overall enjoyment of the game; use them judiciously!

youth shirt size guide

Youth Shirt Size Guide: A Comprehensive Overview (Updated 12/16/2025)

Navigating youth apparel sizing can be tricky! This guide offers detailed insights, covering everything from infant sizes to brand-specific charts,
and online resources.

Explore 180+ stock illustrations for visual aid, and ensure a perfect fit for growing children with our comprehensive approach to shirt sizing.

Understanding Youth Sizing Differences

Youth sizing isn’t simply a scaled-down version of adult measurements. Significant differences exist due to the proportional variations in children’s bodies as they grow.

Unlike adults, where size often correlates with height and weight, youth sizes are more nuanced. A child’s chest circumference and shoulder width are crucial determinants, often differing significantly between age groups. Infant and toddler sizing focuses heavily on length to accommodate diaper needs and varying torso proportions.

Furthermore, the transition between size categories (Infant to Toddler, Toddler to Youth) isn’t always linear. A child might fit within the height range for a larger size but require a smaller size based on chest measurement. This is where understanding specific brand charts becomes vital, as consistency isn’t guaranteed across manufacturers.

Considering these factors ensures a comfortable and appropriately fitted garment, avoiding issues like restricted movement or an ill-fitting appearance.

Why Youth Sizes Matter

Properly sized youth apparel is crucial for comfort, safety, and a child’s overall well-being. Ill-fitting clothing can restrict movement, hindering physical activity and play. Overly large shirts pose a tripping hazard, while excessively tight garments can cause discomfort and skin irritation.

Beyond physical considerations, appropriate sizing contributes to a child’s self-esteem and confidence. Clothes that fit well allow children to participate fully in activities without feeling self-conscious. Selecting the correct size also ensures garments maintain their intended shape and appearance, extending their lifespan.

Furthermore, accurate sizing is essential when purchasing online, where trying on isn’t possible. Utilizing size charts and understanding brand variations minimizes the risk of returns and exchanges, saving time and money. Prioritizing youth sizes demonstrates a commitment to a child’s comfort and positive experience.

Standard Youth Size Categories

Youth shirt sizing generally breaks down into three primary categories: Infant & Toddler, Toddler, and Youth. Infant & Toddler sizes (0-2T) are based on age and weight, focusing on comfort and ease of diaper changes. These sizes often utilize onesies or snap closures for convenience.

Toddler sizes (2T-5T) accommodate increasingly active children, with a slightly looser fit to allow for movement. These shirts typically feature wider necklines for easier on and off. Youth sizes (XS-XL) align more closely with adult sizing, but are proportionally smaller.

Within each category, sizes increase incrementally. It’s important to note that these are general guidelines; variations exist between brands. Understanding these categories provides a foundational framework for navigating the world of youth apparel sizing and finding the best fit.

Infant & Toddler Sizes (0-2T)

Infant and toddler sizing (0-2T) prioritizes comfort and practicality for the youngest wearers. These sizes are typically categorized by age – Newborn, 6 months, 12 months, 18 months, and 2T – but weight is a crucial factor. Manufacturers consider average weight ranges for each age bracket.

Expect features like envelope shoulders and snap closures at the crotch for effortless diaper access and changing. Shirts in this range are often made from soft, breathable materials like cotton to prevent skin irritation. Sizing can vary significantly between brands, so always consult specific size charts.

Focus on a comfortable, non-restrictive fit, allowing room for growth. Avoid overly tight clothing that could limit movement or cause discomfort. Remember, these little ones grow quickly!

Toddler Sizes (2T-5T)

Toddler sizes (2T-5T) bridge the gap between infant wear and youth clothing, offering more standardized sizing but still requiring careful consideration. These sizes generally correspond to ages two through five, but, like infant sizing, weight and height are paramount. Expect a wider range of styles and designs as toddlers develop their preferences.

Shirts in this category often feature larger necklines for easier on-and-off access, as toddlers are gaining independence. Durability is key, as active toddlers put their clothes through rigorous testing! Look for reinforced seams and fabrics that can withstand frequent washing.

Prioritize comfort and freedom of movement. A slightly looser fit is generally preferred, allowing for layering and active play. Always check brand-specific size charts for the most accurate fit.

Youth Sizes (XS-XL)

Youth sizes, typically ranging from XS to XL, are designed for children who have outgrown toddler wear, generally fitting ages 6-14, though this varies significantly. These sizes begin to align more closely with adult sizing conventions, but crucial differences remain. Expect a greater variety of styles mirroring current fashion trends.

Unlike toddler sizes, youth sizing often considers both height and chest measurements more precisely. A growth spurt can quickly render a perfectly fitting shirt too small, so regular checks are essential. Pay attention to sleeve length, as this is a common area for fit issues.

Consider the child’s build – a slim child may need a smaller size than a more robust one, even at the same height. Brand consistency is still a factor, so consulting size charts is vital.

Key Measurements for Accurate Sizing

Achieving the right fit hinges on accurate measurements. Don’t rely solely on age, as children develop at different rates. Three key measurements are crucial: chest, height, and weight. Chest measurement is taken around the fullest part of the chest, under the arms, keeping the tape measure level.

Height measurement should be taken from the top of the head to the floor, wearing no shoes. Weight considerations, while less precise, can help narrow down size options, especially when combined with height and chest measurements.

Record these measurements before shopping, and always compare them to the specific brand’s size chart. Remember to allow for growth – a slightly looser fit is preferable to one that’s too tight!

Chest Measurement

The chest measurement is arguably the most important factor when determining youth shirt size. To obtain an accurate reading, have the child comfortably stand with their arms relaxed at their sides. Wrap the measuring tape around the fullest part of their chest, ensuring it passes under the armpits and remains level across the back.

Avoid pulling the tape too tightly, or leaving it too loose – a snug, but not constricting, fit is ideal. Record the measurement in inches or centimeters, and round up to the nearest whole number if necessary.

Compare this measurement directly to the chest size listed on the brand’s size chart. Remember that different brands may have varying chest measurements for the same youth size!

Height Measurement

Height is a crucial secondary measurement, often used in conjunction with chest size to refine shirt size selection. Have the child stand straight against a wall, without shoes, and measure from the top of their head to the floor. Ensure the measurement is taken accurately, using a ruler or measuring tape held firmly against the wall.

Record the height in inches or centimeters. Many size charts categorize sizes based on height ranges, providing a helpful guideline. However, height alone isn’t always definitive, as children of the same height can have different builds.

Always cross-reference the height measurement with the chest measurement and weight considerations for a more precise fit. Utilize brand-specific charts, as height ranges can vary significantly between manufacturers.

Weight Considerations

While not the primary sizing factor, a child’s weight offers valuable insight, especially when combined with chest and height measurements. It helps differentiate between children with similar height and chest sizes but differing builds.

Record the child’s weight in pounds or kilograms. Many size charts include weight ranges for each size category, acting as a secondary confirmation tool. However, remember that weight can fluctuate, and body composition varies greatly.

Don’t solely rely on weight for sizing; it’s best used as a supporting data point. A child might be at the higher end of a weight range but have a broader chest, necessitating a larger size. Always prioritize chest and height measurements, and consult brand-specific charts for the most accurate fit.

Brand-to-Brand Variations in Youth Sizing

Youth shirt sizing isn’t standardized; significant variations exist between brands. What constitutes a “Youth Medium” in one brand can fit differently in another. This inconsistency stems from differing cut styles, fabric types, and target demographics.

Always consult the specific brand’s size chart before making a purchase. Generic size charts offer a starting point, but brand-specific charts provide the most accurate information. Pay attention to detailed measurements like chest width and garment length.

Consider customer reviews. Other shoppers often share their experiences with a brand’s sizing, offering valuable insights into whether the sizes run small, large, or true to size. Utilizing multiple sources ensures a better fit and reduces the likelihood of returns.

Comparing Common Youth Shirt Brands

Understanding differences between popular brands is crucial. Gildan youth shirts generally run a bit larger, offering a more relaxed fit, making them suitable for layering or comfort. Their size charts are readily available online, detailing chest and height measurements.

Hanes youth shirts tend to be more true to size, with a classic fit. They are a reliable choice for everyday wear, and their sizing is consistent across most styles. Check their website for detailed size guides.

Next Level Apparel youth shirts are known for their softer fabrics and more modern, fitted styles. These often run slightly smaller, so consider sizing up, especially for growing children. Their size charts emphasize garment measurements for accurate selection.

Gildan Youth Size Chart

Gildan’s youth sizing typically spans from XS to XL, catering to a broad age range. Their XS generally fits chest sizes 24-26 inches and heights 28-30 inches, ideal for smaller children. Moving up, the Youth S accommodates 26-28 inch chests and 30-32 inch heights.

Youth M fits chests of 28-30 inches and heights of 32-34 inches, a common size for ages 8-10. The Youth L is designed for 30-32 inch chests and 34-36 inch heights, while the Youth XL fits 32-34 inch chests and 36-38 inch heights.

It’s important to note that Gildan shirts often have a slightly generous cut, so consider this when choosing a size. Always refer to the official Gildan size chart on their website for the most accurate measurements and to avoid returns.

Hanes Youth Size Chart

Hanes youth shirts generally follow a similar XS-XL sizing structure, but with subtle differences compared to Gildan. Hanes’ Youth XS typically fits chest measurements between 24-26 inches and heights of 28-30 inches, suitable for younger children.

The Youth S accommodates chests of 26-28 inches and heights of 30-32 inches, while Youth M is designed for 28-30 inch chests and 32-34 inch heights; For older children, Youth L fits 30-32 inch chests and 34-36 inch heights.

Hanes Youth XL is tailored for 32-34 inch chests and 36-38 inch heights. Hanes shirts are known for their comfortable fit, but it’s still crucial to consult their official size chart. Variations can occur, so precise measurements are key to ensuring a proper fit and minimizing exchanges.

Next Level Apparel Youth Size Chart

Next Level Apparel (NLA) youth shirts are often favored for their softer fabrics and modern fits. Their sizing tends to run slightly slimmer than brands like Gildan or Hanes, so consider this when selecting a size;

NLA’s Youth S generally fits chests ranging from 26-28 inches, with a height recommendation of 48-52 inches. Youth M accommodates chests of 28-30 inches and heights of 52-56 inches. For larger children, Youth L fits chests of 30-32 inches and heights of 56-60 inches.

The Youth XL is designed for chests of 32-34 inches and heights of 60-64 inches. Always refer to NLA’s official size chart, as their cuts and materials can influence the fit. Prioritizing accurate chest and height measurements will help ensure a comfortable and stylish look.

Converting Youth Sizes to Adult Sizes

Converting youth shirt sizes to adult sizes isn’t always straightforward, as brand sizing varies considerably. However, a general guideline can be helpful when a direct adult equivalent is needed.

Typically, a Youth XL corresponds roughly to an Adult Small, but this is dependent on the brand’s specific cut and measurements. A Youth L often aligns with an Adult XS or a smaller Adult Small. Conversely, a Youth M might be comparable to an Adult XS, but again, check the size charts.

It’s crucial to prioritize chest and length measurements when making this conversion. Don’t solely rely on the size label; always compare the garment’s dimensions to the adult size chart. When in doubt, sizing up is generally recommended for a more comfortable fit.

Dealing with In-Between Sizes

Encountering in-between sizes is common when shopping for youth shirts. A child measuring between sizes requires careful consideration to ensure a comfortable and well-fitting garment. Sizing up is generally the preferred approach, offering room for growth and preventing immediate sizing out.

However, consider the shirt’s style and intended use. For a slimmer fit, or if the child is already nearing the upper end of the measurement range, sticking with the smaller size might be appropriate. Pay close attention to the chest and length measurements, prioritizing the larger measurement if there’s a significant difference.

Checking brand-specific size charts is vital, as variations exist. Read customer reviews for insights into how a particular brand runs – larger or smaller than expected. Ultimately, a slightly looser fit is often more practical than one that’s too snug.

Tips for Measuring a Child for a Shirt

Accurate measurements are key to finding the right youth shirt size! Have the child stand naturally, relaxed and upright. Use a flexible measuring tape, not a metal one. Measure chest circumference at the fullest part of the chest, keeping the tape level and snug, but not tight.

For height, measure from the top of the head to the feet, again while standing straight. Avoid distractions during measurement to ensure accuracy. It’s helpful to have a second person assist, especially with younger children.

Record measurements immediately to avoid forgetting. Measure twice to confirm accuracy. Remember to account for layering if the shirt will be worn over other clothing. Compare these measurements to the brand’s specific size chart for the best fit.

Online Size Charts & Resources

Numerous online resources simplify youth shirt sizing! Many major retailers, like Amazon and Target, provide detailed size charts directly on their product pages. Brand websites – Gildan, Hanes, and Next Level Apparel – offer comprehensive charts specific to their garments.

Dedicated sizing websites compile charts from various brands, offering convenient comparisons. Search for “youth shirt size chart” to discover these resources. Visual guides and printable charts are also readily available online, aiding in accurate measurement.

Remember to verify the date of the size chart, as sizing can change. Utilize these resources alongside our guide for a confident purchase. Explore stock image sites for visual references, and consider WhatsApp Web for sharing sizing information with family.

Understanding Shirt Fit: Regular, Slim, and Relaxed

Shirt fit significantly impacts comfort and appearance. Regular fit offers a classic, comfortable cut with ample room for movement – a versatile choice for everyday wear. Slim fit provides a more tailored silhouette, hugging the body closer for a modern look, often preferred by older youth.

Relaxed fit prioritizes maximum comfort, featuring a looser, more generous cut. This style is ideal for active children or those who prefer a less restrictive feel. Consider the child’s preference and activity level when selecting a fit.

Brand variations exist; always check specific product descriptions. Visual aids, like stock images, can demonstrate fit differences. Remember WhatsApp Web for quick consultations with family regarding preferred styles!

Material & Shrinkage Considerations

Fabric composition dramatically affects sizing and longevity. 100% cotton shirts are prone to shrinkage, especially after the first wash, so consider sizing up. Blends like cotton-polyester offer greater stability and resist shrinking significantly.

Pre-shrunk fabrics minimize this issue, but always check the care label. Delicate materials like rayon require gentle washing to maintain their shape and size. Always follow washing instructions to prevent unwanted alterations.

Consider the child’s activity level; more active children may benefit from durable, shrink-resistant fabrics. Explore stock illustrations for fabric texture visualization. Utilize WhatsApp Web to share care label information with caregivers!

Return Policies & Exchanges for Youth Shirts

Understanding return policies is crucial when purchasing youth shirts online or in-store. Many retailers offer a specific timeframe – typically 14 to 30 days – for returns or exchanges, often requiring original tags and proof of purchase.

Check if the policy covers worn items, as some only accept unworn, unwashed shirts. Online purchases may require you to cover return shipping costs, while in-store returns are usually free. Pay attention to final sale items, which are often non-returnable.

Explore retailer websites for detailed policies and consider using WhatsApp Web to quickly share policy links with family. Stock illustrations can visually represent return process steps. Knowing your rights ensures a smooth experience!

Finding the Right Size for Different Body Types

Youth bodies vary greatly, so relying solely on age isn’t enough. Consider a child’s build – are they slender, average, or more robust? For athletic builds, a slightly larger size might allow for movement. For fuller figures, prioritize chest and shoulder measurements.

Pay attention to length; a longer shirt may be preferred for comfort. Don’t hesitate to size up if a child is between sizes, especially if the shirt is a standard fit. Utilize online size charts as a starting point, but always prioritize accurate measurements.

Remember, stock illustrations can’t account for individual variations. Communicate with your child about fit preferences and leverage WhatsApp Web for quick feedback during online shopping!

Where to Find Reliable Youth Size Charts Online

Numerous online resources offer youth shirt size charts, but reliability varies. Brand websites (Gildan, Hanes, Next Level Apparel) are excellent starting points, providing specific measurements for their products. Retailer websites like Amazon and Target often include size charts, but double-check for accuracy.

Dedicated sizing websites compile charts from various brands, offering convenient comparisons. Search for “youth shirt size chart” on Google or Pinterest for visual guides and helpful articles. Be cautious of generic charts lacking brand specificity.

Utilize WhatsApp Web to share charts with family during collaborative shopping. Remember, 180+ stock illustrations are available for visual reference, but accurate measurements remain key!