WoW Cataclysm Classic Cooking Guide: Leveling 1-525
Welcome, aspiring chef! This comprehensive guide details leveling Cooking from 1-525 in WoW Cataclysm Classic, offering efficient strategies and recipe insights for success.
Cataclysm brought significant changes to Cooking in World of Warcraft, introducing new recipes, ingredients, and specializations. This revamped system offers players diverse options for creating powerful consumables. Leveling Cooking provides valuable benefits, including self-sufficiency, gold-making opportunities, and raid/PvP advantages through stat-boosting foods.
Unlike previous expansions, Cata emphasizes specialization, allowing chefs to focus on specific culinary styles. Mastering Cooking requires gathering ingredients from various zones, utilizing daily quests, and potentially participating in events like the Darkmoon Faire. This guide will navigate you through the process, ensuring a smooth and rewarding experience as you become a Cataclysm culinary master.
Why Level Cooking in Cata Classic?
Leveling Cooking in Cataclysm Classic offers substantial advantages beyond simply creating food. It’s a profitable profession, allowing players to sell consumables on the Auction House, generating significant gold. Furthermore, skilled cooks can craft powerful stat-boosting meals crucial for raiding and PvP combat, enhancing performance.
Combining Cooking with Fishing is highly recommended, as many recipes require fish, creating a synergistic leveling experience. Cooking also provides self-sufficiency, reducing reliance on external food sources. Don’t overlook Darkmoon Faire quests, offering unique recipes and rewards. Ultimately, mastering Cataclysm Cooking is a worthwhile investment for any dedicated player.
Essential Cooking Tools & Equipment
Essential tools for a budding Cataclysm Classic cook are surprisingly minimal. Initially, all you truly need is a Cooking skill and access to a fire source – though a proper cooking station is highly recommended for convenience. As you progress, acquiring the Expert Cookbook and later the Artisan Cookbook unlocks new recipes.
While not strictly required, a Fishing skill significantly aids ingredient gathering. Consider investing in fishing gear to improve your catch rate. Remember, higher skill levels unlock access to better recipes, so prioritize skill increases. Finally, a spacious bank is crucial for storing the vast array of ingredients you’ll accumulate!
Leveling Cooking 1-75: Early Game Recipes
Begin your culinary journey with simple meals and fish feasts! Focus on readily available ingredients in the Northern Barrens and Durotar to quickly reach 75 skill.
Gathering Ingredients: Northern Barrens & Durotar
Early leveling focuses on easily accessible ingredients within the Northern Barrens and Durotar. Hunters and gatherers will find plentiful boar and mutton in the Barrens, crucial for basic recipes. Durotar offers abundant fish – specifically, Small and Large Sardines – perfect for quick skill gains.
Prioritize gathering these resources as you quest; it minimizes travel time. Vendors in these zones also sell some necessary ingredients, though farming is more cost-effective. Remember to check your inventory frequently to avoid carrying excessive weight. Efficient ingredient gathering is key to a smooth start in Cataclysm Classic cooking!
Key Recipes: Simple Meals & Fish Feasts
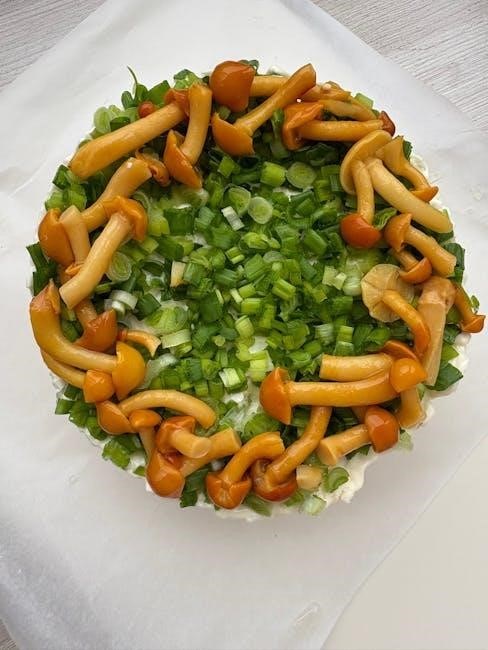
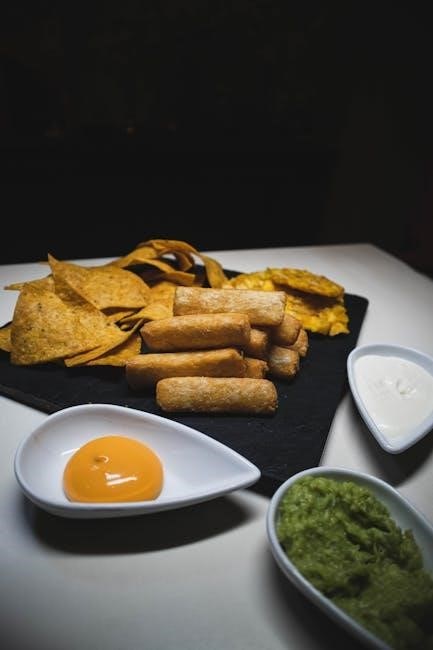
Focus on recipes utilizing readily available ingredients. Simple Meals, crafted from boar and mutton, provide initial skill-ups. Fish Feasts, using sardines, are exceptionally efficient for levels 1-50. Cooked Fish, while basic, offers consistent gains.
Prioritize recipes with high success rates to avoid wasting ingredients. Experiment with different fish types as you progress. Remember, consistent cooking, even with simple recipes, is faster than infrequent attempts at complex dishes. These early recipes lay the foundation for your Cataclysm Classic cooking journey!
Utilizing Cooking Dailies & Events
Maximize your skill gains by participating in available Cooking dailies. These quests often reward substantial skill points and valuable recipes. The Darkmoon Faire, occurring twice monthly, presents unique Cooking quests requiring a minimum skill of 75.
Don’t overlook world events that may offer cooking-related opportunities. Keep an eye out for temporary vendors selling exclusive ingredients or recipes. Completing these activities provides a significant boost and diversifies your culinary knowledge, accelerating your path to 525 Cooking!
Leveling Cooking 75-175: Expanding Your Repertoire
Reach for Expert Cooking at level 20/Cooking 125, purchasing the Expert Cookbook from Wulan in Desolace to unlock new, advanced recipes.
Expert Cooking & The Expert Cookbook
To unlock Expert Cooking, a crucial step in your journey, you must first attain level 20 and elevate your Cooking skill to 125. Once these requirements are met, seek out Wulan, the Horde vendor, located in Desolace at the Shadowprey Village.

She offers the invaluable Expert Cookbook for purchase. Acquiring this cookbook is essential as it unveils a wealth of new recipes, significantly expanding your culinary repertoire and enabling you to progress further in the Cooking profession. This opens doors to more profitable ventures and better consumables. Don’t delay – become an expert!
Ingredient Sources: Thousand Needles & Tanaris
As you advance towards higher Cooking levels, Thousand Needles and Tanaris become vital ingredient hubs. Thousand Needles provides abundant sources of fish, crucial for many recipes, alongside various beasts for meat. Tanaris, a harsh desert landscape, offers unique desert-dwelling creatures and plants.
Expect to farm for items like Desert Dumplings and various seasoned meats. Efficient farming routes are key here. Remember to check the Auction House for potential ingredient purchases, balancing cost versus farming time. These zones are essential for progressing beyond basic recipes and mastering mid-level Cooking.
Recipes for Profit: Early Auction House Opportunities
Early in your Cooking journey, astute players can capitalize on Auction House opportunities. Simple recipes utilizing readily available ingredients often yield a profit margin. Focus on consistently crafted items with stable demand, like basic fish feasts or seasoned meats.
Monitor market prices closely, adjusting your production based on supply and demand. Consider specializing in a niche, such as low-level consumables favored by leveling players. Efficient ingredient gathering and smart pricing are crucial for maximizing profits. This early income can fund further Cooking skill advancement!
Leveling Cooking 175-275: Mid-Game Mastery
Achieve Artisan Cooking and unlock the Artisan Cookbook! Focus on ingredients from desert and jungle regions, crafting consumables for emerging raid content.
Artisan Cooking & The Artisan Cookbook
Reaching Artisan Cooking requires level 20 and a Cooking skill of 175. You’ll then need to purchase the Artisan Cookbook to progress further. For Horde players, Wulan in Desolace (Shadowprey Village) sells this crucial book. Alliance cooks can find it with Lork’han at the Rebel Camp in Desolace.
This cookbook unlocks a wealth of new recipes, allowing you to create more potent and valuable dishes. It’s a significant investment, but essential for maximizing your Cooking skill and profitability. Don’t underestimate the importance of acquiring this book promptly to continue your journey towards Cooking mastery in Cataclysm Classic!
Focus on Desert & Jungle Ingredients
Leveling from 175-275 heavily emphasizes ingredients found in desert and jungle zones. Tanaris and Un’Goro Crater become your primary farming locations. Look for items like Golden Mushrooms, Desert Dumplings, and various types of succulent fish. These ingredients are key to crafting recipes that efficiently boost your skill.
Prioritize gathering these resources while questing in these areas to maximize efficiency. Remember to check the Auction House for competitive pricing, as some ingredients may be cheaper to purchase than farm. Mastering these zones will accelerate your progress towards Artisan Cooking!
Cooking for Raids: Basic Consumables
Reaching Artisan Cooking (275+) unlocks the ability to create essential raid consumables. Focus on recipes providing stat boosts like Spirit, Intellect, and Stamina. These are consistently in demand by raiders preparing for challenging encounters. Simple, yet effective, options include various fish stews and seasoned meats.
Consider the cost of ingredients versus the potential profit margin when deciding what to craft. Regularly check raid forums and guild needs to identify high-demand items. Providing these basic consumables can be a reliable source of gold and reputation within your raiding community!
Leveling Cooking 275-375: Specialization Begins
At 275 skill, Cooking specializations become available, offering unique benefits. Focus on ingredient farming in zones like Un’Goro Crater and the Plaguelands.
Specializations and Their Benefits
Reaching 275 Cooking skill unlocks specializations, dramatically enhancing your culinary abilities. Alchemy specialization boosts potion and flask effects, while Baking improves bread and pastry creation. Brewing enhances ale and beer potency, and Meat specialization increases meat-based food stats.
Choosing a specialization is crucial for maximizing efficiency. Meat is popular for raid consumables, providing significant stat boosts. Alchemy benefits players heavily reliant on potions. Consider your playstyle and needs when selecting a specialization, as it directly impacts the quality and effectiveness of your crafted goods. These choices offer focused progression!
Ingredient Farming: Un’Goro Crater & Western Plaguelands
Un’Goro Crater provides diverse ingredients like Thunder Lizard and Deviate Fish, essential for mid-level recipes. Expect competition from herbalists and skinners, so efficient farming routes are key. Western Plaguelands offers plentiful Gravemold and Bat Guano, crucial for darker, more potent dishes.
Focus on areas with high mob density for faster gathering. Utilize tracking abilities to locate rare ingredients. Remember to clear mobs efficiently to maintain farming speed. These zones offer a balance of accessibility and valuable resources, making them ideal for consistent ingredient supply during this leveling phase.
Advanced Recipes: Stat-Boosting Foods
Leveling beyond 375 unlocks recipes focused on significant stat boosts, vital for raiding and PvP. Focus on acquiring recipes like Blackened Dragonfin, providing Spirit and Intellect, or Spiced Salmon, enhancing Strength and Stamina. These aren’t cheap; ingredient costs rise dramatically.
Prioritize recipes offering desirable stats for your class and playstyle. The Auction House becomes crucial for sourcing rare ingredients. Mastering these recipes demonstrates true Cooking skill and provides a valuable service to fellow players, potentially generating substantial gold.
Leveling Cooking 375-450: Late-Game Ingredients
Outland ingredients become essential, alongside continued Cataclysm zone farming. Fishing provides rare components, while recipes demand increased skill and resourcefulness.
Outland Ingredients & Recipes
Reaching 375 Cooking unlocks access to Outland ingredients, significantly expanding your recipe options. Terokkar Forest and Nagrand become key farming locations, yielding items like Talbuk Meat and Zangarmarsh Crabs. Focus on recipes requiring these materials, as they offer substantial skill gains.
Notable recipes include Spiced Basilisk Ribs and Kodo Fillet, providing valuable stat boosts for players. Remember to check the Auction House for cost-effective ingredient purchases, especially rarer items. Combining Outland ingredients with those from Cataclysm zones creates powerful consumables, maximizing your leveling efficiency and potential profits. Don’t neglect daily quests that reward cooking-related items!
Utilizing Fishing for Rare Ingredients
Fishing is invaluable for Cataclysm Cooking, providing access to unique and often expensive ingredients. Focus on fishing in zones like Howling Fjord and Northrend for specific fish required in high-level recipes. Rare fish, such as Blackfin Torpedo and Giant Squid, are crucial for creating potent consumables.
Consider investing in fishing skill-enhancing gear and utilizing fishing daily quests for bonus rewards. Combining fishing with cooking significantly reduces ingredient costs and boosts your overall progression. Remember to check the Auction House prices before selling your catches – some fish are highly sought after!
Cooking for PvP: Combat-Focused Foods
PvP combat demands specific consumables, and Cataclysm Cooking delivers! Focus on recipes providing stat boosts like Strength, Agility, or Stamina, enhancing your character’s performance in arenas and battlegrounds. Spicy Scorpion Stew and Blackened Dragonfin are excellent choices for immediate combat advantages.
Prioritize foods offering increased critical strike chance or haste, tailoring your selection to your class and specialization. Experiment with different combinations to discover what best suits your playstyle. Remember, a well-fed player has a significant edge in PvP!
Leveling Cooking 450-525: Cataclysm Recipes
Embark on the final stretch! Utilize new Cataclysm zones and ingredients to craft master recipes, unlocking high-end consumables for optimal character progression.
New Cataclysm Zones & Ingredients
Cataclysm brought significant changes to Azeroth, and Cooking reflects this! Mount Hyjal, Vashj’ir, Deepholm, and Uldum introduce unique ingredients crucial for reaching 525 skill. Expect to gather Wildfowl, Twilight Salmon, Rockscale Cod, and various herbs exclusive to these zones.
Focus on farming these areas diligently. Many recipes require specific combinations of these new ingredients alongside familiar ones. Don’t underestimate the value of exploring; hidden caches often contain rare components. Remember to check the Auction House, but farming is generally more cost-effective at this stage. Mastering these zones is key to unlocking the most potent Cataclysm-era recipes.
Master Recipes: High-End Consumables
Reaching 525 Cooking unlocks powerful, end-game consumables vital for raiding and PvP. These “master recipes” demand rare ingredients and significant skill. Expect to craft items like Dragonfin Anglerfish Steak, offering substantial stat boosts, and various potent stews and roasts.
Focus on acquiring recipes from daily quests and reputation vendors. These often require significant gold or rare materials. The Darkmoon Faire also offers exclusive Cooking quests with valuable rewards. Mastering these recipes provides a significant advantage, both in terms of personal power and potential profit through auction house sales.
Darkmoon Faire Cooking Quests
The Darkmoon Faire, appearing twice monthly, presents unique Cooking quests. These quests typically require a minimum Cooking skill of 75 to even view, escalating with higher-tier challenges. Expect tasks involving creating specific dishes for Faire patrons, often demanding rare ingredients sourced from across Cataclysm zones.
Completing these quests yields valuable rewards, including recipes unavailable elsewhere, reputation with the Darkmoon Faire, and potentially even unique cosmetic items. Prioritize participation during the Faire; these quests are a fantastic way to acquire powerful recipes and boost your Cooking profession.