nikon d7200 manual

Nikon D7200 Manual: A Comprehensive Guide

This guide details the Nikon D7200‚ a 24.2MP camera with a DX-format sensor‚ offering a detailed user manual in Russian and English‚ alongside troubleshooting tips.

Welcome to the Nikon D7200‚ a powerful DSLR boasting a 24.2-megapixel CMOS sensor and DX format. This manual provides comprehensive guidance‚ available in multiple languages including Russian. Explore its features‚ from image resolution of 6000×4000 pixels to understanding menu options and troubleshooting common issues.

Discover how to maximize your photographic potential!

Key Features and Specifications

The Nikon D7200 features a 24.2MP CMOS sensor and DX format‚ delivering high-resolution images up to 6000×4000 pixels. Key specs include various white balance presets‚ customizable settings‚ and a user-defined function capability. Manuals detail indicators like memory card status and focusing information.

Explore its full potential!

Understanding the Camera Body

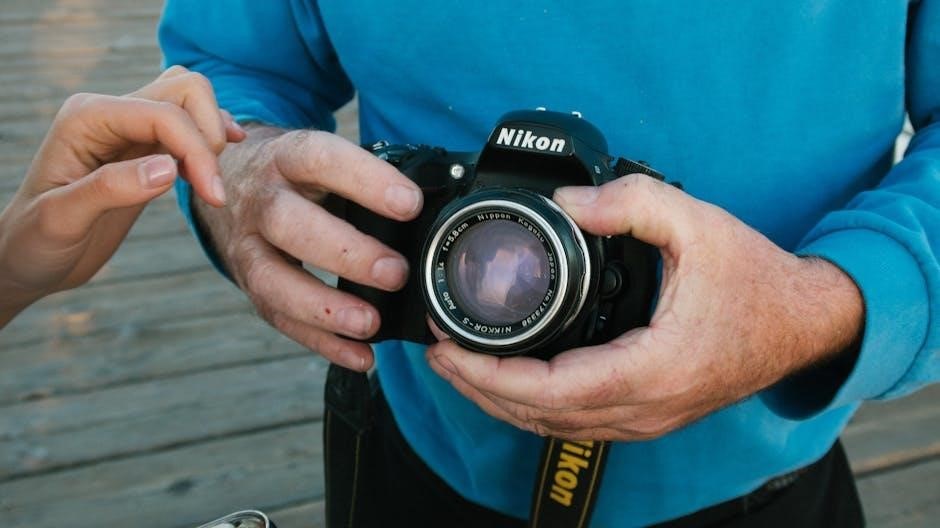
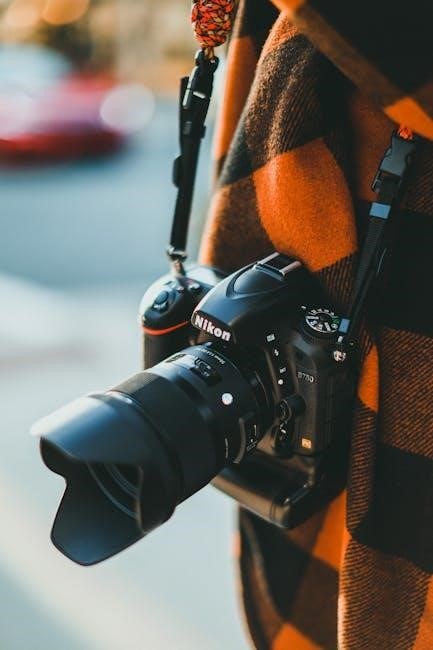
The Nikon D7200 is an SLR-type camera; understanding its physical layout is crucial. Manuals highlight front and rear panel components‚ alongside top panel controls. Indicators for memory card access and focusing are noted. Familiarize yourself with these elements for efficient operation and optimal image capture.

Explore the camera’s design!

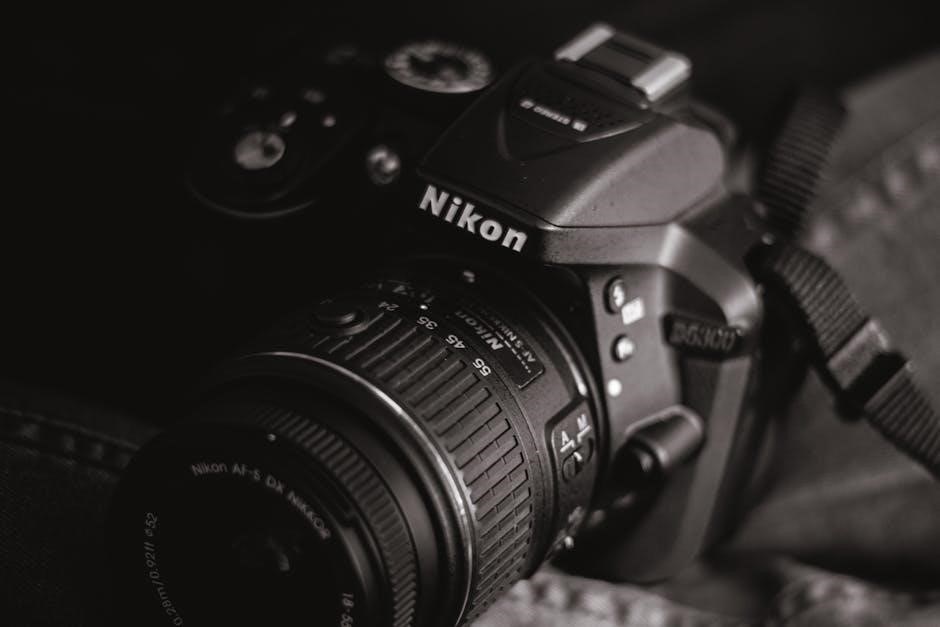
Front and Rear Panel Overview

The Nikon D7200’s front panel houses the lens mount and essential buttons. The rear panel features the LCD screen‚ control dials‚ and menu navigation buttons. Manuals detail indicator locations‚ like the memory card access light. Understanding these layouts streamlines camera operation‚ allowing quick access to key functions for seamless shooting.

Top Panel Controls and Functions

The D7200’s top panel provides direct access to shooting settings. Key controls include the mode dial‚ shutter button‚ and control dials for adjusting settings. The manual highlights functions like the BKT button for bracketed shots. Familiarizing yourself with these controls enables swift adjustments‚ optimizing your shooting experience and responsiveness.

Setting Up the Nikon D7200

Initial setup involves inserting a compatible battery and memory card‚ as detailed in the manual. The guide emphasizes navigating the menu system for initial configurations. Users can select language preferences and customize settings. Proper battery care and storage are also addressed‚ ensuring optimal camera performance and longevity‚ as outlined in provided resources.

Inserting the Battery and Memory Card

The Nikon D7200 requires a compatible battery‚ securely inserted into the designated compartment. Ensure proper orientation before insertion. Similarly‚ insert a compatible memory card; the manual details supported types. Confirm secure locking of both components. Addressing potential “No Memory Card” indicators is crucial for initial operation‚ as highlighted in online resources.

Initial Camera Setup and Menu Navigation

Upon powering on the Nikon D7200‚ follow the on-screen prompts for initial setup‚ including language and date/time. The menu system‚ detailed in the manual‚ allows customization of settings. Explore Custom Settings and the Setup menu for camera reset options. Familiarize yourself with navigating menus for optimal control‚ as described in available guides.

Shooting Modes Explained

The Nikon D7200 offers diverse shooting modes. Auto mode simplifies operation for beginners‚ while Aperture-Priority‚ Shutter-Priority‚ and Manual modes grant full creative control. The manual details each mode’s function‚ enabling photographers to adjust settings for desired effects. Understanding these modes unlocks the camera’s full potential‚ as outlined in user guides.

Auto Mode for Beginners

Auto mode on the Nikon D7200 simplifies photography for newcomers; The camera automatically selects optimal settings for aperture‚ shutter speed‚ and ISO. This mode is ideal for everyday snapshots‚ requiring minimal user input. The manual emphasizes its ease of use‚ allowing beginners to quickly capture quality images without complex adjustments.

Aperture-Priority‚ Shutter-Priority‚ and Manual Modes

Beyond Auto‚ the Nikon D7200 offers creative control. Aperture-Priority lets you set the f-stop‚ controlling depth of field. Shutter-Priority manages motion blur by adjusting shutter speed. Manual mode grants full control over both aperture and shutter speed‚ alongside ISO. The manual details how these modes empower photographers to achieve specific artistic effects.

Focusing System and Techniques

The D7200’s focusing system is crucial for sharp images. The manual explains autofocus modes and settings‚ detailing how to select focus points for precise targeting. It also covers manual focus operation‚ essential for challenging situations. Understanding focus indicators‚ like the in-focus signal‚ is key to mastering this camera’s capabilities.

Autofocus Modes and Settings

The Nikon D7200 manual details various autofocus (AF) modes‚ including Single-servo AF (AF-S)‚ Continuous-servo AF (AF-C)‚ and Auto-servo AF (AF-A). Settings cover AF-area mode selection—like single-point AF and dynamic-area AF—and customization options. Learn to adjust AF sensitivity to match shooting conditions for optimal performance and sharpness.

Manual Focus Operation

The Nikon D7200 manual explains manual focus (MF) operation‚ allowing precise control over focus. Utilize the focusing ring on compatible lenses‚ observing the viewfinder or Live View for sharpness. Features like focus peaking (if supported by the lens) aid accuracy. MF is ideal for critical focus or when AF struggles.

Understanding Exposure Settings

The Nikon D7200 manual details aperture‚ shutter speed‚ and ISO’s interplay for proper exposure. Aperture controls depth of field‚ shutter speed affects motion blur‚ and ISO impacts image noise. Mastering exposure compensation and understanding metering modes—like matrix‚ center-weighted‚ and spot—are crucial for achieving desired results.

Aperture‚ Shutter Speed‚ and ISO

The Nikon D7200’s manual explains how aperture (f-stop) controls light and depth of field. Shutter speed dictates motion capture‚ while ISO adjusts sensor sensitivity. Lower ISOs minimize noise‚ higher ISOs allow shooting in low light. Balancing these three elements is key to achieving well-exposed‚ creatively impactful photographs.

Exposure Compensation and Metering Modes

The D7200 manual details exposure compensation‚ allowing users to fine-tune brightness. Metering modes – Matrix‚ Center-weighted‚ and Spot – determine how the camera assesses light. Matrix is general-purpose‚ Center-weighted prioritizes the center‚ and Spot measures a small area. Understanding these modes ensures accurate exposures in diverse lighting conditions.

White Balance Control

The Nikon D7200 manual explains white balance‚ crucial for accurate color rendition. Preset options like Auto‚ Incandescent‚ and Fluorescent simplify adjustments. Users can also perform custom white balance settings using a gray card for precise color. Fine-tuning A-B and G-M settings further refine color temperature‚ ensuring natural-looking images.

Preset White Balance Options

The Nikon D7200 offers convenient preset white balance options for common lighting scenarios. These include Auto‚ Daylight‚ Cloudy‚ Shade‚ Tungsten‚ and Fluorescent. Selecting the appropriate preset corrects color casts‚ delivering accurate colors without manual adjustments. The manual details how each preset impacts image tone‚ simplifying shooting in varied conditions.

Custom White Balance Settings

The Nikon D7200 allows for precise color control via custom white balance. Users can manually set white balance by photographing a white or gray card under current lighting. This ensures accurate color rendition‚ surpassing preset options. The manual guides users through the process‚ detailing fine-tuning adjustments for optimal results in challenging conditions.

Image Quality and File Formats

The Nikon D7200 offers choices between JPEG and RAW image formats. RAW provides maximum editing flexibility‚ while JPEG offers smaller file sizes. The manual details image size options‚ reaching 6000 x 4000 pixels‚ and compression settings. Understanding these choices impacts image detail‚ file size‚ and post-processing capabilities‚ tailoring output to specific needs.

JPEG vs. RAW Image Formats

JPEG files are compressed‚ ready to share‚ but lose data with editing. RAW files‚ conversely‚ retain all sensor data‚ offering extensive post-processing control. The Nikon D7200 manual explains that RAW is ideal for professional workflows‚ while JPEG suits casual photographers prioritizing convenience and smaller file sizes.

Image Size and Compression Settings

The Nikon D7200 manual details various image size options‚ from 6000×4000 pixels (maximum resolution) down to smaller formats. Compression settings—Fine‚ Normal‚ and Basic—affect file size and quality. Higher resolution and Fine compression yield larger‚ detailed images‚ while lower settings conserve memory card space.

Menu System Deep Dive

The Nikon D7200’s menu system is extensive‚ divided into Setup‚ Shooting‚ Custom Settings‚ and more. Custom Settings allow personalized camera functions. The Setup menu handles camera reset and general configurations. Navigating these menus‚ as detailed in the manual‚ unlocks advanced features and customization options for experienced photographers.

Custom Settings Menu Options

The D7200’s Custom Settings menu offers deep personalization. Options include autofocus settings‚ exposure delay mode‚ and viewfinder display choices. Users can define custom picture controls and assign functions to buttons. The manual details each setting‚ enabling photographers to tailor the camera to their specific shooting style and preferences.

Setup Menu and Camera Reset

The Setup menu controls fundamental camera settings like date/time‚ language‚ and file naming. Crucially‚ it includes options for resetting all settings to factory defaults. This is invaluable for troubleshooting or when preparing the camera for a new user. The manual clearly explains each option‚ ensuring a smooth setup process.

Using the Built-in Flash

The Nikon D7200’s built-in flash offers various modes – Auto‚ Manual‚ and Red-Eye Reduction. The manual details flash compensation adjustments for brightness control. Understanding these settings is vital for improving image quality in low-light conditions or balancing harsh shadows. Explore the options for optimal flash performance.

Flash Modes and Settings

The D7200 provides Auto Flash‚ Manual‚ and Red-Eye Reduction modes. Auto intelligently determines flash use. Manual allows full control over flash power. Red-Eye Reduction emits pre-flashes to minimize this effect. The manual details each setting‚ explaining how to adjust flash output for varied lighting scenarios and desired photographic results.

Flash Compensation and Red-Eye Reduction

Flash compensation adjusts flash output‚ brightening or darkening images. Red-eye reduction utilizes pre-flashes to constrict pupils‚ minimizing the red-eye effect in portraits. The Nikon D7200 manual explains how to fine-tune these settings for optimal results‚ ensuring well-lit and natural-looking photographs‚ even in challenging lighting conditions.

Video Recording with the D7200

The Nikon D7200 facilitates high-quality video recording with selectable resolutions and frame rates. The manual details how to adjust these settings for various shooting scenarios. Explore options for audio recording‚ ensuring clear sound accompanies your videos. Learn to optimize video quality for professional-looking results‚ utilizing the camera’s full potential.

Video Resolution and Frame Rates

The D7200 manual explains how to select optimal video resolutions‚ including 1080p Full HD‚ for detailed footage. Frame rate options‚ such as 24p‚ 25p‚ 30p‚ 50p‚ and 60p‚ are covered‚ influencing motion smoothness. Understanding these settings is crucial for achieving desired cinematic effects or realistic capture‚ as detailed in the guide.

Audio Recording Options

The Nikon D7200 manual details audio settings for video. It explains connecting an external microphone via the stereo mini-pin jack for improved sound quality. Users can adjust audio levels manually or utilize automatic gain control. The guide clarifies how to monitor audio during recording‚ ensuring clear and professional-sounding video content.

Connectivity and Transferring Images

The Nikon D7200 manual outlines image transfer methods. Connecting via USB to a computer allows direct file download. While the camera lacks built-in Wi-Fi‚ optional adapters enable wireless transfer to smartphones or tablets. The guide details necessary software installation and troubleshooting steps for seamless image sharing and backup procedures.

Connecting to a Computer via USB

The Nikon D7200 manual details USB connectivity. Use a USB cable to connect the camera to your computer. Ensure the camera is powered on. Select ‘USB’ in the camera’s setup menu. Your computer should recognize the D7200 as a removable drive‚ allowing easy file transfer. Follow on-screen prompts for driver installation if needed.

Wireless Transfer with Optional Adapters

The Nikon D7200 manual explains wireless options require optional adapters. Utilize the WT-5A/B Wireless File Transmitter for Wi-Fi connectivity. Install Nikon’s Wireless Mobile Utility app on your smartphone or tablet. Connect the adapter‚ configure settings‚ and transfer images wirelessly. Refer to the adapter’s manual for detailed setup instructions.

Troubleshooting Common Issues

The Nikon D7200 manual addresses common problems like “No memory card” indicators. Solutions include ensuring card compatibility and proper insertion. Error messages are explained‚ guiding users through fixes. The manual details handling memory card issues‚ advising proper card formatting and replacement if necessary. Consult the manual for specific error code resolutions.

Error Messages and Solutions

The Nikon D7200 manual provides a comprehensive list of error messages. It details solutions for issues like card errors‚ lens communication problems‚ and internal camera malfunctions. Troubleshooting steps are clearly outlined‚ guiding users through potential fixes. Refer to the manual’s specific error code index for detailed resolution guidance and preventative measures.

Dealing with Memory Card Problems

The Nikon D7200 manual addresses memory card issues‚ including “No card” errors. Solutions involve checking card compatibility‚ ensuring proper insertion‚ and formatting the card within the camera. It advises against formatting on a computer. If problems persist‚ try a different card‚ as card failure is a common cause of data loss.

Maintenance and Care

The Nikon D7200 manual stresses regular cleaning of the sensor and lens to maintain image quality. Proper battery care‚ including storage guidelines‚ extends its lifespan. Avoid extreme temperatures. The guide details safe cleaning procedures‚ emphasizing the importance of preventing dust accumulation for optimal camera performance and longevity.

Cleaning the Sensor and Lens

The Nikon D7200 manual provides detailed instructions for sensor and lens cleaning. Use a blower to remove loose dust‚ then a sensor brush carefully. Lens cleaning requires a microfiber cloth and lens cleaning solution. Avoid harsh chemicals. Regular cleaning prevents dust buildup‚ ensuring optimal image clarity and preventing potential damage to sensitive components.

Battery Care and Storage

The Nikon D7200 manual emphasizes proper battery handling. Fully charge the battery before initial use. Avoid extreme temperatures and prolonged storage in a discharged state. Store the battery in a cool‚ dry place. Use the Nikon charger only. Regularly cycling the battery—charging and discharging—helps maintain its lifespan and optimal performance.

Advanced Features and Customization

The Nikon D7200 manual details extensive customization options. Utilize user-defined functions to assign controls for quick access. Explore Picture Control settings to tailor image appearance. Fine-tune autofocus and metering for specific shooting scenarios. The camera allows personalized settings‚ enhancing workflow and creative control‚ as described in the comprehensive guide.

User-Defined Functions

The Nikon D7200 manual explains how to assign custom operations to buttons and controls. This allows photographers to personalize camera handling for faster access to frequently used features. Reassigning controls streamlines workflow‚ improving responsiveness in various shooting situations. Explore the menu to tailor the camera to your individual preferences.

Picture Control Settings

The Nikon D7200 manual details Picture Control settings‚ allowing customization of image appearance. Options include Standard‚ Neutral‚ Vivid‚ and Monochrome‚ each affecting color‚ contrast‚ and sharpness. Fine-tuning these settings‚ or creating custom profiles‚ enables photographers to achieve desired looks directly in-camera‚ reducing post-processing needs.

Resources and Further Learning

The Nikon D7200 manual points to the official Nikon website for support and updates. Numerous online forums and tutorials offer community-based learning and troubleshooting assistance. Manualsdir.ru provides access to the camera’s documentation‚ while exploring these resources enhances understanding and expands photographic skills beyond the basic guide.

Official Nikon Website and Support

Nikon’s official website is the primary source for the D7200 manual and firmware updates. Direct support channels‚ including FAQs and contact information‚ are readily available. Downloading the latest documentation ensures access to the most current features and troubleshooting guidance‚ maximizing the camera’s potential and resolving any issues.

Online Forums and Tutorials

Numerous online forums and video tutorials offer Nikon D7200 support from experienced users. These platforms provide practical advice‚ shooting tips‚ and solutions to common problems. Sharing experiences and seeking guidance from the community enhances learning and unlocks the camera’s full capabilities‚ supplementing the official manual.

club car 48 volt charger manual

Club Car 48 Volt Charger Manual: A Comprehensive Guide

This guide provides detailed instructions for maintaining and troubleshooting your Club Car 48V charging system. It covers PowerDrive 3 chargers, ERIC models, and essential safety precautions.

Understanding your charger’s specifications (DCOUTPUT: 48V, 13A; ACINPUT: 120V) is crucial for optimal battery performance and longevity.

Refer to www.clubcar.com for additional resources and support, including updated manuals and warranty information for PowerDrive 3 chargers.

Understanding Your Club Car 48V System

Club Car’s 48-volt electrical system is the backbone of your golf car’s performance, powering everything from the motor to the lights. This system relies on a battery pack, typically consisting of eight 6-volt batteries connected in series, to deliver the necessary power. Understanding how these components interact is vital for effective charging and maintenance.

The 48V system is designed for efficiency and reliability, but proper care is essential. Regular battery maintenance, including checking water levels in flooded lead-acid batteries and ensuring clean connections, significantly impacts the system’s lifespan. The PowerDrive 3 charger is specifically engineered to work with this 48V setup, providing a controlled and optimized charging process.

Incorrect charging practices or neglecting battery health can lead to reduced range, premature battery failure, and even damage to the charging system. Familiarizing yourself with the system’s basic principles, as outlined in your owner’s manual, will empower you to diagnose issues and maintain peak performance. Remember to always prioritize safety when working with electrical components.

Identifying Your Charger Model

Accurately identifying your Club Car charger model is the first step towards proper maintenance and troubleshooting. Club Car utilizes several charger types, most notably the PowerDrive 3 and the ERIC series. Each model has unique characteristics and requires specific procedures.

Locate the model number and serial number typically found on a sticker affixed to the charger’s casing. This sticker usually displays key specifications like DCOUTPUT: 48V, 13A and ACINPUT: 120V. The model number is crucial for downloading the correct owner’s manual from www.clubcar.com.

The PowerDrive 3 is a common, advanced charger known for its efficiency and diagnostic capabilities. The ERIC charger, often found on older models, may have different charging profiles. Knowing your specific model ensures you’re using the correct charging procedure and accessing the appropriate troubleshooting information. Incorrect information can lead to ineffective charging or potential damage.

PowerDrive 3 Charger Overview

The PowerDrive 3 charger represents Club Car’s advanced charging technology for 48V systems. It’s designed for efficient and reliable battery maintenance, maximizing battery life and performance. This charger features automatic voltage detection and adjusts charging parameters accordingly, ensuring optimal results for various battery types.

Key features include a multi-stage charging process, which includes bulk, absorption, and float stages, preventing overcharging and extending battery lifespan. The PowerDrive 3 also incorporates diagnostic capabilities, indicated by its indicator lights, to help identify potential issues. Its specifications are typically DCOUTPUT: 48V, 13A and ACINPUT: 120V.

This model often comes with a limited four-year warranty, highlighting Club Car’s confidence in its durability. Refer to the owner’s manual, available at www.clubcar.com, for detailed information on operation, troubleshooting, and warranty claims. Proper understanding of the PowerDrive 3 is essential for maintaining your Club Car’s electrical system.

Charger Specifications (DCOUTPUT: 48V, 13A; ACINPUT: 120V)

Understanding the PowerDrive 3 charger’s specifications is vital for safe and effective operation. The primary output is DCOUTPUT: 48V, 13A, meaning it delivers 48 volts of direct current at a maximum of 13 amperes to charge the battery pack. This output is specifically designed for 48-volt Club Car golf cart battery systems.

The charger requires an ACINPUT: 120V alternating current power source, standard in many regions. It’s crucial to verify your local voltage compatibility before connecting the charger. These specifications dictate the charger’s performance and compatibility, influencing charging times and battery health.

Model number 26560 is frequently associated with this configuration. Always confirm these specifications match your charger model, as variations exist. Incorrect voltage or amperage can damage the charger or the battery pack. Consult the owner’s manual at www.clubcar.com for detailed technical information and safety guidelines.

Safety Precautions When Using the Charger

Prioritizing safety is paramount when operating your Club Car 48V battery charger. Always ensure the charging area is well-ventilated to prevent the accumulation of potentially explosive hydrogen gas emitted during charging. Never charge batteries in an enclosed space.

Disconnect the charger from the AC power source before making any connections or disconnections to the battery. Avoid contact with battery acid, which is corrosive. Wear appropriate eye protection and gloves when handling batteries.

Inspect the charger cord and connector for damage before each use. Do not operate a charger with a damaged cord, as this poses an electrical shock hazard. Only use the charger for its intended purpose – charging 48V Club Car batteries. Refer to the owner’s manual at www.clubcar.com for comprehensive safety guidelines and warnings. Improper use can lead to battery damage or personal injury.

Charging Procedure: Step-by-Step Instructions

Begin by ensuring the Club Car is parked on a level surface and the key switch is in the “OFF” position. Connect the charger connector securely to the golf cart’s charging receptacle. Then, plug the charger into a properly grounded 120V AC outlet.

The charger will automatically initiate a diagnostic check before commencing the charging cycle. Observe the indicator lights to monitor the charging progress. A red light typically indicates charging, while a green light signifies a fully charged battery.

Allow the charger to complete the full charging cycle, even if the cart appears to have sufficient power. Disconnect the charger from the AC outlet first, then from the golf cart. Consult your Club Car owner’s manual at www.clubcar.com for specific instructions related to your PowerDrive 3 or ERIC charger model.

Understanding Charger Indicator Lights

Club Car chargers utilize indicator lights to communicate the charging status and potential issues. A solid red light generally signifies the charger is actively charging the battery pack. A flashing red light may indicate a charging error or a problem with the battery itself.

A solid green light typically confirms a fully charged battery and the charger is in standby mode. However, some models may display a pulsing green light during maintenance or equalization phases. A flashing green light could signal a fault, such as an over-temperature condition.

Refer to your specific PowerDrive 3 or ERIC charger manual, available at www.clubcar.com, for a detailed explanation of the light patterns. Understanding these signals is crucial for diagnosing charging problems and ensuring optimal battery health. Ignoring indicator lights can lead to reduced battery life or charging failures.

Troubleshooting Common Charging Issues

Club Car 48V charging systems can encounter several common issues. If the charger doesn’t initiate, first verify the AC input power source and the connection to the golf cart. A faulty charger connector is another frequent culprit; inspect for corrosion or damage.

If charging begins but doesn’t complete, check the battery voltage and condition. Low or damaged batteries may not accept a full charge. Overheating can also halt the charging process – ensure adequate ventilation around the charger.

Consult the PowerDrive 3 or ERIC charger manual (available at www.clubcar.com) for specific troubleshooting steps. Remember safety first: disconnect the charger before inspecting any wiring. If issues persist, contact a qualified technician. Ignoring problems can lead to battery failure or charger damage.

No Charging – Possible Causes and Solutions

When your Club Car 48V charger fails to initiate, several factors could be at play. Begin by confirming a functioning AC power supply – test the outlet with another device. Inspect the charger’s fuse; a blown fuse immediately halts operation.

A damaged or corroded charger connector prevents proper electrical contact. Examine both the charger-side and cart-side connectors. The battery pack itself might be the issue; a completely discharged battery may not trigger the charger.

Refer to your PowerDrive 3 or ERIC charger manual (www.clubcar.com) for detailed wiring diagrams. If the problem persists, a faulty charger control board could be the cause, requiring professional repair or replacement. Always prioritize safety – disconnect power before any inspection.

Charger Not Recognizing Battery Pack

If your Club Car 48V charger isn’t recognizing the battery pack, the initial step involves verifying the battery pack’s overall voltage. A significantly low voltage prevents the charger from establishing a connection. Inspect the battery pack’s wiring for loose connections or corrosion, particularly at the main terminals and inter-battery cables.

The charger relies on proper communication with the Battery Management System (BMS), if equipped. A faulty BMS can disrupt this communication. Check the charger connector for damage or debris, ensuring a clean and secure connection to the battery pack.

Consult your PowerDrive 3 or ERIC charger manual (available at www;clubcar.com) for specific troubleshooting steps related to BMS issues. A malfunctioning charger control board might also be the culprit, necessitating professional diagnosis and repair.

Overheating Issues and Prevention

Overheating in your Club Car 48V charger can indicate several issues. Restricted airflow is a primary cause; ensure the charger is placed in a well-ventilated area, free from obstructions. Dust accumulation inside the charger can also contribute to heat buildup, requiring periodic cleaning – disconnect power first!

Prolonged charging of a fully charged battery generates excessive heat. Adhere to the recommended charging schedules outlined in your PowerDrive 3 or ERIC charger manual. A failing transformer or rectifier within the charger can also lead to overheating and potential damage.

Inspect the charger’s cooling fan (if equipped) for proper operation. If the fan isn’t functioning, replace it. Regularly check the AC input power supply for correct voltage; fluctuations can stress the charger. For detailed safety guidelines and further assistance, visit www.clubcar.com.

Battery Maintenance for Optimal Charging

Maintaining your Club Car 48V battery pack is crucial for efficient charging and extended lifespan. Regularly inspect battery terminals for corrosion; clean with a baking soda solution and protect with dielectric grease; Ensure all battery connections are tight and secure, as loose connections impede charging.

Always use distilled water to replenish electrolyte levels, avoiding overfilling. Equalize charging periodically, as recommended in your PowerDrive 3 or ERIC charger manual, to balance cell voltages. Avoid deep discharging the batteries, as this reduces their capacity.

Check battery voltage with a multimeter to assess their condition. A consistently low voltage indicates a failing battery. Proper storage during off-season is vital; fully charge batteries before storage and periodically check their voltage. For detailed guidance and support, consult www.clubcar.com.

Checking Battery Voltage and Condition

Regularly checking your Club Car 48V battery pack’s voltage is vital for assessing its health. Use a digital multimeter set to DC voltage. A fully charged battery should read approximately 6.3 volts per cell, totaling around 48V for a six-cell system. Readings below 6.0V indicate a significant discharge or potential cell failure.

Inspect each battery individually for physical damage, such as cracks or bulges. Look for signs of corrosion around the terminals. Perform a load test to evaluate the battery’s ability to deliver current under stress; this requires specialized equipment.

Consistent low voltage, despite charging, suggests a failing battery needing replacement. Refer to your PowerDrive 3 or ERIC charger manual for specific voltage thresholds. For detailed troubleshooting and support, visit www.clubcar.com to access comprehensive resources and locate authorized service centers.

Replacing the Charger Connector

If your Club Car 48V charger connector is damaged, replacement is crucial for safe and efficient charging. Always disconnect the charger from both the cart and the AC power source before beginning. Identify the correct connector type for your PowerDrive 3 or ERIC charger model.

Carefully remove the old connector, noting the wiring configuration. Typically, this involves unscrewing the connector housing and disconnecting the wires. Ensure each wire is securely connected to the corresponding terminal on the new connector, matching the original setup precisely.

Double-check all connections before reassembling the connector housing. A loose connection can cause charging issues or even damage the battery pack. Consult your charger manual or Club Car’s website (www.clubcar.com) for wiring diagrams and detailed instructions. If unsure, seek assistance from a qualified technician.

Wiring Diagrams for 48V Club Car Batteries

Understanding the wiring configuration of your 48V Club Car battery pack is essential for proper charger connection and overall system functionality. Typically, 48V systems utilize eight 6-volt batteries connected in series. Each battery is connected to the next with heavy-gauge cables.

The positive terminal of one battery connects to the negative terminal of the next, creating a chain. The total voltage of the series connection reaches 48 volts. The charger connector then connects to the positive and negative terminals at the ends of this battery series.

Refer to your Club Car owner’s manual or the PowerDrive 3 charger manual for specific wiring diagrams tailored to your cart model. Club Car’s website (www.clubcar.com) also provides valuable resources. Incorrect wiring can lead to battery damage, charger malfunction, or even safety hazards. Always double-check connections before energizing the system.

Club Car ERIC 48V Golf Cart Charger Manual Details

The Club Car ERIC (Electronic Rectifier Integrated Charger) 48V charger is a robust and reliable charging solution designed specifically for Club Car golf carts. This manual details the operation, maintenance, and troubleshooting procedures for this specific charger model.

Key features of the ERIC charger include automatic voltage detection, ensuring compatibility with 48V systems, and a multi-stage charging process to optimize battery life. The manual provides detailed explanations of the charger’s indicator lights, which signal charging status and potential issues.

It also outlines safety precautions to follow during operation, emphasizing the importance of proper ventilation and avoiding contact with live electrical components. The PowerDrive 3 charger shares similar functionalities, and referencing both manuals can provide a comprehensive understanding. For further assistance, visit www.clubcar.com to access the latest documentation and support resources.

Warranty Information for PowerDrive 3 Chargers

Club Car offers a LIMITED FOUR YEAR WARRANTY for PowerDrive 3 chargers, demonstrating their commitment to product quality and customer satisfaction. This warranty covers defects in materials and workmanship under normal use and service, as outlined in the full warranty document.

The warranty period begins on the date of original purchase. To make a claim, you must provide proof of purchase and a detailed description of the defect. The warranty does not cover damage caused by misuse, abuse, accidents, unauthorized modifications, or improper maintenance.

Specifically, the warranty excludes issues arising from incorrect battery voltage, improper charging practices, or failure to follow the guidelines detailed in the Club Car 48 Volt Charger Manual. For complete warranty details, including limitations and exclusions, please refer to the official warranty statement available at www.clubcar.com or contact your local Club Car dealer.

Finding Additional Resources and Support (www.clubcar;com)

Club Car’s official website, www.clubcar.com, serves as a comprehensive hub for owners seeking further assistance with their 48V charging systems and golf carts. You can access a vast library of resources, including downloadable owner’s manuals for various models, including the PowerDrive 3 and ERIC chargers.

The website also features frequently asked questions (FAQs), troubleshooting guides, and wiring diagrams to help you diagnose and resolve common charging issues. If you require a specific manual based on your vehicle’s build code, the site allows you to retrieve it directly by inputting the relevant information.

For personalized support, Club Car provides a dealer locator tool to connect you with authorized service centers in your area. Additionally, you can contact their customer support team through the website for assistance with warranty claims, parts inquiries, or any other questions related to your Club Car charger or vehicle;

hair product guide for men

Hair Product Guide for Men: A Comprehensive Overview (Updated December 16, 2025)

Navigating men’s hair products can be complex! This guide explores various types – pomades, pastes, creams, clays, and gels – offering benefits for all hair types and lengths.

Discover how to choose the right product for your desired style, from classic pompadours to textured crops, and learn about essential hair care considerations.

Understanding Your Hair Type

Determining your hair type is the crucial first step in selecting the right products. Men’s hair isn’t one-size-fits-all; understanding its characteristics unlocks effective styling. Consider both texture and porosity.

Hair texture – fine, medium, or coarse – impacts how well a product holds. Fine hair needs lighter formulas to avoid weighing it down, while coarse hair benefits from stronger holds.

Hair porosity – low, medium, or high – dictates how well your hair absorbs moisture. Low porosity hair resists absorption, needing lightweight products. High porosity hair readily absorbs moisture but can dry out quickly, requiring hydrating formulas.

Knowing these factors allows you to choose products that complement your natural hair, enhancing its appearance and health. A barber can also provide personalized guidance.

Identifying Hair Texture: Fine, Medium, and Coarse

Hair texture refers to the width of individual hair strands. Fine hair feels silky and struggles to hold curls; lighter products are best to avoid flatness. It’s prone to breakage, needing gentle handling.

Medium hair is the most common, offering a balance of thickness and manageability. It holds styles well and responds to a wider range of products. It’s versatile and relatively resilient.

Coarse hair is thick and strong, often feeling rough to the touch. It can be difficult to manage and may require heavier products for hold and definition. Hydration is key to prevent dryness and frizz;

A simple test: take a single strand and compare it to a piece of thread. Thinner than the thread is fine, similar is medium, and thicker is coarse.

Determining Hair Porosity: Low, Medium, and High

Hair porosity indicates how well your hair absorbs and retains moisture. Low porosity hair has tightly bound cuticles, resisting moisture absorption. It benefits from lightweight, water-based products and heat to help open the cuticle;

Medium porosity hair has a looser cuticle structure, allowing for easy moisture absorption and retention. It’s generally healthy and responds well to most products. It’s considered balanced and manageable.

High porosity hair has a very open cuticle, quickly absorbing moisture but also losing it rapidly. It requires heavier products, like oils and butters, to seal in hydration and prevent dryness.

A float test: place a clean strand in water. If it floats, porosity is low; if it sinks slowly, it’s medium; if it sinks quickly, it’s high.

Core Hair Product Categories

Essential men’s hair styling includes pomade for shine, paste for texture, creams for hydration, clay for strong hold, and gel for maximum definition.

Pomade: Classic Styling and Shine

Pomade represents a cornerstone of classic men’s hairstyling, offering versatility for various hair types, including both thin and thick strands. Historically favored, it’s experiencing a resurgence in popularity, often preferred over gels and waxes for its unique properties.

Applying pomade to a finished style imparts a noticeable shine and allows for easy restyling throughout the day. It’s particularly well-suited for achieving slicked-back looks, pompadours, and side parts. Modern pomades come in water-based and oil-based formulations, catering to different hold strengths and washability preferences.

Water-based pomades provide a stronger hold and are easier to rinse out, while oil-based pomades offer a more pliable hold and a classic, glossy finish. Choosing the right pomade depends on your desired style and hair texture.

Paste: Texture and Medium Hold

Hair paste distinguishes itself as a versatile styling aid, delivering a medium hold with a focus on creating textured looks. Unlike pomades that prioritize shine, pastes offer a more matte or natural finish, ideal for contemporary styles. It’s a fantastic option for men seeking a relaxed, effortless aesthetic.

Paste works exceptionally well for shorter to medium-length hair, providing definition and separation without stiffness. It allows for easy manipulation and restyling, making it suitable for dynamic looks that require flexibility throughout the day.

The formulation often includes ingredients that add volume and thickness, benefiting finer hair types. Paste is a go-to for achieving tousled, undone styles and textured crops.

Creams: Natural Look and Hydration

Hair creams are designed for men desiring a natural, understated style coupled with enhanced hair health; Unlike heavier products, creams prioritize hydration and conditioning, making them suitable for all hair types, particularly those prone to dryness or damage. They offer a light to medium hold, focusing on enhancing the hair’s natural texture rather than rigidly styling it.

Creams excel at taming frizz, adding subtle definition, and providing a healthy sheen without appearing greasy. They’re perfect for achieving a polished yet relaxed look.

Look for creams containing beneficial oils and humectants to maximize moisture retention and overall hair care.

Clay: Strong Hold and Matte Finish

Hair clay stands out for men seeking a strong, pliable hold with a distinctly matte finish. This product excels at creating textured styles, offering control without the shine associated with pomades or gels. Clay is particularly effective for shorter to medium-length hair, allowing for sculpting and definition.

The unique texture of clay provides a slightly gritty feel, enabling effortless restyling throughout the day. It’s ideal for looks requiring separation and a natural, undone aesthetic.

Many clays incorporate ingredients that absorb excess oil, making them a good choice for men with oily scalps or hair types.

Gel: Maximum Hold and Definition

Hair gel remains a cornerstone for men desiring maximum hold and sharply defined styles. Offering the strongest level of control among hair products, gel is perfect for slicked-back looks, spikes, or maintaining intricate hairstyles. While often associated with a wet or shiny appearance, modern formulations offer varying levels of sheen.

Gel is versatile, working well on various hair types and lengths, though it’s particularly effective for thicker hair that requires significant control. It’s crucial to apply gel evenly to avoid stiffness or flaking.

Consider gels with added conditioning agents to minimize dryness and maintain hair health.

Specialty Hair Products

Beyond core products, specialty items like texture powder and salt spray enhance styling. These offer unique effects – volume, lift, and beachy waves – for diverse hair types.

Texture Powder: Volume and Lift

Texture powder is a fantastic specialty product designed to instantly add volume and lift to men’s hair. Unlike heavier styling aids, it provides a lightweight feel while creating noticeable texture. This makes it ideal for finer hair types that struggle with flatness, or for adding separation and definition to thicker styles.

Application is key: sprinkle a small amount directly onto the roots of dry hair and work it in with your fingertips. Avoid using too much, as it can create a gritty texture. Texture powders excel at creating a deliberately messy, undone look, perfect for modern, casual styles. They’re also excellent for re-styling throughout the day, refreshing volume without adding weight or stiffness.

Consider texture powder a versatile tool for achieving a fuller, more dynamic hairstyle.

Salt Spray: Beachy Waves and Texture

Salt spray is the go-to product for achieving that coveted “just off the beach” look for men’s hair. Mimicking the effects of seawater, it adds texture, definition, and a relaxed, tousled aesthetic. This product works exceptionally well on medium to long hair lengths, enhancing natural waves and creating a carefree style.

Application is simple: spray onto damp hair, scrunch, and allow to air dry for optimal results. Salt spray is incredibly versatile; it can be used alone for a subtle textured look or combined with other styling products for added hold and definition. It’s perfect for creating a natural, effortless style without stiffness.

Embrace the laid-back vibe with salt spray!

Hair Waxes: Flexible Hold and Sculpting

Hair waxes offer a unique balance between hold and flexibility, making them a popular choice for men seeking sculpted styles with a natural finish. Unlike gels or clays, waxes provide a pliable hold, allowing for easy restyling throughout the day. They are suitable for a wide range of hair types and lengths, particularly short to medium cuts.

Waxes excel at creating textured looks, defined pieces, and adding separation. Application involves warming a small amount between your palms and working it through the hair. They offer a more casual, less polished appearance compared to pomades, ideal for everyday wear.

Experiment with waxes for versatile styling!

Choosing the Right Product for Your Hair Length

Selecting the ideal product depends on your hair length! Shorter styles benefit from waxes and pastes, while medium and long hair thrives with creams and pomades.

Short Hair Styling Products

For shorter hairstyles, control and definition are key. Pomades excel at providing a classic, polished look with varying levels of shine, suitable for slicked-back styles or side parts. Pastes offer a more textured, matte finish, ideal for creating a deliberately messy, yet controlled, appearance.

Waxes provide flexible hold, allowing for sculpting and re-styling throughout the day, perfect for textured crops or faux hawks. Clays are also excellent for short hair, delivering strong hold and a matte look, great for adding volume and definition. Consider a lighter hold gel for a more natural, yet defined, style.

Ultimately, the best product depends on your desired finish – shiny, matte, textured, or sleek – and the level of hold you require for your specific short haircut.

Medium Length Hair Styling Products

Medium-length hair offers versatility, demanding products that provide both hold and texture. Pomades remain a strong choice, delivering shine and control for polished styles like side sweeps or quiffs. Creams are fantastic for a more natural, relaxed look, adding hydration and definition without stiffness.

Pastes excel at creating textured, piecey styles, perfect for a modern, effortless vibe. Clays offer a stronger hold for more structured looks, while gels can define layers and control frizz. Salt sprays are ideal for achieving beachy waves and adding volume.

Experimenting with combinations – a cream for hydration followed by a paste for texture – can unlock your ideal medium-length style.

Long Hair Styling Products

Long hair requires products focused on manageability, hydration, and defining natural movement. Creams and leave-in conditioners are essential for taming frizz and providing moisture, preventing dryness and breakage. Lightweight oils nourish the hair and add shine without weighing it down.

For texture and hold, consider pastes or waxes, applied sparingly to avoid a greasy appearance. Salt sprays can enhance natural waves and create a relaxed, beachy look. Avoid heavy gels, which can make long hair feel stiff and unnatural.

Prioritize products that protect against heat damage if using styling tools, and focus on maintaining overall hair health.

Hair Product Ingredients to Look For

Beneficial oils, humectants, and effective hold polymers are key. Prioritize ingredients that nourish, hydrate, and provide the desired style without damaging your hair.

Beneficial Oils for Hair Health

Incorporating oils into your hair care routine provides substantial benefits. Argan oil, rich in Vitamin E, deeply moisturizes and improves elasticity, combating dryness and breakage. Jojoba oil closely mimics the scalp’s natural sebum, balancing oil production and promoting a healthy scalp environment.

Coconut oil penetrates the hair shaft, reducing protein loss and strengthening strands. Grapeseed oil is lightweight and excellent for fine hair, adding shine without weighing it down. These oils offer protection against environmental stressors and heat damage, contributing to overall hair health.

Look for products featuring these oils to enhance hydration, improve manageability, and restore a natural luster to your hair. They are vital components for maintaining strong, healthy hair.

Humectants for Moisture Retention

Humectants are crucial ingredients in men’s hair products, actively drawing moisture from the atmosphere into the hair shaft. Glycerin is a powerful humectant, effectively hydrating and preventing dryness, especially beneficial for coarse or curly hair types. Hyaluronic acid, known for its exceptional water-holding capacity, provides intense hydration and plumps the hair shaft.

Aloe vera not only soothes the scalp but also acts as a humectant, contributing to overall hair health. These ingredients combat frizz, improve elasticity, and enhance the hair’s natural shine.

Products containing humectants are ideal for maintaining optimal moisture levels, leading to stronger, healthier, and more manageable hair.

Hold Polymers and Their Effects

Hold polymers are the backbone of styling power in men’s hair products, dictating the level of control and longevity of a hairstyle. PVP/VA copolymer offers a strong, flexible hold, commonly found in gels and hairsprays, providing definition without excessive stiffness. Acrylates copolymer provides a medium hold, ideal for pastes and creams, allowing for restyling.

Vinyl pyrrolidone (VP) polymers contribute to film-forming properties, enhancing hold and shine. The concentration and type of polymer significantly impact the product’s performance.

Understanding these polymers helps men choose products that match their desired hold and style versatility.

Hair Care Considerations

Protecting hair from heat and maintaining scalp health are crucial. A quality shampoo and conditioner form the foundation of effective hair care for men.

Protecting Hair from Heat Damage

Frequent use of heat styling tools – like blow dryers, straighteners, and curling irons – can significantly damage men’s hair. Excessive heat strips the hair of its natural oils, leading to dryness, brittleness, and breakage. To mitigate these effects, always apply a heat protectant spray before using any heated device.

These sprays create a barrier between the hair and the heat, minimizing damage. Lower heat settings are also recommended, and avoid prolonged exposure to high temperatures. Consider air-drying your hair whenever possible to reduce heat exposure altogether. Furthermore, deep conditioning treatments can help restore moisture and repair damage caused by heat styling, promoting healthier and stronger hair.

Maintaining Scalp Health

A healthy scalp is fundamental for healthy hair growth in men. Neglecting scalp care can lead to issues like dandruff, dryness, and even hair loss. Regular cleansing with a quality shampoo is crucial to remove dirt, oil, and product buildup. Exfoliating the scalp – either manually or with a specialized scrub – helps remove dead skin cells and promotes circulation.

Consider incorporating a scalp massage into your routine to stimulate blood flow and nourish hair follicles. Avoid harsh chemicals and excessive washing, as these can strip the scalp of its natural oils. Addressing any scalp conditions promptly with appropriate treatments is also essential for maintaining optimal scalp health and encouraging robust hair growth.

The Importance of a Good Shampoo and Conditioner

Selecting the right shampoo and conditioner is paramount for men’s hair health. Shampoos cleanse the scalp and hair, removing dirt and excess oil, while conditioners replenish moisture and improve manageability. Choosing products formulated for your specific hair type – oily, dry, fine, or thick – is key.

Look for shampoos free of harsh sulfates and conditioners containing beneficial oils or humectants. A quality shampoo prepares hair for styling products, while conditioner protects against damage. Consistent use of a good shampoo and conditioner duo maintains hair’s strength, shine, and overall health, creating a solid foundation for any styling routine.

Application Techniques

Proper product distribution is crucial for optimal styling. Start with a small amount, warm it between your palms, and apply evenly throughout your hair for best results.

Proper Product Distribution

Achieving a polished look hinges on mastering product distribution. Begin with a pea-sized amount – you can always add more, but removing excess is trickier! Warm the product thoroughly between your palms; this emulsifies it, making application smoother and preventing clumping.

Start applying at the roots, working your way through the mid-lengths and ends. For shorter hair, focus on the roots for lift and texture. With longer styles, concentrate on the ends to control frizz and define shape.

Use a comb or your fingers to evenly distribute the product, ensuring every strand is coated. Avoid applying too much product in one area, as this can create a greasy or weighed-down appearance. Remember, less is often more!

Styling Tips for Different Looks

For a classic pompadour, use a pomade with strong hold and high shine. Apply liberally, comb upwards and back, creating volume at the front. A fine-tooth comb helps refine the shape.

To achieve a textured crop, opt for a paste or clay. Rub a small amount between your hands and apply to dry hair, creating separation and definition. Use your fingers to tousle and shape.

For a sleek, modern look, a gel or cream provides control and shine. Apply evenly, comb through, and smooth any flyaways. Consider a light-hold gel for a natural finish. Experiment to find what works best!

Re-styling Throughout the Day

Maintaining your style requires minimal effort with the right product. For a quick refresh, lightly mist hair with water to reactivate the product. Avoid over-saturation, which can weigh hair down.

If using pomade or wax, a small amount reapplied to fingertips can redefine shape and control flyaways. Blend carefully to avoid buildup.

Texture powders are excellent for adding volume on-the-go. Sprinkle sparingly at the roots and massage in. For looser styles, a quick tousle with fingers is often sufficient. Carry a small comb for precise adjustments!

Product Recommendations Based on Style

Achieve your desired look with targeted product choices! Explore recommendations for classic pompadours, textured crops, and sleek modern styles, maximizing hold and texture.

Products for a Classic Pompadour

Creating a timeless pompadour requires products offering strong hold and high shine. Pomades are the quintessential choice, providing a pliable yet firm foundation for sculpting and maintaining height. Look for water-based pomades for easy washability and restyling capabilities throughout the day.

Oil-based pomades deliver a superior, glossy finish but require more effort to remove. For added volume and texture, consider layering a texture powder underneath the pomade. This provides grit and lift, enhancing the pompadour’s dramatic silhouette. Experiment with different hold strengths to find the balance between control and natural movement. Remember, proper application and distribution are key to achieving a polished, refined pompadour.

Forté Series offers excellent pomade options for this style.

Products for a Textured Crop

Achieving a modern, textured crop demands products that emphasize piecey definition and a natural, matte finish. Pastes and clays are ideal, offering medium to strong hold without the excessive shine of pomades. These products allow for effortless manipulation and restyling, crucial for creating a deliberately tousled look.

Texture powders can also be incorporated to boost volume at the roots and enhance the overall texture. Avoid products with heavy oils, as they can weigh the hair down and diminish the desired separation. For finer hair, a lightweight cream can provide subtle hold and added thickness. Experiment with layering different products to achieve your preferred level of texture and control.

Forté Series provides excellent options for textured styles.

Products for a Sleek, Modern Look

Creating a polished, sleek hairstyle requires products that offer strong hold and control, minimizing frizz and flyaways. Pomades and gels are excellent choices, providing a smooth, refined finish. Water-based pomades offer a balance of hold and washability, while stronger-hold gels deliver maximum definition.

For a more natural, yet controlled look, consider a cream with a firm hold. Ensure even product distribution to avoid stiffness or a greasy appearance. Heat protectants are vital if using styling tools like flat irons or blow dryers to achieve a perfectly smooth texture. Remember, less is often more – start with a small amount and build up as needed.

Professional stylists often recommend these for a sophisticated finish.

shin megami tensei tabletop rpg pdf

Shin Megami Tensei Tabletop RPG: A Comprehensive Guide

Explore the dark world of Shin Megami Tensei! The English language PDF edition of Tokyo Conception is available now for just $30, offering immediate access.

Dive into a post-apocalyptic Tokyo! Shin Megami Tensei: Tokyo Conception brings the iconic world of Shin Megami Tensei III: Nocturne to your tabletop. This English language edition, initially released as a PDF, meticulously recreates the game’s regions with exquisite detail.

Players can expect nearly 100 pages dedicated to demon statistics, including formidable bosses like Ahriman and Kagutsuchi. Whether you’re a seasoned tabletop veteran or a JRPG enthusiast, this game offers an accessible entry point. The PDF version provides immediate access to this captivating experience for only $30, making it a fantastic starting point!

The History of the SMT Tabletop RPG (1993 ⎼ Present)

A legacy spanning decades! The Shin Megami Tensei tabletop RPG originated in Japan in 1993, evolving through five distinct editions. For years, it remained exclusive to Japanese players, building a dedicated following. Now, Lionwing Publishing and Atlus have collaborated to bring this rich history to English-speaking audiences with Tokyo Conception.

The initial English release focuses on a digital PDF format, priced at $30, offering a convenient and affordable way to experience this long-awaited translation. This marks a significant milestone, finally allowing a wider audience to explore the game’s unique mechanics and lore.

English Language Edition Details

Finally, an English translation! Shin Megami Tensei The Roleplaying Game: Tokyo Conception represents the first official English language edition of this beloved Japanese RPG. Lionwing Publishing and Atlus are spearheading this release, making the game accessible to a global audience.

The initial offering centers around a downloadable PDF version, currently priced at $30. This provides immediate access to the core rulebook and allows players to dive into the world of Tokyo Conception without delay. Hardcover editions and bundles are also available, catering to different preferences.

Lionwing Publishing and Atlus Collaboration

A powerful partnership brings SMT to the tabletop! Lionwing Publishing, known for its dedication to quality RPG releases, has joined forces with Atlus, the creators of the Shin Megami Tensei franchise. This collaboration ensures an authentic and faithful adaptation of the video game’s core themes and mechanics.

This partnership is crucial for delivering the English language PDF and physical editions of Tokyo Conception. Atlus’s oversight guarantees adherence to the established lore, while Lionwing Publishing handles the translation, layout, and distribution, including the digital PDF format.

Available Formats: PDF, Hardcover, and Bundles

Choose your path to demon summoning! Shin Megami Tensei: Tokyo Conception is available in multiple formats to suit every player’s preference and budget. The most accessible option is the digital PDF edition, priced at $30, offering instant download and portability.

For those who prefer a physical copy, a stunning hardcover edition is available for $50. Players can also opt for a combo pack, including both the PDF and hardcover for $60; An ultimate bundle, featuring all three cover variants (Death, Nocturn, and Nihilo) plus the PDF, provides the complete experience.

Core Gameplay Mechanics

Delve into a unique RPG experience! Shin Megami Tensei: Tokyo Conception utilizes a core d100 percentage-based system, providing granular control over success and failure. Players roll two d10s to generate a percentage, aiming to meet or exceed a target number. An optional rule introduces ‘d50 Swap Dice’, allowing players to adjust results, improving success rates, particularly for starting characters.

The game emphasizes strategic combat, demon negotiation, and moral alignment choices. The PDF provides detailed rules for character creation, skill systems, and running challenging encounters within the Vortex World setting.

The d100 Percentage-Based System

Precision and challenge define the core mechanic! The Shin Megami Tensei tabletop RPG initially employs a d100 system – rolling two ten-sided dice to create a percentage. Success hinges on exceeding a target number, demanding careful skill and stat allocation. The PDF details this system thoroughly, explaining how modifiers impact rolls.

Later editions, and the PDF’s optional rules, introduce ‘d50 Swap Dice’ to address low success rates for new characters. This allows players to re-designate the tens and ones digits, boosting their chances.

d50 Swap Dice Optional Rule

Boost your success with a clever twist! The Shin Megami Tensei RPG PDF presents the ‘d50 Swap Dice’ rule as an optional enhancement. Recognizing initial low success rates, particularly for starting characters, this rule empowers players. After rolling the d100, players can choose to swap the tens and ones digits.

This simple adjustment can transform a failing roll into a success, offering a vital lifeline. The PDF provides clear instructions and examples, ensuring seamless integration into your game. It’s a fantastic way to balance challenge and accessibility!

Success Rate Adjustments for Starter Characters

Ensure a smooth start for new adventurers! The Shin Megami Tensei RPG PDF acknowledges the initial difficulty for beginner characters. The core d100 system, while robust, could present frustratingly low success rates early on.

To address this, the optional ‘d50 Swap Dice’ rule (detailed within the PDF) provides a crucial adjustment. This allows players to manipulate their rolls, increasing their chances of success. The PDF emphasizes this is a tool to ease newcomers into the system, fostering enjoyment and engagement from the very first session.

Worldbuilding: Tokyo Conception & Shin Megami Tensei III: Nocturne

Immerse yourself in a meticulously crafted post-apocalyptic Tokyo! The Shin Megami Tensei RPG PDF, specifically Tokyo Conception, draws heavily from the iconic world of Shin Megami Tensei III: Nocturne.

The PDF boasts an “exquisite” level of detail, recreating each region with remarkable accuracy; Game Masters and players alike will find a richly detailed setting ripe for exploration and adventure. This faithful adaptation, available in the PDF, provides a strong foundation for compelling narratives and demon encounters, enhancing the overall tabletop experience.

Exquisite World Detail & Regional Recreation

The Tokyo Conception PDF delivers a stunningly detailed recreation of the game world! Digitally Downloaded highlights the exceptional attention paid to each region within the setting, faithfully adapting the atmosphere of Shin Megami Tensei III: Nocturne.

This PDF isn’t just a map; it’s a living, breathing Tokyo, meticulously rebuilt for tabletop play. Players can expect a deeply immersive experience, exploring familiar locales with a newfound level of detail. The PDF’s worldbuilding provides a rich backdrop for thrilling adventures and demon negotiations.

Key Locations in Tokyo Conception

The Tokyo Conception PDF unveils iconic locations from the Shin Megami Tensei III: Nocturne world! While specific locations aren’t detailed in the provided text, the PDF promises a recreation of “every region” with great attention to detail.

Expect to navigate a faithfully reproduced Tokyo, offering a compelling setting for your RPG campaign. The PDF’s worldbuilding serves as a foundation for thrilling encounters and demon summoning. Prepare to explore the Vortex World, encountering challenges and unraveling mysteries within its distinct areas.

The Vortex World Setting

The Tokyo Conception PDF plunges players into the apocalyptic Vortex World! Born from the Conception, this setting is a twisted reflection of Tokyo, ripe with demonic influence and challenging encounters. The PDF leverages the source material, Shin Megami Tensei III: Nocturne, to deliver a truly immersive experience.

Expect a landscape reshaped by chaos, offering unique opportunities for adventure and negotiation with powerful entities. The PDF provides the tools to navigate this dangerous realm, fostering a campaign filled with moral dilemmas and strategic combat.

Demons and Entities

The Tokyo Conception PDF boasts an extensive bestiary! Prepare to encounter nearly 100 pages dedicated to detailed demon statistics, bringing the terrifying creatures of Shin Megami Tensei to life. The PDF includes iconic boss demons like Ahriman, Baal Avatar, Noah, and the formidable Kagutsuchi, each presenting unique challenges.

Players can utilize summoning mechanics detailed within the PDF to forge alliances or command these entities. The comprehensive demon compendium ensures a diverse and engaging experience, crucial for both combat and negotiation within the Vortex World.

Extensive Demon Statistics (Nearly 100 Pages)

The Tokyo Conception PDF delivers an unparalleled depth of demonic detail! Nearly 100 pages are devoted to meticulously crafted statistics for a vast array of demons, ensuring a rich and challenging tabletop experience. This PDF provides Game Masters with the resources to populate the Vortex World with terrifying and unique entities.

From lesser imps to powerful archdemons, each entry is carefully constructed. The PDF’s comprehensive data allows for balanced encounters and compelling narratives, enhancing the strategic elements of demon summoning and negotiation.

Notable Boss Demons: Ahriman, Baal Avatar, Noah, Kagutsuchi

The Tokyo Conception PDF features terrifying boss encounters! Prepare to face iconic adversaries like Ahriman, Baal Avatar, Noah, and the ultimate force of destruction, Kagutsuchi. These formidable demons present significant challenges, demanding strategic combat and clever negotiation from players.

Detailed statistics and unique abilities are included within the PDF, allowing Game Masters to orchestrate epic battles. These encounters are designed to test the limits of even the most seasoned demon summoners, offering a truly memorable experience.

Demon Compendium and Summoning Mechanics

The Tokyo Conception PDF unlocks a vast demonic arsenal! Within its pages lies a comprehensive demon compendium, boasting nearly 100 pages of detailed statistics for a multitude of entities. Players can utilize intricate summoning mechanics to bind these demons to their will, forming powerful alliances.

The PDF outlines the rules for negotiation, fusion, and release, allowing for dynamic demon management. Mastering these mechanics is crucial for survival in the treacherous world of Shin Megami Tensei, offering strategic depth and customization.

Character Creation and Progression

The Tokyo Conception PDF details robust character options! Players can craft unique protagonists by selecting from diverse character classes and archetypes, each offering distinct strengths and weaknesses. The system supports extensive customization, allowing for tailored skill development and ability acquisition.

The PDF outlines a clear progression path, enabling characters to grow in power and influence throughout their adventures. Moral choices and alignment play a significant role, shaping the narrative and unlocking new possibilities.

Character Classes and Archetypes

The Tokyo Conception PDF presents a variety of character archetypes! While specific classes aren’t detailed in available previews, the system allows for creating unique protagonists suited to different playstyles. Expect options catering to both combat prowess and negotiation skills with demons.

The PDF likely outlines how to build characters focused on magical abilities, physical strength, or a blend of both. Archetypes will influence starting skills and progression paths, offering diverse approaches to surviving the Vortex World.

Skill Systems and Abilities

The Tokyo Conception PDF details a robust skill system! Characters develop abilities crucial for navigating the treacherous Vortex World and negotiating with powerful demons. Expect a range of skills encompassing combat, magic, and social interaction.

These skills likely impact success rates during encounters and influence dialogue options. The PDF will outline how characters learn and improve skills, potentially through experience points or specialized training. Mastering skills is vital for overcoming challenges and forging alliances within the game’s complex setting.

Alignment and Moral Choices

The Tokyo Conception PDF emphasizes impactful moral decisions! True to the Shin Megami Tensei spirit, players will face difficult choices with far-reaching consequences. Alignment isn’t simply “good” or “evil,” but a complex spectrum influencing demon interactions and story paths.

Expect choices that challenge your character’s beliefs and shape the fate of Tokyo Conception. The PDF will detail how alignment shifts based on actions, potentially unlocking unique abilities or hindering progress. Prepare for a morally grey world where every decision matters!

Game Master Resources

The Tokyo Conception PDF equips GMs for challenging campaigns! Beyond the core rules, the digital edition provides extensive resources for crafting compelling narratives. Expect adventure seeds to spark creativity, alongside guidance on running intense combat encounters and navigating complex demon negotiations.

The PDF details how to manage the unique aspects of the SMT universe, including the Vortex World and its inhabitants. GMs will find tools to tailor the experience, ensuring a thrilling and authentic Shin Megami Tensei tabletop experience for all players.

Adventure Seeds and Campaign Ideas

The Tokyo Conception PDF is brimming with inspiration! Within its pages, Game Masters discover numerous adventure seeds, ready to launch thrilling campaigns in the post-apocalyptic Tokyo. These seeds range from investigating strange occurrences in key locations to confronting powerful, notable boss demons like Ahriman and Kagutsuchi.

The PDF provides a foundation for both short, one-shot adventures and sprawling, long-term campaigns. Players can explore the intricacies of demon summoning and negotiation, shaping their own destinies within the Vortex World.

Running Combat Encounters

The Tokyo Conception PDF details a dynamic combat system! Utilizing the d100 percentage-based system (with the optional d50 Swap Dice rule for adjusted success rates), encounters are strategically engaging. The PDF provides extensive demon statistics – nearly 100 pages worth – allowing GMs to accurately portray enemy strengths and weaknesses.

Successfully navigating combat requires understanding demon abilities and exploiting vulnerabilities. The PDF offers guidance on managing these encounters, ensuring a challenging yet rewarding experience for players venturing into the Vortex World.

Managing Demon Negotiations

The Tokyo Conception PDF emphasizes demon negotiation as a core mechanic! Unlike simple combat, successful negotiation requires understanding a demon’s personality and desires. The PDF provides tools and guidelines for GMs to roleplay these interactions effectively, offering a nuanced alternative to brute force.

Players can attempt to recruit demons to their party through conversation, offering items, or appealing to their alignment. The PDF details how to determine a demon’s willingness to cooperate, creating a compelling and strategic layer to gameplay.

Accessibility for New Players

The Tokyo Conception PDF is designed to welcome newcomers to the Shin Megami Tensei universe! No prior experience with the video games or tabletop RPGs is necessary to dive in. The PDF includes a comprehensive ruleset, clearly explaining the d100 system and demon negotiation mechanics.

It’s perfect for JRPG enthusiasts curious about tabletop gaming, offering a familiar yet distinct experience. The PDF’s detailed explanations and character creation guidance ensure a smooth entry point for all players, regardless of their RPG background.

No Prior SMT Knowledge Required

Jump into the vortex world with the Tokyo Conception PDF, even without knowing Shin Megami Tensei! The game is meticulously crafted to be accessible to newcomers. The PDF provides all necessary lore and context within its pages, explaining the setting and core concepts.

You don’t need to have played Nocturne or any other SMT title to enjoy this tabletop experience. The ruleset is self-contained, and the demon compendium offers detailed information on each entity. This PDF is a fantastic entry point for those intrigued by the franchise!

Suitable for JRPG and Tabletop RPG Enthusiasts

The Tokyo Conception PDF bridges the gap between digital and tabletop gaming! Fans of Japanese Role-Playing Games, particularly the Shin Megami Tensei series, will find a familiar and compelling experience. The PDF captures the atmosphere and strategic depth of the video games.

Experienced tabletop gamers will appreciate the unique d100 system and intricate demon negotiation mechanics. Whether you’re a veteran GM or new to RPGs, this PDF offers a challenging and rewarding adventure. It’s a perfect blend of both worlds!

The “End of the Century Survival Guide” Expansion

Enhance your Tokyo Conception experience with the expansion PDF! This add-on introduces the d50 Swap Dice optional rule, addressing initial concerns about success rates, especially for starting characters. It provides a smoother, more accessible gameplay experience;

The PDF expands upon the core rulebook, offering new challenges and deepening the strategic layers of demon negotiation and combat. It’s a must-have for players seeking a more refined and balanced Shin Megami Tensei tabletop adventure. Don’t miss out!

Cover Variants: Death, Nocturn, and Nihilo

Choose your aesthetic with stunning cover variants! The Shin Megami Tensei tabletop RPG PDF is available with three distinct cover options: Death, Nocturn, and Nihilo. Each variant offers a unique artistic interpretation of the game’s dark and compelling themes.

Purchase the PDF individually for $30, or bundle it with a hardcover edition for $60. An ultimate bundle, including all three cover variants and the PDF, is also available. Select the cover that best reflects your vision of the Vortex World!

Pricing and Availability (as of December 16, 2025)

Secure your copy of Tokyo Conception today! As of December 16, 2025, the Shin Megami Tensei tabletop RPG is readily available in multiple formats. The digital PDF edition is priced at $30, providing instant access to the game’s core rules and setting.

For those preferring a physical copy, the hardcover edition is available for $50. Combination bundles, including both PDF and hardcover versions, are offered at $60. The ultimate bundle, featuring all three cover variants and the PDF, completes the collection.

Digital Distribution and PDF Access

Instant access to Tokyo Conception awaits! The PDF version of the Shin Megami Tensei tabletop RPG is the quickest way to begin your journey into the Vortex World. Priced at $30, it’s available for immediate download, eliminating shipping times and costs.

This digital edition contains the complete core rulebook, allowing players and Game Masters to dive straight into character creation, demon summoning, and thrilling encounters. Enjoy the convenience of playing on your preferred device, and easily reference rules during gameplay.

Community Resources and Online Support

Connect with fellow demon hunters! A growing online community surrounds Shin Megami Tensei: Tokyo Conception, offering a wealth of resources for both new and experienced players. Dedicated forums and social media groups provide spaces to discuss strategies, share character builds, and seek advice.

Players who purchased the PDF edition can easily participate in these online discussions, accessing support and contributing to the collective knowledge base. Expect to find adventure seeds, house rules, and fan-created content enriching your gameplay experience.

Future Expansion Plans and Potential Content

The journey doesn’t end with Tokyo Conception! Lionwing Publishing hints at exciting future expansions, building upon the foundation laid by the core rulebook and the “End of the Century Survival Guide”. Expect new demon compendiums, challenging scenarios, and potentially, adaptations of other iconic Shin Megami Tensei settings.

PDF owners will have seamless access to these digital releases, expanding their game with minimal effort. Further content could explore the worlds of Shin Megami Tensei IV or even delve into the Persona universe, enriching the tabletop experience.

Comparison to Other Tabletop RPG Systems

Distinctive mechanics set Tokyo Conception apart. Unlike d20 systems, it utilizes a d100 percentage-based system, offering granular control over success and failure. The optional d50 Swap Dice rule addresses initial low success rates, a unique adjustment not commonly found in other RPGs.

While sharing narrative focus with systems like Fate, SMT emphasizes strategic demon negotiation and challenging combat. The PDF version allows players to easily reference the extensive demon statistics – nearly 100 pages – a scale rivaling dedicated bestiaries in other games.

The Influence of Persona on the TTRPG

Though predating Persona’s mainstream success, Shin Megami Tensei: Tokyo Conception shares thematic DNA. The core concepts of demon summoning, negotiation, and alignment choices—hallmarks of Persona—are deeply rooted in the tabletop RPG’s foundation.

The PDF edition allows players to explore these elements with detailed rules for demon compendium usage and moral consequences. While Persona offers a more curated experience, the TTRPG provides unparalleled freedom in shaping narratives and character arcs, mirroring the series’ complex philosophical underpinnings.

the wrong way to use healing magic light novel pdf

Article Plan: The Wrong Way to Use Healing Magic Light Novel PDF

This article details navigating the popular light novel, focusing on PDF access, story elements, character analysis, and community resources surrounding Riolu and Lucario;

“The Wrong Way to Use Healing Magic” is a captivating isekai light novel series penned by Uso․ It quickly gained traction for its unique premise and comedic execution, diverging from typical hero narratives․ The story centers around Kenosuke Fuse, a high school student unexpectedly transported to a fantasy world․ However, unlike most protagonists, Kenosuke possesses a flawed understanding of healing magic – he can only inflict pain upon using it․

This peculiar limitation forms the core conflict and humor of the series, as Kenosuke navigates a world where his ‘healing’ is anything but․ The narrative explores themes of societal expectations, unconventional power usage, and the protagonist’s struggle to find his place․ The series has expanded beyond the light novel, encompassing manga and anime adaptations, further solidifying its popularity within the isekai genre․

Overview of “The Wrong Way to Use Healing Magic”

The narrative unfolds as Kenosuke attempts to conceal his detrimental healing ability, leading to a series of comical misunderstandings and increasingly absurd situations․ He’s forced to utilize his ‘healing’ strategically, often causing pain to achieve beneficial outcomes, challenging conventional magical norms․ The world itself is a standard fantasy setting, complete with kingdoms, magic guilds, and mythical creatures, providing a backdrop for Kenosuke’s unconventional adventures․

The story isn’t solely focused on comedy; it also delves into political intrigue and the exploration of moral ambiguities․ Kenosuke’s actions, while often humorous, have real consequences, forcing him to confront the ethical implications of his power․ The light novel’s charm lies in its subversion of tropes and its endearing protagonist․

Popularity and Fanbase

“The Wrong Way to Use Healing Magic” has garnered a substantial and dedicated fanbase, particularly within the isekai and comedy genres․ Its appeal stems from its unique premise, relatable protagonist, and consistently humorous execution․ Online forums and social media platforms are brimming with discussions, fan art, and cosplay inspired by the series․

The light novel’s popularity has extended beyond its original Japanese release, with translations attracting a global audience․ The fanbase actively engages with the author and fellow readers, contributing to a vibrant community․ This enthusiastic reception has fueled the series’ adaptation into manga and anime formats, further expanding its reach and influence․

Availability of the Light Novel PDF

Finding a PDF version of “The Wrong Way to Use Healing Magic” presents a complex situation․ While readily available through unofficial channels, accessing these often carries risks․ Legal purchasing options are strongly recommended to support the author and publisher․ Official digital releases are typically found on established ebook platforms․

Numerous websites offer downloadable PDFs, but these frequently contain low-quality translations, formatting errors, or even malicious software․ Prioritizing legitimate sources ensures a positive reading experience and ethical consumption․ Supporting official releases helps guarantee continued production of the series and future translations․

Legal Sources for Purchasing

Readers seeking a legitimate copy of “The Wrong Way to Use Healing Magic” have several reliable options․ Yen Press is the official English publisher, offering both physical and digital versions․ Major ebook retailers like Amazon Kindle, Google Play Books, and Kobo consistently stock the light novel series․

Directly purchasing from Yen Press’s website guarantees support for the author and translator․ These platforms provide high-quality, professionally edited translations, ensuring an optimal reading experience․ Avoiding unofficial sources protects against malware and supports the creative process, fostering continued releases․

Risks of Downloading Illegal PDFs

Obtaining “The Wrong Way to Use Healing Magic” through unauthorized PDF downloads carries significant risks․ These files often harbor malware, viruses, and other malicious software, potentially compromising your device and personal data․ Furthermore, downloading copyrighted material is illegal and unethical, undermining the author’s livelihood and the publishing industry․

Unofficial PDFs frequently suffer from poor translation quality, formatting errors, and missing content, diminishing the reading experience․ Supporting legitimate sources ensures continued series publication and demonstrates respect for the creators’ hard work․ Prioritize legal avenues for a safe and enjoyable reading journey․

Core Concepts of the Story

“The Wrong Way to Use Healing Magic” centers around a unique magic system where healing isn’t solely restorative․ Kenosuke Fuse, the protagonist, discovers his healing magic possesses unexpected side effects – often causing more trouble than it solves․ This misuse forms the core comedic element and drives the narrative forward․

The world’s magic operates on established rules, but Kenos’s unconventional approach constantly challenges these norms․ His healing abilities aren’t limited to physical ailments; they can manipulate emotions and even alter physical attributes, leading to chaotic and hilarious situations․ This subversion of typical fantasy tropes is central to the novel’s appeal․

Misuse of Healing Magic – Kenos’s Approach

Kenosuke Fuse doesn’t utilize healing magic for its intended purpose․ Instead of simply restoring health, his applications are… unorthodox․ He inadvertently inflicts status effects, alters personalities, and generally creates mayhem with every attempt to help․ This isn’t due to a lack of skill, but rather a fundamental misunderstanding – or perhaps a deliberate disregard – for the proper techniques․

His healing often comes with unforeseen consequences, turning simple injuries into comical disasters․ This approach isn’t malicious; Kenos genuinely wants to assist, but his powers consistently backfire․ The humor stems from the contrast between his intentions and the chaotic results, making his healing attempts a source of constant entertainment․

The World’s Magic System

The world of “The Wrong Way to Use Healing Magic” operates on a mana-based magic system, where individuals channel internal energy to produce various effects․ Healing magic, specifically, is typically a precise art focused on restoring vitality․ However, the system allows for nuanced applications and, crucially, vulnerabilities․

The novel reveals that magic isn’t simply about power, but also about understanding the flow of mana and its interaction with the body․ Kenos’s “misuse” isn’t a glitch in the system, but a demonstration of its potential for unintended consequences when wielded without proper control or knowledge․ This system allows for creative, and often hilarious, magical mishaps․

Main Characters and Their Roles

“The Wrong Way to Use Healing Magic” centers around a compelling cast, primarily Kenosuke Fuse, the protagonist, and Faruna, a key supporting character․ Kenos, unexpectedly gifted with powerful healing magic, struggles with its application, often causing more trouble than he solves due to his unorthodox methods․

Faruna, a skilled and dedicated magic user, initially serves as a foil to Kenos, representing the conventional approach to magic․ She gradually becomes both a reluctant partner and a source of guidance, despite his chaotic tendencies․ Their dynamic drives much of the story’s humor and plot progression, showcasing contrasting ideologies․

Kenosuke Fuse – The Protagonist

Kenosuke Fuse is the unconventional hero of the series, possessing immense healing magic but lacking the traditional understanding of its proper use․ He doesn’t aim to cure; instead, his healing often results in bizarre and unintended consequences, like enhancing physical abilities beyond normal limits or causing unexpected mutations․

This stems from his unique interpretation of the magic’s principles, prioritizing raw power over finesse․ Kenos’s personality is a blend of naiveté and determination, leading to both comedic mishaps and surprisingly effective solutions․ He’s a catalyst for chaos, constantly challenging the established norms of the magical world․

Faruna – The Supporting Character

Faruna serves as a crucial counterpoint to Kenosuke’s chaotic healing, often acting as his voice of reason and a reluctant participant in his experiments․ As a member of the Blades – an organization dedicated to eliminating those deemed dangerous – she initially views Kenos as a threat due to his unpredictable magic․

However, she gradually comes to understand his intentions and even develops a complex relationship with him, balancing her duty with a growing respect for his unique abilities․ Faruna’s stoicism and combat prowess complement Kenos’s unconventional approach, making them a surprisingly effective team despite their contrasting ideologies․

Common Themes Explored in the Novel

“The Wrong Way to Use Healing Magic” delves into several compelling themes, notably the subversion of traditional hero tropes and the exploration of morality within a fantastical setting․ The novel questions the conventional understanding of ‘healing’ and its implications, showcasing how even benevolent magic can be twisted for unconventional purposes․

Furthermore, it examines the consequences of unchecked power and the importance of individual agency․ The story also touches upon themes of prejudice and societal expectations, as Kenos challenges the established norms of the magical world․ Through humor and satire, the novel prompts readers to consider the complexities of good and evil․

Analysis of Kenos’s Character Development

Kenosuke Fuse undergoes significant development throughout the series, initially presented as a somewhat apathetic and unconventional protagonist․ His character arc revolves around learning to navigate a world that doesn’t understand his unique approach to healing magic․ Initially motivated by self-preservation and a desire for a peaceful life, Kenos gradually embraces his abilities and the responsibilities that come with them․

He evolves from a reluctant hero to a more proactive figure, though always retaining his quirky and often morally ambiguous methods․ His interactions with Faruna and others force him to confront his own beliefs and motivations, leading to a nuanced and compelling character journey․

The Humor and Satire in the Story

“The Wrong Way to Use Healing Magic” masterfully blends comedic elements with satirical commentary on typical isekai tropes and power fantasies․ The humor stems largely from Kenos’s deliberately unconventional and often problematic use of healing magic, creating absurd and unexpected situations․ The story frequently subverts expectations, poking fun at the genre’s common clichés, such as overpowered protagonists and predictable plotlines․

This satirical approach extends to the world-building and character interactions, offering a refreshing and self-aware take on the isekai formula․ The light novel doesn’t take itself too seriously, resulting in a genuinely entertaining and engaging reading experience․

Differences Between the Light Novel, Manga, and Anime Adaptations

Adaptations of “The Wrong Way to Use Healing Magic” present varying levels of detail and interpretation․ The light novel, being the source material, offers the most comprehensive narrative and internal monologue from Kenos, providing deeper character insights․ The manga adaptation streamlines the story, focusing on key plot points and visual gags, sometimes omitting nuanced details;

The anime further condenses the narrative, prioritizing pacing and animation spectacle․ Certain subplots and character arcs are altered or removed for brevity․ While the anime captures the core humor, it often lacks the satirical depth present in the original light novel PDF version․

Fan Theories and Discussions

Online forums dedicated to “The Wrong Way to Use Healing Magic” are rife with speculation and debate․ A prominent theory revolves around the origins of Kenos’s unique healing abilities and whether a hidden power source exists beyond his initial understanding․ Discussions frequently analyze Faruna’s motivations and potential romantic interests, dissecting subtle cues from the light novel PDF․

Fans also debate the implications of the world’s magic system, proposing alternative explanations for its limitations and potential loopholes․ Some theorize about future antagonists and their connection to Kenos’s past, while others focus on the comedic timing and satirical elements within the story․

Common Issues with Fan-Translated PDFs

Fan-translated PDFs of “The Wrong Way to Use Healing Magic” often suffer from inconsistencies and errors․ Translation quality can vary drastically, leading to misinterpretations of crucial plot points and character nuances․ Formatting issues are prevalent, with text alignment, missing characters, and image distortions frequently encountered within the PDF․

Editing errors, such as typos and grammatical mistakes, further detract from the reading experience․ These issues can obscure the author’s intended meaning and disrupt the flow of the narrative․ Readers should be aware that these PDFs may not accurately represent the original light novel content․

Translation Quality Concerns

The quality of fan translations for “The Wrong Way to Use Healing Magic” is a significant concern for readers․ Nuances in Japanese language and cultural context are often lost or misinterpreted, impacting the story’s humor and emotional depth․ Literal translations can sound awkward or unnatural in English, hindering comprehension․

Inconsistent terminology and character naming conventions further contribute to confusion․ Translators may lack a comprehensive understanding of the magic system or world-building, leading to inaccuracies․ Readers relying on these translations risk missing subtle jokes or important plot details, diminishing their overall enjoyment of the novel․

Formatting and Editing Errors

Illegally sourced PDF versions of “The Wrong Way to Use Healing Magic” frequently suffer from significant formatting and editing issues․ These can range from minor inconveniences like inconsistent font sizes and spacing to major disruptions such as missing text, scrambled paragraphs, and incorrect image placement․

Poorly converted files often lack proper table of contents or page numbers, making navigation difficult․ Grammatical errors, typos, and punctuation mistakes are commonplace, further detracting from the reading experience․ These flaws demonstrate a lack of professional editing and quality control, impacting readability and immersion within the story’s world․

Where to Find Reliable Information About the Series

For accurate details regarding “The Wrong Way to Use Healing Magic,” several online resources prove invaluable․ Official publisher websites, like Yen Press, offer synopses, release schedules, and legitimate purchasing options․ Dedicated fan wikis, such as those found on fandom platforms, compile extensive information about characters, plot points, and the magic system․

Reputable anime and light novel news sites provide updates on adaptations and related media․ Social media accounts associated with the author and official distributors also offer insights․ Avoiding unofficial sources and prioritizing verified information ensures a comprehensive and accurate understanding of the series, beyond just PDF availability․

The Appeal of Isekai Genre and This Novel’s Place Within It

The Isekai genre, translating to “different world,” captivates audiences with its escapism and power fantasy elements․ “The Wrong Way to Use Healing Magic” taps into this appeal, offering a protagonist transported to a fantasy realm․ However, it subverts typical Isekai tropes with Kenosuke’s unconventional approach to healing magic, focusing on inflicting status ailments rather than pure restoration;

This unique twist distinguishes it from standard narratives, attracting readers seeking a fresh perspective․ The novel’s humor and satirical take on the genre further enhance its appeal, offering a compelling blend of familiar Isekai elements and innovative storytelling, even within PDF formats․

Potential Spoilers and Avoiding Them

When exploring “The Wrong Way to Use Healing Magic” through PDF versions, spoiler risks are significant․ Online forums and unofficial translations often contain discussions revealing key plot points and character developments․ Readers should exercise caution when browsing these sources, particularly before completing the initial volumes․

Utilizing official summaries and reviews can provide context without revealing crucial surprises․ Avoiding image searches related to character evolutions, like Riolu to Lucario, can also minimize accidental exposure․ Prioritizing legally obtained PDFs reduces the likelihood of encountering spoiler-filled content within the files themselves, preserving the narrative’s impact․

Community Forums and Discussion Platforms

Dedicated online communities thrive around “The Wrong Way to Use Healing Magic,” offering spaces for fans to discuss the light novel, manga, and anime adaptations․ Platforms like Reddit (r/TheWrongWayToUseHealingMagic) and dedicated Discord servers are hubs for sharing theories, fan translations, and artwork․

These forums also serve as valuable resources for locating information about PDF availability, though caution regarding legality is advised․ Discussions frequently delve into character analyses – like Kenosuke Fuse – and comparisons to Pokémon like Riolu, fostering a vibrant exchange of perspectives and enhancing the overall fan experience․

Future of the Series – Ongoing Releases and Potential Sequels

The light novel series remains actively ongoing in Japan, with new volumes consistently released, fueling continued interest among fans eagerly awaiting English translations․ While official announcements regarding sequels beyond the main storyline are currently scarce, the expansive world and compelling characters leave room for potential spin-offs or continuation of the narrative․

Discussions within online communities, similar to those surrounding Pokémon like Riolu’s evolution, often speculate on future developments․ Accessing the latest PDF chapters legally through official sources ensures support for the author and continued series production․

“The Wrong Way to Use Healing Magic” captivates readers with its unique blend of isekai tropes, comedic timing, and a protagonist who subverts expectations․ Kenosuke’s unconventional approach to healing, coupled with the intriguing magic system, sets it apart․ The series’ popularity is further fueled by readily available, though sometimes problematic, PDF versions circulating online․

Like the dedicated fanbase tracking Pokémon evolutions such as Riolu into Lucario, readers are invested in Kenosuke’s growth and the unfolding mysteries․ Choosing legal purchasing options supports the author and ensures continued access to quality content․

comptia network+ guide to networks 9th edition

CompTIA Network+ (9th Edition), authored by Jill West, provides a comprehensive guide to networking concepts․
It’s available as an eBook, PDF, and with MindTap course lists,
preparing individuals for the industry-recognized Network+ certification․

Overview of the CompTIA Network+ Certification

The CompTIA Network+ certification validates essential skills for establishing, managing, and troubleshooting networks․ It’s a vendor-neutral credential, demonstrating proficiency across various technologies․ The 9th Edition guide by Jill West thoroughly prepares candidates for the N10-008 exam․

This certification covers a broad spectrum of networking knowledge, including network fundamentals, security, and troubleshooting․ Resources like the CompTIA Network Guide to Networks, available as an eBook and with accompanying testbanks, are crucial for success․ Students benefit from digital textbook formats and MindTap course lists, enhancing the learning experience․ Passing the exam signifies a foundational understanding of networking principles, opening doors to entry-level network roles․

Target Audience for the 9th Edition Guide

The 9th Edition of the CompTIA Network Guide to Networks, by Jill West, is designed for a diverse audience․ It’s ideal for students pursuing entry-level IT careers, particularly those aiming for roles like network support specialists or help desk technicians․ Individuals seeking to validate their networking skills and obtain the CompTIA Network+ certification will find it invaluable․

The guide also benefits those with some IT experience looking to formalize their knowledge․ Its comprehensive coverage, available in eBook, PDF, and MindTap formats, caters to various learning styles․ Whether utilizing the textbook directly or leveraging the accompanying testbank, the material is accessible to both beginners and those needing a refresher․

Networking Fundamentals

CompTIA Network+ (9th Edition) delves into core networking principles, including topologies and hardware․ The guide, by Jill West, builds a foundation for understanding network operations․

OSI Model and TCP/IP Model

CompTIA Network+ (9th Edition), as detailed by Jill West’s guide, extensively covers the foundational OSI (Open Systems Interconnection) and TCP/IP (Transmission Control Protocol/Internet Protocol) models․ These models are crucial for understanding how data communication functions across networks․

The guide explains the seven layers of the OSI model – Physical, Data Link, Network, Transport, Session, Presentation, and Application – and their respective roles in data transmission․ It then contrasts this with the TCP/IP model, a more practical four-layer framework used in the internet․

Understanding these models is vital for troubleshooting, network design, and comprehending how different networking technologies interact․ The 9th edition provides a detailed exploration of each layer, ensuring a solid grasp of these core networking concepts․

Encapsulation and De-encapsulation

CompTIA Network+ (9th Edition), guided by Jill West, thoroughly explains encapsulation and de-encapsulation – fundamental processes in network communication․ Encapsulation involves adding headers and trailers to data as it moves down the OSI model layers, preparing it for transmission․

Each layer adds its own control information, creating a layered structure․ Conversely, de-encapsulation occurs at the receiving end, where these headers and trailers are removed layer by layer as the data ascends the model․

The guide emphasizes how these processes enable reliable and organized data transfer․ Understanding encapsulation and de-encapsulation is critical for comprehending data flow, protocol interactions, and troubleshooting network issues, as highlighted in the 9th edition’s comprehensive coverage․

Network Topologies (Physical and Logical)

CompTIA Network+ (9th Edition), authored by Jill West, details both physical and logical network topologies․ Physical topology defines the actual cable layout – like star, bus, ring, and mesh – impacting installation and maintenance․ The guide explains each topology’s advantages and disadvantages․

Logical topology, however, describes how data flows within the network, regardless of the physical arrangement․ Common logical topologies include broadcast and token ring․ The 9th edition emphasizes that a network can have one physical topology and a different logical topology․

Understanding these distinctions is crucial for network design, troubleshooting, and optimizing performance, as covered within the comprehensive materials․

Common Network Cables and Connectors

CompTIA Network+ (9th Edition), by Jill West, thoroughly covers essential network cabling and connectors․ Key cable types include twisted-pair (Cat5e, Cat6, Cat6a) – commonly used for Ethernet – and fiber optic cables, offering higher bandwidth and longer distances․

The guide details various connectors like RJ45 (for twisted-pair), SC and LC (for fiber optic), and their respective applications․ It explains cable standards, limitations, and best practices for installation and termination․

Understanding cable characteristics – like shielding and bandwidth capacity – is vital for optimal network performance, a core focus of the 9th edition’s curriculum․

Network Devices

CompTIA Network+ (9th Edition), by Jill West, details crucial network hardware․ This includes routers, switches, firewalls, and wireless access points (WAPs) for connectivity․

Routers and Their Functions

Routers are fundamental network devices, as detailed in CompTIA Network+ (9th Edition) by Jill West․ They connect multiple networks, forwarding data packets between them based on IP addresses․ This process involves examining the destination IP address of each packet and using routing tables to determine the optimal path․

Routers perform Network Address Translation (NAT), allowing multiple devices on a private network to share a single public IP address․ They also provide security features like firewalls and access control lists (ACLs)․ Modern routers often include wireless capabilities, functioning as both a router and a wireless access point․ Understanding router configuration and troubleshooting is a key component of the Network+ certification․

The 9th edition guide provides in-depth coverage of these functions and more․

Switches and Their Operation

Switches, as covered in CompTIA Network+ (9th Edition) by Jill West, are crucial for local area network (LAN) connectivity․ Unlike hubs, switches intelligently forward data only to the intended destination device, improving network efficiency․ They operate at the Data Link Layer (Layer 2) of the OSI model, utilizing MAC addresses to build a forwarding table․

This table maps MAC addresses to specific ports, enabling direct communication․ Switches support various features like VLANs (Virtual LANs) for network segmentation and Spanning Tree Protocol (STP) to prevent loops․ Understanding switch configuration, including port security and troubleshooting common issues, is vital for Network+ certification preparation․

The 9th edition guide offers detailed explanations and practical examples․

Firewalls and Network Security

Firewalls, a key component of network security detailed in CompTIA Network+ (9th Edition), protect networks from unauthorized access․ The guide by Jill West explains how firewalls examine network traffic based on pre-defined rules, blocking malicious content and controlling inbound/outbound connections․ They can be hardware or software-based, offering varying levels of protection․

Understanding firewall types – packet filtering, stateful inspection, and next-generation firewalls – is crucial․ The book also covers network security concepts like intrusion detection/prevention systems (IDS/IPS) and common network threats․

Securing a network involves implementing robust security policies and regularly updating security measures, as emphasized throughout the 9th edition․

Wireless Access Points (WAPs)

Wireless Access Points (WAPs), thoroughly covered in CompTIA Network+ (9th Edition) by Jill West, enable devices to connect to a network wirelessly․ The guide details how WAPs bridge wired and wireless networks, broadcasting a Wi-Fi signal․ Understanding WAP functionality is vital for network design and troubleshooting․

The 9th edition explains different WAP modes – access point, repeater, and bridge – and their respective uses․ It also emphasizes the importance of secure wireless configuration, including choosing strong passwords and implementing appropriate security protocols like WPA2/WPA3․

Proper WAP placement and channel selection are crucial for optimal performance and minimizing interference, as highlighted in the text․

IP Addressing and Subnetting

CompTIA Network+ (9th Edition) details IPv4 basics, subnet masks, and CIDR notation․ It clarifies private versus public IP addresses, alongside DHCP and DNS concepts․

IPv4 Addressing Basics

IPv4 addressing, a core component covered in CompTIA Network+ (9th Edition), utilizes a 32-bit numerical system to uniquely identify devices on a network․ This system allows for over four billion unique addresses, represented in dotted decimal notation (e․g․, 192․168․1․1)․

The guide explains how IPv4 addresses are structured, including network and host portions, crucial for understanding network segmentation․ It details the concept of address classes (A, B, C, D, and E), though classful networking is largely outdated․

Furthermore, the 9th edition emphasizes the importance of understanding how IPv4 addresses are assigned and managed, laying the groundwork for more advanced topics like subnetting and routing․ It’s a foundational element for network professionals․

Subnet Masks and CIDR Notation

CompTIA Network+ (9th Edition) thoroughly explores subnet masks, essential for dividing a network into smaller, more manageable subnetworks․ These masks, also in dotted decimal format, determine the network and host portions of an IPv4 address․ The guide details how to calculate subnet masks based on network requirements․

Alongside subnet masks, the book introduces CIDR (Classless Inter-Domain Routing) notation, a more concise way to represent networks and subnet masks (e․g․, /24)․ Understanding CIDR is vital for efficient IP address allocation and routing protocols․

The 9th edition emphasizes the practical application of subnetting and CIDR, preparing candidates to analyze network designs and troubleshoot connectivity issues effectively․

Private vs․ Public IP Addresses

CompTIA Network+ (9th Edition) clearly differentiates between private and public IP addresses․ Private IPs, like those in the 192․168․x․x range, are used within local networks and aren’t globally routable on the internet․ They enable multiple devices to share a single public IP address through Network Address Translation (NAT)․

Public IP addresses, assigned by ISPs, are unique identifiers for devices accessible on the internet․ The guide explains how NAT functions to translate private IPs to public IPs for external communication․

Understanding this distinction is crucial for network security and proper network configuration, as detailed within the 9th edition’s comprehensive coverage․

DHCP and DNS Concepts

CompTIA Network+ (9th Edition) dedicates significant coverage to DHCP (Dynamic Host Configuration Protocol) and DNS (Domain Name System)․ DHCP automates IP address assignment, reducing administrative overhead by dynamically leasing IP configurations to network devices․ This eliminates manual configuration and potential IP conflicts․

DNS translates human-readable domain names (like google․com) into IP addresses, enabling users to access websites without memorizing numerical IPs․ The guide explains the DNS resolution process and the hierarchy of DNS servers․

Mastering these concepts, as presented in the 9th edition, is vital for understanding network functionality and troubleshooting connectivity issues․

Network Protocols

CompTIA Network+ (9th Edition) details essential protocols like TCP, UDP, HTTP, HTTPS, FTP, SFTP, SMTP, POP3, and IMAP,
crucial for network communication understanding․

TCP and UDP Protocols

TCP (Transmission Control Protocol) and UDP (User Datagram Protocol) are foundational protocols for data transmission․ CompTIA Network+ (9th Edition) thoroughly explains their differences․ TCP is connection-oriented, ensuring reliable delivery through sequencing, error checking, and acknowledgements – ideal for applications needing guaranteed data integrity, like web browsing (HTTPS)․

Conversely, UDP is connectionless, prioritizing speed over reliability․ It doesn’t guarantee delivery or order, making it suitable for applications like streaming or online gaming where occasional packet loss is tolerable․ Understanding these protocols is vital for network troubleshooting and application performance analysis, as detailed within the guide’s comprehensive coverage․

HTTP and HTTPS Protocols

HTTP (Hypertext Transfer Protocol) is the foundation of data communication on the web, enabling resource retrieval․ CompTIA Network+ (9th Edition) details how it functions, but emphasizes the critical importance of its secure counterpart, HTTPS (HTTP Secure)․

HTTPS encrypts data transmitted between a user’s browser and the web server using TLS/SSL, protecting sensitive information like passwords and credit card details․ The guide explains how HTTPS utilizes port 443, contrasting it with HTTP’s port 80․ Understanding these protocols is crucial for network security, as secure web communication is paramount in today’s digital landscape, a key focus of the certification․

FTP and SFTP Protocols

FTP (File Transfer Protocol), as covered in CompTIA Network+ (9th Edition), is a standard network protocol used for transferring files between a client and server․ It operates on ports 20 and 21, but transmits data, including credentials, in plaintext, making it inherently insecure․

This is where SFTP (Secure File Transfer Protocol) comes in․ SFTP utilizes SSH (Secure Shell) to encrypt both commands and data, providing a much more secure method for file transfer․ The guide highlights the importance of SFTP over FTP for sensitive data․ Understanding the security implications and operational differences between these protocols is vital for network professionals preparing for the certification exam․

Email Protocols (SMTP, POP3, IMAP)

CompTIA Network+ (9th Edition) details the core protocols governing email communication․ SMTP (Simple Mail Transfer Protocol), operating on port 25, is responsible for sending email messages between servers․ However, it doesn’t handle receiving or storing emails․

For receiving emails, POP3 (Post Office Protocol version 3), typically on port 110, downloads emails to a client device, often deleting them from the server․ IMAP (Internet Message Access Protocol), using port 143, allows users to access and manage emails directly on the server, synchronizing across multiple devices․ The guide emphasizes understanding these distinctions for effective network troubleshooting and email system administration․

Network Security

CompTIA Network+ (9th Edition) covers vital security aspects, including threats, wireless protocols (WEP, WPA, WPA2, WPA3), VPNs, and network access control measures․

Common Network Threats

CompTIA Network+ (9th Edition) extensively details prevalent network threats, crucial for robust security implementations․ These encompass malware – viruses, worms, and Trojans – designed to compromise systems and data․

Phishing attacks, utilizing deceptive communications, aim to steal sensitive information․

Denial-of-Service (DoS) and Distributed Denial-of-Service (DDoS) attacks disrupt network services by overwhelming resources․

Man-in-the-Middle (MitM) attacks intercept communications, potentially altering or stealing data․

Ransomware encrypts data, demanding payment for its release․

Understanding these threats, alongside social engineering tactics, is paramount for effective network defense, as emphasized within the guide’s comprehensive coverage․

Wireless Security Protocols (WEP, WPA, WPA2, WPA3)

CompTIA Network+ (9th Edition) thoroughly examines wireless security protocols, detailing their evolution and vulnerabilities․

WEP, the earliest standard, is now considered insecure due to easily cracked encryption․

WPA addressed WEP’s flaws but also proved susceptible to attacks․

WPA2, utilizing AES encryption, offered significant improvements and became widely adopted․

However, WPA3 represents the latest standard, providing enhanced security features like Simultaneous Authentication of Equals (SAE) and improved cryptographic strength․

The guide emphasizes understanding each protocol’s strengths and weaknesses for implementing appropriate wireless security measures, safeguarding networks from unauthorized access․

VPNs and Network Access Control

CompTIA Network+ (9th Edition) details VPNs (Virtual Private Networks) as crucial for secure remote access․ These create encrypted tunnels, protecting data transmitted over public networks like the internet․
The text explains different VPN protocols and their implementations․
Alongside VPNs, Network Access Control (NAC) is covered, focusing on controlling access to network resources․
NAC solutions verify device compliance with security policies before granting network access, mitigating threats․
The guide highlights how these technologies work in tandem to bolster network security, ensuring only authorized users and devices connect, safeguarding sensitive information․

Troubleshooting Networks

CompTIA Network+ (9th Edition) emphasizes systematic troubleshooting, utilizing tools to interpret network logs and diagnose issues efficiently for optimal network performance․

Common Network Troubleshooting Tools

Effective network troubleshooting relies on a diverse toolkit․ The CompTIA Network+ (9th Edition) guide highlights essential utilities for diagnosing connectivity problems; Ping verifies reachability, while traceroute maps the path packets take․ Nslookup and dig assist in DNS resolution issues․

Ipconfig/ifconfig displays network configuration details, crucial for identifying incorrect settings․ Netstat reveals active network connections and listening ports․ Wireshark, a powerful packet analyzer, captures and decodes network traffic for in-depth analysis․ Utilizing these tools, alongside interpreting network logs, forms a systematic approach to resolving network issues efficiently, as detailed within the guide․

Systematic Troubleshooting Approach

The CompTIA Network+ (9th Edition) emphasizes a structured approach to network troubleshooting․ Begin by identifying the problem and gathering information – what’s not working, and for whom? Next, establish a theory of the root cause․ Test the theory using tools like ping or traceroute to confirm or refute your hypothesis․

Implement a solution, carefully documenting each step․ Verify functionality to ensure the issue is resolved and hasn’t created new problems․ Finally, document the entire process for future reference․ This methodical process, detailed in the guide, minimizes downtime and ensures efficient network maintenance․

Interpreting Network Logs

CompTIA Network+ (9th Edition) highlights the critical skill of interpreting network logs for effective troubleshooting․ These logs, generated by devices like routers and firewalls, record events and errors․ Learning to decipher these entries is paramount for identifying security breaches and performance issues․

The guide teaches how to filter logs to focus on relevant information, recognizing timestamps, source/destination IPs, and error messages․ Understanding common log formats and correlating events across multiple devices are key skills․ Analyzing logs allows proactive identification of potential problems before they escalate, ensuring network stability and security․

posterior tibial tendonitis exercises pdf

Understanding Posterior Tibial Tendonitis

Understanding this condition involves recognizing its progressive nature; early intervention, utilizing a structured exercise program, is crucial to prevent irreversible foot structure changes.

PTTD management often centers around a protocol combining orthotics and targeted exercises, specifically designed to strengthen the posterior tibialis muscle.

A consistent Home Exercise Program (HEP), completed 5-7 times weekly, is vital throughout rehabilitation, emphasizing posterior tibialis focused movements.

What is the Posterior Tibial Tendon?

The posterior tibial tendon is a crucial structure, acting as a dynamic support for the foot’s arch. Originating from the calf muscle, it travels down the inner leg and attaches to bones within the foot.

Its primary responsibility is to maintain the arch’s integrity during weight-bearing activities like walking and jumping. A healthy tendon effectively supports the foot, enabling smooth and stable movement.

However, this tendon is susceptible to injury, leading to Posterior Tibial Tendon Dysfunction (PTTD). Understanding its function is key to appreciating the impact of dysfunction and the importance of targeted exercise and rehabilitation. Strengthening this tendon is vital for foot stability.

Causes of Posterior Tibial Tendonitis

Posterior tibial tendonitis, or PTTD, develops from a combination of factors, often involving gradual degeneration rather than a single acute injury. Overuse, particularly in activities with repetitive impact, is a significant contributor.

Risk factors include high-impact exercise, obesity, and structural foot abnormalities like flat feet. An acute injury, such as a fall, can also initiate the process.

This degeneration weakens the tendon, hindering its ability to support the arch. Early intervention, including a tailored exercise program, is crucial to slow progression and prevent irreversible structural changes. Addressing biomechanical issues is also key.

Symptoms of Posterior Tibial Tendonitis

Symptoms typically begin gradually, with pain and swelling along the inner side of the ankle and foot. Individuals may notice a progressive flattening of the arch, leading to a change in gait.

Pain often worsens with activity and improves with rest, initially. As the condition progresses, pain can become constant, and the foot may become rigid.

Early diagnosis and a structured exercise program are vital to manage symptoms. The ability to perform single-leg jumps without pain indicates a positive response to rehabilitation, but professional assessment is crucial.

Diagnosis and Assessment

Diagnosis relies on a thorough physical examination and may include imaging tests like X-rays and MRI to evaluate tendon integrity and foot structure.

Physical Examination Techniques

Assessment begins with a detailed patient history, focusing on activity levels and symptom onset. Palpation along the posterior tibial tendon identifies tenderness. The Single Limb Stance Test assesses arch collapse; a noticeable flattening suggests dysfunction.

Foot and ankle range of motion are evaluated, noting any limitations. A “too many toes” sign – observing excessive outward tilting of the foot – is indicative. Neurological and vascular assessments rule out other contributing factors. Careful observation of gait reveals compensatory patterns.

Strength testing focuses on calf muscles and intrinsic foot muscles. These techniques collectively help determine the severity and stage of PTTD.

Imaging Tests (X-rays, MRI)

X-rays are initially used to rule out other conditions and assess for arthritic changes. However, they often appear normal in early PTTD. As the condition progresses, X-rays may reveal flattening of the arch and bone spurs.

MRI provides a more detailed view of the posterior tibial tendon itself, visualizing tears, inflammation, and tenosynovitis. It’s crucial for confirming the diagnosis and assessing the extent of tendon damage.

MRI also helps evaluate surrounding structures, like ligaments and cartilage. This imaging allows for accurate staging of PTTD, guiding treatment decisions and monitoring progress.

Non-Surgical Treatment Options

Non-surgical approaches prioritize rest, activity modification, and targeted exercises to strengthen the posterior tibialis, often combined with orthotic support for arch control.

Rest and Activity Modification

Initial management of posterior tibial tendonitis necessitates a period of rest, crucially avoiding activities that exacerbate pain, such as prolonged standing, walking, or high-impact exercises. Activity modification is paramount; transitioning to lower-impact alternatives like swimming or cycling can maintain fitness without stressing the tendon.

Gradually decreasing activity levels allows inflammation to subside, paving the way for a structured rehabilitation program. Complete rest isn’t always ideal, as prolonged immobilization can lead to muscle weakness and stiffness, hindering recovery. Therefore, a balanced approach—reducing aggravating activities while maintaining gentle movement—is recommended.

Listen to your body and adjust activity levels accordingly, prioritizing pain-free movement as a guiding principle.

Ice and Compression

Applying ice to the affected area is a cornerstone of early posterior tibial tendonitis management, effectively reducing inflammation and alleviating pain. Ice packs should be applied for 15-20 minutes at a time, several times daily, especially after activity. Always use a cloth barrier to protect the skin.

Compression, utilizing an elastic bandage, further aids in minimizing swelling and providing support to the injured tendon. Ensure the bandage isn’t too tight, as this can impede circulation. Combining ice and compression offers synergistic benefits, accelerating the healing process.

These conservative measures are often implemented alongside rest and activity modification.

Orthotics and Arch Support

Orthotics play a crucial role in managing posterior tibial tendonitis by providing essential arch support and correcting biomechanical imbalances. Custom or over-the-counter arch supports help redistribute pressure, reducing stress on the inflamed tendon.

These supports limit excessive pronation, a common contributing factor to the condition. Proper footwear, combined with orthotics, creates a stable environment for the foot during activity.

Consistent use, even during low-impact activities, is recommended. Orthotics are often integrated into a comprehensive treatment plan alongside exercise and other conservative measures.

Posterior Tibial Tendonitis Exercises, Phase 1 (Early Stage)

Phase 1 focuses on gentle movements: towel curls, double leg calf raises, and alphabet tracing with the foot, initiating a pain-free recovery.

Towel Curls

Towel curls are a foundational exercise in Phase 1, designed to gently activate the posterior tibialis muscle without placing excessive stress on the injured tendon. To perform this exercise, sit comfortably with your foot flat on a towel placed on the floor.

Using only your toes, curl the towel towards you, drawing it closer with a controlled motion. Focus on engaging the muscles on the inner side of your ankle and foot. Slowly release and repeat the curling motion 10-15 times.

This exercise helps improve muscle strength and coordination, preparing the tendon for more advanced rehabilitation exercises. Ensure the movement is pain-free; stop if you experience any discomfort.

Calf Raises (Double Leg)

Double leg calf raises are a crucial early-stage exercise, strengthening the calf muscles which support the posterior tibialis tendon. Stand with your feet flat on the floor, shoulder-width apart, and maintain a slight bend in your knees.

Slowly rise up onto your toes, lifting your heels off the ground as high as comfortably possible. Focus on controlled movement, avoiding any jerky motions. Hold the raised position for a second, then slowly lower your heels back to the floor.

Repeat this exercise 10-15 times. This builds strength and endurance, preparing the lower leg for more challenging exercises in later phases of rehabilitation.

Alphabet Tracing with Foot

Alphabet tracing is a gentle, yet effective, exercise to improve ankle range of motion and posterior tibialis control. Sit comfortably with your leg extended, and slowly “write” each letter of the alphabet using your big toe as a pencil.

Focus on maintaining control throughout the movement, and avoid compensating with your entire leg. This exercise promotes proprioception – your body’s awareness of its position in space – and helps restore normal foot mechanics.

Perform one full alphabet cycle, repeating 2-3 times. This exercise is excellent for early-stage rehabilitation, enhancing coordination and preparing for weight-bearing activities.

Posterior Tibial Tendonitis Exercises ― Phase 2 (Intermediate Stage)

Phase 2 builds strength and endurance with exercises like single leg calf raises, heel walks, and toe walks, progressing from initial stabilization efforts.

Single Leg Calf Raises

Single leg calf raises are a crucial progression in posterior tibial tendonitis rehabilitation, building strength and endurance in the calf muscles and supporting tendon. Begin by standing on the affected leg, using a chair or wall for balance if needed.

Slowly rise up onto your toes, focusing on controlled movement and full range of motion. Hold briefly at the top, then slowly lower back down. Perform 3 sets of 10-15 repetitions, gradually increasing the repetitions as strength improves.

Ensure proper form – avoid rolling your ankle inward or outward. This exercise directly targets the muscles supporting the arch, aiding in restoring function and preventing further strain on the posterior tibialis tendon.

Heel Walks

Heel walks are an excellent intermediate-stage exercise for posterior tibial tendonitis rehabilitation, strengthening the anterior tibialis muscle and improving ankle dorsiflexion. To perform, lift your toes off the ground and walk forward solely on your heels for a designated distance – approximately 20-30 feet.

Maintain a controlled pace and focus on keeping your ankle stable. Perform 3 sets of heel walks, resting between each set. This exercise helps counteract the strain on the posterior tibialis by strengthening opposing muscle groups.

Pay attention to any pain; modify the distance or discontinue if discomfort arises.

Toe Walks

Toe walks represent another valuable intermediate-stage exercise within a posterior tibial tendonitis rehabilitation program, focusing on strengthening the calf muscles and promoting plantarflexion. To execute, lift your heels off the ground and walk forward exclusively on your toes for a distance of 20-30 feet.

Maintain a steady, controlled gait, concentrating on engaging the calf muscles throughout the movement. Complete 3 sets of toe walks, incorporating rest periods between each set. This exercise indirectly supports the posterior tibialis by enhancing overall ankle stability.

Monitor for any pain signals and adjust accordingly.

Posterior Tibial Tendonitis Exercises ― Phase 3 (Advanced Stage)

Phase 3 focuses on advanced strengthening and proprioception, incorporating eccentric heel drops, single-leg stance work, and targeted training for optimal foot stability.

Eccentric Heel Drops

Eccentric heel drops are a cornerstone of Phase 3 rehabilitation, specifically targeting the posterior tibialis tendon. Perform these by standing on a slightly elevated surface, like a step. Rise up onto your toes using both legs, then slowly lower the affected heel below the step’s level.

Control the descent, resisting the pull of gravity – this is the eccentric portion. Focus on a slow, controlled movement over 3-5 seconds. Begin with 3 sets of 10-15 repetitions, gradually increasing the number of sets and reps as tolerated. Ensure proper form to avoid re-injury; pain should be minimal and controlled.

This exercise strengthens the tendon during lengthening, promoting improved function and reducing pain.

Balance Exercises (Single Leg Stance)

Single leg stance is a crucial component of Phase 3, enhancing proprioception and strengthening supporting muscles around the ankle and foot. Begin by standing on the affected leg, maintaining a slight bend in the knee. Hold this position for 30-60 seconds, aiming for stability without wobbling.

Progress by performing the exercise with your eyes closed, or on an unstable surface like a foam pad. Complete 3-5 repetitions per leg. Focus on engaging your core and maintaining proper alignment.

This exercise improves dynamic stability and prepares the foot for higher-level activities.

Proprioceptive Training

Proprioceptive training, vital in Phase 3, focuses on restoring the foot’s ability to sense its position in space. Begin with simple exercises like weight shifting, gently rocking forward, backward, and side-to-side while maintaining balance.

Progress to more challenging activities, such as standing on an unstable surface (foam pad or wobble board) and performing small, controlled movements. Incorporate reaching tasks while balancing to further challenge stability.

These exercises enhance neuromuscular control, improving coordination and reducing the risk of re-injury. Aim for 3-5 repetitions, focusing on controlled movements and maintaining balance.

Rehabilitation Protocol & Guidelines

Rehabilitation follows a phased approach, emphasizing consistent HEP adherence (5-7 times weekly) and progressive exercise loading, guided by pain and functional improvements.

Guidelines prioritize posterior tibialis strengthening and restoring foot/ankle stability, crucial for returning to high-level activity or sports.

Frequency and Duration of Exercises

Consistent adherence to the prescribed Home Exercise Program (HEP) is paramount for successful rehabilitation. Generally, exercises should be performed 5-7 times per week, allowing for adequate rest and recovery between sessions.

Initially, each exercise may be completed for 2-3 sets of 10-15 repetitions. As strength and pain levels improve, the number of sets and repetitions can be gradually increased. It’s crucial to listen to your body and avoid pushing through significant pain.

Duration of each exercise session will vary depending on the phase of rehabilitation, but typically ranges from 20-30 minutes. Regular review and re-emphasis of the HEP by a therapist ensures proper form and progression.

Progression Criteria

Advancement through rehabilitation phases hinges on meeting specific criteria, not simply time elapsed. A key indicator is the ability to perform exercises with minimal pain – ideally, no more than a 2/10 on a pain scale.

Successful completion of current exercise sets and repetitions with good form is essential. Functional improvements, such as improved balance (single leg stance) and walking mechanics, also signal readiness for progression.

The ability to jump on both legs without pain, and subsequently on the injured leg, demonstrates sufficient strength and stability. A therapist’s evaluation confirms these milestones before advancing to more challenging exercises.

Surgical Intervention

Surgery is considered when non-surgical methods fail, often involving tendon repair or transfer alongside calcaneal osteotomy to restore foot alignment.

Rehabilitation guidelines are crucial post-op, with a phased approach beginning immediately after the posterior tibial tendon repair.

When is Surgery Considered?

Surgical intervention for posterior tibial tendonitis isn’t the first line of defense; it’s typically reserved for cases where conservative treatments – rest, orthotics, and a dedicated exercise program – have proven ineffective over an extended period.

Specifically, surgery becomes a viable option when significant structural damage has occurred, leading to substantial foot deformity and persistent pain that severely limits daily activities.

If the tendon is severely torn or the foot has progressed to a rigid deformity, surgical reconstruction, like tendon repair or transfer with a calcaneal osteotomy, may be necessary to restore function and alleviate symptoms. The decision is made collaboratively between the patient and surgeon.

Surgical Procedures (Tendon Repair, Transfer)

Surgical options for posterior tibial tendon dysfunction aim to restore foot stability and alleviate pain. Tendon repair involves directly reattaching the torn tendon to its original insertion point on the navicular bone, if sufficient tissue quality exists.

However, often the tendon is too damaged for direct repair, necessitating a tendon transfer. This involves relocating another tendon, typically the flexor digitorum longus, to take over the function of the damaged posterior tibialis.

Frequently, a calcaneal osteotomy is performed concurrently to realign the heel bone and improve foot mechanics, optimizing the transferred tendon’s effectiveness and long-term outcome.

Post-Operative Rehabilitation

Post-operative care follows a phased approach, beginning with immobilization and gentle range-of-motion exercises, progressing to weight-bearing and strengthening as healing advances.

Rehabilitation guidelines emphasize gradual loading and adherence to a structured exercise plan, tailored to each phase of recovery post-repair or transfer.

Phase 1 (0-6 Weeks Post-Op)

Phase 1 focuses on protecting the surgical repair and minimizing swelling. Rehabilitation begins with strict non-weight bearing, utilizing crutches or a scooter, and immobilization in a cast or boot. Gentle range-of-motion exercises, focusing on ankle pumps and toe wiggles, are initiated to maintain circulation and prevent stiffness.

Exercises are performed within a pain-free range. Isometric exercises, contracting muscles without movement, may be introduced towards the end of this phase to begin activating the posterior tibialis without stressing the repair. Emphasis is placed on edema control with elevation and ice. The goal is to achieve a pain-free, protected healing environment, preparing for the next phase of rehabilitation.

Phase 2 (6-12 Weeks Post-Op)

Phase 2 transitions towards partial weight-bearing, as tolerated, often with continued use of a boot or orthotic. Exercises progress to include gentle stretching and strengthening of the calf muscles and intrinsic foot muscles. Towel curls and calf raises, initially double-leg, are introduced to begin restoring strength in the posterior tibialis.

Proprioceptive exercises, like weight shifting, are added to improve balance and coordination. Pain and swelling continue to be monitored closely, guiding progression. The focus remains on gradually increasing weight-bearing tolerance and restoring a more normal gait pattern, preparing for advanced strengthening in Phase 3.

Preventing Recurrence

Maintaining strength through ongoing exercises, wearing supportive footwear, and adhering to a consistent rehabilitation plan are key to preventing PTTD return.

Prioritize flexibility and strength, alongside appropriate orthotic support, for long-term foot and ankle stability.

Proper Footwear

Selecting appropriate footwear is paramount in both preventing and managing posterior tibial tendonitis. Shoes should offer substantial arch support and excellent motion control to minimize stress on the affected tendon. Avoid flat shoes, high heels, and worn-out footwear, as these exacerbate the condition.

Look for shoes with a firm heel counter to stabilize the foot and prevent excessive pronation. Consider consulting a podiatrist or specialist running store for personalized recommendations based on your foot type and activity level. Properly fitted shoes, combined with orthotics when needed, create a supportive foundation for effective rehabilitation and long-term tendon health.

Ongoing Exercise Program

Maintaining a consistent exercise program post-rehabilitation is crucial for preventing recurrence of posterior tibial tendonitis. Continue performing the prescribed exercises – towel curls, calf raises, and balance work – 5-7 times per week, even after symptom resolution.

Focus on strengthening the posterior tibialis muscle and improving proprioception. Gradually increase exercise intensity and duration as tolerated. Incorporate activities that challenge balance and stability. Regular exercise, coupled with proper footwear and activity modification, ensures long-term tendon health and minimizes the risk of future complications.

us history eoc study guide

This comprehensive guide details pivotal moments, from early colonization through the Progressive Era, focusing on key events, influential figures, and transformative periods in American history․

I․ Colonial Period (1607-1775)

The Colonial Period, spanning 1607-1775, witnessed the establishment and development of British colonies in North America․ Jamestown, founded in 1607, marked the beginning of permanent English settlement․ Early colonization faced hardships, including disease and conflict with Native Americans․ Distinct colonial regions emerged: New England, characterized by Puritan settlements and commerce; the Middle Colonies, known for their diversity and agriculture; and the Southern Colonies, reliant on plantation agriculture and enslaved labor․

Growing colonial discontent stemmed from British policies like mercantilism and taxation without representation․ Events like the French and Indian War further strained relations, setting the stage for revolution․

A․ Early Colonization (1607-1660)

The initial phase of colonization (1607-1660) was marked by struggle and adaptation for English settlers․ Jamestown’s success hinged on tobacco cultivation, but early years were plagued by starvation and conflict with the Powhatan Confederacy․ Plymouth Colony, founded by Pilgrims in 1620, sought religious freedom․ Massachusetts Bay Colony followed, establishing a theocratic society․

These colonies developed distinct economic systems – agriculture in the South, commerce in the North․ The headright system and indentured servitude fueled labor needs, eventually leading to the widespread use of enslaved Africans․

B․ Colonial Regions (New England, Middle, Southern)

Colonial America diversified into three distinct regional identities․ New England, with rocky soil, fostered shipbuilding, fishing, and commerce, emphasizing town meetings and Puritan values․ The Middle Colonies – New York, Pennsylvania, New Jersey, and Delaware – became a hub of agriculture and trade, showcasing religious tolerance and diverse populations․

The Southern Colonies, characterized by fertile land, centered on plantation agriculture (tobacco, rice, indigo) reliant on enslaved labor․ Social structures differed greatly; New England prioritized education, while the South developed a hierarchical society based on land ownership and slavery․

C․ Causes of Colonial Discontent

Growing tensions between Great Britain and its American colonies stemmed from economic and political grievances․ Mercantilist policies, like the Navigation Acts, restricted colonial trade, benefiting Britain at colonial expense․ Taxation without representation – exemplified by the Stamp Act and Townshend Acts – ignited widespread protest, fueled by Enlightenment ideals of self-governance․

British attempts to assert greater control, including quartering troops and limiting westward expansion (Proclamation of 1763), further inflamed colonial resentment․ Colonial resistance, initially through boycotts and petitions, escalated towards demands for greater autonomy and ultimately, independence․

II; American Revolution (1775-1783)

The American Revolution was a defining struggle for independence from British rule․ Sparked by escalating colonial discontent, key events like the Battles of Lexington and Concord initiated armed conflict․ The Continental Army, led by George Washington, faced a formidable British force․

The Declaration of Independence, articulating Enlightenment principles, formally declared the colonies’ separation․ Crucial battles – Saratoga and Yorktown – proved pivotal turning points, securing foreign alliances (France) and ultimately leading to British surrender․ The Treaty of Paris (1783) officially recognized American independence, establishing a new nation․

A․ Key Events Leading to Revolution

Growing tensions between Great Britain and its American colonies stemmed from restrictive policies․ The French and Indian War (1754-1763) left Britain deeply in debt, prompting taxation without colonial representation – a core grievance․ Acts like the Stamp Act, Townshend Acts, and Tea Act fueled resentment․

Colonial protests, including boycotts and the Boston Tea Party, escalated the conflict․ British responses, such as the Intolerable Acts, further inflamed passions․ The First Continental Congress convened to address grievances, while skirmishes like Lexington and Concord marked the point of no return, igniting the Revolutionary War․

B․ Declaration of Independence & Enlightenment Ideas

The Declaration of Independence, adopted in 1776, formally announced the colonies’ separation from Great Britain․ Penned primarily by Thomas Jefferson, it articulated a philosophy deeply rooted in Enlightenment thought․

Key Enlightenment ideas, such as John Locke’s concepts of natural rights – life, liberty, and property – profoundly influenced the Declaration․ Jefferson adapted these to “life, liberty, and the pursuit of happiness․” The document also championed popular sovereignty, asserting that governments derive their legitimacy from the consent of the governed․

It justified revolution based on violations of these rights, establishing a foundation for American ideals․

C․ Revolutionary War: Strategies & Turning Points

The Revolutionary War (1775-1783) pitted the Continental Army against the British forces․ British strategies initially focused on suppressing the rebellion through military strength and controlling key cities like Boston and New York․

However, the Continental Army, led by George Washington, employed a strategy of attrition, aiming to prolong the war and exhaust British resources․ A crucial turning point was the Battle of Saratoga (1777), securing vital French support․

Valley Forge represented immense hardship, but Washington’s leadership maintained the army․ The decisive victory at Yorktown (1781), aided by French naval power, effectively ended major combat operations․

III․ Creating a Nation (1783-1800)

Following the Revolutionary War, the newly independent United States faced the challenge of establishing a stable government․ The initial attempt, the Articles of Confederation, proved inadequate due to its weak central authority and inability to effectively regulate commerce or taxation․

Recognizing these flaws, delegates convened the Constitutional Convention in 1787, crafting a new framework based on principles of federalism and separation of powers․

Ratification was fiercely debated between Federalists, who supported the Constitution, and Anti-Federalists, who feared centralized power․ The Bill of Rights ultimately secured its acceptance, laying the foundation for a lasting nation․

A․ Articles of Confederation: Weaknesses & Failures

Adopted in 1781, the Articles of Confederation represented the first attempt to establish a national government after independence․ However, it intentionally created a weak central government, fearing the tyranny of a strong executive, resulting in significant shortcomings․

A major weakness was the lack of power to tax effectively, leaving the national government financially unstable and reliant on voluntary contributions from states․ It also lacked a national currency or the ability to regulate interstate commerce, hindering economic growth․

Furthermore, amendments required unanimous consent, making it nearly impossible to adapt to changing circumstances, ultimately leading to its failure and the call for a Constitutional Convention․

B․ Constitutional Convention & Ratification

In 1787, delegates convened in Philadelphia to address the shortcomings of the Articles of Confederation․ This Constitutional Convention aimed to create a more effective national government, leading to intense debates and compromises․

Key issues included representation in Congress – resolved by the Great Compromise creating a bicameral legislature – and slavery, addressed through the Three-Fifths Compromise․ The resulting Constitution established a federal system with separated powers among the legislative, executive, and judicial branches․

Ratification required approval by at least nine states, sparking fierce debate between Federalists, who supported the Constitution, and Anti-Federalists, who opposed it, ultimately leading to its adoption and a new era for the nation․

C․ Federalist vs․ Anti-Federalist Debate

The ratification of the Constitution ignited a passionate debate between Federalists and Anti-Federalists․ Federalists, like James Madison and Alexander Hamilton, advocated for a strong central government, arguing it was essential for national unity and economic stability․ They penned The Federalist Papers to persuade states to ratify․

Anti-Federalists, including Patrick Henry and George Mason, feared a powerful central government would threaten individual liberties and states’ rights․ They demanded a Bill of Rights to protect citizens from potential government overreach․

This clash of ideologies shaped the early American political landscape, ultimately leading to the inclusion of the Bill of Rights, securing ratification and establishing a balance between federal authority and individual freedoms․

IV․ Early Republic & Expansion (1800-1860)

The era of the Early Republic witnessed significant territorial growth and economic transformation․ The Louisiana Purchase of 1803 doubled the size of the United States, fueling westward expansion and debates over slavery in new territories․ This expansion was driven by Manifest Destiny, the belief in America’s divinely ordained right to expand across the continent․

Simultaneously, the Industrial Revolution spurred economic growth, particularly in the North, creating a market economy and increasing urbanization․ Reform movements emerged, advocating for abolitionism and women’s rights, challenging existing social norms and laying the groundwork for future progress․

A․ Louisiana Purchase & Westward Expansion

In 1803, the United States purchased the Louisiana Territory from France for $15 million, dramatically expanding the nation’s size and opening vast lands for exploration and settlement․ This acquisition, known as the Louisiana Purchase, doubled the country’s territory and provided control of the Mississippi River and the port of New Orleans․

Westward expansion, fueled by Manifest Destiny, led to increased migration, conflicts with Native Americans, and debates over the expansion of slavery․ Explorers like Lewis and Clark mapped the territory, while settlers established farms and communities, shaping the American West and its future development․

B․ Industrial Revolution & Market Economy

The Industrial Revolution, beginning in the early 19th century, transformed the American economy from agrarian to industrial․ New technologies like the cotton gin, steam engine, and power loom spurred mass production and factory systems, particularly in the North․ This shift led to urbanization as people migrated to cities seeking employment․

Simultaneously, a market economy emerged, characterized by increased trade, transportation improvements (canals, railroads), and financial innovations․ This fostered economic growth but also created social problems like poor working conditions and widening wealth inequality, setting the stage for reform movements․

C․ Reform Movements (Abolitionism, Women’s Rights)

The early to mid-19th century witnessed a surge in reform movements driven by ideals of equality and social justice․ Abolitionism, led by figures like Frederick Douglass and William Lloyd Garrison, sought to end slavery through moral persuasion and political action, ultimately contributing to the Civil War․

Concurrently, the women’s rights movement gained momentum, spearheaded by Elizabeth Cady Stanton and Susan B․ Anthony․ The Seneca Falls Convention in 1848 marked a pivotal moment, advocating for women’s suffrage and equal rights․ These movements, often intertwined, challenged existing social norms and laid the groundwork for future progress․

V․ Civil War & Reconstruction (1861-1877)

The Civil War (1861-1865), sparked by long-standing disputes over slavery and states’ rights, pitted the Union against the Confederacy․ Key battles like Gettysburg and Vicksburg proved turning points, ultimately leading to Union victory and the abolition of slavery with the 13th Amendment․

Reconstruction (1865-1877) aimed to rebuild the South and integrate formerly enslaved people into society․ While the 14th and 15th Amendments granted citizenship and voting rights, Reconstruction faced resistance and ultimately fell short of its goals due to political compromises and systemic racism, leaving a legacy of inequality․

A․ Causes of the Civil War

The Civil War stemmed from deeply rooted sectional differences, primarily concerning slavery․ Economic disparities between the industrial North and the agrarian South fueled tensions, as did differing views on states’ rights versus federal authority․ The expansion of slavery into new territories ignited fierce debates, exemplified by events like the Missouri Compromise and the Kansas-Nebraska Act․

Abolitionist movements gained momentum, further polarizing the nation․ Political events, including the Dred Scott decision and John Brown’s raid, heightened anxieties․ Ultimately, Abraham Lincoln’s election in 1860 triggered secession, initiating the conflict․

B․ Key Battles & Leaders of the Civil War

The Civil War witnessed numerous pivotal battles, shaping the conflict’s trajectory․ Early Confederate victories at Bull Run demonstrated the war’s potential length․ The Union’s triumph at Antietam prompted Lincoln’s Emancipation Proclamation, shifting the war’s focus․ Gettysburg marked a turning point, halting Lee’s invasion of the North, while Vicksburg secured Union control of the Mississippi River․

Key leaders included Abraham Lincoln, Ulysses S․ Grant, and William Tecumseh Sherman for the Union, and Jefferson Davis, Robert E․ Lee, and Stonewall Jackson for the Confederacy․ Their strategic decisions and military prowess profoundly impacted the war’s outcome․

C․ Reconstruction: Successes & Failures

Reconstruction (1865-1877) aimed to rebuild the South and integrate formerly enslaved people into society․ Successes included the 13th, 14th, and 15th Amendments, abolishing slavery, granting citizenship, and securing voting rights for African American men․ Public school systems were established in the South, and infrastructure began to rebuild․

However, Reconstruction faced significant failures․ White Southern resistance, including the Ku Klux Klan, employed violence and intimidation to suppress Black rights․ Economic hardship and political corruption hampered progress․ Ultimately, Reconstruction ended with the Compromise of 1877, leaving many gains unrealized and setting the stage for Jim Crow laws․

VI․ The Gilded Age & Progressive Era (1870-1920)

The Gilded Age, marked by rapid industrialization and urbanization, saw immense wealth concentrated in the hands of a few “robber barons․” This era also witnessed significant social problems like poverty, unsafe working conditions, and political corruption․ The rise of big business spurred labor movements seeking better wages and rights․

The Progressive Era (roughly 1890-1920) responded to these issues with reforms․ Progressives aimed to address corruption, regulate monopolies, and improve living conditions․ Key achievements included antitrust legislation, food safety laws, and expanded suffrage, demonstrating a growing role for government regulation․

A․ Industrialization & Urbanization

Following the Civil War, the United States experienced unprecedented industrial growth fueled by technological advancements like steel production, railroads, and electricity․ This led to mass migration to urban centers seeking employment in factories․ Cities swelled in population, creating challenges like overcrowding, sanitation issues, and inadequate housing․

Industrialization fostered a new economic system – the market economy – characterized by competition and innovation․ However, it also resulted in harsh working conditions, long hours, and low wages for many laborers․ The concentration of wealth in the hands of industrialists defined the Gilded Age, sparking social and political tensions․

B․ Rise of Big Business & Labor Movements

The late 19th century witnessed the emergence of powerful corporations and monopolies, led by figures like Rockefeller (oil), Carnegie (steel), and Vanderbilt (railroads)․ These “captains of industry” amassed immense fortunes, often through ruthless business practices and exploitation of workers․ This concentration of economic power fueled public resentment and calls for regulation․

In response to harsh working conditions, laborers organized into unions like the Knights of Labor and the American Federation of Labor (AFL)․ These unions advocated for better wages, shorter hours, and improved safety standards, often resorting to strikes and collective bargaining․ Labor unrest, such as the Haymarket Affair, highlighted the growing conflict between capital and labor․

C․ Progressive Reforms & Government Regulation

The Progressive Era (roughly 1890-1920) saw widespread social activism and political reform aimed at addressing the problems created by industrialization and urbanization․ Progressives sought to curb the power of big business, protect consumers, and improve the lives of the working class;

Key reforms included antitrust legislation like the Sherman Antitrust Act and the Clayton Antitrust Act, designed to break up monopolies․ Government regulation of industries, such as railroads and food production (Pure Food and Drug Act), increased․ Furthermore, initiatives like the 16th Amendment (income tax) and the 17th Amendment (direct election of senators) aimed to make government more democratic and responsive to the people’s needs․

moonshot ai filetype:pdf

Moonshot AI: A Deep Dive (Filetype: PDF Focus)

Moonshot AI’s Kimi Chat excels at PDF summarization and analysis, handling extensive documents with a 200k character context window, offering efficient information extraction.

Moonshot AI, a Beijing-based startup founded in 2023 and backed by Alibaba, is rapidly gaining prominence in the artificial intelligence landscape. The company distinguishes itself through its focus on large language models (LLMs) and, notably, its Kimi Chat chatbot. A key capability highlighted is its exceptional ability to process and analyze extensive documents, including PDF files, thanks to a remarkably long context window of 200,.

This allows users to upload lengthy research papers, reports, or books and receive concise summaries or detailed analyses. Moonshot AI’s emergence coincides with increasing geopolitical tensions surrounding AI dominance between the US and China, positioning it as a leading Chinese contender in the field.

Company Overview: Beijing Moonshot AI Co. Ltd.

Beijing Moonshot AI Co. Ltd. is a Chinese artificial intelligence startup making significant strides in the development of large language models. Founded in 2023, the company is backed by Alibaba, providing substantial resources for innovation. Their core product, Kimi Chat, demonstrates a particular strength in handling complex document analysis, including extensive PDF files.

Moonshot AI’s architecture, Kimi K2, delivers trillion-parameter performance and domain-specific intelligence. The company is actively contributing to the open-source AI community, releasing models and making architectural details available, furthering its impact on the global AI market.

Founding and Backing

Beijing Moonshot AI Co. Ltd. was established in 2023, rapidly emerging as a key player in China’s burgeoning AI sector. The company benefits from strong financial backing from Alibaba, a leading technology conglomerate, providing crucial investment for research and development. This support fuels the creation of advanced large language models like Kimi Chat, capable of sophisticated PDF processing and analysis.

The Alibaba affiliation positions Moonshot AI strategically within a robust ecosystem, accelerating its growth and enabling access to valuable resources. This backing is pivotal in navigating the competitive AI landscape and challenging established US-based frontier labs.

Kimi Chat: Core Product & Capabilities

Kimi Chat is Moonshot AI’s flagship product, demonstrating remarkable capabilities in understanding and processing extensive text inputs. A core strength lies in its ability to summarize and analyze PDF documents, extracting key information efficiently. It boasts an impressive 200,000-character context window, allowing it to handle lengthy reports and research papers with ease.

Beyond PDF analysis, Kimi Chat assists with PPT generation, web link analysis, and general conversational AI tasks. Its user-friendly interface and powerful features position it as a compelling alternative to existing AI chatbots, particularly for users dealing with large document sets.

Kimi K2 Architecture & Performance

Kimi K2 delivers trillion-parameter performance and domain-specific intelligence, enabling superior PDF processing and analysis alongside other advanced AI functionalities.

Trillion-Parameter Performance

Moonshot AI’s Kimi K2 architecture boasts trillion-parameter performance, a significant leap forward in AI capabilities. This immense scale allows for nuanced understanding and processing of complex data, including extensive PDF documents. The ability to handle such large models translates directly into improved accuracy and efficiency when summarizing, analyzing, and extracting information from lengthy reports, research papers, and other PDF-based content.

This performance level empowers Kimi Chat to discern subtle details and contextual cues often missed by smaller models, resulting in more comprehensive and insightful PDF analysis. Enterprise AI integrators are leveraging this architecture to build custom LLMs, bringing this power to private applications and specialized workflows involving large document sets.

Domain-Specific Intelligence

Moonshot AI’s Kimi K2 architecture doesn’t just offer scale; it delivers domain-specific intelligence, enhancing its ability to process and understand specialized PDF content. This means Kimi Chat can effectively analyze technical manuals, legal documents, scientific research papers, and financial reports with greater accuracy than general-purpose models.

When dealing with PDF files, this intelligence allows for precise extraction of key data points, identification of relevant terminology, and a deeper comprehension of the subject matter. Enterprise applications benefit from this capability, creating tailored LLMs capable of handling industry-specific PDF workflows with remarkable efficiency and insight.

Long Context Window Capabilities (200k Characters)

Moonshot AI’s Kimi Chat boasts an impressive long context window of 200,, a significant advantage when processing lengthy PDF documents. This allows the model to analyze entire reports, research papers, or books without losing crucial information from earlier sections. Unlike models with limited context, Kimi can maintain coherence and understanding throughout extensive PDF files.

For PDF summarization, this capability is invaluable, enabling comprehensive and nuanced summaries that capture the full scope of the document. Users can upload substantial PDFs and receive insightful analyses, making Kimi a powerful tool for research, legal review, and knowledge management.

Applications of Moonshot AI

Moonshot AI streamlines workflows via PDF summarization, analysis, and PPT generation, aiding scientific research and enabling seamless enterprise AI integration.

PPT Generation & Assistance

Moonshot AI’s Kimi Chat offers a dedicated PPT assistant, accessible through its interface or keyboard shortcuts. Users can input instructions – for example, requesting a presentation on the allure of traditional Chinese culture and art – and the system generates a complete PPT with a single click.

The tool allows for template selection and online editing for content adjustments. This functionality demonstrates Kimi Chat’s ability to translate textual prompts into visually structured presentations, significantly reducing the time and effort required for creating professional-quality slides; It’s a practical application showcasing the AI’s creative and assistive capabilities.

PDF Summarization & Analysis

Moonshot AI’s Kimi Chat distinguishes itself with exceptional PDF handling capabilities. It can effectively summarize inputted PDF files and analyze web links, providing concise overviews of complex documents. A key feature highlighted by the company is its exceptionally long context window, capable of processing up to 200,000 Chinese characters.

This allows Kimi Chat to grasp the nuances of lengthy reports and research papers, offering users a significant advantage when dealing with extensive information. It addresses the common frustration of paywalls and dense academic texts, making research more accessible and efficient.

Autonomous Scientific Research

Moonshot AI has developed an artificial intelligence system capable of autonomously conducting scientific research across multiple disciplines. This system can generate research papers from initial concepts, signifying a leap forward in AI-driven discovery. While not directly tied to PDF analysis in the provided text, the ability to process and synthesize information from research papers – often distributed as PDFs – is crucial.

The AI’s capacity to independently generate papers suggests a sophisticated understanding and processing of existing scientific literature, potentially including extensive PDF document analysis, marking a new era in automated research.

Enterprise AI Integration

Enterprise AI integrators are now leveraging Moonshot AI’s Kimi K2 architecture to build next-generation custom Large Language Models (LLMs). This integration brings trillion-parameter performance and domain-specific intelligence to private and secure enterprise environments. While the source doesn’t detail PDF-specific applications within this integration, the ability to process and understand complex documents, like those frequently shared as PDFs, is a key benefit.

These custom LLMs can analyze internal reports, contracts, and research – often in PDF format – providing valuable insights and automating workflows for businesses.

Competition & Geopolitical Context

Moonshot AI emerges as a leading Chinese AI contender, rivaling US frontier labs amid escalating US-China tensions in the AI and chip sectors.

Competition with OpenAI & US Frontier Labs

Moonshot AI is rapidly escalating competition with established US AI giants like OpenAI. While concerns grow regarding OpenAI’s spending and strategy, Chinese providers, including Moonshot AI and MiniMax, are aggressively advancing. This rivalry is particularly notable as Moonshot AI, backed by Alibaba, demonstrates capabilities in areas like PDF analysis and long-context understanding, challenging OpenAI’s dominance.

The emergence of strong Chinese contenders signifies a shift in the global AI landscape, potentially disrupting the previously US-centric leadership. Moonshot AI’s focus on open-source contributions and efficient model architecture, like Kimi K2, further intensifies this competitive dynamic, offering alternatives to proprietary US models.

US-China AI Sector Tensions

Moonshot AI’s rise occurs amidst heightened geopolitical tensions between the US and China regarding AI and semiconductor control. The launch of advanced models like Kimi K2, capable of sophisticated PDF processing and analysis, is viewed within the context of this competition. Both nations are striving for leadership in AI, recognizing its strategic importance for economic and military advancement.

This rivalry extends beyond technological innovation to encompass concerns about data security, intellectual property, and potential misuse of AI technologies. Moonshot AI’s development, backed by Alibaba, is closely watched as a symbol of China’s growing AI prowess, fueling anxieties in the US about maintaining its technological edge.

Emergence as a Leading Chinese AI Contender

Moonshot AI, alongside MiniMax and DeepSeek, is rapidly establishing itself as a frontrunner in China’s AI landscape, challenging US frontier labs. Its Kimi K2 architecture, demonstrated through impressive PDF summarization and analysis capabilities, showcases a commitment to large language model (LLM) development. The company’s focus on long context windows – handling up to 200k characters – distinguishes it from competitors.

Backed by Alibaba and founded in 2023, Moonshot AI is quickly gaining recognition for its innovative approach and potential to disrupt the global AI market. This emergence signals a shift in the AI power dynamic, with China increasingly asserting its technological independence.

Kimi 2 Thinking: Advanced Features

Kimi 2 Thinking significantly upgrades tool use and agentic capabilities, enhancing its ability to process and analyze complex PDF documents autonomously.

Upgraded Tool Use

Moonshot AI’s latest iteration, Kimi 2 Thinking, demonstrates a substantial leap in tool utilization. This advancement allows the AI to interact with external resources more effectively, particularly when processing complex PDF files. The system can now autonomously leverage various tools to extract, analyze, and synthesize information contained within these documents.

This enhanced capability extends beyond simple text extraction; Kimi 2 Thinking can interpret charts, tables, and images embedded in PDFs, providing a more comprehensive understanding of the document’s content. The upgraded tool use facilitates more nuanced and accurate responses, making it a powerful asset for research and data analysis involving extensive PDF datasets.

Agentic Capabilities

Kimi 2 Thinking introduces significant agentic capabilities, enabling it to autonomously manage tasks related to PDF document processing. This means the AI can independently determine the necessary steps to achieve a specific goal, such as summarizing a lengthy research paper or extracting key data points from multiple PDF reports.

Rather than requiring explicit instructions for each step, users can provide a high-level objective, and Kimi 2 Thinking will orchestrate the process, utilizing its upgraded tool use to navigate and analyze PDF content effectively. This autonomous approach streamlines workflows and unlocks new possibilities for automated document analysis and knowledge discovery.

Challenges & Concerns

PDF analysis raises concerns about AI-generated content, specifically academic paper forgery using generative tools, impacting research integrity and trust in information.

Academic Paper Forgery & AI-Generated Content

Moonshot AI’s capabilities, while innovative, contribute to a growing concern: the proliferation of forged academic papers. Recent investigations reveal Chinese paper mills are leveraging generative AI tools to mass-produce these falsified documents. This poses a significant threat to the integrity of scholarly research and the credibility of academic institutions. The ability to rapidly analyze and synthesize information from PDF documents, a core strength of Kimi Chat, unfortunately facilitates this deceptive practice.

The ease with which AI can now generate seemingly legitimate research raises questions about authorship, originality, and the overall quality of published work. Addressing this challenge requires robust detection methods and a re-evaluation of academic publishing standards to combat the spread of AI-generated misinformation.

Skepticism Regarding Buildout Strategy

Despite rapid advancements, including impressive PDF processing abilities within Kimi Chat, skepticism surrounds Moonshot AI’s overall buildout strategy. Concerns echo those directed at US-based OpenAI, specifically regarding substantial spending commitments and the sustainability of such a resource-intensive approach. While the Kimi K2 architecture demonstrates trillion-parameter performance, questions remain about the practical scalability and long-term viability of this model.

Analysts are evaluating whether Moonshot AI can effectively translate its technological prowess into a profitable and sustainable business, particularly amidst escalating competition in the AI landscape. The focus is on efficient resource allocation and demonstrable return on investment.

Open Source Contributions

Moonshot AI released Kimi 2 Thinking as an open-source AI model, showcasing upgraded tool use and agentic capabilities, furthering AI accessibility and innovation.

Release of Open-Source AI Models

Moonshot AI demonstrated a commitment to the broader AI community by releasing Kimi 2 Thinking as an open-source model on January 10, 2024. This strategic move allows developers and researchers to explore and build upon their advancements in large language models. The release signifies a departure from closed-garden approaches, fostering collaboration and accelerating innovation within the field.

Specifically, Kimi 2 Thinking boasts significantly upgraded tool use and agentic capabilities, meaning it can interact with external tools and perform tasks autonomously. This open-source availability enables scrutiny and improvement by the global AI community, potentially leading to rapid enhancements and novel applications. It positions Moonshot AI as a key player in democratizing access to cutting-edge AI technology, particularly in the context of PDF processing and analysis.

Kimi K2 Architecture Availability

Moonshot AI’s Kimi K2 architecture is now accessible to enterprise AI integrators, enabling the creation of custom Large Language Models (LLMs). This availability allows businesses to leverage trillion-parameter performance and domain-specific intelligence tailored to their unique needs. The architecture’s power is particularly relevant for complex document processing, including detailed PDF summarization and analysis;

By building upon Kimi K2, companies can enhance their AI capabilities without the immense cost of developing such a model from scratch. This democratizes access to advanced AI, fostering innovation across various industries. The architecture’s focus on long context windows—handling up to 200k characters—makes it ideal for extracting insights from lengthy PDF reports and research papers.

Future Outlook & Development

Moonshot AI will likely escalate competition, innovating further in PDF processing and AI integration, impacting the global market with advanced capabilities.

Escalating Competition in the AI Landscape

Moonshot AI is rapidly intensifying the competition within the artificial intelligence sector, particularly challenging established US-based frontier labs like OpenAI. This escalation is occurring even as skepticism surrounds OpenAI’s spending and buildout strategies. The Chinese startup, backed by Alibaba and founded in 2023, is demonstrating significant advancements, especially in areas like long-context understanding crucial for detailed PDF analysis.

Alongside MiniMax, Moonshot AI is emerging as a leading Chinese contender, showcasing the nation’s growing prowess in AI development. Their focus on open-source contributions, including models like Kimi 2 Thinking, further fuels this competitive drive, offering alternatives and accelerating innovation in the field. This dynamic landscape promises rapid advancements and increased accessibility to powerful AI tools.

Potential for Further Innovation

Moonshot AI’s Kimi K2 architecture, with its trillion-parameter performance and domain-specific intelligence, unlocks substantial potential for future AI innovation. Its exceptional long context window – capable of processing 200, – is particularly impactful for complex PDF document analysis and autonomous scientific research.

The release of open-source models like Kimi 2 Thinking, featuring upgraded tool use and agentic capabilities, encourages community contributions and accelerates development. Further advancements are anticipated in areas like PPT generation, enterprise AI integration, and combating academic paper forgery, solidifying Moonshot AI’s role as a key innovator.

Impact on the Global AI Market

Moonshot AI’s emergence as a leading Chinese AI contender significantly impacts the global landscape, escalating competition with established players like OpenAI. Its focus on PDF processing capabilities, particularly long-context understanding, offers a unique advantage in research and enterprise applications.

The company’s open-source contributions and advancements in areas like autonomous research challenge the dominance of US frontier labs. Amidst US-China AI sector tensions, Moonshot AI drives innovation and potentially reshapes market dynamics, offering alternative solutions and fostering a more diverse AI ecosystem globally.

soccer training program pdf

Soccer Training Program PDF: A Comprehensive Plan

Comprehensive soccer training programs, often available as PDF resources, offer coaches structured plans with drills and exercises for player development throughout the course of a season.

Soccer training programs, increasingly distributed as convenient PDF documents, are essential for player growth and team success. These programs provide a roadmap for coaches, outlining structured drills, exercises, and session plans. A well-designed program caters to various skill levels, from 6-U beginners to elite players, focusing on technical skill, tactical awareness, and physical conditioning.

The availability of PDF resources simplifies coaching, offering readily accessible and printable materials for use on the football pitch or during workout sessions. Many programs include detailed lesson plans, like those for 6-U age groups, and emphasize the importance of adaptable drills, such as the kick-off drill for practice endings. Accessing free PDFs with proven coaching drills is now commonplace, supporting continuous improvement.

The Importance of a Structured Training Plan

A structured soccer training plan, often found as a downloadable PDF, is paramount for maximizing player potential. Without a clear plan, training can become disjointed and ineffective. These plans ensure progressive overload, gradually increasing the intensity and complexity of drills and exercises. They also facilitate focused development of technical skills – dribbling, passing, and shooting – alongside tactical understanding and physical fitness.

PDF resources allow coaches to consistently implement proven methodologies. A well-defined course of action, outlined in a PDF, helps track player progress and adjust training accordingly. Utilizing a plan, like those offering 50 soccer drills, ensures efficient use of practice time, whether at a local pitch or during a 3v3 match, ultimately leading to improved performance.

Key Components of a Successful Soccer Training Program

Successful soccer training programs, frequently distributed as PDF guides, integrate several key elements. These include a focus on physical conditioning – encompassing cardiovascular endurance, strength training (particularly leg strength and core strength), and agility drills. Equally vital is technical skill development, with dedicated sessions for dribbling, passing, receiving, and shooting.

A PDF resource should also emphasize tactical awareness through small-sided games and positional play. Coaching advisors often highlight the importance of coordination movement drills. Furthermore, a comprehensive plan includes cool-down routines, nutrition guidance, and hydration strategies, ensuring holistic player development throughout the course of the season, utilizing resources like free PDF downloads with proven drills.

Physical Conditioning for Soccer Players

Soccer training programs, often in PDF format, prioritize fitness training, including football agility drills to enhance balance and overall athletic performance.

Warm-up Exercises & Dynamic Stretching

Soccer training program PDFs consistently emphasize the critical role of proper warm-ups. These typically begin with light cardiovascular activity, preparing the body for more intense work. Following this, dynamic stretching is key, focusing on movements that mimic soccer-specific actions.

Examples include leg swings, arm circles, torso twists, and high knees. These movements increase blood flow to the muscles, improve flexibility, and enhance range of motion, reducing the risk of injury. A well-structured warm-up, detailed in many PDF resources, should last approximately 10-15 minutes, progressively increasing intensity.

Coaching advisors often include specific warm-up routines tailored to different age groups and skill levels within these training plans.

Cardiovascular Endurance Training

Soccer training program PDFs highlight that high levels of cardiovascular endurance are fundamental for success. These programs incorporate various methods to improve a player’s ability to sustain effort throughout a match. Common techniques include interval training – alternating between high-intensity bursts and recovery periods – and continuous running at a moderate pace.

Fitness training often utilizes football agility drills to enhance endurance alongside traditional running exercises. Many PDF resources detail specific interval protocols, such as 400m repeats or shuttle runs. The duration and intensity of these sessions are progressively increased over time, building stamina and improving the body’s ability to utilize oxygen efficiently.

Proper conditioning is vital for peak performance.

Strength Training for Soccer

Soccer training program PDFs emphasize that strength training is crucial for enhancing power, speed, and injury prevention. These programs typically include exercises targeting major muscle groups used in football, with a focus on lower body and core strength. A well-rounded approach is essential for optimal athletic development.

Many PDF resources outline specific strength exercises, categorized by muscle group. These often include squats, lunges, and plyometrics for leg strength, alongside planks and rotational exercises for core strength. Circuits utilizing football agility drills are also common, improving balance and body control.

Progressive overload – gradually increasing weight or resistance – is a key principle detailed in these programs.

Leg Strength Exercises

Soccer training program PDFs consistently highlight the importance of strong legs for explosive movements, powerful shots, and overall endurance. These resources detail a variety of leg strength exercises, often categorized by difficulty and targeted muscle groups. Foundational exercises like squats – both bodyweight and weighted – are frequently included, building overall lower body strength.

Lunges, in their various forms (forward, reverse, lateral), are also prominent, improving unilateral strength and balance. Plyometric exercises, such as box jumps and jump squats, are recommended for developing explosive power. PDF guides often suggest incorporating these drills into circuits for a more dynamic workout.

Proper form is always emphasized to prevent injuries.

Core Strength Exercises

Soccer training program PDFs universally recognize a strong core as fundamental for stability, power transfer, and injury prevention. These resources outline numerous core strength exercises, moving beyond simple crunches to encompass a holistic approach. Plank variations – including forearm planks, side planks, and plank with leg lifts – are consistently recommended for building isometric strength.

Dynamic exercises like Russian twists, bicycle crunches, and leg raises are also frequently included to improve rotational power and abdominal definition. Many PDF guides suggest incorporating medicine ball exercises, such as twists and slams, to further challenge the core.

Emphasis is placed on maintaining proper form throughout each exercise to maximize effectiveness and minimize risk.

Agility and Speed Drills

Soccer training program PDFs dedicate significant sections to enhancing agility and speed, crucial components for success on the field. These resources detail a variety of drills designed to improve quickness, reaction time, and change-of-direction ability. Cone drills, including shuttle runs and figure-eight patterns, are staples, fostering footwork and acceleration.

Ladder drills are frequently featured, promoting coordination and rapid leg movements. Many PDF guides incorporate reactive agility drills, where players respond to visual or auditory cues, simulating game-like scenarios.

Short sprints, often with changes in direction, are also common, building explosive power. The emphasis is on proper technique and controlled movements to prevent injuries while maximizing performance gains.

Technical Skill Development

Soccer training program PDFs emphasize mastering fundamental skills like dribbling, passing, shooting, and ball control through focused drills and progressive exercises.

Dribbling Drills

Soccer training program PDFs dedicate significant attention to dribbling drills, recognizing this skill as foundational for individual player success. These drills often begin with simple cone weaving exercises, progressively increasing in complexity and speed.

A common drill involves navigating a 2×2 meter grid, focusing on close control and quick changes of direction. More advanced drills incorporate defenders, simulating game-like pressure. PDF resources frequently detail variations, such as dribbling with specific foot surfaces or incorporating a finish on goal.

Coaching points highlighted in these PDFs emphasize maintaining a low center of gravity, using small touches, and keeping the ball close to the feet. Progressive overload is key, gradually increasing the difficulty and intensity of the drills to challenge players and enhance their ball control.

Passing and Receiving Drills

Soccer training program PDFs consistently feature a robust section on passing and receiving drills, crucial for building team cohesion and effective ball movement. These drills start with simple two-player passing exercises, emphasizing accuracy and proper technique – inside of the foot passes are often prioritized initially.

Progressive drills introduce movement, requiring players to pass and move to create passing lanes. PDF resources detail drills involving three or more players, simulating game scenarios and demanding quick decision-making. Receiving skills are honed through exercises focusing on cushioning the ball and controlling it with different body parts.

Coaching points within these PDFs stress the importance of weight of pass, timing, and communication. Variations include passing under pressure and incorporating target players, enhancing the realism and challenge of the drills.

Shooting Drills

Soccer training program PDFs dedicate significant attention to shooting drills, recognizing the importance of finishing chances. These drills typically begin with stationary shooting, focusing on proper technique – plant foot placement, body positioning, and follow-through are key elements emphasized in the PDF guides.

Progressive drills introduce movement before the shot, simulating game-like situations. Players practice shooting after dribbling, receiving a pass, or making a run. PDF resources often include drills targeting specific shooting techniques, such as bending the ball or shooting with power.

Accuracy is a primary focus, with drills incorporating targets and small goals. Coaching points within the PDFs highlight the importance of keeping the head down and striking through the ball. Advanced drills involve shooting under pressure from defenders.

Shooting Technique and Accuracy

Soccer training program PDFs consistently emphasize fundamental shooting technique. Proper form begins with the plant foot positioned alongside the ball, pointing towards the target. Players are instructed to keep their head down and their eye on the ball throughout the strike, ensuring focused accuracy.

The striking foot should connect with the ball’s sweet spot, generating power and control. PDF guides detail the importance of a full follow-through, extending the leg towards the intended target. Drills often focus on ankle lock, promoting a firm and consistent strike.

Improving accuracy involves visualizing the target and practicing with focused intention. PDF resources suggest using cones or designated areas within the goal to refine placement. Consistent repetition and coaching feedback are crucial for developing reliable shooting skills.

Ball Control Exercises

Soccer training program PDFs dedicate significant attention to ball control exercises, recognizing it as a foundational skill. These drills aim to enhance a player’s ability to manipulate the ball with all surfaces of the foot – inside, outside, sole, and laces.

Common exercises include sole rolls, where players move the ball back and forth using the bottom of their foot, and toe taps, focusing on quick, controlled touches. PDF guides often incorporate variations, like performing these exercises while moving or under pressure.

Coaching resources emphasize the importance of keeping the ball close to the body and maintaining a low center of gravity. Drills progressively increase in difficulty, challenging players to maintain control while changing direction and speed, ultimately improving overall game awareness.

Tactical Awareness and Team Play

Soccer training program PDFs frequently include small-sided games (3v3, 5v5) to develop positional play, movement, and essential defensive tactics for cohesive team performance.

Small-Sided Games (3v3, 5v5)

Soccer training program PDFs emphasize small-sided games like 3v3 and 5v5 as crucial for tactical development. These games, often utilizing a 20 yd x 25 yd field with goals, maximize player touches and decision-making opportunities.

The limited space forces quick thinking, improved passing accuracy, and constant movement. PDF resources detail how these games enhance positional understanding, offensive creativity, and defensive responsibilities. Coaches can easily implement these drills, often requiring only a 2×2 meter grid and one minute per drill, fostering a dynamic and engaging training environment.

These games simulate game-like scenarios, preparing players for the demands of a full match and improving their ability to react effectively under pressure. They are a cornerstone of modern soccer coaching methodologies.

Positional Play and Movement

Soccer training program PDFs frequently dedicate sections to positional play and player movement, recognizing their importance in tactical organization. These resources outline drills designed to improve understanding of spatial awareness and how to create passing lanes.

Effective positioning isn’t static; PDF guides emphasize dynamic movement – supporting teammates, making runs to exploit space, and shifting defensively as a unit. Coaches utilize these drills to teach players how to maintain shape, offer passing options, and react to changing game situations.

The goal is to develop players who instinctively understand their roles within the team’s structure, contributing to cohesive and effective attacking and defensive play. This is often integrated within small-sided game scenarios.

Defensive Tactics and Strategies

Soccer training program PDFs dedicate significant attention to defensive tactics, moving beyond individual skills to emphasize team organization. These resources detail drills focused on pressing, tracking runners, and winning the ball back effectively.

Key concepts covered include zonal marking, man-to-man marking, and the importance of a compact defensive shape. PDF guides often include exercises to improve communication between defenders and the goalkeeper, crucial for preventing scoring opportunities.

Strategies like delaying the attack, forcing opponents into wide areas, and covering runs are thoroughly explained. Coaches use these drills to build a resilient defense capable of absorbing pressure and launching counter-attacks.

Sample Soccer Training Session Plan (PDF Focus)

Soccer training program PDFs frequently include lesson plans, like a 6-U example with 3v3 matches, demonstrating practical application of drills and coaching techniques.

6-U Soccer Training Lesson Plan Example

A typical 6-U soccer training session, often found within a PDF resource, centers around fun and fundamental skill development. The lesson plan might begin with a brief warm-up, followed by activities focusing on basic ball control and movement.

A key component is the 3v3 soccer match, utilizing a 20 yd x 25 yd field with goals. This small-sided game encourages active participation and provides opportunities to practice dribbling, passing, and shooting in a game-like scenario. Coaches emphasize simple instructions and positive reinforcement.

The PDF may also detail specific drills, each lasting approximately one minute, repeated ten times within a 2×2 meter grid. This structured approach ensures focused practice and maximizes learning within a short timeframe, catering to the attention span of young players.

Utilizing PDF Resources for Coaching

PDF resources are invaluable tools for soccer coaches, offering readily accessible and organized training plans, drills, and exercises. Downloading a free PDF can provide access to proven football coaching drills developed by experienced coaches, delivered directly and conveniently.

These documents often contain detailed session outlines, including setup instructions, coaching points, and progressions for various skill levels. PDF formats allow for easy printing and portability, enabling coaches to bring plans to the field without relying on electronic devices.

Furthermore, subscribing to services offering weekly coaching practices via PDF ensures a continuous stream of fresh ideas and innovative drills, keeping training sessions engaging and effective. Elite soccer drills are often available as PDF files too.

Cool-down and Recovery

Soccer training necessitates proper cool-down routines, including static stretching, alongside focused nutrition and strategic hydration for optimal player recovery and performance.

Static Stretching

Static stretching is a crucial component of any soccer training program’s cool-down phase, aiding in muscle recovery and flexibility enhancement. Holding each stretch for approximately 30 seconds allows muscles to lengthen, reducing post-exercise soreness and improving range of motion.

Focus on major muscle groups utilized during play, including hamstrings, quadriceps, groin muscles, and calves. PDF resources often detail specific stretches and proper form. Implementing a consistent static stretching routine minimizes injury risk and prepares players for subsequent training sessions.

Remember to breathe deeply throughout each stretch, avoiding bouncing movements. Prioritizing flexibility through static stretching contributes significantly to long-term athletic performance and overall player well-being within the soccer context;

Nutrition for Soccer Players

Soccer demands high energy expenditure, making proper nutrition paramount for optimal performance and recovery. A well-balanced diet, detailed in many soccer training program PDF guides, should prioritize complex carbohydrates for sustained energy, lean proteins for muscle repair, and healthy fats for overall health.

Pre-game meals should focus on carbohydrates, while post-game nutrition should emphasize protein and carbohydrate replenishment. PDF resources often provide sample meal plans tailored to training intensity and game schedules.

Adequate vitamin and mineral intake, particularly iron and calcium, is also vital. Players should avoid processed foods and sugary drinks, opting instead for whole, nutrient-rich options to fuel their bodies effectively throughout the season.

Hydration Strategies

Soccer players lose significant fluids through sweat, making consistent hydration crucial for maintaining performance and preventing fatigue. Soccer training program PDF documents frequently emphasize proactive hydration, not just reacting to thirst.

Players should drink water before, during, and after training sessions and matches. Electrolyte drinks can be beneficial during intense activity to replace lost sodium and potassium.

PDF resources often outline specific hydration schedules based on environmental conditions and individual sweat rates. Avoiding sugary drinks and excessive caffeine is also recommended, as these can contribute to dehydration. Monitoring urine color – aiming for pale yellow – is a simple way to assess hydration status.

Advanced Soccer Training Drills

Elite soccer drills, often found within PDF training guides, focus on coordination, movement, and game-realistic scenarios to elevate player skill and tactical awareness.

Elite Soccer Drills Overview

Elite soccer drills represent the pinnacle of training methodologies, designed to push players beyond their comfort zones and refine their abilities to a professional level. Many resources, including downloadable PDF documents, compile these advanced techniques for coaches seeking to maximize player potential.

These drills often emphasize complex coordination, rapid decision-making, and intense physical exertion. They move beyond basic skill work, incorporating tactical elements and simulating game-like pressures. Expect to find exercises focused on quick passing combinations, dynamic off-ball movement, and sophisticated defensive strategies.

A key aspect of these drills is their adaptability; coaches can modify them to suit the specific needs and skill levels of their team. The goal is to “train like a pro,” fostering a mindset of continuous improvement and a commitment to excellence. Accessing these drills through PDF guides provides a convenient and organized way to implement them into a structured training plan.

Coordination Movement Drills

Coordination movement drills are fundamental to developing well-rounded soccer players, enhancing their agility, balance, and overall control on the field. These exercises, frequently detailed in soccer training program PDF resources, focus on integrating multiple movements into fluid, efficient actions.

A coaching advisor highlights the importance of these drills, particularly for younger players (6-U), building a foundation for more complex skills. Drills often involve navigating obstacles, changing direction quickly, and performing ball skills while maintaining balance. They improve proprioception – the body’s awareness of its position in space.

These aren’t just about fancy footwork; they translate directly to improved passing accuracy, quicker reactions, and more effective dribbling. Implementing these drills, often within a structured training plan, helps players develop the neuromuscular pathways necessary for peak performance.

Kick-Off Drill for Practice Endings

The Kick-Off drill serves as an excellent concluding activity for soccer practices, offering a dynamic way to wind down while reinforcing key skills. Often found within comprehensive soccer training program PDF guides, this drill is particularly useful when players are fatigued, allowing them to practice decision-making under pressure without excessive exertion.

It’s described as an exercise that develops game awareness and quick reactions. The drill typically involves a simulated kick-off scenario, requiring players to immediately transition from a stationary position into passing, dribbling, and attacking movements.

This isn’t merely a cool-down; it’s a practical application of skills learned during the session. Coaches can adapt the drill to focus on specific tactical objectives, such as quick passing combinations or exploiting space. Utilizing this drill consistently, as outlined in many training plans, ensures players end practice with a positive and purposeful experience.