wedding dress size guide

Understanding Wedding Dress Sizes

Navigating wedding dress sizing can be surprisingly complex, differing significantly from everyday clothing. Fashion is shifting, and understanding these nuances is crucial for a seamless experience.

Why Standard Sizes Can Be Misleading

Standard dress sizes are notoriously inconsistent across brands, and bridal sizing adds another layer of complexity. What you typically wear as a size 12 in regular clothing might translate to a size 8 or even a 14 in a wedding dress. This isn’t about vanity sizing; bridal designers often use different measurement charts altogether.

The industry doesn’t adhere to a universal standard, meaning a size 10 at one boutique could fit drastically different than a size 10 elsewhere. This inconsistency stems from variations in cut, fabric, and the intended silhouette of the dress. Furthermore, the emotional weight attached to finding “the one” can make the sizing experience feel particularly fraught with anxiety, adding to the confusion. Don’t rely on your usual size; accurate measurements are key!

The Difference Between Street Size and Bridal Size

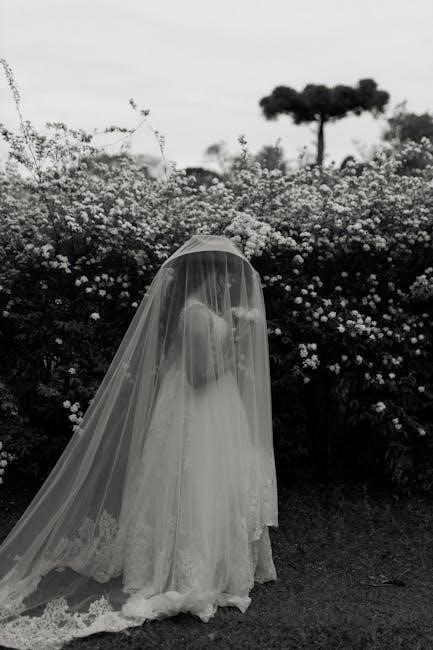
Bridal sizing operates on a different scale than standard “street” sizes, often running smaller. A bride who comfortably wears a size 8 in everyday clothes may require a size 10 or 12 in a wedding dress. This isn’t a reflection of your body; it’s simply how bridal designers construct their garments.

Bridal sizes are based on your measurements, not a pre-determined number. Designers aim for a closer, more fitted silhouette, requiring more precise sizing. Don’t be discouraged if the number on the tag is higher than expected – it’s incredibly common! Focus on how the dress feels and fits, rather than the label. Remember, alterations are almost always necessary to achieve a perfect fit, regardless of the initial size chosen.

Taking Accurate Measurements

Precise measurements are the foundation of finding your dream dress. Accurate data ensures a better fit and minimizes extensive alterations, saving both time and money.

Essential Measurements for a Wedding Dress

Several key measurements are vital when selecting a wedding dress, going beyond standard sizes. Bust measurement, taken at the fullest part of your chest while wearing a properly fitted bra, is paramount. Waist measurement should be taken at your natural waistline – typically the narrowest part of your torso. Hip measurement is crucial, especially for fitted styles like mermaid or trumpet gowns, and is taken at the fullest part of your hips.

Additionally, consider your hollow-to-hem measurement, taken from the hollow of your neck to the floor while wearing your wedding shoes. Shoulder width, from one shoulder point to the other, is also important for sleeve styles. Don’t forget to measure your back width, and arm length if the dress has sleeves. These details contribute to a perfectly tailored fit, ensuring comfort and confidence on your special day. Accurate measurements are the cornerstone of a beautiful silhouette.

Who Should Take Your Measurements?

While you can technically take your own measurements, it’s highly recommended to enlist assistance for accuracy. A professional at a bridal boutique is ideal, as they are experienced in taking precise measurements specifically for wedding dresses. They understand where and how to measure for the best fit, considering the dress’s structure and style.

If a boutique visit isn’t immediately possible, ask a friend or family member who is comfortable with a measuring tape and detail-oriented. Ensure they understand exactly where each measurement should be taken – referencing online guides can be helpful. Avoid attempting this alone, as reaching certain areas (like your back) can be difficult and lead to inaccuracies. Remember, precise measurements are crucial for alterations and a flawless fit, so prioritize accuracy!

Decoding Bridal Size Charts

Bridal size charts vary by designer and region, encompassing US, UK, and EU standards. Understanding bust, waist, and hip measurements is key to finding your perfect size.

Common Bridal Size Charts (US, UK, EU)

Bridal sizing isn’t standardized, creating potential confusion for brides-to-be. US bridal sizes generally run smaller than typical street clothes sizes, often differing by one or two sizes. A US size 8 bridal gown might correspond to a US size 10 or 12 in ready-to-wear clothing. UK bridal sizes follow a similar pattern, typically being one or two sizes larger than standard UK high street sizes.

European (EU) sizing presents another layer of complexity. EU sizes are numerically based, with a size 38 often equating to a US size 6-8, depending on the designer. Ricca Sposa, for example, offers a wide range of sizes from XS to 10XL (EU 34 and up). It’s vital to consult the specific size chart provided by the designer or retailer, as variations are common. Always prioritize measurements over relying solely on your usual dress size, ensuring a better fit and minimizing alteration costs.

Understanding Bust, Waist, and Hip Measurements

Accurate measurements are paramount when selecting a wedding dress. Bust measurement should be taken at the fullest part of your chest, wearing a properly fitted bra. The waist measurement is determined at the narrowest point of your torso, typically an inch above your belly button. Hip measurement is taken at the fullest part of your hips, ensuring the tape measure is level.

These three measurements – bust, waist, and hip – form the foundation of bridal sizing. Designers use these figures to determine the closest corresponding size in their charts. It’s crucial to have these measurements taken professionally, or by someone experienced, to avoid errors. Remember, a well-fitting dress starts with precise measurements, minimizing the need for extensive and costly alterations later in the process.

Wedding Dress Styles and Sizing Considerations

Different dress silhouettes require varying fitting approaches; styles like A-line, mermaid, and ballgowns necessitate unique sizing adjustments for optimal appearance and comfort.

A-Line Dresses and Size Adjustments

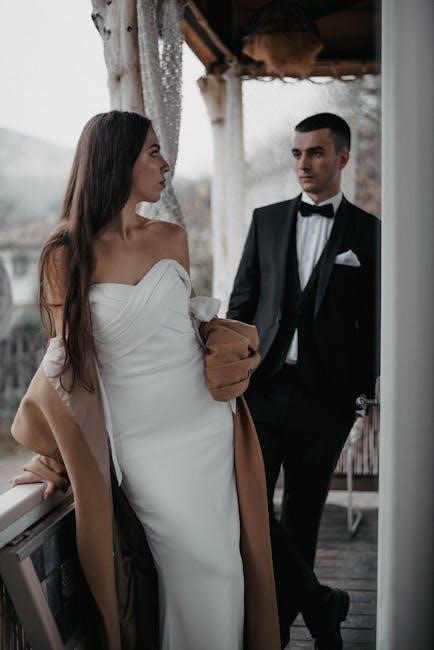
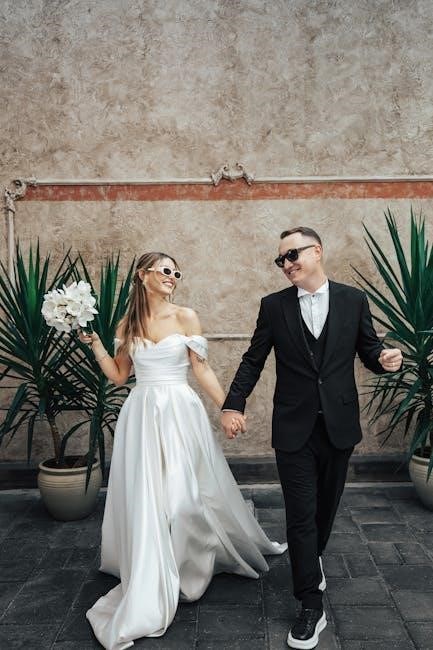
A-line dresses are universally flattering and often require fewer alterations than more fitted styles. Their forgiving shape gracefully skims over the hips and thighs, making them a popular choice for brides of all body types. However, even with an A-line silhouette, adjustments are almost always necessary to achieve a perfect fit. Common alterations include taking in or letting out the bodice to refine the waistline, and adjusting the straps or adding internal support for a secure and comfortable feel.

The length is frequently altered to accommodate varying heel heights, ensuring the dress flows beautifully on the wedding day. Brides should also consider potential adjustments to the neckline, whether it’s a sweetheart, V-neck, or scoop neck, to enhance their décolletage. Because A-line dresses offer more fabric, minor size discrepancies can often be resolved with relatively simple and cost-effective alterations, making them a practical and elegant option.

Mermaid/Trumpet Dresses and Fit

Mermaid and trumpet dresses, known for their fitted bodices and dramatic flares, demand a precise fit for optimal effect. These styles accentuate curves, but require careful consideration of sizing and potential alterations. Unlike more forgiving silhouettes, these dresses offer less room for error; a too-tight fit restricts movement, while a too-loose fit loses the intended shape; Expect alterations to the bodice to perfectly contour to your torso, and potentially adjustments to the hips to ensure a smooth, flattering line.

The length is also crucial, as the flare begins at or below the knee, impacting the overall proportion. Brides should be prepared for potentially higher alteration costs with these styles due to the complexity of the fit. Prioritizing a skilled seamstress experienced with fitted gowns is essential for achieving a stunning and comfortable result.

Ballgown Dresses and Potential Alterations

Ballgown dresses, the epitome of fairytale romance, often require significant alterations to achieve a perfect fit. While the full skirt offers some flexibility, the fitted bodice demands precision. Common alterations include taking in the waist to accentuate the smallest part of the torso, and adjusting the bust for optimal support and shape. Shoulder adjustments are also frequent, ensuring the straps or sleeves lie smoothly.

The skirt itself may need shortening, and potentially taken in at the waist to prevent bunching. Brides should anticipate alterations to create a balanced silhouette, as the voluminous skirt can sometimes overwhelm a smaller frame. A skilled seamstress can expertly tailor the gown, ensuring comfort and a flattering fit for a truly magical bridal look.

Alterations: Expect the Unexpected

Alterations are almost always necessary, even with a seemingly perfect fit. Budget accordingly, as costs vary, and remember that multiple fittings are often required.

Common Alterations and Their Costs

Expect to budget for alterations, as they are a standard part of the wedding dress process. Hemming the dress to the correct length is frequently needed, typically ranging from $100 to $300, depending on the fabric and complexity. Taking in or letting out the sides usually costs between $75 and $250 per side. Adjusting the bodice for a perfect fit can range from $100 to $400, especially if significant changes are required.

Adding straps or sleeves, or altering existing ones, can add another $50 to $150 per strap/sleeve. More complex alterations, like completely reshaping the bodice or adding intricate detailing, can easily exceed $500. Remember that rush fees can significantly increase these costs, so plan ahead and allow ample time for alterations before your wedding date. A qualified seamstress will provide a detailed quote after your fitting, outlining the specific costs for each alteration needed.

Finding a Qualified Seamstress

Selecting the right seamstress is paramount for achieving a flawless fit. Ask for recommendations from your bridal boutique, friends, or online wedding groups. Review their portfolio to assess their skill and experience with wedding dresses – look for examples of similar styles to yours. Schedule consultations with several seamstresses to discuss your alterations and get quotes.

During the consultation, assess their communication style and ensure they understand your vision. A good seamstress will listen carefully, offer expert advice, and explain the alteration process clearly. Check online reviews and verify their credentials. Avoid seamstresses who offer unrealistically low prices, as quality work requires expertise and time. Trust your instincts and choose someone you feel comfortable with and confident in.

Plus Size Wedding Dresses

Dedicated boutiques and designers offer stunning plus-size options, ensuring every bride feels beautiful and confident on her special day, regardless of size.

Dedicated Plus Size Bridal Boutiques

Fortunately, the bridal industry is becoming increasingly inclusive, with a growing number of boutiques specializing in plus-size wedding dresses. These boutiques understand the unique needs and desires of curvier brides, offering a more comfortable and personalized shopping experience. Unlike mainstream salons with limited options, dedicated plus-size boutiques carry a wider range of styles, sizes, and designers specifically catering to fuller figures.

Expect knowledgeable staff who are skilled in fitting and alterations for larger body types. They can guide you towards silhouettes that flatter your shape and ensure a perfect fit. Many boutiques also offer private appointments, allowing you to browse and try on dresses in a relaxed and supportive environment. Searching online for “plus size bridal boutiques near me” is a great starting point to discover local options. Remember to check reviews and browse their online catalogs before scheduling a visit.

Styles That Flatter Different Body Types

Choosing a wedding dress that complements your body shape is key to feeling confident and beautiful on your big day. A-line dresses are universally flattering, creating a balanced silhouette. For pear-shaped figures, an A-line or empire waist can accentuate the waist and skim over the hips. Hourglass shapes shine in fitted styles like mermaid or trumpet gowns, highlighting curves.

If you’re apple-shaped, consider a dress with a dropped waist or empire line to draw attention upwards. Ballgowns work well for many body types, offering a classic and romantic look. Don’t be afraid to experiment with different necklines and sleeve lengths to find what suits you best. Ultimately, the most flattering style is the one that makes you feel amazing!

Shopping Online for Wedding Dresses

Online wedding dress shopping presents both convenience and risks; carefully review return policies and size exchange details before committing to a purchase.

Risks and Benefits of Online Shopping

Embarking on the journey of online wedding dress shopping offers a unique blend of advantages and potential pitfalls for brides-to-be. The convenience is undeniable – browsing a vast selection from the comfort of your home, often at more competitive prices, is a significant draw. However, the inability to physically try on dresses before purchasing presents a considerable risk. Sizing discrepancies are common, as bridal sizes often differ from standard street sizes, and variations can occur between brands.

Furthermore, accurately assessing the fabric quality, construction, and overall fit from online images alone can be challenging. Return policies are paramount; thoroughly investigate the retailer’s procedures for returns and size exchanges, noting any associated costs or time limitations. While online shopping expands your options and can save time, diligent research and a clear understanding of the retailer’s policies are essential to avoid disappointment and ensure a perfect fit for your special day.

Return Policies and Size Exchanges

Navigating return policies and size exchange procedures is absolutely critical when purchasing a wedding dress, especially online. Before finalizing any purchase, meticulously review the retailer’s specific guidelines. Understand the timeframe allowed for returns – it’s often shorter than standard clothing purchases – and any associated fees, such as restocking charges or return shipping costs. Many bridal retailers have strict policies regarding alterations; a dress that has been altered may be non-returnable.

Size exchanges can be complex, depending on availability. Confirm whether a direct exchange is possible or if a refund will be issued, requiring you to repurchase the correct size. Be aware of potential delays in processing returns and exchanges, particularly during peak wedding season. Document all communication with the retailer and retain proof of purchase and shipping. A clear understanding of these policies will protect your investment and ensure a stress-free experience.

presto 23 qt pressure cooker manual

Presto 23 Quart Pressure Cooker Manual: A Comprehensive Guide

This guide offers detailed instructions for safe and effective use of your Presto 23-quart cooker, including pressure cooking and canning procedures. Download the PDF!

Understanding Your Presto 23 Quart Cooker

Your Presto 23-quart pressure cooker is a versatile kitchen appliance designed for both rapid cooking and safe home canning. This larger capacity is ideal for families or batch cooking, significantly reducing meal preparation time. Familiarizing yourself with its components and operation is crucial for optimal performance and safety.

This cooker utilizes pressure to elevate the boiling point of water, resulting in faster cooking times and enhanced flavor retention. It’s compatible with induction cooktops, offering flexibility in your kitchen setup. Remember to always refer to the complete instruction manual for detailed guidance, especially regarding pressure cooking and canning procedures. Proper understanding ensures maximum enjoyment and safety while using this Presto appliance.

Key Features and Components

The Presto 23-quart pressure cooker boasts several key features for efficient operation. These include a robust locking mechanism for secure lid closure, a pressure regulator to maintain desired pressure levels, and a pressure indicator for monitoring the cooking process. The large 23-quart capacity accommodates substantial quantities of food, perfect for large families or meal prepping.

Essential components include the pot body, lid, sealing ring, steam vent, and pressure gauge. Understanding each part’s function, as detailed in the instruction manual, is vital. Its induction compatibility expands cooking options. Regular inspection of these components ensures safe and reliable pressure cooking and canning experiences.

Safety First: Important Safeguards

Prioritize safety when using your Presto 23-quart pressure cooker. Never force or attempt to open the lid while pressure remains inside. Always ensure the steam vent and pressure regulator are clean and functioning correctly before each use. Avoid overfilling the cooker; leave sufficient headspace for proper steam circulation.

Do not pressure cook certain foods like applesauce, cranberries, or dry beans without following specific instructions. Carefully read the manual before first use and familiarize yourself with all safety precautions. Improper use can lead to burns or cooker malfunction. Regular inspection of the sealing ring is crucial for a secure seal.

Before First Use: Preparation & Inspection

Before your initial use of the Presto 23-quart pressure cooker, thoroughly wash the cooker body, lid, and all removable parts with warm, soapy water. Inspect the sealing ring for any cracks, nicks, or damage; replace if necessary. Ensure the vent pipe and pressure regulator are clear of obstructions.

Carefully examine the lid to confirm it aligns properly with the cooker body. A proper seal is vital for safe operation. Download the instruction manual for detailed diagrams. Verify all components are present and undamaged. This initial preparation ensures optimal performance and longevity of your appliance.

Getting Started: Basic Operation

To begin, add the desired amount of liquid – at least 3 cups – to the Presto 23-quart cooker. Place food on the rack, avoiding overfilling beyond the maximum fill line. Securely attach the lid, aligning the arrows as indicated in the manual; Set the pressure regulator to the appropriate setting for your recipe.

Heat on high until the regulator begins to rock gently, then reduce heat to maintain a steady rocking motion. This indicates the cooker has reached pressure. Cooking time begins when the regulator starts rocking. Refer to recommended cooking times for various foods.

Understanding Pressure Control Settings

Your Presto 23-quart cooker features adjustable pressure control settings, typically indicated by markings on the regulator weight. The lower setting (usually 15 PSI) is ideal for tenderizing meats and cooking vegetables, while the higher setting (10 PSI) is suited for quicker cooking of smaller items.

Ensure the correct weight is selected before heating. Incorrect settings can lead to undercooked or overcooked food. Always consult your recipe for the recommended pressure setting. Maintaining a consistent rocking motion of the regulator indicates the correct pressure is being maintained throughout the cooking process.

Locking and Unlocking the Lid

Proper lid locking is crucial for safe operation of your Presto 23-quart pressure cooker. Align the lid with the cooker body, ensuring the arrow markings match. Rotate the lid clockwise until it locks securely into place – you should hear a distinct click.

Never attempt to force the lid. To unlock, gently rotate the lid counterclockwise. Do not open the cooker until all pressure has been released using one of the recommended methods. A secure lock prevents accidental opening during pressurization and ensures safe cooking. Always inspect the sealing ring for damage before each use.

Releasing Pressure: Methods Explained

Releasing pressure safely is paramount when using your Presto 23-quart cooker. Three methods are available: Natural Pressure Release, Quick Release, and Cold Water Release (though the latter is not recommended).

Natural Release allows the pressure to dissipate gradually – ideal for soups and foods with liquids. Quick Release involves carefully activating the pressure release valve, venting steam. Exercise extreme caution! Cold Water Release, involving running cold water over the lid, is discouraged due to potential warping and food contamination.

Natural Pressure Release

Natural Pressure Release is the safest method for your Presto 23-quart cooker, especially for foods containing liquids like soups, stews, and beans. Simply remove the cooker from the heat source and allow the pressure to decrease on its own.

This process can take anywhere from 10 to 30 minutes, or even longer, depending on the volume and temperature of the contents. Avoid any attempt to speed up the process. Once the pressure indicator drops to zero, the lid can be safely opened. This method prevents food from sputtering and ensures more tender results.

Quick Release Method

The Quick Release Method for your Presto 23-quart pressure cooker involves carefully lifting the pressure regulator valve to vent steam. Important: Keep hands and face away from the steam vent to avoid burns! This method is best suited for foods that don’t require a gradual pressure reduction, like vegetables.

Be aware that using quick release can sometimes cause liquids to sputter, so it’s not ideal for liquids-rich dishes. Ensure the valve is fully open during venting. Once the pressure indicator drops to zero, the lid can be safely unlocked and opened. Exercise extreme caution during this process.

Cold Water Release (Not Recommended)

Presto strongly does not recommend the cold water release method for your 23-quart pressure cooker. This involves running cold water over the lid to quickly reduce pressure. It can cause a sudden temperature change, potentially warping the cooker’s components and compromising its safety.

Furthermore, cold water can be drawn into the steam vent, diluting the food and affecting its flavor and texture. The rapid cooling can also cause food to become soggy. Stick to the safer and recommended methods of natural and quick release for optimal results and to maintain the longevity of your appliance.

Pressure Cooking Instructions

Before you begin pressure cooking with your Presto 23-quart cooker, ensure adequate liquid is added – typically 1 to 3 cups, depending on the recipe. Securely lock the lid, following the detailed locking instructions. Select the appropriate pressure control setting based on the food being cooked.

Allow the cooker to reach the desired pressure, indicated by the pressure regulator. Once at pressure, adjust the heat to maintain a steady pressure throughout the cooking time. Refer to the recommended cooking times chart for various foods, remembering to adjust for altitude as needed.

Recommended Cooking Times for Common Foods

Here’s a guide to pressure cooking times for popular dishes using your Presto 23-quart cooker. Beef stew requires approximately 30-45 minutes at 15 PSI. Whole chickens cook in roughly 25-30 minutes. Dried beans, a common pressure cooking staple, need 20-25 minutes.

Potatoes typically take 8-12 minutes, while rice cooks in just 3-5 minutes. Remember these times are estimates and can vary based on food quantity and desired tenderness. Always consult a detailed recipe for precise instructions. Adjust cooking times based on altitude to ensure proper food safety and texture.

Adjusting Cooking Times for Altitude

Cooking at higher altitudes requires adjustments to pressure cooking times. Water boils at a lower temperature with increased altitude, impacting cooking efficiency. For altitudes between 2,000 and 4,000 feet, increase cooking time by 5%. Between 4,000 and 6,000 feet, add 10% to the recommended time.

Above 6,000 feet, increase cooking time by 15-20%. These are general guidelines; always prioritize food safety. Ensure food reaches a safe internal temperature. Using a Presto 23-quart cooker, carefully monitor the pressure and adjust accordingly. Refer to reliable canning resources for specific altitude adjustments when canning.

Food Preparation Guidelines

Proper food preparation is crucial for safe and successful pressure cooking with your Presto 23-quart cooker. Meats should be cut into uniform sizes for even cooking. Avoid overfilling the cooker – never exceed the maximum fill line. Liquids are essential; always include at least one cup, or as specified in the recipe.

Certain foods, like applesauce, cranberries, and pasta, are not suitable for pressure cooking due to potential foaming or clogging. When canning, follow specific preparation guidelines for each food type. Always remove bones from meat and trim excess fat. Thorough preparation ensures optimal results and prevents accidents.

Canning with Your Presto 23 Quart Cooker

Your Presto 23-quart cooker is suitable for both pressure canning and water bath canning, preserving foods safely for long-term storage. Pressure canning is essential for low-acid foods like vegetables and meats, reaching temperatures high enough to destroy botulism spores. Always follow tested recipes and processing times.

Ensure jars are properly prepared, filled, and sealed according to canning guidelines. Refer to the complete instructions beginning on page 6 for detailed pressure canning procedures. Remember, accurate timing and adherence to safety protocols are vital for successful and safe home canning.

Pressure Canning vs. Water Bath Canning

Pressure canning utilizes higher temperatures – 240°F (116°C) – achieved within the pressurized environment of your Presto 23-quart cooker, making it crucial for low-acid foods like meats, poultry, seafood, and vegetables. This heat effectively destroys Clostridium botulinum spores, preventing botulism.

Water bath canning, conversely, relies on boiling water (212°F/100°C) and is suitable only for high-acid foods like fruits, jams, jellies, and pickles. The acidity inhibits bacterial growth. Choosing the correct method is paramount for food safety; never attempt to water bath can low-acid foods.

Recommended Canning Times & Procedures

Canning times vary based on food type, jar size, and altitude. Always consult a current, research-based canning guide (like the USDA Complete Guide to Home Canning) for precise recommendations.

Generally, pressure canning involves filling jars, leaving headspace, removing air bubbles, wiping rims, applying lids and bands, and processing for the specified time at the correct pressure. Follow the Presto manual’s venting and pressurization instructions carefully.

Proper procedures are vital; under-processing can lead to spoilage, while over-processing can affect food texture. Adjust processing times for altitude as indicated in canning guides.

Jar Preparation for Canning

Proper jar preparation is crucial for successful canning. Inspect jars for chips or cracks; discard any damaged ones. Wash jars in hot, soapy water and rinse thoroughly. Sterilize jars by boiling them for 10 minutes, or running them through a sterilize cycle in your dishwasher.

Keep jars hot until filling. Lids and bands should also be heated – simmer lids in hot water (do not boil) to soften the sealing compound. Ensure bands are free of rust.

Careful preparation prevents seal failures and ensures food safety. Follow Presto’s guidelines alongside current canning recommendations for optimal results.

Troubleshooting Common Issues

If your Presto 23-quart cooker won’t pressurize, check the lid seal, vent, and ensure sufficient liquid is inside. A lid that won’t seal often indicates a dirty sealing ring or improper closure. Food burning suggests insufficient liquid or too high a heat setting.

Always verify the vent is clear of obstructions. If issues persist, consult the full instruction manual. Do not attempt to force the lid open while pressurized.

Remember safety first! Refer to the Presto website or customer support for further assistance with complex problems.

Cooker Won’t Pressurize

If your Presto 23-quart pressure cooker fails to reach pressure, first ensure sufficient liquid is present – at least the minimum amount specified in your recipe. Verify the lid is securely locked in place; improper alignment prevents sealing. Inspect the sealing ring for cracks, damage, or debris, replacing it if necessary.

Also, confirm the vent pipe and vent/cover lock are clear of obstructions. Ensure the heat source is set to high initially.

Do not force the lid; consult the manual for detailed troubleshooting steps.

Lid Won’t Seal

A lid that won’t seal on your Presto 23-quart cooker prevents pressure buildup. First, check the sealing ring – ensure it’s properly positioned in the lid groove and free from cracks, nicks, or food particles. A damaged ring must be replaced for safe operation.

Verify the lid is correctly aligned with the cooker body; arrows or markings often indicate proper positioning. Ensure the vent pipe is clean and unobstructed.

Also, confirm there’s enough liquid inside; insufficient liquid hinders steam creation needed for sealing. Refer to the manual for detailed diagrams and troubleshooting guidance.

Food is Burning

If food is burning in your Presto 23-quart pressure cooker, it usually indicates insufficient liquid or too high a heat setting. Always ensure the minimum liquid requirement, as specified in the manual and recipes, is met.

Reduce the heat after the cooker reaches pressure; maintaining high heat isn’t necessary. Stir food occasionally, if possible, to prevent sticking, especially with thicker sauces or stews.

Avoid pressure cooking ingredients prone to scorching, like milk or chocolate, without careful attention and frequent stirring. Refer to recommended cooking times to prevent overcooking.

Care and Maintenance

Proper care extends the life of your Presto 23-quart pressure cooker. After each use, allow the cooker to cool completely before cleaning. The pot and lid are dishwasher safe, but hand washing is recommended to preserve the finish.

Inspect the pressure regulator and safety valve regularly for any blockages or damage. Ensure the sealing ring is clean, pliable, and properly seated in the lid; replace it when it loses its elasticity.

Store the cooker in a dry place, avoiding stacking heavy items on top. Refer to the manual for replacement parts and detailed cleaning instructions.

Cleaning Your Pressure Cooker

Thorough cleaning is vital for your Presto 23-quart cooker’s longevity. After cooling, wash the pot and lid with warm, soapy water. Both are typically dishwasher safe, though hand washing preserves their appearance.

Pay close attention to the pressure regulator, vent pipe, and safety valve, ensuring they are free from food particles. The sealing ring should be removed, washed, and inspected for cracks or damage; replace as needed.

Avoid abrasive cleaners that could scratch the surfaces. Dry all components completely before storing. Consult the manual for detailed instructions and specific cleaning recommendations.

Proper Storage Techniques

Correct storage preserves your Presto 23-quart pressure cooker’s condition. Ensure all parts are completely dry before storing to prevent rust or mildew. The pot can be stacked with other cookware, but protect the interior surface.

Store the lid separately, ideally with the sealing ring removed to prevent odor absorption and maintain its elasticity. Keep the pressure regulator and other small components in a safe, accessible location.

Refer to the manual for specific recommendations. Avoid prolonged exposure to direct sunlight or extreme temperatures. Proper care ensures your cooker remains ready for future use.

Finding Replacement Parts

Genuine Presto replacement parts ensure optimal performance and safety for your 23-quart cooker. The official Presto website (GoPresto.com) is the primary source for parts like sealing rings, pressure regulators, safety valves, and even complete lid assemblies.

Authorized retailers may also carry common replacement parts. When ordering, have your cooker’s model number handy to guarantee compatibility. Avoid using non-genuine parts, as they may compromise safety and void any warranty.

Check the manual for a parts diagram. Presto’s customer support can also assist in identifying the correct replacement part for your needs.

Downloading the Manual (PDF)

Accessing a digital copy of your Presto 23-quart pressure cooker manual is quick and convenient. Visit the official Presto website at GoPresto.com. Navigate to the “Instruction Manuals” section, often found under “Customer Support” or “Resources”.

Search for your specific model – ensure it’s the 23-quart version – to locate the correct PDF document. Downloading the manual allows you to have it readily available on your computer, tablet, or smartphone for easy reference during cooking or canning.

Save the PDF to your preferred location for future use. A digital copy is especially useful if you’ve misplaced the original printed manual.

Accessing Spanish Language Instructions

Presto understands the need for accessibility and offers the 23-quart pressure cooker manual in Spanish. You can obtain a Spanish version through several convenient methods. Visit www.GoPresto.com/espanol to download the instruction manual directly as a PDF file.

Alternatively, you can request a printed copy by contacting Presto Customer Support. This ensures you have a physical copy for easy reference. Estas instrucciones también están disponibles en español – these instructions are also available in Spanish!

Presto is committed to providing resources in multiple languages to support all users of their products.

Contacting Presto Customer Support

Presto provides excellent customer support to assist with any questions or concerns regarding your 23-quart pressure cooker. For immediate assistance, visit the official Presto website, where you’ll find a comprehensive FAQ section addressing common issues.

If you require further help, you can directly contact Presto through their dedicated customer service channels. While specific contact details aren’t provided in the snippets, exploring the “Contact Us” section on their website (www.GoPresto.com) will yield the necessary information.

Expect knowledgeable support to guide you through operation, maintenance, and troubleshooting.

Resources and Recipes

Presto offers a wealth of resources to enhance your 23-quart pressure cooker experience, extending beyond the basic instruction manual. Explore the official Presto website (www.GoPresto.com) for a diverse collection of recipes specifically tailored for pressure cooking.

These recipes cover a wide range of dishes, from savory meals to delectable desserts, designed to maximize the efficiency and versatility of your appliance. Additionally, Presto provides helpful tips and techniques for successful pressure cooking and canning.

Discover new culinary possibilities and unlock the full potential of your Presto cooker!

wh32ux9019 manual pdf

The Westinghouse WH32UX9019 is a 32-inch 4K UHD monitor, perfect for home or office use, offering a blend of visual fidelity and practical features.

This monitor, available through retailers like Amazon, boasts IPS LED technology, FreeSync compatibility, and EyeRest/Anti-Glare features for comfortable viewing.

The accompanying manual, often found as a WH32UX9019 manual PDF, guides users through setup, operation, and troubleshooting of this versatile display.

Overview of the WH32UX9019

The Westinghouse WH32UX9019 presents a compelling visual experience with its 32-inch 4K Ultra HD (3840 x 2160) IPS LED panel. This monitor is designed to cater to a diverse range of users, from those seeking immersive gaming to professionals requiring accurate color representation for work.

Key selling points include its 60Hz refresh rate, 8ms response time (Gray-to-Gray), and support for AMD FreeSync technology, minimizing screen tearing and stuttering during gameplay. The inclusion of EyeRest technology and an anti-glare coating further enhance user comfort, reducing eye strain during prolonged use.

The WH32UX9019 manual PDF provides detailed instructions on maximizing these features, covering everything from initial setup and OSD navigation to troubleshooting common issues. It’s a crucial resource for understanding and optimizing your viewing experience.

Key Features and Specifications

The Westinghouse WH32UX9019 boasts a vibrant 32-inch IPS LED display with a stunning 4K UHD (3840 x 2160) resolution. Its 60Hz refresh rate and 8ms response time (Gray-to-Gray) deliver smooth visuals, enhanced by AMD FreeSync technology for tear-free gaming.

Connectivity options include HDMI and DisplayPort, ensuring compatibility with a wide range of devices. The integrated EyeRest technology and anti-glare screen minimize eye strain, making it ideal for extended use. The monitor’s design caters to both home and office environments.

The WH32UX9019 manual PDF details these specifications and features, alongside comprehensive instructions for utilizing the On-Screen Display (OSD) and customizing picture/audio settings. It’s your guide to unlocking the monitor’s full potential.

Setting Up Your Monitor

Proper setup is crucial for optimal performance. Consult the WH32UX9019 manual PDF for detailed instructions on unboxing, connecting cables, and initial configuration.

Unboxing and Package Contents

Carefully unpack your Westinghouse WH32UX9019 monitor, referencing the WH32UX9019 manual PDF for a visual inventory. The box should contain the monitor itself, the monitor stand (likely requiring assembly), a power cable, and potentially an HDMI or DisplayPort cable.

Inspect all components for any shipping damage. The manual PDF details each part and provides assembly instructions for the stand. Retain the original packaging for potential warranty claims or future transport.

Confirm all listed items are present before proceeding. Missing components should be reported to the retailer immediately. The manual also highlights important safety information regarding handling and setup.

Connecting to Power and Devices

Before connecting your Westinghouse WH32UX9019, consult the WH32UX9019 manual PDF for voltage requirements. Connect the provided power cable to the monitor and a grounded outlet. Avoid using damaged cables.

For video input, use either HDMI or DisplayPort cables (sold separately if not included). The manual PDF illustrates the port locations on the monitor’s rear panel. Ensure cables are securely connected to both the monitor and your computer or device.

Power on the monitor after all connections are made. Refer to the manual for initial setup instructions and troubleshooting tips if no signal is displayed.

HDMI Connection Guide

To connect via HDMI, locate an available HDMI port on the rear of your Westinghouse WH32UX9019 monitor – the WH32UX9019 manual PDF clearly identifies these. Use a standard HDMI cable (not always included) to connect the monitor to your computer, Blu-ray player, or gaming console.

Ensure the cable is firmly seated in both the monitor and the source device. Power on both devices. Use the monitor’s input source selection (refer to the OSD section in the manual PDF) to choose the correct HDMI input.

If no image appears, double-check the cable connections and input selection. The manual PDF provides troubleshooting steps for HDMI-related issues.

DisplayPort Connection Guide

For DisplayPort connectivity, identify the DisplayPort input on the back of your Westinghouse WH32UX9019 monitor; the WH32UX9019 manual PDF illustrates its location. Utilize a DisplayPort cable to link the monitor to your computer’s graphics card. DisplayPort often supports higher refresh rates and resolutions compared to HDMI.

Securely connect the cable at both ends. Power on both the monitor and your computer. Navigate to the monitor’s On-Screen Display (OSD) using the control buttons and select the appropriate DisplayPort input source.

If you encounter issues, consult the manual PDF for troubleshooting guidance, ensuring the cable is correctly seated and the input is properly selected.

Initial Setup and On-Screen Display (OSD)

Upon connecting power, the Westinghouse WH32UX9019 will initiate its initial setup. The WH32UX9019 manual PDF details the process, guiding you through language selection and basic configuration. Access the On-Screen Display (OSD) using the buttons located on the monitor’s bezel – the manual PDF provides a diagram of their positions.

The OSD allows customization of picture settings, audio levels, and input sources. Familiarize yourself with the menu structure as outlined in the manual PDF. Initial adjustments to brightness and contrast are recommended for optimal viewing.

Ensure the correct input source is selected to display content from your connected device.

Understanding the On-Screen Display (OSD)

The WH32UX9019’s OSD, detailed in the WH32UX9019 manual PDF, provides comprehensive control over display settings, including picture, audio, and input source adjustments.

Navigating the OSD Menu

Accessing the On-Screen Display (OSD) on your Westinghouse WH32UX9019 is straightforward, typically achieved through physical buttons located on the monitor’s bezel – details are clearly outlined in the WH32UX9019 manual PDF.

The OSD menu structure is logically organized, presenting options in categories like Picture, Audio, Input, and System. Use the directional buttons to navigate between these main menus and submenus. Selecting an option usually involves pressing the ‘Enter’ or ‘OK’ button.

The manual PDF emphasizes that the OSD layout might vary slightly depending on firmware versions, but the core functionality remains consistent. Remember to save any changes made within the OSD to ensure they are applied; the manual details the saving process.

Picture Settings

Within the OSD’s ‘Picture’ menu, the WH32UX9019 offers extensive customization options, thoroughly explained in the WH32UX9019 manual PDF. Users can fine-tune Brightness and Contrast to achieve optimal image clarity and depth, adjusting to ambient lighting conditions.

Color Temperature Control allows selection between preset modes (Warm, Cool, Normal) or custom RGB adjustments for precise color accuracy. Sharpness controls detail enhancement, while Dynamic Contrast automatically adjusts contrast levels for a more immersive viewing experience.

The manual PDF advises experimenting with these settings to find the ideal balance for personal preference and content type. It also notes that resetting to factory defaults is an option if adjustments are unsatisfactory.

Brightness and Contrast Adjustment

Adjusting brightness and contrast are fundamental to optimizing your viewing experience on the WH32UX9019, detailed within the WH32UX9019 manual PDF. Brightness controls the overall luminance of the screen, impacting how light or dark the image appears.

Contrast defines the difference between the lightest and darkest shades, influencing image depth and detail. The manual recommends increasing brightness in brightly lit rooms and decreasing it in darker environments.

Similarly, adjusting contrast enhances image clarity; however, excessive contrast can lead to lost detail in shadows or highlights. The PDF suggests a balanced approach, experimenting with both settings to achieve a visually comfortable and accurate picture.

Color Temperature Control

Color temperature, as explained in the WH32UX9019 manual PDF, dictates the warmth or coolness of the displayed colors, measured in Kelvin (K). Lower Kelvin values (e.g., 6500K) produce warmer tones – reds and yellows are more prominent – while higher values (e.g., 9300K) yield cooler tones – blues are emphasized.

The monitor typically offers presets like “Warm,” “Cool,” and “Normal,” alongside a user-customizable option. The manual advises selecting a color temperature that suits your viewing preferences and ambient lighting.

For accurate color reproduction, 6500K is often recommended. Experimentation is key; the PDF encourages adjusting until colors appear natural and visually pleasing, minimizing eye strain during prolonged use.

Sharpness and Dynamic Contrast

Sharpness control, detailed in the WH32UX9019 manual PDF, adjusts the clarity of image edges. Increasing sharpness enhances detail but can introduce artifacts if set too high, resulting in a grainy or unnatural appearance. The manual recommends finding a balance for optimal clarity without excessive distortion.

Dynamic Contrast automatically adjusts the contrast ratio based on the content displayed. This feature aims to deepen blacks and brighten whites, enhancing perceived image depth and realism.

However, the PDF notes that aggressive dynamic contrast settings can sometimes lead to a “pumping” effect, where brightness fluctuates noticeably. Experiment with different levels to find a setting that improves image quality without being distracting.

Audio Settings

The WH32UX9019, as detailed in the WH32UX9019 manual PDF, features integrated speakers and a headphone jack for audio output. The OSD’s Audio Settings menu allows users to control volume levels, adjust equalization, and select audio sources.

Volume control is straightforward, offering a range from 0 to 100. The manual suggests starting with a moderate volume and adjusting to a comfortable level. Equalization presets, if available, can tailor the sound to different content types – for example, a “Movie” preset might emphasize bass.

The manual also clarifies how to select the appropriate audio source when using multiple input connections, ensuring sound originates from the desired device.

Input Source Selection

The Westinghouse WH32UX9019, as outlined in the WH32UX9019 manual PDF, supports multiple input sources including HDMI and DisplayPort. Accessing the Input Source Selection menu within the OSD allows users to easily switch between connected devices.

The manual details a step-by-step process for navigating to this menu, typically using the monitor’s physical buttons. Each available input is listed by name (e.g., HDMI1, HDMI2, DisplayPort). Selecting the correct input ensures the video and audio signals are routed from the intended source.

Troubleshooting tips within the manual address scenarios where the selected input doesn’t display a signal, advising users to verify cable connections and device power status.

Advanced Features

The WH32UX9019, detailed in the WH32UX9019 manual PDF, offers FreeSync technology, EyeRest anti-glare, and a responsive 8ms experience for immersive visuals.

FreeSync Technology Explained

FreeSync technology, thoroughly explained within the WH32UX9019 manual PDF, dynamically synchronizes the monitor’s refresh rate with the frame rate of your compatible graphics card. This eliminates screen tearing and stuttering, resulting in exceptionally smooth and fluid motion during gameplay and video playback.

Traditional monitors with a fixed refresh rate can lead to visual artifacts when the frame rate output by your computer doesn’t match. FreeSync resolves this by allowing the monitor to adapt, providing a more seamless and responsive visual experience. To utilize this feature, ensure your graphics card supports FreeSync and is properly configured within your system settings, as detailed in the manual.

The WH32UX9019’s FreeSync implementation enhances gaming performance, reducing input lag and providing a competitive edge.

EyeRest Technology and Anti-Glare Features

The Westinghouse WH32UX9019 incorporates both EyeRest technology and an anti-glare coating, designed to minimize eye strain during prolonged use. The WH32UX9019 manual PDF details how these features work in tandem to create a more comfortable viewing experience.

EyeRest technology aims to reduce blue light emission, a known contributor to eye fatigue and sleep disruption. The anti-glare coating minimizes reflections from ambient light sources, enhancing image clarity and reducing eye strain caused by glare. These features are particularly beneficial for users who spend extended periods working, gaming, or browsing.

The manual provides guidance on optimizing these settings for your specific environment and preferences, ensuring optimal visual comfort and reduced eye fatigue.

Response Time and Gaming Performance

The Westinghouse WH32UX9019 boasts an 8ms Gray-to-Gray response time, making it suitable for casual gaming and general use. While not a top-tier gaming monitor, it offers a reasonably smooth experience for many titles. The WH32UX9019 manual PDF provides insights into optimizing display settings for improved gaming performance.

Its FreeSync technology synchronizes the monitor’s refresh rate with the graphics card’s frame rate, reducing screen tearing and stuttering. This feature enhances visual fluidity, particularly in fast-paced games. The manual explains how to enable and configure FreeSync for optimal results.

Users can adjust response time settings within the OSD to fine-tune performance based on their gaming preferences and the specific game being played.

Troubleshooting Common Issues

The WH32UX9019 manual PDF offers solutions for common problems like no signal, distorted images, or audio issues.

It guides users through diagnosing and resolving these issues, ensuring optimal monitor performance and a seamless user experience.

No Signal Displayed

If your Westinghouse WH32UX9019 displays a “No Signal” message, consult the WH32UX9019 manual PDF for detailed troubleshooting steps. First, verify the cable connection (HDMI or DisplayPort) to both the monitor and your device is secure.

Ensure the correct input source is selected on the monitor using the OSD menu. Try a different cable to rule out a faulty connection. Confirm your computer or device is outputting a signal and is powered on correctly.

The manual suggests testing with another device to isolate the problem. If the issue persists, check the monitor’s power supply and consider a factory reset via the OSD. A complete power cycle of both the monitor and source device is also recommended.

Distorted Image or Colors

Experiencing distorted images or inaccurate colors on your Westinghouse WH32UX9019? The WH32UX9019 manual PDF offers solutions. Begin by accessing the monitor’s On-Screen Display (OSD) and navigating to the ‘Picture Settings’ menu.

Adjust the brightness, contrast, and sharpness levels. Experiment with the color temperature settings (Warm, Cool, Normal) to achieve your desired color profile. Incorrect cable connections can also cause distortion; ensure a secure HDMI or DisplayPort link.

The manual advises checking your graphics card settings on your computer, as these can override monitor settings. A factory reset of the monitor via the OSD may resolve persistent issues. If problems continue, consult the manual’s troubleshooting section for further guidance.

Audio Problems

Encountering audio issues with your Westinghouse WH32UX9019? The WH32UX9019 manual PDF provides troubleshooting steps. First, verify the volume level on both the monitor and your connected device (PC, laptop, etc.). Ensure the correct audio output device is selected within your computer’s sound settings.

Check the audio settings within the monitor’s On-Screen Display (OSD) menu. Confirm the audio input source matches your connection type (HDMI ARC, for example). A faulty audio cable can also be the culprit; try a different cable.

The manual suggests testing with different audio sources to isolate the problem. If issues persist, a factory reset of the monitor might help. Refer to the manual’s detailed troubleshooting section for advanced solutions.

Safety Precautions and Maintenance

The WH32UX9019 manual PDF details crucial safety guidelines and maintenance tips. Always follow these instructions to ensure safe operation and prolong the monitor’s lifespan.

General Safety Guidelines

Refer to the WH32UX9019 manual PDF for comprehensive safety information before operating the monitor. Avoid using the device near water or excessive humidity to prevent electrical hazards.

Ensure the monitor is placed on a stable surface to prevent accidental falls and potential injuries. Do not block ventilation openings, as this can cause overheating and damage the internal components.

Only use the provided power cord and ensure it is properly grounded. Disconnect the power cord during thunderstorms or prolonged periods of non-use.

Avoid looking directly at the bright LED backlight for extended periods. The manual emphasizes that this product is not suitable for young children without adult supervision.

Do not attempt to disassemble or repair the monitor yourself; contact qualified personnel for assistance.

Cleaning and Care Instructions

Consult the WH32UX9019 manual PDF for detailed cleaning guidance to maintain your monitor’s optimal condition. Always disconnect the power cord before cleaning to avoid electrical shock.

Use a soft, dry, lint-free cloth to gently wipe the screen and exterior surfaces. Avoid applying excessive pressure, which could damage the display.

For stubborn smudges, slightly dampen the cloth with distilled water, ensuring it’s not dripping wet. Never use harsh chemicals, abrasive cleaners, or solvents, as these can harm the screen coating.

Regular dusting prevents buildup and maintains clarity. Avoid spraying liquids directly onto the monitor; always apply to the cloth first.

Proper care extends the lifespan of your Westinghouse WH32UX9019 monitor and ensures continued high-quality performance.

Important Warnings and Disclaimers

Refer to the WH32UX9019 manual PDF for crucial safety information and disclaimers. This monitor is intended for indoor use only, and exposure to extreme temperatures or humidity should be avoided.

Do not attempt to disassemble or repair the monitor yourself; unauthorized modifications void the warranty. The manufacturer is not liable for damage resulting from improper use or neglect.

Prolonged display of static images may cause screen burn-in; utilize screen savers or vary content regularly. Ensure adequate ventilation around the monitor to prevent overheating.

The information contained within the manual is subject to change without notice. Always prioritize safety and follow all provided guidelines for optimal performance and longevity.

Technical Specifications in Detail

The WH32UX9019 manual PDF details a 3840 x 2160 resolution, 60Hz refresh rate, 8ms response time, and IPS panel technology for vibrant visuals.

Display Resolution and Refresh Rate

The Westinghouse WH32UX9019, as detailed in the WH32UX9019 manual PDF, features a stunning Ultra HD (UHD) resolution of 3840 x 2160 pixels. This 4K resolution delivers incredibly sharp and detailed images, enhancing both work and entertainment experiences.

Complementing this high resolution is a native refresh rate of 60Hz. While not geared towards competitive esports, this refresh rate provides smooth motion for everyday tasks, video playback, and casual gaming. The manual clarifies optimal settings for achieving the best visual performance at this refresh rate, including recommended cable connections and display configurations.

Users can find specific instructions within the manual regarding resolution and refresh rate adjustments through the On-Screen Display (OSD) menu, ensuring compatibility with various devices and content sources.

Response Time Details

The WH32UX9019 boasts a response time of 8ms (Gray-to-Gray), as specified in the WH32UX9019 manual PDF. This metric indicates the speed at which pixels change color, impacting motion clarity. While 8ms isn’t the fastest response time available, it’s generally sufficient for everyday computing, media consumption, and casual gaming.

The manual details that faster response times are typically found in monitors geared towards competitive gaming. However, the WH32UX9019’s response time strikes a balance between affordability and performance. Users can explore OSD settings to potentially optimize response time, though excessive adjustments may introduce visual artifacts;

The PDF manual also clarifies that perceived motion blur can be influenced by factors beyond response time, such as refresh rate and panel technology.

Connectivity Options (Full List)

According to the WH32UX9019 manual PDF, this monitor offers a comprehensive range of connectivity options to accommodate various devices. It includes one HDMI port and one DisplayPort, enabling connections to PCs, gaming consoles, and other multimedia sources.

The manual further specifies a 3.5mm audio output jack for connecting headphones or external speakers. While it doesn’t feature USB ports directly on the monitor, the available HDMI and DisplayPort connections support audio transmission.

The PDF documentation details the supported video resolutions and refresh rates for each port, ensuring optimal display performance. It’s important to consult the manual for specific cable requirements and compatibility information.

Warranty Information

The WH32UX9019 manual PDF details warranty coverage, typically a one-year limited warranty against manufacturing defects.

It outlines claim procedures, requiring proof of purchase and a description of the issue for valid requests;

Warranty Coverage Details

The WH32UX9019 manual PDF specifies a standard one-year limited warranty commencing from the original purchase date. This warranty covers defects in materials and workmanship under normal use; It does not cover damage resulting from misuse, accidents, modifications, or unauthorized repairs.

Specifically, the warranty addresses backlight failure, panel defects (like dead pixels within a defined tolerance), and issues with the monitor’s internal circuitry. Cosmetic damage, such as scratches or dents, is generally excluded. The warranty is non-transferable and applies only to the original purchaser.

Furthermore, the manual clarifies that any attempted self-repair voids the warranty. Users are directed to contact Westinghouse authorized service centers for assistance during the warranty period.

How to Claim Warranty

According to the WH32UX9019 manual PDF, initiating a warranty claim requires contacting Westinghouse customer support with proof of purchase – a valid receipt or invoice. You’ll need to provide the monitor’s serial number, detailed description of the defect, and your contact information.

Westinghouse will then issue a Return Merchandise Authorization (RMA) number and instructions for shipping the monitor to an authorized service center. Shipping costs for the initial return are typically the responsibility of the customer.

Upon inspection, if the defect is covered, Westinghouse will repair or replace the monitor at their discretion. The repaired or replacement unit will then be shipped back to you, with shipping costs covered by Westinghouse.

mlb the show 23 trophy guide

MLB The Show 23 Trophy Guide: A Comprehensive Plan

Embark on a journey to unlock all 26 MLB The Show 23 trophies, culminating in the prestigious Platinum reward: Champion Of The Diamond!

Welcome to our detailed guide for achieving Platinum in MLB The Show 23! This comprehensive resource is designed to navigate you through the game’s 26 trophies, offering strategies and insights for both seasoned veterans and newcomers. We’ll break down each trophy’s requirements, difficulty, and estimated completion time, ensuring a smooth path to becoming a true Champion of the Diamond.

This guide covers all trophy types – from Road to the Show and Franchise Mode to Diamond Dynasty and gameplay-specific challenges. We’ll also address potential glitches (as of December 16, 2025) and optimal difficulty settings to streamline your experience. Whether you’re aiming for a quick Platinum run or a thorough completionist experience, this guide has you covered. Prepare to dominate the diamond and unlock every achievement!

Understanding Trophy Difficulty

MLB The Show 23’s trophy list presents a moderate challenge, with a blend of easily attainable and demanding achievements. The majority of trophies are tied to progression within the game’s various modes – Road to the Show, Franchise, and Diamond Dynasty – requiring significant time investment rather than exceptional skill. However, several gameplay-specific trophies demand precision hitting, pitching, and fielding.

The Platinum trophy, “Champion Of The Diamond!”, is considered a 6-10 hour endeavor for experienced players, potentially extending to 20+ hours for newcomers. Diamond Dynasty trophies often present the biggest hurdle due to online competition. Difficulty settings can be adjusted to ease certain challenges, but some trophies require specific conditions. Careful planning and utilizing available resources are key to success.

Platinum Trophy Overview: Champion Of The Diamond!

The coveted “Champion Of The Diamond!” Platinum trophy in MLB The Show 23 signifies complete mastery of the game. It’s awarded upon unlocking all 26 available trophies, a testament to dedication and skill across all game modes. This prestigious achievement requires a comprehensive understanding of Road to the Show, Franchise Mode, and the complexities of Diamond Dynasty.

Expect a significant time commitment, ranging from 6 to 20+ hours depending on your familiarity with the series. Online trophies within Diamond Dynasty will likely pose the greatest challenge. Earning this Platinum demonstrates a well-rounded skillset and a thorough exploration of everything MLB The Show 23 has to offer. Prepare for a rewarding, yet demanding, journey!

Road to the Show (RTTS) Trophies

RTTS trophies focus on your created ballplayer’s journey from rookie hopeful to MLB superstar. Expect challenges tied to player development, achieving statistical milestones, and progressing through the minor league system. Key trophies will likely involve reaching specific batting or pitching ratings, winning awards like Rookie of the Year, and successfully navigating crucial in-game moments.

Be prepared for grinding attribute points and making strategic decisions regarding training and perk selection. Some trophies may require completing specific storylines or achieving certain career goals. Mastering the timing and mechanics of hitting and pitching is crucial for efficiently unlocking these achievements. Patience and persistence are key!

Creating and Developing Your Ballplayer

The foundation of RTTS success lies in meticulous ballplayer creation and strategic development. Carefully consider your player’s archetype – power hitter, contact specialist, or balanced all-rounder – as this dictates their growth path. Utilize training drills and focus on improving key attributes relevant to your chosen playstyle.

Don’t neglect personality archetypes, as these influence player interactions and storyline opportunities. Regularly monitor your player’s progression and adjust training routines accordingly. Mastering the Show’s player development system is vital for maximizing potential. Remember to strategically equip perks to enhance performance and unlock hidden abilities, ultimately shaping a dominant MLB star.

Achieving Key RTTS Milestones

Progressing through Road to Show demands hitting specific milestones for trophy unlocks. Focus on achieving high player ratings, earning All-Star selections, and winning awards like the Silver Slugger or Gold Glove. Successfully navigating crucial storyline moments and building strong relationships with teammates are also essential.

Strive for consistent on-field performance to secure a starting role and climb the ranks within your organization. Reaching the postseason and contributing to a World Series victory are paramount. Remember to fulfill contract objectives and maintain a positive reputation to maximize career longevity and unlock further achievements within your RTTS journey.

Franchise Mode Trophies

Franchise Mode presents a unique set of challenges for trophy hunters. Building a successful dynasty requires astute team management, strategic player development, and shrewd scouting. Focus on drafting promising young talent and nurturing their skills through customized training programs.

Successfully navigating multiple seasons, winning pennants, and ultimately securing World Series championships are crucial for progression. Mastering financial aspects, like contract negotiations and stadium upgrades, is also vital. Don’t overlook the importance of maintaining team chemistry and fan engagement to maximize revenue and overall franchise value throughout your long-term save.

Building a Dynasty: Team Management

Effective team management is paramount in Franchise Mode. Prioritize scouting to identify players fitting your strategic vision, then aggressively pursue them through trades or free agency. Carefully balance your roster, addressing weaknesses and maximizing strengths at each position.

Mastering contract negotiations is key – avoid overpaying for aging veterans while securing long-term deals with promising stars. Invest wisely in stadium upgrades to boost revenue and fan satisfaction. Regularly assess team chemistry and morale, making adjustments as needed to maintain a cohesive and motivated squad. A successful dynasty isn’t built overnight; patience and strategic planning are essential.

Player Development and Scouting

Robust scouting is crucial for identifying hidden gems and future stars. Focus on scouting regions known for specific player archetypes to maximize efficiency. Diligently evaluate prospects’ potential, considering both current ratings and projected growth curves.

Invest heavily in your farm system, utilizing training drills and development programs to unlock players’ full potential. Pay close attention to player personalities and tendencies, tailoring training regimens accordingly. Don’t be afraid to trade prospects to address immediate needs, but always retain a core of high-potential players for long-term success. A well-developed farm system fuels a lasting dynasty.

Diamond Dynasty Trophies

Diamond Dynasty presents a unique set of challenges focused on card collection and online competition. Building a competitive team requires strategic card acquisition through packs, the marketplace, and completing missions. Focus on synergy and team chemistry to maximize player performance.

Trophies in this mode demand success in various online competitions and challenges, testing your team-building skills against other players. Mastering the gameplay mechanics is essential for consistently winning online matches. Be prepared to invest time and potentially resources to acquire top-tier cards and dominate the Diamond Dynasty scene, earning those coveted trophies!

Card Collection and Team Building

Successfully navigating Diamond Dynasty hinges on a robust card collection and strategic team composition. Prioritize acquiring players who complement each other, focusing on key attributes and team chemistry bonuses. Explore various acquisition methods – pack openings, the marketplace, and completing missions – to expand your roster.

Don’t underestimate the power of completing collections for valuable rewards, including exclusive cards. Experiment with different team builds to find a strategy that suits your playstyle. Mastering the art of team building is crucial for competitive success and unlocking related Diamond Dynasty trophies, demanding patience and strategic thinking.

Online Competitions and Challenges

Diamond Dynasty’s online modes present significant trophy hunting opportunities, but demand skill and dedication. Compete in Ranked Seasons to climb the leaderboards and earn exclusive rewards, including trophies tied to achieving specific tiers. Regularly participate in Showdown events, completing challenges to unlock valuable cards and progress towards trophy milestones.

Successfully navigating online competitions requires mastering gameplay mechanics and adapting to opponent strategies. Be prepared for a steep learning curve and potential frustration. Consistent performance and strategic team adjustments are key to victory and unlocking those coveted online trophies, proving your Diamond Dynasty prowess.

Gameplay-Specific Trophies

These trophies test your baseball fundamentals within MLB The Show 23, demanding precision and strategic thinking. Expect challenges centered around hitting – achieving a certain number of home runs, recording multi-hit games, or mastering situational hitting. Pitching trophies will require strikeouts, immaculate innings, and maintaining a low ERA.

Defensive prowess is also rewarded, with trophies for making difficult catches, throwing runners out, and executing double plays. Don’t neglect base running; stealing bases and scoring from second on a single can unlock trophies. Mastering all facets of the game is crucial for completion, showcasing true baseball mastery!

Hitting and Pitching Achievements

Dominate the plate and the mound to secure these challenging trophies! Hitting achievements demand consistency – aim for multiple multi-hit games, a high batting average, and a significant number of home runs with various players. Mastering timing and reading pitches is essential.

Pitching trophies require precision and stamina. Strive for immaculate innings, high strikeout totals, and maintaining a remarkably low ERA across multiple starts. Utilize pitch variety and pinpoint accuracy. Successfully navigating high-pressure situations, like closing out a save, also unlocks rewards. These trophies truly test your baseball skills!

Defensive Prowess and Base Running

Exceptional defense and aggressive base running are key to trophy success! Defensive trophies require consistent, highlight-reel plays – diving catches, accurate throws to nail runners, and quick reactions to batted balls. Mastering positioning and utilizing the right fielder’s throwing abilities is crucial.

On the basepaths, trophies reward daring steals, tagging up effectively, and scoring from second on a single. Understanding outfield arm strength and timing your slides perfectly are vital. Successfully executing double plays and preventing runners from advancing also contribute. These achievements demonstrate complete baseball awareness!

Hidden Trophies and Missables

Be warned: MLB The Show 23 contains a few hidden trophies that won’t appear in the trophy list until unlocked! These often relate to specific, less-obvious actions within Road to the Show or Franchise Mode. Missable trophies are also present, particularly those tied to story elements in RTTS – make crucial dialogue choices carefully!

Ensure you complete all side quests and explore every available option in RTTS to avoid missing out. Regularly check online trophy guides and communities for updates on confirmed hidden trophies and potential missable scenarios. Diligence and thoroughness are essential for a complete collection!

Trophy Glitches and Workarounds (as of 12/16/2025)

As of today, December 16th, 2025, reports indicate a minor glitch affecting the “Champion Of The Diamond!” Platinum trophy. Some players experienced it not popping after legitimately earning all other trophies; a full game restart often resolves this.

Additionally, a rare issue in Franchise Mode can prevent certain player development trophies from unlocking if specific scouting parameters aren’t met. Workarounds involve manually adjusting scouting focus. Always back up save data before attempting any workaround. Monitor PlayStationTrophies.org and relevant forums for the latest updates and community-sourced solutions to emerging issues!

Optimizing Trophy Difficulty Settings

For trophy hunters prioritizing speed, most trophies can be earned on All-Star difficulty or below. However, certain pitching and hitting achievements benefit from Rookie or Beginner settings to guarantee success and minimize frustration. Diamond Dynasty trophies require online competition, so skill is paramount, regardless of in-game settings;

Road to Show trophies don’t have difficulty restrictions, allowing for a relaxed experience. Franchise Mode offers flexibility; focus on easier tasks initially. Remember, adjusting difficulty doesn’t invalidate trophies, but it can significantly streamline the process. Experiment to find a balance between challenge and efficiency!

Estimated Time to Platinum

Achieving Platinum in MLB The Show 23 typically requires between 50-75 hours, depending on player skill and dedication. Diamond Dynasty trophies contribute significantly to this timeframe, potentially adding 20-30 hours due to online grinding and card collection. Road to Show and Franchise Mode are relatively quicker, around 15-20 hours combined, assuming efficient player development and team management.

Gameplay-specific trophies and hidden objectives add another 5-10 hours. A focused approach, utilizing optimal difficulty settings and online strategies, can reduce the overall completion time. Be prepared for some grinding, especially in Diamond Dynasty!

Useful Resources and Communities

For trophy hunters tackling MLB The Show 23, several online resources prove invaluable. PlayStationTrophies.org offers a comprehensive trophy list, guides, and completion percentages. Reddit’s r/MLBTSD is a vibrant community for discussions, tips, and trade offers, particularly for Diamond Dynasty.

MLB.com provides official news and updates, while ESPN delivers live scores and game information. Utilize YouTube for video guides demonstrating difficult achievements. Engaging with these communities accelerates your progress and provides solutions to challenging trophies. Don’t hesitate to ask for help – the MLB The Show community is generally supportive!

Trophy Showcase and Completion Tracking

Visually track your progress towards Platinum with trophy showcase features on platforms like PlayStation. PlayStationTrophies.org allows you to mark trophies as earned, providing a clear overview of remaining challenges. Consider creating a spreadsheet or utilizing a trophy tracking app to meticulously document your journey.

Sharing your trophy collection online fosters motivation and allows comparison with other players. Celebrate milestones and display your hard-earned achievements! Regularly reviewing your progress helps identify areas needing focus. Remember, the “Champion Of The Diamond!” Platinum trophy signifies mastery of MLB The Show 23.

Post-Platinum: What’s Next?

Having earned the “Champion Of The Diamond!” Platinum trophy, consider refining your skills and exploring deeper gameplay aspects. Dive into Diamond Dynasty, perfecting your card collection and dominating online competitions. Focus on mastering challenging game modes or achieving specific in-game goals beyond trophy requirements.

Alternatively, begin a new playthrough with a different Road to the Show build or Franchise Mode team. Share your expertise with the MLB The Show community, assisting others on their trophy hunting journeys. Anticipate the release of future MLB The Show installments and prepare for new challenges!

learn russian pdf

Article Plan: Learn Russian PDF

This comprehensive guide details leveraging PDF resources for effective Russian language acquisition, covering free materials, textbooks, grammar aids, and reading practice.
It explores copyright considerations and maximizing learning through annotation and combined methods, referencing resources like “Russian Step by Step”.

Today is 12/16/2025 21:33:30 ()

PDFs offer a versatile and accessible pathway to mastering Russian, providing structured lessons and authentic materials.
These digital resources, like workbooks and textbooks, facilitate self-paced learning and convenient study, enhancing comprehension and skill development.

Today is 12/16/2025 21:33:30 ()

The Rise of PDF Resources for Language Learning

The proliferation of PDF resources has revolutionized language learning, offering a cost-effective and readily available alternative to traditional methods. This shift is driven by increased digitization and the demand for flexible learning options. PDFs allow learners to access materials on various devices, fostering consistent study habits.

Specifically for Russian, PDFs provide access to a wealth of materials often unavailable elsewhere. Resources like “Russian Step by Step” are easily distributed and utilized. The format supports interactive exercises and detailed grammar explanations. Furthermore, PDFs facilitate focused study, allowing learners to annotate texts and highlight key concepts.

The convenience of portable document format, combined with the growing availability of free and paid Russian learning content, has cemented PDFs as a cornerstone of modern language acquisition. They bridge geographical barriers and democratize access to quality educational materials.

Today is 12/16/2025 21:33:30 ()

Benefits of Using PDFs for Russian Study

Utilizing PDFs for Russian study offers numerous advantages, primarily accessibility and affordability. Many essential textbooks and workbooks, like “Russian Step by Step”, are available as free PDFs, reducing financial barriers to learning. The portability of PDFs allows for studying anytime, anywhere, on any device.

Furthermore, PDFs facilitate active learning through annotation tools – highlighting, underlining, and note-taking directly on the text. This is particularly useful for grasping complex Russian grammar, including stress marks. PDFs also support offline access, eliminating reliance on internet connectivity.

The format is ideal for focused reading of authentic materials, from short stories to news articles, enhancing comprehension and vocabulary. Ultimately, PDFs empower learners with control over their study environment and pace, fostering a more effective and personalized learning experience.

Today is 12/16/2025 21:33:30 ()

Target Audience: Who is this guide for?

This guide is designed for a broad spectrum of Russian language learners, from complete beginners to those with some existing knowledge. It caters to individuals seeking cost-effective learning solutions, leveraging the abundance of free Russian PDF resources available online.

Specifically, it benefits self-directed learners who prefer independent study and appreciate the flexibility of digital materials. Students enrolled in formal Russian courses can utilize PDFs as supplementary resources to reinforce classroom learning.

The guide also addresses those interested in improving their reading comprehension skills through authentic Russian texts found in PDF format. Whether you’re aiming to master basic grammar or delve into Russian literature, this resource provides a roadmap for effective PDF-based learning.

Today is 12/16/2025 21:33:30 ()

Finding Free Russian PDF Resources

Numerous websites and online archives offer free Russian learning PDFs, including textbooks, workbooks like “Russian Step by Step”, and authentic reading materials for diverse skill levels.

Today is 12/16/2025 21:33:30 ()

Popular Websites Offering Free Russian PDFs

Several online platforms provide access to a wealth of free Russian PDF resources for learners of all levels. Websites dedicated to language exchange often host user-submitted materials, including scanned textbook chapters and grammar exercises. Online libraries and digital archives, such as Internet Archive, frequently contain digitized versions of older Russian textbooks and literature, available for download in PDF format.

Dedicated language learning websites also curate collections of free PDFs. These resources often include beginner-friendly phrasebooks, vocabulary lists, and short stories designed to build foundational skills. Furthermore, university websites sometimes offer open educational resources, including complete Russian language courses in PDF format. Remember to always verify the source and copyright information before downloading and using any PDF materials found online, ensuring responsible and legal access to these valuable learning tools.

Today is 12/16/2025 21:33:30 ()

“Russian Step by Step” PDF: A Detailed Overview

The “Russian Step by Step” PDF is a widely used workbook designed to facilitate the initial stages of Russian language learning. It focuses heavily on building a solid foundation in reading and writing the Cyrillic alphabet, alongside essential vocabulary and basic grammatical structures. The PDF format allows for convenient access and portability, enabling learners to study anytime, anywhere.

This resource typically includes a series of exercises and drills, progressively increasing in difficulty to reinforce newly acquired skills. It’s particularly beneficial for self-study, offering clear explanations and ample practice opportunities. The workbook often incorporates cultural insights and practical phrases, enhancing the learning experience. It’s a valuable tool for beginners aiming to develop proficiency in reading and understanding simple Russian texts.

Today is 12/16/2025 21:33:30 ()

Utilizing Online Archives and Libraries

Numerous online archives and digital libraries offer a wealth of free Russian learning PDFs, expanding beyond standard textbooks. These platforms often host digitized versions of older Russian literature, historical documents, and linguistic studies, providing authentic materials for advanced learners. Websites like the Internet Archive and various university library repositories are excellent starting points for exploration.

Accessing these resources requires careful searching, utilizing keywords like “Russian language,” “Russian grammar,” or specific author names. While quality can vary, diligent searching often uncovers hidden gems – rare textbooks, specialized grammar guides, and collections of Russian short stories. Remember to verify the source and copyright status before downloading and using any materials found within these digital archives;

Today is 12/16/2025 21:33:30 ()

Essential Russian Learning PDFs: Textbooks

PDF textbooks provide structured Russian lessons, covering grammar, vocabulary, and cultural insights. Resources like “Russian Step by Step” offer comprehensive learning paths for various proficiency levels.

Today is 12/16/2025 21:33:30 ()

Beginner Russian Textbooks in PDF Format

For those initiating their Russian language journey, several PDF textbooks offer a solid foundation. “Russian Step by Step” is frequently recommended, providing a workbook-style approach to reading and foundational grammar. These resources often begin with the Cyrillic alphabet, pronunciation guides, and basic vocabulary.

Many beginner PDFs focus on practical phrases for everyday conversations, covering greetings, introductions, and essential questions. They typically include exercises to reinforce learning, such as fill-in-the-blanks and simple translation tasks. Some textbooks, designed for self-study, incorporate audio components accessible online, complementing the PDF material.

It’s important to select a textbook aligned with your learning style; some prioritize grammar rules, while others emphasize communicative competence; Remember that even those fluent in their native language may benefit from revisiting fundamental grammatical concepts, as highlighted in introductory texts.

Today is 12/16/2025 21:33:30 ()

Intermediate Level Russian Textbooks (PDF)

Intermediate Russian learners require PDFs that build upon foundational knowledge, introducing more complex grammar and expanding vocabulary. These textbooks typically move beyond basic conversations, focusing on narrative tenses, conditional clauses, and nuanced expressions. Expect a greater emphasis on reading comprehension with longer texts and authentic materials.

PDFs at this level often incorporate cultural insights, providing context for language usage and fostering a deeper understanding of Russian society. Exercises become more challenging, including composition tasks and open-ended questions requiring detailed responses. Some resources introduce specialized vocabulary related to specific fields, like business or science.

Look for textbooks that encourage active learning, prompting students to analyze texts, formulate arguments, and engage in simulated dialogues. Remember the importance of consistent practice to solidify newly acquired skills.

Today is 12/16/2025 21:33:30 ()

Advanced Russian Grammar PDFs

For advanced learners, Russian grammar PDFs delve into the intricacies of the language, tackling complex constructions and subtle nuances. These resources move beyond basic rules, exploring aspects like verbal aspect in depth, participial and gerundial clauses, and the sophisticated use of prepositions. Expect detailed explanations of stylistic variations and literary grammar.

Advanced PDFs often focus on refining accuracy and fluency, addressing common errors made by non-native speakers. They may include exercises designed to challenge your understanding of grammatical concepts and improve your ability to apply them in writing and speech.

Resources at this level often emphasize the importance of understanding stress marks and their impact on pronunciation and meaning, as well as the subtleties of word order.

Today is 12/16/2025 21:33:30 ()

Focusing on Russian Grammar with PDFs

PDFs offer focused Russian grammar study, providing concise summaries and targeted exercises. Understanding stress marks is crucial, and resources help avoid common grammatical pitfalls.

Today is 12/16/2025 21:33:30 ()

Grammar Summary PDFs: Importance and Usage

Grammar summary PDFs are invaluable tools for Russian learners, offering condensed explanations of complex rules. These resources allow for quick reference and focused review, solidifying understanding of key concepts. They’re particularly useful for identifying patterns and exceptions within the Russian language system.

Effective usage involves actively consulting the PDF during reading and writing exercises, rather than passively memorizing rules. Referencing the summary while encountering new grammatical structures in texts reinforces learning.

As noted, it isn’t always necessary to include stress marks when writing, but utilizing PDFs that demonstrate proper stress placement aids comprehension and pronunciation. These summaries often highlight common errors, enabling learners to proactively avoid mistakes. Regularly revisiting these PDFs strengthens grammatical foundations and boosts overall fluency.

Today is 12/16/2025 21:33:30 ()

Understanding Stress Marks in Russian PDFs

Russian stress is unpredictable and crucial for correct pronunciation and meaning; therefore, understanding stress marks within PDFs is paramount. Unlike many languages with predictable stress patterns, Russian stress can fall on any syllable, altering a word’s form and even its definition. PDFs often visually highlight stressed syllables, aiding learners in accurate pronunciation.

Pay close attention to these marks during reading, actively practicing the correct pronunciation. While not always required in writing, recognizing stress patterns improves comprehension when listening and speaking. Some resources, like grammar summaries, intentionally include stress marks for clarity.

Ignoring stress can lead to miscommunication. Utilizing PDFs that consistently demonstrate stress placement builds a strong foundation for fluent and accurate Russian.

Today is 12/16/2025 21:33:30 ()

Common Grammatical Errors and PDF Resources to Avoid Them

Russian grammar presents unique challenges for learners, with case endings, verb conjugations, and gender agreement being frequent stumbling blocks. Common errors include incorrect case usage after prepositions, mismatched verb-subject agreement, and confusion with noun genders. Many PDFs specifically address these pitfalls.

Seek out resources offering targeted exercises on declensions and conjugations. Grammar summary PDFs often highlight common mistakes and provide corrective examples. Workbooks, like “Russian Step by Step”, offer practice opportunities to solidify understanding.

Focus on identifying your personal error patterns and actively seeking PDFs that address those specific areas. Consistent practice and focused study of these resources will significantly improve grammatical accuracy.

Today is 12/16/2025 21:33:30 ()

Utilizing Russian Reading Materials in PDF Format

PDFs offer diverse Russian reading practice, from beginner short stories to authentic literature and current news articles, enhancing comprehension and vocabulary skills effectively.

Today is 12/16/2025 21:33:30 ()

Short Stories and Texts for Beginners (PDF)

Starting with simplified Russian texts in PDF format is crucial for building a foundational understanding. These materials typically feature shorter sentences, high-frequency vocabulary, and often include glossaries or translations to aid comprehension. Look for PDFs specifically designed for A1 or A2 level learners, focusing on everyday topics like family, hobbies, or daily routines.

Beginner PDFs often incorporate visual aids and interactive exercises to reinforce learning. The “Russian Step by Step” resource, available as a PDF, can be a valuable starting point, offering structured lessons and practice materials. Gradually increase the complexity of the texts as your skills improve, moving from simple dialogues to slightly longer narratives. Remember to focus on understanding the main idea rather than getting bogged down in every single word.

Utilizing these resources consistently will significantly boost your reading speed and confidence, preparing you for more challenging authentic materials.

Today is 12/16/2025 21:33:30 ()

Authentic Russian Literature PDFs

Transitioning to authentic Russian literature in PDF format presents a rewarding, yet challenging, step in language acquisition. While initially daunting, exposure to real-world language enhances vocabulary, grammar comprehension, and cultural understanding. Start with shorter works or excerpts from classic authors like Pushkin or Chekhov, readily available online in PDF form.

Don’t be afraid to utilize dictionaries and translation tools alongside the text. Focus on identifying familiar grammatical structures and vocabulary, gradually building your ability to infer meaning from context. Many online archives and libraries offer digitized versions of Russian novels and short stories.

Remember that the goal isn’t immediate complete comprehension, but rather immersion and gradual improvement. Consistent reading, even with assistance, will significantly accelerate your progress.

Today is 12/16/2025 21:33:30 ()

News Articles and Current Events in Russian (PDF)

Utilizing Russian news articles and current events in PDF format offers a dynamic and relevant learning experience. This method exposes learners to contemporary language, idiomatic expressions, and real-world vocabulary not always found in textbooks. Numerous Russian news websites provide downloadable PDFs of their publications, or allow easy conversion to this format.

Begin with articles on familiar topics to ease comprehension. Focus on identifying key information and understanding the overall context, rather than translating every single word. Online dictionaries and translation tools are invaluable aids during this process.

Regularly reading news in Russian keeps your language skills sharp and provides insights into Russian culture and society. It’s a practical way to stay updated and improve fluency simultaneously.

Today is 12/16/2025 21:33:30 ()

Legal Considerations & Disclaimer

Respecting copyright is crucial when using Russian PDFs. Publishers and authors retain rights to their content, and liability limitations apply to online resource usage.

Today is 12/16/2025 21:33:30 ()

Copyright and Usage Rights of Russian PDFs

Understanding copyright is paramount when utilizing Russian PDFs for learning. Most materials are protected by international copyright laws, meaning unauthorized distribution, modification, or commercial use is prohibited.

Free PDFs found online may have varying usage rights; some are openly licensed for educational purposes, while others are shared without explicit permission. Always check for licensing information or terms of use before downloading or sharing.

Textbooks and commercial materials, even in PDF format, generally require purchase or subscription for legal access. Using illegally obtained PDFs constitutes copyright infringement.

Respecting author and publisher rights ensures continued creation and availability of valuable Russian learning resources. Proper attribution is also essential when quoting or referencing PDF content in your own work. Be mindful of these legal considerations to support ethical language learning practices.

Today is 12/16/2025 21:33:30 ()

Publisher and Author Disclaimer Regarding PDF Content

Publishers and authors typically include disclaimers within Russian learning PDFs, limiting liability for errors or omissions in the material. These disclaimers often state that the content is provided “as is” and without warranty, express or implied.

Authors may disclaim responsibility for how learners interpret or apply the information presented. They generally aren’t liable for any consequences resulting from using the PDF’s content.

Furthermore, publishers often state they aren’t responsible for the accuracy of information sourced from third parties included within the PDF.

It’s crucial to understand that these disclaimers protect creators from legal claims. Learners should critically evaluate the information and supplement it with other resources. Always verify information independently and consult with qualified instructors for personalized guidance.

Today is 12/16/2025 21:33:30 ()

Liability Limitations When Using Online Resources

Utilizing free Russian learning PDFs online carries inherent risks regarding liability. Websites hosting these resources often include disclaimers absolving them of responsibility for the accuracy, legality, or safety of the content. Users assume full responsibility for any potential issues arising from downloading or using these PDFs.

This includes risks like malware, viruses, or copyright infringement. Publishers and authors, as stated in their disclaimers, aren’t liable for damages resulting from using their materials obtained through unofficial channels.

It’s vital to exercise caution, use reputable antivirus software, and respect copyright laws. Always download PDFs from trusted sources and be aware of the potential for inaccurate or outdated information. Reliance on online resources is at your own discretion.

Today is 12/16/2025 21:33:30 ()

Maximizing Your Learning with Russian PDFs

Enhance Russian study by actively annotating PDFs, combining them with diverse methods, and employing effective note-taking strategies for optimal comprehension and retention.

Today is 12/16/2025 21:33:30 ()

Effective Note-Taking Strategies While Reading PDFs

Employing strategic note-taking while studying Russian PDFs significantly boosts retention and understanding. Highlight unfamiliar vocabulary directly within the PDF using annotation tools, creating a personalized glossary. Marginal notes are invaluable; jot down grammatical explanations, related words, or translation challenges encountered.

Consider color-coding: one color for grammar, another for vocabulary, and a third for cultural insights. Summarize each paragraph or section concisely in your own words, reinforcing comprehension. Don’t just copy; process the information.

Utilize a separate notebook or digital document to expand on PDF notes, creating detailed tables of verb conjugations or declension patterns. Regularly review these notes, spaced repetition being key to long-term memory. Focus on actively engaging with the text, transforming passive reading into an interactive learning experience.

Today is 12/16/2025 21:33:30 ()

Combining PDF Study with Other Learning Methods

Maximizing Russian language acquisition requires a multi-faceted approach, integrating PDF study with diverse methods. PDFs provide foundational material, but shouldn’t be the sole resource. Supplement PDF textbooks with interactive language learning apps like Duolingo or Memrise for vocabulary reinforcement and pronunciation practice.

Engage in conversation with native speakers, utilizing platforms like iTalki to apply learned grammar and vocabulary. Watch Russian films and TV shows with subtitles, gradually reducing reliance on them. Listen to Russian music and podcasts to improve auditory comprehension.

Consider a formal Russian course for structured learning and personalized feedback. Regularly review PDF materials alongside these activities, solidifying knowledge through repetition and varied application. A blended approach accelerates progress and fosters a deeper understanding of the language and culture.

Today is 12/16/2025 21:33:30 ()

Utilizing PDF Annotation Tools for Enhanced Learning

PDF annotation tools significantly enhance the Russian learning experience, transforming static documents into interactive study aids. Programs like Adobe Acrobat Reader, Xodo, or Foxit PDF Editor allow highlighting key vocabulary, grammar points, and challenging phrases directly within the PDF text.

Add sticky notes to explain complex concepts in your own words, or to record personal examples. Utilize the commenting feature to ask questions and track your progress. Drawing tools can help visualize grammatical structures or declension patterns.

These annotations create a personalized learning resource, tailored to your specific needs and learning style. Regularly reviewing annotated PDFs reinforces understanding and facilitates efficient revision. Effectively leveraging these tools maximizes the value of your Russian PDF materials.

Today is 12/16/2025 21:33:30 ()

frigidaire dishwasher parts manual

Frigidaire Dishwasher Parts Manual: A Comprehensive Guide

This manual provides detailed diagrams and parts lists for Frigidaire dishwashers, aiding in efficient troubleshooting, repair, and maintenance of your appliance.

Embarking on Frigidaire dishwasher repair can seem daunting, but with the right resources, it’s often a manageable DIY project. This guide aims to empower you with the knowledge to diagnose and fix common issues, potentially saving on costly service calls. Understanding your dishwasher’s components and how they interact is crucial. Before diving in, always prioritize safety by disconnecting the power supply.

Genuine Frigidaire parts ensure optimal performance and compatibility. Utilizing parts diagrams, readily available online, simplifies identifying the correct replacement components. Whether it’s a clogged filter, a faulty pump, or a leaking valve, this manual will guide you through the process. Remember, if a repair feels beyond your skill level, consulting a qualified technician is always recommended.

Understanding Frigidaire Dishwasher Models

Frigidaire offers a diverse range of dishwasher models, each with unique features and component layouts. From basic models to the advanced Gallery Collection, understanding these differences is key to successful repair. Models like the FGHD2465NF1A and FGID2468UF1A, for example, may have slightly varying parts configurations.

The Gallery Collection emphasizes practical features and aesthetic finishes. Identifying your specific model is the first step; this dictates the correct parts diagrams and repair procedures. Variations exist in wash systems, control panels, and internal structures. Accessing online schematics tailored to your model number ensures accurate part identification and a smoother repair process. Knowing your dishwasher’s generation also helps locate compatible replacement parts.

Locating Your Dishwasher’s Model Number

Finding your Frigidaire dishwasher’s model number is crucial for ordering the correct replacement parts and accessing the appropriate repair diagrams. Typically, the model number is located on a label inside the dishwasher door, often along the top or side edge when fully opened.

It’s a combination of letters and numbers (e.g., FGHD2465NF1A, FGID2468UF1A) that uniquely identifies your specific dishwasher model. Sometimes, the label is also found on the back of the unit, requiring you to carefully pull the dishwasher away from the cabinetry. Having this number readily available streamlines the parts lookup process on websites like PartSelect and Frigidaire.com, ensuring compatibility and a successful repair.

Essential Parts & Their Functions

Frigidaire dishwashers rely on key components like spray arms, filters, pumps, and valves to deliver optimal cleaning performance and efficient operation.

Spray Arms & Wash Impellers

Spray arms are crucial for distributing water throughout the dishwasher, ensuring comprehensive cleaning of dishes. These arms feature strategically placed nozzles that rotate and spray water with force. Wash impellers, often found in newer models, enhance water circulation by creating a powerful vortex.

Over time, spray arms can become clogged with food particles or mineral deposits, reducing their effectiveness. Inspecting and cleaning the spray arm nozzles regularly is essential for maintaining optimal performance; Damaged or cracked spray arms should be replaced to prevent uneven cleaning and potential water leaks. Identifying the correct spray arm for your specific Frigidaire model is vital, and parts diagrams are invaluable for this process. Replacement is straightforward, typically involving a simple snap-in or screw-in mechanism.

Filters & Strainers

Dishwasher filters and strainers are essential for trapping food particles and debris, preventing them from recirculating and potentially clogging the drain pump. Frigidaire dishwashers typically feature a combination of a coarse filter and a fine filter, working together to capture various sizes of particles. Regular cleaning of these filters – usually after every few cycles – is crucial for maintaining optimal dishwasher performance and preventing odors.

A clogged filter can lead to reduced cleaning effectiveness, longer cycle times, and even drain pump failure. Replacement filters are readily available and relatively inexpensive. Consult your dishwasher’s parts diagram to identify the correct filter type for your model. Proper installation ensures effective debris capture and contributes to the longevity of your Frigidaire dishwasher.

Water Inlet Valve

The water inlet valve controls the flow of water into your Frigidaire dishwasher, opening and closing based on signals from the control board. A faulty valve can manifest as insufficient water entering the dishwasher, preventing proper cleaning, or continuous water flow, leading to potential flooding. Diagnosing a failing valve often involves checking for electrical continuity and ensuring it’s not blocked by sediment.

Replacement is a straightforward process, typically involving disconnecting the water supply lines and electrical connections. Always ensure the power is off before attempting any repairs. When selecting a replacement valve, verify it’s compatible with your specific Frigidaire dishwasher model using the parts diagram. A functioning water inlet valve is critical for the dishwasher’s cleaning cycle.

Drain Pump & Hose

The drain pump expels wastewater from your Frigidaire dishwasher during and after each cycle, while the drain hose carries this water to your home’s drain system. A malfunctioning drain pump can result in standing water inside the dishwasher, leading to poor cleaning performance and potential mold growth. Common issues include clogs from food particles or a failing pump motor.

Inspect the drain hose for kinks or obstructions. Replacing the drain pump typically involves accessing it from the bottom of the dishwasher and disconnecting electrical connections. Ensure the new pump is compatible with your model number. A clear drain hose and a functioning pump are essential for complete water removal, preventing lingering odors and ensuring optimal dishwasher operation.

Circulation Pump & Motor

The circulation pump and motor are vital for creating the water pressure needed to spray water onto dishes during the wash cycle. This component draws water from the sump and forces it through the spray arms, ensuring thorough cleaning. A failing circulation pump often manifests as weak spray pressure or a dishwasher that doesn’t clean effectively.

Troubleshooting involves checking for obstructions in the pump housing and verifying the motor’s functionality. Replacement requires disconnecting electrical connections and carefully removing the old pump assembly. Always confirm the new circulation pump matches your dishwasher’s model number for a proper fit and optimal performance. A properly functioning circulation system is crucial for sparkling clean dishes.

Troubleshooting Common Issues

Diagnose and resolve frequent dishwasher problems like poor cleaning, drainage issues, leaks, excessive noise, and decipher error codes for swift repairs.

Dishwasher Not Cleaning Properly

If your Frigidaire dishwasher isn’t cleaning dishes effectively, several components could be at fault. Begin by inspecting the spray arms and wash impellers for blockages or damage; clogged holes restrict water flow. Next, examine the filters & strainers, removing any food particles or debris that hinder proper water circulation.

A malfunctioning water inlet valve might not be supplying enough water, while a weakened circulation pump & motor could lack the power to distribute water adequately. Ensure proper detergent usage and load distribution, avoiding overcrowding. Check for any obstructions within the dishwasher’s interior, and verify the water temperature is sufficient for optimal cleaning performance.

Dishwasher Not Draining

A Frigidaire dishwasher failing to drain typically points to issues with the drain pump & hose. First, inspect the drain hose for kinks, clogs, or obstructions that restrict water flow. Then, check the drain pump itself for debris, such as food particles or broken glass, that may be jamming the impeller.

A clogged filter & strainer can also contribute to drainage problems, so ensure these are clean. Verify the air gap (if present) isn’t blocked. If the pump seems functional but isn’t draining, a faulty drain solenoid might be the culprit. Consider checking the dishwasher’s control board for error codes related to drainage issues, and consult the parts diagram for accurate component identification.

Leaking Dishwasher

A leaking Frigidaire dishwasher can stem from several sources. Inspect the door gasket for damage or improper sealing; a worn gasket often causes leaks around the door. Check the water inlet valve and its connections for any signs of drips or loose fittings. Examine the spray arms and their connections, as cracks or loose attachments can lead to spraying and subsequent leaks.

Also, scrutinize the drain pump & hose for cracks or leaks, particularly at connection points. A faulty circulation pump seal can also cause leaks. Refer to the parts diagram to pinpoint the exact location of potential leak sources. Ensure all hoses are securely clamped and that there are no visible signs of corrosion or damage.

Noisy Operation

Excessive noise during a dishwasher cycle often indicates a problem with internal components. A common culprit is the circulation pump & motor; listen for grinding or squealing sounds which may signal bearing wear. Check the spray arms for obstructions or damage – items lodged within can create rattling noises. Inspect the wash impeller for cracks or loose parts.

Verify that dishes are loaded correctly, avoiding contact with the spray arms. A failing drain pump can also produce loud humming or buzzing sounds. Consult the parts diagram to identify the source of the noise and determine if a replacement part is needed. Ensure all components are securely fastened, as loose parts can vibrate and amplify noise.

Error Codes & Diagnostics

Frigidaire dishwashers utilize error codes to pinpoint specific malfunctions, simplifying the diagnostic process. These codes, displayed on the control panel, correspond to issues like water inlet problems, heating element failures, or drainage obstructions. Refer to your dishwasher’s specific model manual for a complete list of error codes and their meanings.

Utilizing the parts diagram alongside the error code can help identify the faulty component. For example, a water inlet valve error suggests a potential issue with that part, easily located on the schematic. Diagnostic tests, often outlined in the manual, can further confirm the problem. Remember to disconnect power before attempting any repairs and consult a qualified technician if unsure.

Using Frigidaire Dishwasher Parts Diagrams

Accessing schematics online and interpreting parts lists are crucial for identifying specific components and ensuring accurate repairs for your Frigidaire dishwasher.

Accessing Online Schematics

Locating Frigidaire dishwasher parts diagrams online is now remarkably straightforward, offering a convenient resource for both DIY enthusiasts and professional technicians. Several websites specialize in appliance schematics, including the official Frigidaire website and reputable parts suppliers like PartSelect.com;

These platforms typically require your dishwasher’s model number to retrieve the correct diagram. Once entered, you’ll gain access to detailed exploded views illustrating each component’s location and relationship to others. Many sites also offer interactive diagrams where you can click on a part to view its corresponding part number and availability.

Furthermore, some retailers provide downloadable PDF versions of the schematics for offline access. Utilizing these online resources empowers you to accurately identify the necessary parts for your repair, streamlining the process and minimizing potential errors.

Interpreting Parts Lists

Frigidaire dishwasher parts lists, accompanying the schematics, are crucial for successful repairs. Each line item typically details a specific component, including a part number, description, and often, the quantity required for a complete assembly. Understanding these lists requires attention to detail.

The part number is the key identifier; ensure it precisely matches the component you need to avoid compatibility issues. Descriptions can be technical, so cross-referencing with the diagram is vital. Some lists include notes regarding superseded parts – newer versions replacing older ones.

Pay close attention to any quantity specifications, especially for small parts like screws or seals. Online retailers often link directly from the parts list to the product page, simplifying the ordering process.

Identifying Specific Components

Successfully navigating Frigidaire dishwasher parts diagrams hinges on accurately identifying components; Diagrams utilize exploded views, showcasing how parts assemble. Each part is labeled with a reference number, directly corresponding to the parts list. Start by locating the assembly you’re working on – spray arm, drain pump, or water inlet valve, for example.

Trace the lines from the assembly to individual parts, noting their reference numbers. Compare these numbers to the parts list to confirm the component’s name and part number.

Pay attention to variations; some parts appear similar but have different numbers. Zooming in on the diagram can clarify details.

Where to Buy Frigidaire Dishwasher Parts

Genuine Frigidaire parts are available through authorized retailers and online suppliers like PartSelect, ensuring a proper fit and reliable performance for repairs.

Authorized Frigidaire Parts Retailers

Locating authorized Frigidaire parts retailers is crucial for securing genuine components, guaranteeing compatibility and maintaining your dishwasher’s performance. These retailers directly source parts from Frigidaire, offering assurance of quality and adherence to manufacturer specifications. Many local appliance repair shops also function as authorized dealers, providing expert advice alongside part sales.

Frigidaire’s official website often features a “Find a Retailer” tool, enabling you to pinpoint nearby authorized locations. Benefits of choosing authorized retailers include access to warranty support for parts and the confidence that you’re receiving authentic Frigidaire products. They can also assist in identifying the correct part number based on your dishwasher’s model, streamlining the repair process. Remember to have your model number readily available when visiting or contacting a retailer.

Online Parts Suppliers (PartSelect, etc.)

Numerous online parts suppliers, such as PartSelect, offer a convenient avenue for sourcing Frigidaire dishwasher components. These platforms typically boast extensive inventories, competitive pricing, and detailed parts diagrams to aid in identification. PartSelect, in particular, provides model-specific searches, video tutorials, and expert support to guide DIY repairs.

When utilizing online suppliers, verifying the part number against your dishwasher’s model is paramount to ensure compatibility. Many sites offer same-day shipping for orders placed before a specific cutoff time, minimizing downtime. Be mindful of return policies and warranty information before finalizing your purchase. Comparing prices across multiple suppliers can also yield significant savings. Online resources often include exploded views and schematics, simplifying the parts selection process.

OEM vs. Aftermarket Parts

When replacing Frigidaire dishwasher parts, a key decision involves choosing between Original Equipment Manufacturer (OEM) and aftermarket options. OEM parts are manufactured by Frigidaire or its authorized suppliers, guaranteeing a precise fit and maintaining the appliance’s original performance standards; They often come with a higher price tag but offer assured quality and compatibility.

Aftermarket parts, produced by third-party manufacturers, are generally more affordable but may vary in quality. While many aftermarket parts function adequately, some may exhibit reduced durability or require modifications for proper installation. Utilizing OEM parts is often recommended for critical components like pumps and control boards, ensuring long-term reliability. Always verify the supplier’s reputation and read customer reviews before opting for aftermarket alternatives.

DIY Repair vs. Professional Service

Assess your skills and the repair’s complexity; simple fixes can be DIY, but complex issues or gas connections necessitate a qualified technician’s expertise.

Safety Precautions for Dishwasher Repair

Before commencing any Frigidaire dishwasher repair, prioritize safety above all else. Disconnect the power supply at the circuit breaker to prevent electrical shock – this is absolutely crucial. Turn off the water supply to the dishwasher to avoid potential flooding during component removal or installation.

Wear appropriate safety glasses to protect your eyes from debris and gloves to shield your hands. Be mindful of sharp edges on internal components. When handling the dishwasher, especially during movement, ensure it’s stable to prevent tipping or injury.

If dealing with gas connections (on certain models), consult a qualified technician; never attempt gas line repairs yourself. Properly dispose of any old parts or fluids according to local regulations. Always refer to the Frigidaire dishwasher parts manual for specific safety guidelines related to your model.

Tools Needed for Common Repairs

Successfully tackling Frigidaire dishwasher repairs requires a basic toolkit. Essential items include a screwdriver set (Phillips and flathead), pliers, an adjustable wrench, and a socket set for various fasteners. A multimeter is invaluable for testing electrical components like the heating element and water inlet valve.

For leak repairs, silicone sealant and plumber’s tape are necessary. A bucket and towels are crucial for managing water spillage during drain pump or hose replacements. A nut driver set can simplify access to hard-to-reach components.

Consider a wire stripper/crimper for electrical connections. Always consult the Frigidaire dishwasher parts manual for model-specific tool requirements, ensuring you have the right tools for the job.

When to Call a Qualified Technician

While many Frigidaire dishwasher repairs are DIY-friendly, certain issues demand professional expertise. If you encounter complex electrical problems, such as persistent error codes or malfunctioning control boards, a technician is crucial. Any repair involving the dishwasher’s sealed system – refrigerant lines – requires certified handling.

Significant leaks that you can’t pinpoint or resolve, or issues with the motor or circulation pump, often necessitate professional intervention. If you’re uncomfortable working with electricity or water, or lack confidence in your repair skills, prioritize safety and call a qualified technician.

Factory-trained Frigidaire technicians possess specialized knowledge and tools for accurate diagnosis and repair, ensuring your dishwasher operates safely and efficiently.

christmas trivia questions and answers pdf

Christmas Trivia Questions and Answers PDF: An Article Plan

Crafting a comprehensive Christmas trivia experience requires a detailed plan. This includes diverse question difficulty levels – easy, medium, and hard – and a readily available PDF format for easy distribution and enjoyment during festive gatherings.

The plan will encompass questions spanning history, carols, movies, global traditions, food, symbols, and even grammar nuances like “on” versus “at” Christmas.

Furthermore, the PDF will feature answer keys and potentially scoring systems, enhancing its usability as a game for all ages and ESL learners.

Christmas trivia is a delightful way to engage with the festive season, sparking joy and friendly competition amongst family and friends. It’s more than just recalling facts; it’s about revisiting cherished memories, exploring the rich history behind traditions, and celebrating the spirit of giving. A well-crafted Christmas trivia game can transform a simple gathering into an unforgettable experience, fostering connection and laughter.

The appeal of Christmas trivia lies in its broad scope. Questions can range from identifying popular carols and classic movie quotes to delving into the origins of Christmas customs and the diverse ways the holiday is celebrated worldwide. This inclusivity ensures there’s something for everyone, regardless of their age or knowledge level.

Presenting this trivia in a PDF format offers convenience and accessibility. A downloadable PDF allows for easy printing and sharing, making it perfect for parties, classrooms, or even a quiet evening with loved ones. It’s a portable source of festive fun, ready to be enjoyed whenever and wherever the Christmas spirit strikes. The format also lends itself well to varying difficulty levels, catering to both casual players and seasoned trivia enthusiasts.

The History of Christmas Traditions – Trivia Focus

Christmas traditions, as we know them today, are a fascinating blend of ancient customs and evolving practices. A trivia focus on this history reveals surprising origins, moving beyond the modern commercial aspects to explore the roots of our celebrations. Many traditions aren’t solely Christian in origin, incorporating elements from pagan winter solstice festivals and Victorian-era innovations.

Trivia questions can explore the evolution of the Christmas tree, tracing its Germanic roots and its popularization by Queen Victoria and Prince Albert. The story of Christmas cards, a Victorian invention, provides another rich area for questioning. Similarly, the origins of Christmas carols, evolving from medieval hymns to popular songs, offer compelling trivia material.

Exploring the history of Christmas gift-giving, linked to the generosity of Saint Nicholas, and the development of Christmas feasts, influenced by centuries of culinary traditions, adds depth. A PDF trivia compilation should include questions about these historical shifts, challenging players to differentiate between myth, legend, and documented fact, enriching their understanding of the holiday’s past.

Popular Christmas Carols – Trivia Questions

Christmas carols are integral to the festive season, and a trivia section dedicated to them offers a melodic challenge. Questions should range from identifying composers and lyricists to deciphering the historical context and original meanings behind beloved songs. For example, probing the origins of “Silent Night” – penned in Austria in 1818 – or “O Holy Night,” with its abolitionist undertones, adds depth.

Trivia can also focus on lyrical details: “What did my true love give to me on the fifth day of Christmas?” or identifying carols featuring specific winter imagery. Questions about the cultural impact of carols, their translations into different languages, and their appearances in popular media (movies, commercials) broaden the scope.

A comprehensive PDF should include varying difficulty levels. Easy questions might ask for the title of a well-known carol based on a short musical excerpt, while harder questions could delve into the historical evolution of carol singing or the theological significance of specific lyrics, testing even the most seasoned carol enthusiasts.

Christmas Movies – Trivia Challenge

A dedicated section on Christmas movies is essential for any comprehensive trivia PDF. Questions should span classic films like “It’s a Wonderful Life” and “Miracle on 34th Street,” to modern favorites like “Elf” and “Home Alone.” The challenge lies in crafting questions that go beyond simple plot recall.

Trivia can explore behind-the-scenes details: Who directed a particular film? Which actor played a specific role? What was the film’s original budget? Questions about iconic scenes, memorable quotes, and the cultural impact of these movies add layers of complexity. For instance, asking about the significance of the leg lamp in “A Christmas Story” or the meaning behind George Bailey’s wish.

Difficulty levels should vary. Easy questions might ask for the name of a movie based on a brief synopsis, while harder questions could focus on obscure facts or the film’s critical reception. Including questions about animated Christmas specials, like “Rudolph the Red-Nosed Reindeer,” expands the appeal.

Santa Claus Around the World – Trivia

Exploring the diverse traditions surrounding Santa Claus globally provides rich trivia material. This section should move beyond the North Pole narrative, delving into how different cultures depict and celebrate the gift-giver. Questions could focus on names – Sinterklaas in the Netherlands, Père Noël in France, or Papá Noel in Spain – and their associated customs.

Trivia can investigate how Santa delivers presents: Does he arrive by boat, horse, or chimney? What do children leave out for him – milk and cookies, or something else entirely? Exploring the companions of Santa, like Krampus in Alpine regions, adds a fascinating dimension. Questions about the historical origins of these figures, tracing back to Saint Nicholas, are also valuable.

Difficulty should range from identifying Santa’s name in a specific country (easy) to detailing the folklore surrounding his helpers and the punishments for naughty children (hard). This section offers a unique opportunity to showcase the global reach and cultural adaptation of the Christmas spirit.

Christmas Food & Drink – Trivia Time

This section focuses on the delectable traditions surrounding Christmas cuisine and beverages worldwide. Trivia questions should explore the origins and cultural significance of popular dishes. For example, what is the historical root of Christmas pudding, and what ingredients traditionally went into it? Or, what country popularized the tradition of gingerbread houses?

Questions can also delve into regional specialties – from roast goose in Germany to panettone in Italy, and buche de Noel in France. Beverage-related trivia could cover eggnog’s origins, the history of mulled wine, or the evolution of festive cocktails. Consider questions about unusual Christmas foods from lesser-known traditions.

Difficulty levels should vary. Easy questions might ask about common Christmas treats, while harder ones could explore the symbolism behind specific ingredients or the historical context of a particular dish. Including questions about dietary adaptations and modern Christmas food trends adds a contemporary twist.

Christmas Symbols & Their Meanings – Trivia

This trivia segment explores the rich symbolism woven into Christmas traditions. Questions should focus on the origins and significance of iconic symbols like the Christmas tree, wreaths, mistletoe, and holly. For instance, what was the original purpose of decorating homes with evergreen branches during winter?

Delve into the meaning behind colors – red, green, and gold – and their association with the holiday. Explore the symbolism of lights, stars, and bells. Questions could also cover the historical evolution of these symbols and how their meanings have changed over time. Consider including questions about less common symbols found in specific cultures.

Difficulty should range from identifying basic symbols to understanding their deeper historical and religious roots. Harder questions might explore the pagan origins of certain symbols and their subsequent Christian adaptation. The trivia should aim to educate players about the fascinating stories behind these cherished Christmas emblems.

Christmas Vocabulary – Trivia Test

This section will assess players’ understanding of Christmas-specific vocabulary. Questions should move beyond common terms like “Santa” and “reindeer,” exploring more nuanced festive language. Think about words related to decorations, traditions, and food – terms like ‘wassail,’ ‘yuletide,’ ‘epiphany,’ or ‘advent.’

The trivia can include questions testing definitions, synonyms, and antonyms. For example, “What is a ‘stocking stuffer’?” or “Which word means the opposite of ‘miserly’ in the context of Christmas spirit?” Consider incorporating questions about the etymology of certain words, tracing their origins and historical usage.

Difficulty levels should cater to a broad audience. Easy questions might focus on identifying basic Christmas terms, while harder questions could challenge players with obscure or archaic vocabulary. A focus on correct spelling and pronunciation could also be included, adding an extra layer of challenge and educational value.

Christmas in Different Cultures – Trivia

This trivia segment will explore how Christmas is celebrated globally, moving beyond Western traditions; Questions should highlight unique customs and beliefs associated with the holiday in various countries. For instance, “In Japan, is Christmas traditionally a religious holiday or more of a secular event?” or “What role does ‘La Befana’ play in Italian Christmas celebrations?”

The focus should be on diversity, showcasing how different cultures have adapted and integrated Christmas into their own traditions. Questions could cover food, decorations, gift-giving practices, and religious observances. Consider including questions about lesser-known Christmas figures or folklore from around the world.

Difficulty levels should range from easily recognizable customs (like Swedish Julbord) to more obscure practices. This section aims to broaden players’ understanding of Christmas as a globally celebrated, yet culturally diverse, holiday, fostering appreciation for different traditions.

“On Christmas” vs. “At Christmas” – Grammar Trivia

This section will delve into the subtle yet important grammatical distinction between “on Christmas” and “at Christmas.” Questions will test understanding of when to use each preposition correctly, focusing on the scope of time being referenced. For example: “Which preposition, ‘on’ or ‘at,’ is typically used when discussing a specific Christmas Day event?”

The trivia will explain that “at Christmas” generally refers to the entire holiday period, encompassing the weeks leading up to and including Christmas; Conversely, “on Christmas” usually denotes a specific day – Christmas Day itself. Questions could present scenarios requiring players to choose the correct preposition based on context.

Difficulty will increase with nuanced examples, challenging players to differentiate between general holiday references and specific date-related events. This section aims to improve grammatical accuracy and understanding of common English prepositions within the context of Christmas celebrations.

“Merry Christmas” vs. “Happy Christmas” – Usage Trivia

This trivia segment explores the subtle differences in usage between “Merry Christmas” and “Happy Christmas,” a common point of confusion for English language learners and even native speakers. Questions will focus on regional preferences and the connotations associated with each phrase.

The core of the trivia will highlight that “Merry Christmas” is the more traditional and widely used greeting, particularly in the United States. However, “Happy Christmas” is prevalent in the United Kingdom and some Commonwealth countries. Questions will test players’ knowledge of these geographical variations.

Furthermore, the trivia will touch upon the emotional nuance – “happy” denoting a state of being, while “merry” suggests joyful celebration. Questions might ask players to identify scenarios where one greeting feels more appropriate than the other, enhancing their understanding of English idioms and cultural context.

Last Christmas – Song Trivia

This section of the Christmas trivia PDF will center around Wham!’s iconic 1984 hit, “Last Christmas.” Questions will delve into the song’s history, lyrical content, and cultural impact, testing players’ knowledge beyond simply recognizing the tune.

Trivia will explore the song’s initial reception – surprisingly not an immediate chart-topper – and its subsequent rise to become a perennial Christmas favorite. Questions will cover the story behind the lyrics, specifically the theme of unrequited love and the heartbreak experienced by the narrator.

More challenging questions will focus on the song’s recording details, the musicians involved, and its enduring popularity, evidenced by consistent chart appearances decades after its release. The trivia will also include a question about the song’s music video and its memorable imagery, solidifying its place in Christmas pop culture.

Christmas Eve vs. Christmas Day – Trivia Distinction

This trivia segment within the PDF will focus on differentiating between the traditions and significance of Christmas Eve and Christmas Day. Questions will explore the historical origins of both days and how their celebrations have evolved over time.

The trivia will cover common practices associated with each day – for example, the tradition of opening one gift on Christmas Eve in some cultures, versus the larger gift-giving occasion on Christmas Day. Questions will also address religious aspects, such as Midnight Mass on Christmas Eve and church services on Christmas Day.

More nuanced questions will explore the cultural variations in how these days are celebrated globally, highlighting differences in family customs, festive meals, and overall atmosphere. The aim is to test players’ understanding of the distinct character of each day within the broader Christmas season, moving beyond simple date recognition.

Christmas Spelling – “Christmas” vs. “Chrismas” Trivia

This section of the Christmas trivia PDF will playfully address a common misspelling: “Chrismas.” Questions will directly ask players to identify the correct spelling of the holiday name, testing their attention to detail and familiarity with standard English orthography.

The trivia won’t simply be about rote memorization; it will incorporate questions about the etymology of “Christmas,” tracing its roots back to Old English and its connection to “Christ’s Mass.” This adds an educational element to the spelling challenge.

Furthermore, questions might present sentences with either the correct or incorrect spelling, asking players to identify the error. A more challenging question could involve explaining why “Chrismas” is incorrect, prompting players to recall the historical and linguistic origins of the word. This section aims to be lighthearted yet informative, reinforcing correct usage.

Christmas Day – Specific Trivia Questions

This segment of the Christmas trivia PDF will focus exclusively on facts and traditions surrounding December 25th. Questions will move beyond general Christmas knowledge, delving into specifics about Christmas Day celebrations throughout history and across cultures.

Expect questions about the historical origins of celebrating December 25th as Christmas, its connection to winter solstice festivals, and the evolution of Christmas Day traditions. We’ll include inquiries about popular Christmas Day activities in different countries – from festive meals to unique customs.

The trivia will also explore the cultural impact of Christmas Day, referencing famous literary depictions, iconic films, and notable historical events that occurred on this date. Difficulty will range from easy questions about common Christmas Day practices to challenging inquiries about lesser-known historical details, ensuring engagement for all trivia participants.

Christmas Traditions: Origins – Trivia

This section of the Christmas trivia PDF will unravel the fascinating histories behind beloved Christmas traditions. Questions will explore the roots of practices we often take for granted, tracing their evolution from ancient customs to modern celebrations.

Expect inquiries about the origins of the Christmas tree, the Yule log, gift-giving, and the tradition of sending Christmas cards. We’ll delve into the pagan influences that shaped early Christmas celebrations, examining how these customs were adapted and integrated into Christian traditions.

The trivia will also cover the historical development of Santa Claus, from Saint Nicholas to the modern-day jolly figure. Difficulty levels will vary, offering accessible questions for beginners alongside challenging inquiries for seasoned trivia enthusiasts, all designed to illuminate the rich tapestry of Christmas tradition origins.

Christmas Trivia for ESL Learners

This dedicated section within the Christmas trivia PDF caters specifically to English as a Second Language (ESL) learners. Questions will be carefully crafted using simpler vocabulary and sentence structures, focusing on practical Christmas-related language.

The trivia will incorporate questions about common Christmas greetings, vocabulary related to decorations and food, and basic descriptions of Christmas traditions. Multiple-choice options will be provided to aid comprehension and encourage participation.

Furthermore, a glossary of key Christmas terms will be included, offering definitions and pronunciations to enhance language learning. The aim is to create an engaging and accessible experience that builds confidence in English while celebrating the festive season. Difficulty will be primarily focused on beginner and intermediate levels, fostering a positive learning environment.

Creating a Christmas Trivia Game – PDF Format

The Christmas trivia questions and answers will be compiled into a user-friendly PDF document, optimized for easy printing and digital sharing. Design considerations will prioritize readability, with clear formatting, appropriate font sizes, and visually appealing elements like festive borders or images.

The PDF will be structured to facilitate gameplay, potentially including sections for individual or team play, scoring instructions, and answer keys conveniently located at the end. Interactive elements, such as fillable answer sheets, could be incorporated for digital use.

Furthermore, the PDF will be designed to be adaptable, allowing users to easily select questions based on difficulty level or theme. A table of contents will enable quick navigation. The final product will be a polished, engaging, and readily accessible Christmas trivia game for all to enjoy.

Christmas Trivia: Difficulty Levels (Easy, Medium, Hard)

To cater to a diverse audience, the Christmas trivia will be categorized into three distinct difficulty levels: Easy, Medium, and Hard. Easy questions will focus on widely known facts and traditions, suitable for families and younger players – think basic Santa Claus knowledge or popular carol recognition.

Medium-level questions will require a bit more knowledge, delving into the history of Christmas customs, details about Christmas movies, or slightly obscure carols. These are ideal for those with a general interest in the holiday.

Hard questions will challenge even the most dedicated Christmas enthusiasts, exploring niche traditions, complex historical origins, or intricate details from lesser-known Christmas stories. This tiered approach ensures an enjoyable experience for everyone, regardless of their Christmas expertise.

Sample Christmas Trivia Questions (Easy)

Here are a few examples of easy-level Christmas trivia questions, perfect for getting everyone involved in the festive fun. Question 1: What color is Rudolph the Red-Nosed Reindeer’s nose? (a) Blue (b) Red (c) Green. Question 2: In the song “Twelve Days of Christmas,” what is given on the fifth day? (a) Five Golden Rings (b) Six Geese a-Laying (c) Seven Swans a-Swimming.

Question 3: What do people traditionally put on top of a Christmas tree? (a) A star (b) An angel (c) A snowman. Question 4: Which country did eggnog originate from? (a) England (b) Germany (c) Medieval Britain. These questions are designed to be accessible and enjoyable for all ages, sparking conversation and holiday cheer.

Answers: 1. (b) Red, 2. (a) Five Golden Rings, 3. (a) A star, 4. (c) Medieval Britain. These simple questions serve as a great starting point for a broader Christmas trivia game.

Sample Christmas Trivia Questions (Medium)

Stepping up the challenge, these medium-level Christmas trivia questions require a bit more knowledge of holiday traditions and lore. Question 1: What is the name of the Grinch’s dog? (a) Max (b) Buddy (c) Comet. Question 2: In “The Nutcracker,” what does the Nutcracker transform into? (a) A Prince (b) A Toy Soldier (c) A Mouse King.

Question 3: What popular Christmas ballet premiered in Saint Petersburg, Russia in 1892? (a) Swan Lake (b) The Nutcracker (c) Sleeping Beauty. Question 4: What is traditionally baked into a Christmas pudding? (a) A silver coin (b) A golden ring (c) A chocolate chip. These questions are designed to test a moderate understanding of Christmas culture.

Answers: 1. (a) Max, 2. (a) A Prince, 3. (b) The Nutcracker, 4. (a) A silver coin. These questions offer a balanced level of difficulty, suitable for those with a good grasp of Christmas history and stories.

Sample Christmas Trivia Questions (Hard)

Prepare for a serious challenge with these hard-level Christmas trivia questions! These delve into obscure facts and historical details, testing even the most dedicated holiday enthusiasts. Question 1: What was the original name for Santa Claus in Dutch folklore? (a) Sinterklaas (b) Father Christmas (c) Kris Kringle. Question 2: In what country did the tradition of putting up a Christmas tree originate? (a) Germany (b) England (c) France.

Question 3: What is a Wassail? (a) A type of Christmas carol (b) A hot mulled cider drink (c) A traditional Christmas game. Question 4: Which composer wrote the carol “Silent Night”? (a) Franz Schubert (b) Johann Sebastian Bach (c) Wolfgang Amadeus Mozart. These questions require in-depth knowledge of Christmas origins and traditions.

Answers: 1. (a) Sinterklaas, 2. (a) Germany, 3. (b) A hot mulled cider drink, 4. (a) Franz Schubert. These are designed for trivia masters and those seeking a truly challenging Christmas quiz experience.

Resources for Christmas Trivia PDFs

Finding pre-made Christmas trivia PDFs is remarkably easy, saving you valuable time and effort. Several websites offer free, printable options catering to various age groups and difficulty levels. Websites like TriviaHub and Sporcle host extensive collections of holiday-themed quizzes, often downloadable as PDFs. Additionally, educational resource platforms such as Teachers Pay Teachers provide professionally designed Christmas trivia sets, some free and others available for purchase;

Pinterest is a treasure trove of links to various Christmas trivia PDFs, curated by users. For ESL learners, specialized resources offering simplified questions and vocabulary lists can be found on ESL Games Plus and similar educational sites. Remember to preview the PDFs before use to ensure content appropriateness and accuracy. Utilizing these resources streamlines your Christmas event planning, offering instant entertainment for all.

Don’t hesitate to combine questions from multiple sources to create a unique and personalized trivia experience!

crownful air fryer manual

Crownful Air Fryer Manual: A Comprehensive Guide

Welcome! This Crownful user manual provides essential safety guidelines and instructions for models AIRFRYER06 and B08739L374, ensuring optimal performance․

Discover how to connect via the Crownful app, troubleshoot WiFi issues, and enjoy perfectly cooked meals with your smart air fryer oven today!

Congratulations on selecting the Crownful Air Fryer! This innovative appliance revolutionizes your cooking experience, offering a healthier and more convenient way to enjoy your favorite foods․ Air frying significantly reduces the need for oil, resulting in lower-fat meals without compromising on taste or texture․

This manual serves as your comprehensive guide, detailing everything from initial setup and operation to cleaning and troubleshooting․ Whether you’re a seasoned chef or a kitchen novice, you’ll quickly master the art of air frying with your new Crownful oven․ Explore a world of culinary possibilities, from crispy chicken wings and golden french fries to perfectly toasted bread and beyond․

Please read this manual carefully before first use to ensure safe and optimal performance; We are confident that your Crownful Air Fryer will become an indispensable part of your kitchen!

Unboxing and Initial Setup

Carefully remove your Crownful Air Fryer and all included accessories from the packaging․ Verify that you have the oven, frying basket, crisping tray, and this user manual․ Inspect all components for any signs of damage during shipping․ If damage is present, contact customer support immediately․

Before first use, thoroughly clean the frying basket and crisping tray with warm, soapy water․ Wipe down the exterior of the oven with a damp cloth․ Ensure all parts are completely dry before assembly․ Place the air fryer on a stable, heat-resistant surface with adequate ventilation․

Download the Crownful app and create an account to unlock smart features․ Follow the in-app instructions to connect your oven to WiFi for remote control capabilities․

Key Features and Components

The Crownful Air Fryer boasts several key features, including rapid air circulation technology for crispy, evenly cooked food with less oil․ Its spacious interior accommodates a variety of dishes, from chicken wings to french fries․ The digital control panel offers precise temperature and time settings․

Key components include the frying basket, designed for easy food placement and removal, and the crisping tray, which enhances texture․ The function knob allows for selection of preset programs, while the TIME/TEMP button enables manual adjustments․ A clear digital display provides real-time cooking information․

Smart features, accessible through the Crownful app, offer remote control and convenient monitoring of your cooking process․

Understanding the Control Panel

Explore the intuitive Crownful control panel featuring a function knob, TIME/TEMP button, and digital display for precise cooking adjustments and program selection․

Function Knob Overview

The function knob is your primary interface for selecting cooking modes on your Crownful Air Fryer․ Rotating the knob allows you to cycle through various preset programs, such as fries, chicken wings, or toast․

It also enables manual temperature and time adjustments․ After pressing the TIME/TEMP button, turning the knob modifies the desired settings, displayed on the digital screen․

Confirm your selections by pressing the TIME/TEMP button again․ This intuitive design provides effortless control over your cooking process․ Remember to gently rotate the knob to avoid accidental program changes․ The knob’s responsiveness ensures precise and efficient operation, making your air frying experience seamless and enjoyable․

Time/Temp Button Functionality

The TIME/TEMP button on your Crownful Air Fryer is crucial for customizing cooking parameters․ Pressing this button activates the time and temperature adjustment mode․ Subsequently, rotating the function knob allows you to precisely set your desired cooking duration and temperature․

After making adjustments, pressing the TIME/TEMP button again confirms your selections, initiating the cooking process with your specified settings․ This dual-function button streamlines operation, offering both access to customization and confirmation of choices․

It’s a key component for achieving perfectly cooked results, tailored to your specific recipe needs․ Remember to confirm each setting for accurate and consistent cooking․

Digital Display Indicators

The digital display on your Crownful Air Fryer provides vital information during operation․ It clearly shows the set cooking time and temperature, allowing for easy monitoring of the cooking process․ A WiFi indicator illuminates when the air fryer is successfully connected to your home network․

If the WiFi indicator turns on and off repeatedly, it signals a connection issue requiring troubleshooting․ Error codes, if any, will also appear on the display, prompting you to consult the troubleshooting section of this manual for solutions․

The display dynamically updates, reflecting remaining cooking time and any active preset program selections․

Operating Instructions

Begin by manually starting the cooking process on your Crownful Air Fryer․ Utilize the function knob and TIME/TEMP button for precise control!

Preheating the Air Fryer

Preheating your Crownful Air Fryer is crucial for achieving consistently crispy and evenly cooked results․ While not always strictly necessary, preheating significantly enhances the texture of many foods, particularly those requiring a golden-brown finish․

To preheat, simply set the desired temperature using the TIME/TEMP button and function knob․ A common preheating temperature is 400°F (204°C)․ Allow the air fryer to run empty for approximately 3-5 minutes․ The appliance is ready when the indicator light signals it has reached the set temperature․

Remember, preheating ensures optimal heat distribution, leading to faster cooking times and superior food quality․ For recipes like toast, preheating is highly recommended for achieving the perfect level of crispness․

Basic Air Frying Procedure

Begin by placing your food into the frying basket, ensuring not to overfill it – this allows for proper air circulation and even cooking․ Gently shake the basket halfway through the cooking process to promote uniform browning and crisping․

Set the desired time and temperature using the function knob and TIME/TEMP button․ Confirm your settings by pressing the TIME/TEMP button again․ The air fryer will automatically shut off when the timer reaches zero․

Always exercise caution when removing the basket, as both the basket and the food will be hot․ Use oven mitts or tongs to safely handle these components․ Enjoy your perfectly air-fried creation!

Using Preset Cooking Programs

Your Crownful air fryer offers convenient preset programs for popular dishes like chicken wings, french fries, and toast․ To utilize these, simply turn the function knob until the desired preset icon illuminates on the digital display․

The air fryer will automatically set the optimal time and temperature for that specific food․ However, you can still adjust these settings if needed, using the TIME/TEMP button and function knob to customize the cooking process․

Remember that preheating may be required for certain presets to achieve the best results․ Refer to the cooking guide for specific recommendations․

Cooking with Your Crownful Air Fryer

Enjoy delicious, healthier meals! This section details how to air fry chicken wings, make crispy french fries, and perfectly toast bread using your Crownful oven․

Air Frying Chicken Wings

For crispy, flavorful chicken wings, begin by patting them dry with paper towels․ This ensures maximum crispness during air frying․ Next, toss the wings with your favorite seasonings – consider paprika, garlic powder, and a touch of cayenne pepper for a delightful kick!

Place the seasoned wings in the Crownful air fryer basket in a single layer, avoiding overcrowding․ Set the temperature to 400°F (204°C) and cook for approximately 20-25 minutes․

Crucially, flip the wings halfway through the cooking process to ensure even browning and crisping․ For extra crispy skin, you can increase the cooking time by a few minutes․ Always check for an internal temperature of 165°F (74°C) to guarantee they are fully cooked․ Enjoy!

Making French Fries

Achieve perfectly crispy French fries with your Crownful air fryer! Begin by soaking your cut potatoes in cold water for at least 30 minutes – this removes excess starch, leading to crispier results․ Thoroughly dry the potatoes before seasoning with salt, pepper, and any desired spices․

Place the fries in the air fryer basket in a single layer, ensuring they aren’t overcrowded․ Set the temperature to 380°F (193°C) and cook for 15-20 minutes․

Remember to shake the basket halfway through cooking to promote even browning․ For extra crispiness, a light spray of oil can be applied before air frying․ Check for golden-brown perfection and enjoy your healthier, homemade fries!

Toasting Bread

Enjoy perfectly toasted bread with your Crownful air fryer! Simply add your sliced bread to the air fryer oven basket․ For optimal results, set the temperature to 400°F (204°C) and air fry for approximately 4 minutes․

Important Note: Toasting times may vary depending on the thickness of your bread slices․ If using very thinly sliced bread, reduce the cooking time to avoid burning․

Monitor the bread closely during the final minutes to achieve your desired level of golden-brown crispness․ Experiment with different times to find your perfect toast setting․ Enjoy a quick and convenient breakfast or snack!

Connectivity and Smart Features

Unlock smart cooking! Download the Crownful app, connect to WiFi, and enjoy remote control of your air fryer oven for ultimate convenience․

Crownful App Download and Installation

Begin your smart cooking journey! To utilize the advanced features of your Crownful air fryer, downloading and installing the Crownful app is essential․ First, open your smartphone’s app store (Apple App Store or Google Play Store)․

Search for “Crownful” and locate the official app – ensure it’s the correct application to avoid potential issues․ Tap “Install” and allow the app to download and install on your device․

Once installed, tap “Open” to launch the app․ If you are a new user, you will need to create a Crownful account․ Follow the on-screen prompts to register, providing the necessary information․ If you already have an account, simply log in with your credentials․

Connecting to WiFi

Establish a seamless connection! To connect your Crownful air fryer to WiFi, ensure your smartphone is connected to a 2․4 GHz WiFi network․ Open the Crownful app and select your smart air fryer oven․

Tap the “+” icon within the app to add a new device․ Follow the in-app instructions carefully; the app will guide you through the pairing process․ You may need to press and hold a specific button on your air fryer to initiate pairing mode․

Enter your WiFi password when prompted, ensuring accuracy․ The app will then attempt to connect your air fryer to the network․ A successful connection will be indicated by a solid WiFi indicator on the air fryer’s display․

Remote Control via the App

Effortless cooking at your fingertips! Once connected to WiFi, the Crownful app unlocks remote control capabilities for your air fryer․ You can start, stop, and pause cooking cycles directly from your smartphone, regardless of your location․

Adjust cooking time and temperature remotely, tailoring recipes to your preferences․ Explore a library of preset cooking programs within the app for popular dishes like chicken wings and french fries․ Monitor cooking progress in real-time, receiving notifications when your food is ready․

The app also allows you to schedule cooking cycles in advance, ensuring a hot meal awaits you upon your return․ Enjoy the convenience and flexibility of controlling your Crownful air fryer from anywhere!

Safety Precautions

Caution is key! Always observe extreme care when handling hot components like the basket and tray after air frying․ Avoid overfilling for safe operation․

Handling Hot Components

Extreme caution is absolutely necessary when dealing with the Crownful Air Fryer after use․ The crisping tray, frying basket drawer, and, of course, the cooked food itself will be exceptionally hot to the touch․

Always utilize oven mitts or heat-resistant gloves when removing these components from the appliance․ Avoid direct contact with skin to prevent burns․ Ensure the air fryer is placed on a stable, heat-resistant surface during operation and cooling․

Allow sufficient cooling time before attempting to clean or store the unit․ Never immerse hot components in cold water, as this could cause warping or damage․ Prioritize safety to enjoy your Crownful experience!

Avoiding Overfilling the Basket

Proper food capacity is crucial for optimal Crownful Air Fryer performance and safety․ Overfilling the frying basket restricts air circulation, leading to unevenly cooked food and potentially compromised results․

Ensure food is arranged in a single layer whenever possible, avoiding overcrowding․ For best results, do not exceed the maximum fill line indicated within the basket․ Overloading can also cause the air fryer to work harder, potentially shortening its lifespan․

Work in batches if necessary to maintain adequate airflow and achieve consistently crispy and delicious outcomes․ Prioritizing proper basket loading ensures a superior cooking experience․

Proper Ventilation

Maintaining adequate ventilation is paramount when operating your Crownful Air Fryer; Ensure sufficient space around the unit – at least 6 inches on all sides – to allow for proper airflow during operation․

Never place the air fryer directly against walls, cabinets, or other appliances․ Restricted airflow can cause overheating, potentially leading to damage or a fire hazard․ Always operate the appliance on a heat-resistant surface․

Avoid covering the air intake or exhaust vents during use․ Proper ventilation ensures efficient cooking and prevents the buildup of steam or condensation, contributing to a safer and more enjoyable cooking experience․

Troubleshooting

Encountering issues? This section offers solutions for WiFi connection problems, heating failures, and deciphering Crownful error codes for a seamless experience․

WiFi Connection Issues

Experiencing difficulty connecting your Crownful Air Fryer to WiFi? First, ensure your home network is functioning correctly and that you have entered the correct password within the Crownful app․

If the WiFi indicator continues to blink, try restarting both your router and the air fryer․ Confirm the air fryer is within range of your WiFi signal․

Within the app, tap to select your smart air fryer oven and follow the in-app instructions to re-establish the connection․ If problems persist, consult the Crownful support website for further assistance and detailed troubleshooting steps․ A stable connection unlocks remote control features!

Air Fryer Not Heating

If your Crownful Air Fryer isn’t heating, first verify the unit is properly plugged into a functioning power outlet․ Ensure the frying basket is fully inserted, as a safety mechanism prevents operation when it’s open․

Check that the correct time and temperature settings have been selected and confirmed using the TIME/TEMP button and function knob․ It may need to be started cooking manually․

If the issue persists, try resetting the air fryer by unplugging it for several minutes․ If still not heating, contact Crownful customer support for assistance, providing your model number for efficient troubleshooting․

Error Codes and Solutions

Encountering an error code on your Crownful Air Fryer? While specific codes aren’t detailed, a common indicator is a flashing WiFi symbol, often signaling a connection problem․ Ensure your WiFi network is stable and the air fryer is within range․

If the error persists, try power cycling the unit – unplug it for five minutes, then plug it back in․ Refer to the Crownful app for potential in-app troubleshooting steps or further guidance․

For unresolved errors, document the code (if displayed) and contact Crownful customer support, providing your model number for accurate assistance․

Cleaning and Maintenance

Regular cleaning ensures longevity! Wipe the exterior, thoroughly clean the frying basket and crisping tray after each use, and store properly when not in use․

Cleaning the Frying Basket and Crisping Tray

After each use, allow the frying basket and crisping tray to cool completely before cleaning․ Caution: these components are hot immediately after air frying!

Both the basket and tray are typically dishwasher safe, offering a convenient cleaning option․ However, for stubborn food residue, hand washing is recommended․ Use warm, soapy water and a non-abrasive sponge to gently scrub away any remaining particles․

Avoid using harsh chemicals or scouring pads, as these can damage the non-stick coating․ Ensure both components are thoroughly rinsed and completely dry before reassembling and storing․ Proper cleaning maintains optimal performance and extends the lifespan of your Crownful air fryer․

Wiping Down the Exterior

To maintain the appearance and hygiene of your Crownful air fryer, regularly wipe down the exterior surfaces․ Always ensure the unit is unplugged and completely cool before cleaning․

Use a soft, damp cloth with a mild detergent to gently wipe away any splatters, grease, or fingerprints․ Avoid abrasive cleaners or scouring pads, as they can scratch or damage the finish․ Pay particular attention to the control panel and handle areas․

For stubborn stains, a slightly dampened cloth with a small amount of baking soda can be effective․ After cleaning, wipe the exterior with a clean, dry cloth to prevent water spots․ Regular exterior cleaning keeps your air fryer looking its best!

Long-Term Storage

When storing your Crownful air fryer for an extended period, ensure it is completely clean, dry, and cool․ Remove all components – the frying basket, crisper tray, and any accessories – and wash them thoroughly before storing separately․

Store the air fryer in a cool, dry place, away from direct sunlight and moisture․ Consider using the original packaging to protect it from dust and potential damage․ Avoid stacking heavy items on top of the appliance․

Before first use after long-term storage, inspect the power cord for any signs of damage․ A quick test run is recommended to ensure everything functions correctly․

linear programing problems and solutions pdf

Linear programming tackles efficiency problems for organizations, utilizing algorithms like the simplex method for optimal solutions. It’s a powerful tool,
streamlining workflows and aiding ambitious startups in product planning and scaling, as detailed in available PDF resources.

What is Linear Programming?

Linear programming (LP) is a mathematical method for achieving the best outcome – such as maximum profit or lowest cost – in a mathematical model whose requirements are represented by linear relationships. It involves solving a system of linear equations and inequalities, often found within PDF guides detailing problems and solutions.

Essentially, LP helps determine the optimal allocation of limited resources, like time, money, or materials, to meet specific objectives. The simplex method, a cornerstone algorithm, efficiently navigates these constraints to find the best possible solution. Numerous online courses and textbooks, often available as PDF downloads, provide comprehensive explanations and practical examples of applying LP to real-world scenarios. It’s a foundational technique in operations research, management science, and engineering, offering a structured approach to complex decision-making.

Historical Context: George Dantzig and the Simplex Method

The development of linear programming is deeply intertwined with the work of George Dantzig. His creation of the simplex method in the late 1940s revolutionized the field, providing a practical algorithm for solving complex efficiency problems. Before Dantzig, tackling these problems was incredibly laborious; his method offered a systematic and efficient approach, often detailed in academic PDFs.

Dantzig’s work proved invaluable during World War II for optimizing logistics and resource allocation. The simplex method’s impact extends far beyond military applications, becoming a cornerstone of modern operations research and management science. Numerous PDF resources and textbooks document the method’s evolution and its continued relevance; Dantzig’s legacy lies in providing a powerful tool for optimizing decisions across diverse industries, fundamentally changing how organizations approach resource management and problem-solving.

Formulating Linear Programming Problems

Defining decision variables, objective functions (maximization or minimization), and constraints are crucial steps in building a linear model, often found in PDF guides.

Defining Decision Variables

Decision variables represent the quantities you control in a linear programming problem. These are the unknowns that the model will determine optimal values for, directly impacting the solution. For instance, in a production planning scenario, decision variables might represent the number of units of each product to manufacture.

Carefully defining these variables is paramount; they must be clearly defined, measurable, and non-negative. PDF resources on linear programming consistently emphasize this foundational step. Incorrectly defined variables will lead to an inaccurate or unusable model. They form the basis of the objective function and constraints, dictating the feasible region and ultimately, the optimal outcome. Understanding their role is key to effectively applying linear programming techniques.

Objective Function: Maximization and Minimization

The objective function is the mathematical expression that defines the goal of a linear programming problem. It quantifies what you aim to maximize (like profit) or minimize (like cost). This function is a linear equation involving the decision variables.

PDF guides on linear programming highlight that the objective function must be clearly stated and aligned with the problem’s overall objective. Maximization problems seek the highest possible value, while minimization problems aim for the lowest. The choice depends entirely on the specific scenario. Successfully formulating this function is crucial, as the entire solution process revolves around optimizing its value within the defined constraints. It’s the core of the model’s purpose.

Constraints: Types and Representation

Constraints in linear programming are limitations or restrictions that define the feasible region for the solution. These are typically expressed as linear inequalities or equalities. Common types include resource limitations (e.g., limited materials), demand requirements, and production capacities.

PDF resources emphasize that accurately representing these constraints is vital. They define the boundaries within which the objective function can be optimized. Constraints can be ‘less than or equal to’, ‘greater than or equal to’, or ‘equal to’. Formulating these correctly, often involving decision variables, ensures the problem reflects real-world limitations. Ignoring or misrepresenting constraints leads to unrealistic or invalid solutions, rendering the entire model ineffective.

Solving Linear Programming Problems

Various methods, including graphical approaches, the simplex method, and computer systems like Excel Solver, offer solutions to linear programming problems, as detailed in PDF guides.

Graphical Method for Two-Variable Problems

The graphical method provides a visual approach to solving linear programming problems involving only two decision variables. This technique involves plotting the constraints on a graph, defining a feasible region representing all possible solutions that satisfy these constraints.

Once the feasible region is identified, the objective function is evaluated at each corner point (vertex) of this region. The corner point yielding the optimal value – either maximum or minimum, depending on the objective – represents the optimal solution.

Numerous PDF resources and tutorials demonstrate this method with detailed examples, illustrating how to formulate the problem, graph the constraints, identify the feasible region, and determine the optimal solution. This method is particularly useful for understanding the underlying concepts of linear programming and provides a clear visual representation of the solution space. It’s a foundational technique before tackling more complex methods.

The Simplex Method: An Overview

The Simplex method, developed by George Dantzig, is a powerful algorithm for solving linear programming problems, especially those with numerous variables where graphical methods become impractical. It’s an iterative process that systematically explores feasible solutions, moving from one corner point of the feasible region to another, until the optimal solution is found.

The method begins with a basic feasible solution and iteratively improves it by examining neighboring solutions. This process continues until no further improvement is possible, indicating the optimal solution has been reached. Detailed explanations and step-by-step examples of the Simplex method are readily available in various PDF guides and textbooks.

Understanding the underlying principles of the Simplex method is crucial for tackling complex optimization problems and interpreting the solutions effectively. It forms the basis for many linear programming software packages.

Using Computer Systems: Excel Solver

For practical application, linear programming problems are often solved using computer systems like Microsoft Excel’s Solver add-in. Solver provides a user-friendly interface to define objective functions, decision variables, and constraints, automating the complex calculations of methods like the Simplex. It’s a valuable tool for students and professionals alike.

Numerous online tutorials and PDF resources demonstrate how to formulate and solve linear programming models within Excel. These guides typically walk through setting up the problem, specifying the target cell (objective function), and defining variable cells and constraints. Solver then iteratively finds the optimal solution.

While powerful, understanding the underlying linear programming concepts remains vital for interpreting Solver’s results and ensuring the model accurately represents the real-world problem.

Examples of Linear Programming Applications

Linear programming excels in resource allocation, production planning, and transportation problems; detailed solutions and case studies are readily available in PDF formats.

Resource Allocation Problems

Resource allocation problems are a cornerstone of linear programming applications, frequently explored in detailed PDF guides and academic texts. These scenarios involve optimally distributing limited resources – such as materials, personnel, or budget – across various activities to maximize a specific objective, like profit or output. For instance, a manufacturing company might use linear programming to determine the ideal production levels for different products, given constraints on raw material availability and production capacity.

PDF resources often present illustrative examples, demonstrating how to formulate these problems mathematically, defining decision variables, the objective function, and constraints. The simplex method, a core algorithm, provides a systematic approach to finding the optimal solution. These applications extend beyond manufacturing, encompassing areas like finance, where linear programming aids in portfolio optimization, and logistics, where it optimizes delivery routes and warehouse locations. Understanding these applications requires access to comprehensive solutions and detailed explanations, commonly found in readily available PDF documents.

Production Planning Problems

Production planning problems are frequently addressed using linear programming, with numerous examples and solutions detailed in accessible PDF resources. These problems center around determining the most efficient production schedule to meet demand while minimizing costs or maximizing profits. Constraints typically include production capacity, raw material availability, and storage limitations. A company might utilize linear programming to decide how much of each product to manufacture, considering varying production costs and market prices.

PDF guides often showcase how to formulate these scenarios mathematically, defining decision variables representing production quantities. The objective function reflects the goal – maximizing profit or minimizing cost – and constraints represent the limitations. The simplex method, a fundamental algorithm, then identifies the optimal production plan. These solutions are crucial for optimizing resource utilization and ensuring timely delivery, as demonstrated in various case studies available in PDF format, offering practical insights into real-world applications.

Transportation Problems

Transportation problems, a classic application of linear programming, focus on minimizing the cost of distributing goods from multiple sources (e.g., factories) to various destinations (e.g., warehouses). Detailed solutions and illustrative examples are readily available in PDF documentation. These models consider supply capacities at each source and demand requirements at each destination, aiming to find the optimal shipping plan. Constraints ensure that supply does not exceed capacity and demand is fully met.

PDF resources often present these problems using transportation tables, simplifying the formulation. The objective function represents the total transportation cost, which linear programming seeks to minimize. Algorithms like the simplex method efficiently solve these complex scenarios, providing insights into the optimal quantities to ship along each route. Understanding these solutions is vital for logistics optimization, reducing expenses, and improving delivery efficiency, as showcased in numerous practical examples found in PDF guides.

Resources for Further Learning

Explore linear programming through online courses, tutorials, and comprehensive PDF textbooks offering detailed problems and step-by-step solutions for practical application.

Online Courses and Tutorials

Numerous platforms offer structured learning paths for mastering linear programming. Websites provide introductory tutorials covering fundamental concepts, while more advanced courses delve into the simplex method and sensitivity analysis. Many resources feature downloadable PDFs containing practice problems with detailed solutions, allowing for self-paced learning and skill reinforcement.

These courses often utilize real-world examples, such as resource allocation and production planning, to illustrate the practical applications of linear programming. Interactive simulations and coding exercises further enhance understanding. Look for courses that emphasize both theoretical foundations and hands-on implementation, equipping learners with the ability to formulate and solve complex optimization problems effectively. Several universities also offer open courseware materials, including lecture notes and assignments, freely accessible online.

PDF Resources and Textbooks

A wealth of PDF documents and textbooks are available for in-depth study of linear programming. These resources often present a comprehensive treatment of the subject, starting with foundational concepts and progressing to advanced techniques. Many PDFs provide worked-out solutions to practice problems, aiding self-study and comprehension.

Classic textbooks offer rigorous mathematical formulations and detailed explanations, while supplementary PDFs may focus on specific applications like transportation or production planning. Searching online databases reveals numerous lecture notes and problem sets from university courses. These materials frequently include step-by-step solutions, enabling learners to grasp the intricacies of formulating and solving linear programming problems. Look for resources that align with your learning style and mathematical background for optimal understanding.

Software Tools for Linear Programming

Numerous software tools facilitate the solving of linear programming problems, ranging from spreadsheets to dedicated optimization packages. Excel Solver, readily accessible, provides a user-friendly interface for smaller-scale problems, often accompanied by tutorials in PDF format. More sophisticated tools, like dedicated linear programming solvers, handle larger and more complex models efficiently.

These often require understanding of modeling languages and offer advanced features like sensitivity analysis. Many software vendors provide extensive documentation, including PDF manuals and example problems with solutions. Online platforms and cloud-based services also offer linear programming capabilities, eliminating the need for local installation. Choosing the right tool depends on the problem’s size, complexity, and the user’s technical expertise.

Advanced Topics in Linear Programming

Linear programming extends beyond basic solutions, delving into sensitivity analysis and duality. Detailed PDF resources explore these concepts, enhancing problem-solving capabilities.

Sensitivity Analysis

Sensitivity analysis is a crucial advanced technique within linear programming, examining how changes in input parameters – like objective function coefficients or constraint right-hand sides – impact the optimal solution. This isn’t merely about finding a solution, but understanding its robustness. Detailed PDF resources and textbooks dedicate significant sections to this, illustrating how to determine the range within which parameter values can fluctuate without altering the current optimal basis.

Understanding these ranges is vital for practical decision-making. For instance, knowing how much the cost of a resource can increase before a different production plan becomes optimal. It allows for informed “what-if” scenarios, providing valuable insights beyond the initial solution. These analyses often involve examining reduced costs and shadow prices, concepts thoroughly explained in comprehensive linear programming materials available as PDFs, aiding in effective problem-solving.

Duality in Linear Programming

Duality is a fundamental concept in linear programming, revealing a surprising relationship between the original “primal” problem and a related “dual” problem. Every linear program has a corresponding dual, and solving one often provides insights into the other. Comprehensive PDF guides on linear programming detail how to formulate the dual from the primal, and vice versa, showcasing the inherent symmetry.

The dual problem offers valuable information, such as shadow prices – the change in the optimal objective function value for a unit increase in a constraint’s right-hand side. This is crucial for resource valuation and decision-making. Studying duality, as explained in numerous PDF resources and textbooks, enhances understanding of problem structure and provides alternative approaches to finding optimal solutions, often simplifying complex scenarios.

bullfrog spa manual

Bullfrog Spa Manual: A Comprehensive Guide

Today’s date is December 17, 2025, at 01:01:16 AM (). Redmond, WA plumbers offer 24/7 service, addressing issues like leaks and backups with a smile, ensuring smooth operation.

Welcome to the world of Bullfrog Spas! These innovative spas are designed to deliver an unparalleled hydrotherapy experience, combining cutting-edge engineering with luxurious comfort. Bullfrog Spas stand apart due to their unique JetPak Therapy System, allowing for customizable jet configurations to target specific muscle groups.

This manual serves as your comprehensive guide to understanding, operating, and maintaining your Bullfrog Spa. Whether you’re a first-time spa owner or a seasoned enthusiast, this resource will provide valuable insights into maximizing your spa’s performance and longevity. Remember, prompt plumbing service, like those available in Redmond, WA, is crucial for maintaining optimal home systems.

From initial setup and water care to troubleshooting and advanced features, we’ll cover everything you need to know. Current weather conditions, as reported on December 17, 2025, are also important to consider for spa maintenance, especially during colder months.

Understanding Your Bullfrog Spa System

Your Bullfrog Spa is a sophisticated system comprised of several key components working in harmony. The heart of the spa is the JetPak Therapy System, featuring interchangeable jet clusters for personalized hydrotherapy. The pump circulates water through the jets and filter, while the heater maintains your desired water temperature.

The control panel allows you to manage all spa functions, from jet intensity to lighting and audio. Understanding the electrical connections and grounding is paramount for safety, much like relying on qualified plumbers in Redmond, WA, for electrical plumbing needs.

Regularly monitoring water chemistry – pH, alkalinity, and sanitizers – is vital for a clean and healthy spa experience. Remember to consult weather forecasts (as of December 17, 2025) to adjust settings based on ambient temperatures and potential winterizing requirements.

Spa Setup and Installation

Redmond, WA plumbers are available 24/7 for emergencies. Proper location preparation, electrical connections, and initial inspection are crucial for a seamless Bullfrog Spa installation.

Unpacking and Initial Inspection

Carefully unpack your new Bullfrog Spa, noting any visible damage during shipping. Redmond plumbers emphasize thoroughness! Inspect the spa shell for cracks or blemishes, and verify all components listed on the packing slip are present.

Check the equipment compartment for loose connections or signs of transit-related stress. Ensure the control panel is securely attached and displays power. Confirm the jet pump system appears undamaged.

Document any discrepancies immediately with photographs and contact Bullfrog Spas customer support. Do not attempt to operate a damaged spa. Professional plumbers in Redmond advise against this. A detailed initial inspection prevents future complications and ensures a relaxing spa experience. Remember today’s date: December 17, 2025!

Location Requirements and Preparation

Selecting the right location is crucial for your Bullfrog Spa’s longevity. A level, stable surface is essential – concrete pads are ideal. Redmond plumbers suggest avoiding soft ground or areas prone to settling. Ensure the location can support the filled spa’s considerable weight.

Adequate drainage is vital to prevent water accumulation around the base. Consider proximity to a GFCI-protected electrical outlet and access for servicing. Avoid direct sunlight for extended periods to minimize UV damage and chemical imbalance.

Prepare the area by clearing debris and ensuring a safe walking surface. Today, December 17, 2025, check local regulations regarding spa installations. Proper preparation safeguards your investment and ensures years of enjoyment, much like reliable plumbing services in Redmond!

Electrical Connections and Grounding

Electrical safety is paramount when installing your Bullfrog Spa. Always use a dedicated GFCI (Ground Fault Circuit Interrupter) protected circuit, sized according to your spa’s specifications. Redmond’s best plumbers emphasize the importance of professional electrical work.

Proper grounding is non-negotiable. Connect the spa’s grounding wire to a grounded metal conduit or grounding rod, following local electrical codes. Never use the neutral wire for grounding. Incorrect wiring can lead to electric shock or damage the spa’s components.

Today, December 17, 2025, consult a qualified electrician for all electrical connections. Ensure all connections are tight and weatherproof. Like dependable plumbing, a secure electrical setup guarantees safe and reliable operation for years to come.

Operating Your Bullfrog Spa

Redmond plumbers are available 24/7 for emergencies, mirroring the spa’s always-ready nature; enjoy features like jet pumps, temperature control, and lighting for ultimate relaxation.

Control Panel Overview and Functions

The Bullfrog Spa control panel is your central hub for managing all spa functions, offering intuitive control over temperature, jet systems, and lighting. Familiarize yourself with the display, which clearly indicates water temperature and active settings. Key functions include up and down arrows for temperature adjustment, jet control buttons to activate or adjust the intensity of various jet zones, and light controls for ambiance.

Many models feature programmable schedules, allowing you to pre-set temperatures and jet cycles for automated operation. Explore the menu options to customize your spa experience, including filter cycle settings and energy-saving modes. Remember, like finding a reliable Redmond plumber for home emergencies, understanding your control panel ensures a seamless and enjoyable spa experience. Consult the full manual for detailed explanations of each function and troubleshooting tips, mirroring the comprehensive service offered by local plumbing professionals.

JetPump System Operation

The Bullfrog Spa’s jet pump system is designed for powerful hydrotherapy and efficient circulation. The pump circulates water through the filters and jets, providing massage and maintaining water temperature. Understanding its operation is key to optimal performance. The system typically includes multiple speed settings, allowing you to adjust jet intensity from a gentle massage to a vigorous deep-tissue experience.

Regular operation of the jet pump ensures proper water mixing and sanitation. Like relying on a Redmond plumber for consistent water flow, the jet pump’s consistent operation is vital. Note any unusual noises or reduced jet pressure, as these could indicate a need for maintenance. The pump’s efficiency contributes to energy savings, similar to choosing a reliable service provider for long-term cost-effectiveness. Always refer to the manual for specific pump details and troubleshooting guidance.

Water Temperature Adjustment

Adjusting your Bullfrog Spa’s water temperature is simple via the control panel. The recommended temperature range is typically between 100°F and 104°F (38°C and 40°C), but personal preference dictates the ideal setting. Incremental adjustments are best; avoid large temperature swings, as these can strain the heating system – much like sudden plumbing demands.

Monitor the water temperature after each adjustment, allowing sufficient time for the spa to reach the new setting. Be mindful of safety, especially with children or individuals sensitive to heat. Consistent temperature maintenance, like reliable plumbing in Redmond, WA, ensures a comfortable and enjoyable spa experience. Remember to consider external weather conditions, as colder temperatures may require slightly higher settings to maintain desired warmth. Always consult the manual for specific temperature control features.

Lighting and Entertainment Features

Bullfrog Spas offer a range of lighting and entertainment options to enhance your relaxation. Control panel settings allow you to adjust the intensity and color of the underwater LED lighting, creating a soothing ambiance. Many models feature Bluetooth connectivity, enabling wireless music streaming from your smartphone or other compatible devices – a modern convenience akin to dependable Redmond, WA plumbing services.

Explore the audio system guide for detailed setup instructions. Some spas include built-in speakers for immersive sound. Regularly check Bluetooth connections for optimal performance. Proper maintenance, like ensuring a secure spa cover, protects these features. Remember to prioritize safety when using electrical components near water. Enjoy the enhanced experience these features provide, transforming your spa into a personal oasis.

Water Care and Maintenance

Maintaining pristine water is crucial. Consistent monitoring of pH, alkalinity, and sanitizers, alongside regular filter cleaning, ensures a hygienic and enjoyable spa experience, like reliable plumbing.

Water Chemistry Basics (pH, Alkalinity, Sanitizers)

Maintaining proper water chemistry is paramount for a safe and enjoyable Bullfrog Spa experience. pH measures acidity or alkalinity, ideally between 7.2 and 7.8. Low pH can corrode equipment, while high pH reduces sanitizer effectiveness. Alkalinity acts as a pH buffer, preventing drastic swings; aim for 80-120 ppm.

Sanitizers, like chlorine or bromine, eliminate bacteria and algae. Chlorine levels should be 1-3 ppm, while bromine should be 3-5 ppm. Regularly test your water using a reliable test kit or strips. Adjust chemicals carefully, following product instructions. Remember, balanced water protects your investment and ensures a comfortable soak, much like dependable Redmond plumbing services protect your home!

Consistent monitoring and adjustment, similar to checking weather forecasts for Redmond, WA, are key to optimal water quality.

Filter Cleaning and Replacement

A clean filter is crucial for clear, healthy spa water and efficient JetPump system operation. Regularly rinse your filter with a garden hose, removing debris. For a deeper clean, use a filter cleaning solution every 3-6 months, following the product’s instructions. This removes oils and minerals that rinsing alone misses.

Filter cartridges don’t last forever. Inspect your filter for wear and tear – cracks, fraying, or stiffness indicate it’s time for a replacement. Typically, filters need replacing every 1-2 years, depending on spa usage and water quality. Like reliable plumbers in Redmond, WA, proactive maintenance prevents bigger problems.

A clogged filter strains the pump and reduces water flow. Consistent filter care, similar to monitoring daily weather conditions, ensures optimal performance.

Spa Surface Cleaning and Care

Maintaining your Bullfrog Spa’s surface ensures longevity and a pleasant experience. Regularly wipe down the acrylic shell with a mild soap and soft cloth. Avoid abrasive cleaners, as they can scratch the surface – think of it like choosing a plumber who treats your home with respect.

For tougher stains, a specialized spa surface cleaner may be necessary, always following the manufacturer’s directions. Regularly check for and remove any leaves, dirt, or debris that accumulate in the spa. Consistent cleaning, much like monitoring weather forecasts, prevents build-up.

Protect your spa cover from harsh sunlight and weather to prevent cracking and fading. A clean spa surface contributes to better water quality and overall enjoyment, mirroring the reliability of Redmond, WA plumbing services;

Water Draining and Refilling Procedures

Properly draining and refilling your Bullfrog Spa is crucial for maintaining water quality and preventing damage. Begin by disconnecting the power supply to the spa for safety – akin to calling a reliable Redmond, WA plumber for electrical concerns.

Locate the drain valve (consult your spa’s specific diagram) and attach a garden hose to direct the water away from your home’s foundation. Allow the spa to drain completely, which may take several hours; Once drained, thoroughly clean the spa shell using a mild soap and soft cloth.

Refill the spa with fresh water, ensuring proper chemical balance before use. Follow the water chemistry guidelines in this manual. Like checking daily weather forecasts, regular water changes are essential for a healthy spa experience.

Troubleshooting Common Issues

Addressing jet malfunctions, heating problems, or control panel errors requires careful attention. Like Redmond plumbers handling emergencies, swift action prevents further damage and ensures spa enjoyment.

Jet Malfunctions and Solutions

Experiencing issues with your Bullfrog Spa jets? Several factors can contribute to diminished jet pressure or complete failure. First, verify the filter is clean, as a clogged filter restricts water flow significantly. Next, inspect the jet nozzles themselves for any blockages – mineral buildup or debris can obstruct water passage. Carefully remove and rinse each nozzle, using a mild cleaning solution if necessary.

If the problem persists, check the jet pump. Listen for unusual noises, which could indicate a failing pump motor or impeller. A qualified technician should diagnose and repair pump issues. Also, ensure the air control valves are properly adjusted; these regulate air mixing with the water, impacting jet intensity. Remember, like reliable Redmond plumbers, addressing issues promptly prevents escalation and maintains optimal spa performance. Finally, consult your Bullfrog Spa manual for specific jet system diagrams and troubleshooting steps.

Heating System Problems

Encountering issues with your Bullfrog Spa’s heating? A common problem is insufficient water flow, hindering heat transfer. Ensure the filter is clean and the jet pump is functioning correctly, as these directly impact circulation. Verify the thermostat setting is accurate and hasn’t been inadvertently adjusted. If the heater isn’t reaching the set temperature, a faulty high-limit switch might be the culprit – this safety feature shuts off the heater to prevent overheating.

Like seeking a responsive Redmond plumber for urgent repairs, addressing heating issues promptly is crucial. A qualified technician should inspect the heating element for damage or corrosion. Electrical connections should also be checked for looseness or corrosion. Remember to always disconnect power before attempting any electrical inspection. Consult your Bullfrog Spa manual for specific error codes and troubleshooting guidance related to the heating system.

Control Panel Errors and Codes

Your Bullfrog Spa’s control panel utilizes error codes to diagnose issues. These codes aren’t simply random; they pinpoint specific problems within the system, much like a plumber in Redmond, WA, diagnoses a leak. Common codes relate to water temperature sensors, jet pump functionality, or heater operation. Refer to the dedicated “Error Codes” section within your spa’s manual – it’s a vital resource!

If a code appears, first attempt a simple power cycle: turn off the spa at the breaker for 30 seconds, then restore power. If the code persists, consult the manual for the specific meaning and recommended action. Don’t attempt repairs beyond your expertise; contacting a qualified technician is advisable. Ignoring error codes can lead to more significant, costly repairs, similar to delaying a plumbing emergency.

Leak Detection and Repair

Regularly inspect your Bullfrog Spa for leaks. Begin by checking around the equipment compartment, plumbing connections, and the shell itself. Wet areas, even small damp spots, indicate a potential leak – address these promptly, much like a Redmond, WA plumber handles a dripping faucet. Initially, tighten any loose unions or fittings.

For persistent leaks, shut off power to the spa at the breaker. Carefully examine the pump, heater, and jet connections. If you identify a cracked fitting or damaged component, replacement is necessary. Do not attempt repairs involving electrical components yourself! Contact a qualified spa technician. Ignoring leaks can lead to water damage and costly repairs, mirroring the consequences of neglecting a plumbing issue.

Advanced Features and Options

Explore Bullfrog Spa’s audio systems and Bluetooth connectivity for enhanced relaxation. Proper spa cover maintenance and winterizing procedures are crucial for longevity, like reliable plumbing.

Bullfrog Spa Audio System Guide

Your Bullfrog Spa audio system is designed to elevate your relaxation experience. This guide provides essential information for optimal performance and enjoyment. Begin by familiarizing yourself with the system’s components, including the speakers, subwoofer (if equipped), and audio source connections. Ensure all connections are secure and properly shielded to prevent interference.

The audio system is typically controlled through the spa’s control panel, allowing you to adjust volume, select audio sources (Bluetooth, auxiliary input, or potentially built-in radio), and customize sound settings. For Bluetooth pairing, navigate to the Bluetooth settings on your device and select your Bullfrog Spa from the available devices. A successful connection will be indicated on both the spa’s control panel and your device.

Remember to keep the audio system components dry and protected from direct exposure to water. Regular cleaning with a soft, damp cloth will help maintain optimal sound quality. If you encounter any issues, consult the troubleshooting section of this manual or contact Bullfrog Spa customer support for assistance. Enjoy the immersive audio experience!

Bluetooth Connectivity and Setup

Establishing a Bluetooth connection with your Bullfrog Spa allows wireless audio streaming from compatible devices. To begin, ensure your spa’s audio system is powered on and in pairing mode – typically activated through the control panel’s settings menu. On your smartphone, tablet, or other Bluetooth-enabled device, access the settings and enable Bluetooth functionality.

The spa should appear in the list of available devices. Select “Bullfrog Spa” (or a similar identifier) to initiate the pairing process. You may be prompted to enter a pairing code; if so, refer to your spa’s specific documentation. Once successfully paired, your device will connect automatically whenever both are within range.

Troubleshooting connection issues? Verify Bluetooth is enabled on both devices, and that no other devices are interfering with the signal. Restarting both the spa and your device can often resolve connectivity problems. Enjoy seamless audio streaming!

Spa Cover Maintenance and Replacement

Your Bullfrog Spa cover is crucial for heat retention, safety, and cleanliness. Regular maintenance extends its lifespan. Clean the cover monthly with a mild soap and water solution, avoiding harsh chemicals that can damage the vinyl. Apply a vinyl protectant periodically to shield against UV rays and prevent cracking.

Inspect the cover regularly for tears, damage to the locking mechanisms, or waterlogged areas. A waterlogged cover becomes heavy and loses insulating properties. If the cover is damaged, repair it promptly or consider replacement. A properly fitted cover is essential; ensure it seals tightly around the spa’s perimeter.

Replacement covers are available through authorized Bullfrog Spa dealers. When ordering, provide your spa’s model and dimensions for a precise fit. Remember, a well-maintained cover saves energy and protects your investment!

Winterizing Your Bullfrog Spa

Preparing your Bullfrog Spa for winter prevents freeze damage and ensures easy spring startup. Begin by draining the spa completely, including all plumbing lines. Use a wet/dry vacuum to remove any remaining water from jets and pipes. Add winterizing chemicals specifically designed for spas, following the manufacturer’s instructions carefully.

Disconnect all electrical power to the spa. Insulate the equipment compartment and plumbing lines with foam pipe wrap. A thermal spa cover is essential for maintaining minimal heat retention and protecting against the elements. Consider adding an additional layer of insulation over the cover for extremely cold climates.

Regularly check the spa throughout the winter for any signs of freezing or damage. Proper winterization safeguards your investment and allows for a hassle-free return to relaxation when warmer weather arrives!

Safety Precautions and Warranty Information

Electrical safety is paramount; handle chemicals with care. Redmond plumbers advise consulting professionals for emergencies, while Bullfrog Spa warranties detail coverage for defects.

Electrical Safety Guidelines

Prioritize safety around your Bullfrog Spa’s electrical components. Always ensure the spa is properly grounded, adhering to local electrical codes – Redmond plumbers emphasize this for all appliances. Never operate the spa with a damaged power cord or plug; immediate replacement is crucial. Avoid using extension cords, as they can overheat and pose a fire hazard.

Inspect the electrical panel regularly for any signs of corrosion or damage. Disconnect power before performing any maintenance or cleaning near electrical components. Keep the area around the spa clear of water and electrical devices. If you encounter any electrical issues, immediately shut off the power and contact a qualified electrician – don’t attempt DIY repairs. Remember, professional plumbers in Redmond stress the importance of qualified assistance for electrical work. Following these guidelines will help ensure a safe and enjoyable spa experience.

Chemical Handling and Storage

Proper chemical handling is vital for spa safety and water quality. Always read and follow the manufacturer’s instructions on all spa chemicals. Never mix different chemicals together, as this can create dangerous fumes or reactions. Wear appropriate protective gear, including gloves and eye protection, when handling chemicals – Redmond plumbers advise caution with all household chemicals.

Store chemicals in a cool, dry, and well-ventilated area, out of reach of children and pets. Keep containers tightly sealed to prevent spills and contamination. Avoid storing chemicals in direct sunlight or near heat sources. Dispose of empty containers responsibly, following local regulations. Remember, like plumbing emergencies, chemical imbalances require prompt attention. Prioritize safety and consult a professional if unsure about chemical usage or storage.

Bullfrog Spa Warranty Details

Your Bullfrog Spa is protected by a comprehensive warranty, designed for peace of mind. The shell carries a limited lifetime warranty against defects in material and workmanship. Equipment, including the pump, heater, and control system, is covered for a specified period, typically several years – consult your specific warranty documentation for exact terms.

Plumbing components also have a defined warranty duration. This warranty covers manufacturing defects but does not cover damage resulting from misuse, improper water chemistry, or unauthorized repairs. Maintaining proper water balance, as Redmond plumbers recommend, is crucial for warranty validity. Register your spa promptly to activate the warranty. Keep your proof of purchase and warranty documents in a safe place. Contact Bullfrog Spas directly for warranty claims and service.