
Oster Roaster Oven User Guide: A Comprehensive Overview (12/16/2025)
Today‚ December 16‚ 2025‚ marks the release of this comprehensive Oster Roaster Oven User Guide‚ available in PDF format․ This guide provides detailed instructions for optimal use․

It covers everything from initial setup and safety precautions to roasting‚ baking‚ slow cooking‚ and convenient warming features․
Find answers to frequently asked questions and access troubleshooting tips for a seamless cooking experience with your Oster appliance․
Welcome to the world of convenient and versatile cooking with your new Oster Roaster Oven! This appliance is designed to simplify meal preparation‚ especially for large gatherings or when you need extra oven capacity․ The Oster Roaster Oven offers a spacious interior capable of accommodating sizable roasts‚ turkeys‚ or multiple dishes simultaneously․
This user guide serves as your comprehensive resource‚ providing step-by-step instructions and helpful tips to maximize your cooking experience․ Whether you’re a seasoned chef or a beginner in the kitchen‚ this guide will empower you to create delicious meals with ease․ The Oster oven is more than just a cooking appliance; it’s a solution for simplifying holiday feasts‚ family dinners‚ and everyday cooking needs․
Before you begin‚ please take a moment to familiarize yourself with the oven’s features and safety precautions outlined in this manual․ Understanding the controls and capabilities of your Oster Roaster Oven will ensure safe and efficient operation․ This guide will also direct you to where you can download the Oster Roaster Oven User Guide in PDF format for easy access․

Understanding Your Oven: Key Features
Your Oster Roaster Oven boasts several key features designed for optimal performance and user convenience․ The spacious interior provides ample room for large cuts of meat‚ poultry‚ or multiple baking pans‚ making it ideal for holiday gatherings and family meals․ A notable feature is the adjustable temperature control‚ allowing precise cooking for various recipes – from slow cooking to high-temperature roasting․
The included roasting pan and rack are specifically designed to fit the oven’s interior‚ ensuring even heat distribution and efficient cooking․ The “Warm” setting is a valuable addition‚ keeping cooked food at the perfect serving temperature for extended periods․ Accessing the Oster Roaster Oven User Guide‚ available as a PDF download‚ will further clarify these features․
Furthermore‚ the oven’s durable construction ensures long-lasting reliability․ Understanding these features‚ detailed in the instruction manual‚ will unlock the full potential of your Oster appliance‚ transforming your cooking experience and simplifying meal preparation․ Remember to always follow the safety precautions outlined within․

Safety Precautions & Important Warnings
Important: Prioritize safety when operating your Oster Roaster Oven․ The oven body retains significant residual heat during and immediately after the cooking cycle; avoid touching it until fully cooled to prevent burns․ Always use oven mitts or pot holders when handling the roasting pan and rack‚ as they become extremely hot․
Never immerse the oven‚ cord‚ or plug in water or other liquids․ Ensure the oven is placed on a stable‚ heat-resistant surface away from flammable materials․ Do not operate the oven with a damaged cord or plug‚ and if it malfunctions‚ discontinue use and consult the Oster support team․

Supervise children closely when the oven is in use; Refer to the complete instruction manual‚ downloadable as a PDF‚ for a comprehensive list of safety guidelines․ Ignoring these warnings could result in personal injury or damage to the appliance․ Always follow these safety precautions for a secure cooking experience․
Getting Started: Initial Setup
Before your first use of the Oster Roaster Oven‚ unpack it carefully and remove all packaging materials․ Inspect the oven for any visible damage․ Wash the roasting pan and rack with warm‚ soapy water‚ then dry thoroughly․ Avoid abrasive cleaners‚ which could damage the non-stick coating․
Place the oven on a stable‚ heat-resistant surface with adequate ventilation․ Ensure there’s sufficient space around the oven for proper airflow․ Familiarize yourself with the control panel – a detailed explanation is provided in the User Guide‚ available as a PDF download․
Plug the oven into a grounded electrical outlet․ It’s recommended to perform a test run by setting the oven to a low temperature for approximately 15-20 minutes to burn off any manufacturing residue․ Refer to the instruction manual for detailed setup steps and safety information․
Control Panel Explained
The Oster Roaster Oven’s control panel features intuitive settings for effortless operation․ The primary controls include a temperature dial‚ allowing precise adjustments from “Warm” to 450°F (232°C)․ A timer dial enables you to set cooking durations‚ automatically shutting off the oven upon completion․
The “Warm” setting maintains food temperature without further cooking‚ ideal for serving․ Some models may include dedicated function selectors for roasting‚ baking‚ or slow cooking‚ simplifying the process․ Refer to the Oster Roaster Oven User Guide – downloadable in PDF format – for a detailed diagram of the control panel․
Understanding each control is crucial for optimal results․ The instruction manual provides clear explanations of each function‚ ensuring you can confidently utilize all features․ Always consult the guide for specific temperature and time recommendations based on your recipe․
Using the Roasting Pan & Rack
The Oster Roaster Oven includes a durable roasting pan and rack‚ essential for achieving perfectly cooked results․ Before first use‚ wash the pan and rack with warm‚ soapy water․ The roasting pan is designed to fit snugly within the oven cavity‚ ensuring even heat distribution․
When roasting‚ place the rack inside the pan to elevate the food‚ allowing for air circulation and preventing sticking․ For larger items like turkeys‚ the rack provides stability and promotes even cooking․ Always refer to the Oster Roaster Oven User Guide (available as a PDF download) for specific recommendations regarding pan placement and rack usage․
Remember that the roasting oven body retains heat; exercise caution when handling the pan after cooking․ Proper use of the pan and rack is vital for maximizing the oven’s performance and ensuring delicious‚ evenly cooked meals․
Temperature Settings & Guide
The Oster Roaster Oven offers a versatile range of temperature settings to accommodate various cooking needs․ Typically‚ settings range from a low “Warm” setting (around 140°F) to a high of 450°F․ Consult the detailed Oster Roaster Oven User Guide – readily available as a PDF – for precise temperature recommendations for specific foods․
For roasting poultry‚ a temperature between 325°F and 350°F is generally recommended․ Baking often requires temperatures between 350°F and 400°F․ Always preheat the oven before adding food to ensure consistent cooking․ The control panel allows for precise temperature adjustments‚ crucial for achieving optimal results․
Remember to use an oven thermometer to verify the internal temperature‚ as oven calibrations can vary․ Understanding these settings‚ as outlined in the instruction manual‚ is key to unlocking the full potential of your Oster appliance․
Roasting a Turkey: A Step-by-Step Guide
Preparing a turkey in your Oster Roaster Oven is straightforward․ First‚ ensure the turkey is fully thawed․ Place the turkey on the roasting rack inside the roasting pan․ Season generously‚ both inside and out‚ with your preferred herbs and spices․ Add approximately one cup of broth or water to the bottom of the pan to maintain moisture․
Set the temperature to 325°F – 350°F‚ referencing the Oster Roaster Oven User Guide (available as a PDF) for specific timing based on the turkey’s weight․ Baste the turkey every 30-45 minutes with pan juices․
Use a meat thermometer to check the internal temperature in the thickest part of the thigh; it should reach 165°F․ Once cooked‚ let the turkey rest for 20-30 minutes before carving․ Refer to the instruction manual for detailed guidance and safety precautions․ Enjoy!
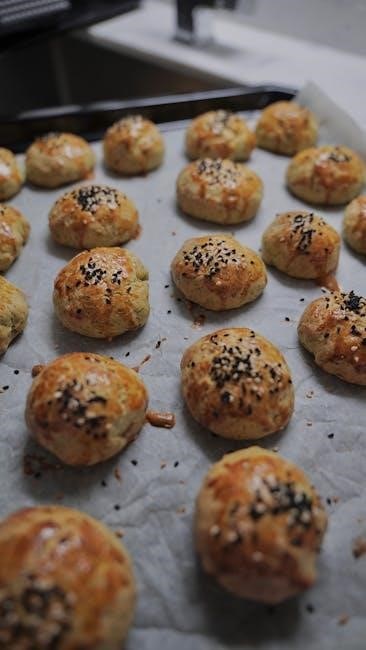
Baking with Your Oster Roaster Oven
Your Oster Roaster Oven isn’t just for roasting; it’s a versatile baking appliance! Preheat the oven to your desired baking temperature‚ consulting the Oster Roaster Oven User Guide (available in PDF format) for precise settings․ Use standard baking pans – cake‚ cookie sheets‚ or casseroles – that fit comfortably within the oven cavity;
Baking times may slightly differ from a conventional oven‚ so check for doneness a little earlier than the recipe suggests․ For cakes and breads‚ a toothpick inserted into the center should come out clean․ Cookies will be golden brown around the edges․
Remember to consult the instruction manual for temperature guidelines and safety precautions․ The “Warm” setting can be used to keep baked goods at serving temperature․ Enjoy experimenting with your favorite recipes!
Slow Cooking Capabilities
The Oster Roaster Oven excels as a slow cooker‚ offering tender‚ flavorful results with minimal effort․ To utilize this function‚ select a lower temperature setting – often between 250°F and 300°F – and allow ample cooking time․ Refer to your Oster Roaster Oven User Guide‚ downloadable as a PDF‚ for specific temperature recommendations․
The roasting pan is ideal for slow-cooked meats‚ stews‚ and chili․ Ensure ingredients are adequately covered with liquid to maintain moisture throughout the extended cooking process․ Remember to always follow the safety precautions outlined in the instruction manual․
Slow cooking allows flavors to meld beautifully‚ creating rich and satisfying meals․ The “Warm” setting can then maintain the perfect serving temperature until you’re ready to enjoy․ Explore new recipes and savor the convenience!
Keeping Food Warm: The “Warm” Setting
The Oster Roaster Oven’s “Warm” setting is a convenient feature for maintaining food temperature after cooking is complete․ This prevents your delicious creations from cooling down while awaiting serving‚ ensuring a consistently enjoyable meal for everyone․
To activate the “Warm” setting‚ simply select it on the control panel after the roasting or baking cycle has finished․ The oven will operate at a low temperature‚ typically around 150°F ⸺ 200°F‚ to keep food warm without further cooking․ Consult your Oster Roaster Oven User Guide – available as a PDF download – for precise temperature details․
It’s important to note that prolonged use of the “Warm” setting may slightly dry out certain foods․ For best results‚ limit warming time to a few hours․ Always refer to the instruction manual for specific recommendations and safety guidelines․
Cleaning and Maintenance
Regular cleaning and maintenance will ensure the longevity and optimal performance of your Oster Roaster Oven․ Always unplug the oven and allow it to cool completely before beginning any cleaning procedures․ The roasting pan and rack are typically dishwasher-safe‚ offering a convenient cleaning option․
For the oven interior‚ wipe down surfaces with a damp cloth and mild detergent․ Avoid abrasive cleaners‚ as they can damage the finish․ Stubborn food residue may require a bit more effort‚ but gentle scrubbing is recommended․ Refer to your Oster Roaster Oven User Guide – easily downloadable as a PDF – for detailed cleaning instructions․

The exterior of the oven can be cleaned with a damp cloth as well․ Ensure no water enters the oven’s electrical components․ Proper care‚ as outlined in the instruction manual‚ will keep your Oster appliance in excellent condition for years to come․
Troubleshooting Common Issues
Encountering issues with your Oster Roaster Oven? This section addresses common problems and offers solutions․ If the oven isn’t heating‚ first ensure it’s properly plugged in and the temperature is set correctly․ Check your circuit breaker as well․ If food is cooking unevenly‚ rotate the roasting pan during the cooking process․
For questions like “How do I roast a turkey in my Oster roaster oven?”‚ consult the detailed instructions within the Oster Roaster Oven User Guide‚ available as a PDF download․ If the “Warm” setting isn’t maintaining temperature‚ verify the oven door is securely closed․
Remember to consult the full instruction manual for a comprehensive list of troubleshooting steps․ If problems persist‚ refer to the warranty information for support․ Addressing these common issues will help you enjoy seamless cooking with your Oster appliance․
Downloading the Oster Roaster Oven User Guide (PDF)
Accessing the Oster Roaster Oven User Guide in PDF format is simple and convenient! The optimized PDF version contains detailed instructions‚ safety precautions‚ and helpful tips for maximizing your cooking experience․ This digital format allows for easy storage and access on your computer‚ tablet‚ or smartphone․
You can find the PDF download link on the official Oster website or through various online resources․ If you’re having trouble opening the PDF‚ ensure you have a PDF viewer installed on your device․ Several free PDF viewers are readily available for download․
Having the instruction manual readily available as a PDF ensures you always have quick access to essential information about your Oster oven․ Download your copy today and unlock the full potential of your appliance!
Finding Instruction Manuals Online
Locating instruction manuals for your Oster Roaster Oven online is straightforward․ Several websites specialize in hosting appliance manuals‚ offering a convenient way to access information without needing a physical copy․ ManualsBase‚ for example‚ provides a collection of Oster manuals‚ including those for roaster ovens․

Begin by searching on the official Oster website; they typically have a dedicated support section where you can download manuals by model number․ Alternatively‚ utilize search engines like Google‚ using specific keywords such as “Oster Roaster Oven manual” or “Oster oven instructions․”
Remember to verify the source’s reliability to ensure you’re downloading a legitimate and accurate manual․ Many sites offer PDF versions for easy viewing and printing․ Having online access to your manual ensures you can quickly troubleshoot issues or refresh your knowledge of the oven’s features․
Frequently Asked Questions (FAQ)
Q: Can the Oster roaster oven be used to keep food warm? A: Absolutely! The oven features a dedicated “Warm” setting designed to maintain food temperature without continued cooking‚ perfect for buffet-style serving or delaying meals․
Q: How do I roast a turkey in my Oster roaster oven? A: A step-by-step guide is available within the full user manual‚ detailing preparation‚ cooking times based on weight‚ and temperature recommendations for a perfectly roasted turkey․
Q: Is this oven suitable for baking? A: Yes‚ the Oster roaster oven functions effectively as a secondary oven for baking cakes‚ casseroles‚ and other baked goods; Adjust baking times slightly as needed․
Q: What should I do if the oven isn’t heating? A: Consult the troubleshooting section of the manual․ Ensure the oven is properly plugged in and the temperature is set correctly․ If issues persist‚ contact Oster support․
Roaster Oven Dimensions & Capacity
Understanding the Oster Roaster Oven’s dimensions and capacity is crucial for successful cooking․ While specific measurements vary by model‚ generally‚ these ovens are designed to accommodate large food items‚ particularly poultry․
Most standard models offer a cooking capacity ranging from 18 to 22 quarts‚ comfortably fitting a turkey up to 20-25 pounds․ Internal dimensions typically allow for a roasting pan approximately 11” x 16” x 2․5”․
External dimensions generally fall around 18” x 22” x 14”‚ requiring ample counter space․ Always verify the exact dimensions of your specific model in the included user manual or on the Oster website․
Properly assessing capacity ensures you can roast your desired dishes without overcrowding‚ leading to even cooking and optimal results․ Consider these measurements when planning your meals!
Warranty Information & Support
Oster stands behind the quality of its Roaster Ovens with a limited warranty‚ typically covering defects in materials and workmanship for a specified period․ The standard warranty duration is often one year from the date of original purchase․
This warranty doesn’t cover damage resulting from misuse‚ accidents‚ or unauthorized repairs․ To make a warranty claim‚ retain your proof of purchase and contact Oster customer support․
For assistance beyond the warranty period‚ or for general inquiries‚ Oster provides comprehensive support resources․ These include a detailed FAQ section on their website‚ downloadable user guides in PDF format‚ and a responsive customer service team․
You can reach Oster support via phone‚ email‚ or online chat․ Their website also offers troubleshooting guides and helpful tips to resolve common issues․ Ensure a positive cooking experience!