Canon EOS Rebel XSi/450D: A Comprehensive Manual Guide
This guide details the Canon EOS Rebel XSi/450D, offering a 196-page PDF user manual in English․ Access specifications, tutorials, and troubleshooting resources online today!
The Canon EOS Rebel XSi (also known as the 450D) is a 12․20-megapixel digital single-lens reflex camera, celebrated for its user-friendly design and impressive image quality․ Released in 2008, it quickly became a favorite among both beginner and enthusiast photographers․
This camera offers a blend of affordability and performance, making advanced photography accessible․ The official Canon manual, available as a PDF, provides comprehensive guidance on utilizing its features․ Explore its capabilities and unlock your photographic potential!
Key Features and Specifications
The Canon EOS Rebel XSi boasts a 12․2-megapixel CMOS sensor, delivering detailed images․ Its DIGIC 3 image processor enhances speed and quality․ Key specs include a 9-point autofocus system and a 3․0-inch LCD screen․
The camera supports RAW and JPEG file formats, offering flexibility in post-processing․ The downloadable PDF manual details these features, alongside ISO settings (up to 1600, expandable to 3200) and continuous shooting at 3․5fps․ Explore its full potential!
Unboxing and Initial Setup
Upon unboxing your Canon EOS Rebel XSi, you’ll find the camera body, a kit lens, battery, and charger․ The included PDF manual guides initial setup, including inserting the battery and memory card․
Follow the on-screen prompts to set the language, date, and time․ Connect the camera to a computer via USB (drivers may be required, downloadable from Canon’s website) to ensure proper functionality․ Begin exploring your new camera!
Understanding the Camera Body
The Canon EOS Rebel XSi features a robust, yet user-friendly body design․ Refer to the comprehensive PDF manual for detailed diagrams․ Key elements include the mode dial, shutter button, and control dials․
Familiarize yourself with the placement of ports for USB and remote control․ The camera’s build allows for comfortable handling during shooting․ Understanding these physical aspects is crucial for efficient operation․
Buttons and Dials Explained
The Canon XSi’s buttons and dials control essential functions․ The main dial selects shooting modes, while dials adjust aperture, shutter speed, and settings․ The ‘SET’ button confirms menu selections․
The directional buttons navigate menus and select focus points․ The ‘DISP’ button toggles information displayed on the LCD screen․ Consult the PDF manual for a detailed button layout and function guide․

Viewfinder and LCD Screen
The Canon XSi features an optical viewfinder for clear, real-time composition․ The 2․7-inch LCD screen displays images, menus, and shooting information․ Use the ‘DISP’ button to customize the LCD display․
The viewfinder shows approximately 95% coverage․ Review captured images on the LCD screen, utilizing zoom for detailed inspection․ Refer to the comprehensive PDF manual for optimal viewing and display settings․
Menus and Settings Navigation
The Canon XSi utilizes a user-friendly menu system for customizing camera settings․ Access menus via the ‘MENU’ button․ Navigate using the directional buttons and set selections with the ‘SET’ button․

The menu is divided into sections: Shooting, AF, Setup, and others․ Explore options for image quality, autofocus, and various camera functions․ Consult the detailed PDF manual for a complete understanding of each setting and its impact․
Shooting Menu Options
Within the Shooting Menu, configure essential photographic parameters․ Adjust image quality between RAW and JPEG formats, selecting appropriate image size and compression levels․ Customize white balance settings for accurate color rendition․
Explore Picture Style presets to tailor image aesthetics․ Manage auto-exposure settings and metering modes for optimal exposure control․ Refer to the Canon XSi manual’s PDF for detailed explanations of each shooting menu option and its effect on your images․
Setup Menu Customization
The Setup Menu allows personalization of your Canon XSi․ Customize date/time settings, format memory cards, and adjust display options like LCD brightness and viewfinder settings․ Configure button functions for quicker access to frequently used features․
Manage auto-power functions and sensor cleaning settings․ Refer to the Canon EOS Rebel XSi manual’s PDF for a comprehensive guide to each customization option, ensuring optimal camera performance and a tailored shooting experience․
Focusing Modes and Techniques
The Canon XSi offers diverse focusing options․ Explore the autofocus system, utilizing One-Shot for static subjects and AI Servo for tracking moving objects․ Master manual focus for precise control, especially in challenging lighting․
The PDF manual details focus point selection and lock-on behavior․ Practice switching between autofocus and manual focus modes to adapt to various shooting scenarios, enhancing image sharpness and overall photographic quality․
Autofocus System Overview
The Canon XSi features a 9-point autofocus system․ This system employs cross-type sensors at the center for enhanced accuracy․ Select focus points manually or allow the camera to automatically choose one․
The PDF manual explains autofocus modes like One-Shot and AI Servo․ Understand how these modes impact focusing behavior for still and moving subjects, optimizing sharpness and capturing decisive moments effectively․
Manual Focus Operation
The Canon XSi allows precise manual focusing via the lens focusing ring․ Switch the lens to MF mode for complete control․ Utilize the viewfinder or LCD screen for visual confirmation of sharpness;

The PDF manual details magnification for critical focus․ Fine-tune focus for challenging situations where autofocus struggles, ensuring optimal image clarity and artistic control over your photographs․

Exposure Control: Aperture, Shutter Speed, and ISO
Mastering exposure is key with the Canon XSi․ The camera offers Aperture Priority (Av), Shutter Priority (Tv), and full Manual (M) modes․ The PDF manual explains how these settings interact to control image brightness․
Adjust aperture for depth of field, shutter speed for motion blur, and ISO for sensitivity; Understanding these elements, detailed in the guide, unlocks creative photographic potential․
Aperture Priority Mode (Av)
In Aperture Priority (Av) mode on the Canon XSi, you select the aperture (f-stop), controlling depth of field․ The camera automatically sets the shutter speed for proper exposure․
The PDF manual details how wider apertures (lower f-numbers) create shallow depth of field, ideal for portraits, while smaller apertures (higher f-numbers) maximize sharpness throughout the scene․ Experiment to achieve desired results!
Shutter Priority Mode (Tv)
Shutter Priority (Tv) mode on the Canon XSi allows you to control the shutter speed, freezing or blurring motion․ The camera automatically adjusts the aperture for correct exposure․
Refer to the PDF manual for guidance: faster shutter speeds freeze action, perfect for sports, while slower speeds create motion blur, ideal for waterfalls․ Mastering this mode enhances creative control!
Manual Mode (M)
Manual (M) mode on the Canon XSi grants complete control over both aperture and shutter speed․ This mode requires understanding the exposure triangle – aperture, shutter speed, and ISO – for optimal results․
Consult the PDF manual for detailed instructions․ Manual mode is ideal for challenging lighting situations, allowing precise adjustments․ It’s a powerful tool for experienced photographers!
Shooting Modes: Scene and Creative
The Canon XSi offers a variety of Scene and Creative Zone modes for diverse shooting scenarios․ Pre-set Scene modes simplify capturing portraits, landscapes, sports, and more․
Creative Zone modes – like Aperture Priority, Shutter Priority, and Manual – provide greater control․ Refer to the PDF manual for detailed explanations of each mode, enhancing your photographic creativity!
Pre-set Scene Modes
The Canon EOS Rebel XSi/450D features convenient pre-set Scene modes for simplified shooting․ These modes automatically optimize camera settings for common subjects like portraits, landscapes, close-ups, sports, night scenes, and more․
Consult the PDF manual to understand each mode’s specific function․ Utilizing these modes allows beginners to achieve excellent results without complex adjustments, enhancing ease of use!
Creative Zone Modes
The Canon XSi’s Creative Zone modes empower photographers with greater control․ These include Program (P), Aperture Priority (Av), Shutter Priority (Tv), and Manual (M) modes․ The PDF manual details how to leverage these for customized image creation․
Explore these modes to master exposure settings and unlock your artistic vision․ Experimentation within these zones allows for unique photographic expression, moving beyond automatic settings!
Working with Flash
The Canon XSi features a built-in flash with various functionalities, detailed within the PDF manual․ Explore settings like flash exposure compensation and red-eye reduction․ The manual also covers compatibility with external flash units, expanding your lighting options․
Learn how to synchronize flash with shutter speed for creative effects․ Mastering flash control enhances image quality in challenging lighting conditions, as outlined in the comprehensive guide!
Built-in Flash Features
The Canon XSi’s integrated flash offers several key features, explained thoroughly in the camera’s manual․ Users can adjust flash exposure compensation to fine-tune brightness․ Red-eye reduction is also available, minimizing unwanted red reflections in portraits․
Explore modes like auto flash and forced flash for diverse shooting scenarios․ The PDF guide details how to utilize these features effectively, improving your photography in low-light situations!
External Flash Compatibility
The Canon EOS Rebel XSi/450D supports a wide range of Canon Speedlite external flashes․ The camera manual details how to connect and configure these units for enhanced lighting control․ Utilize features like E-TTL metering for automatic flash exposure, ensuring properly lit images․
Explore high-speed sync and other advanced flash modes․ The PDF guide provides comprehensive instructions for maximizing the potential of external flash photography, expanding your creative options!
Image Quality and File Formats
The Canon XSi allows shooting in both RAW and JPEG formats․ RAW files offer maximum editing flexibility, capturing all image data, while JPEGs are smaller and ready to share․ The camera manual details the benefits of each․
Adjust image size and compression levels to balance quality and storage space․ Refer to the PDF guide for optimal settings based on your needs, ensuring the best possible image quality!
RAW vs․ JPEG
Choosing between RAW and JPEG impacts editing control and file size․ RAW files preserve all sensor data, allowing extensive post-processing adjustments without quality loss․ However, they require more storage space and editing software․
JPEG files are compressed, resulting in smaller files suitable for immediate use, but with limited editing capabilities․ The Canon XSi manual explains these differences, helping you select the best format for your workflow․
Image Size and Compression
The Canon XSi allows adjusting image size and compression levels․ Larger sizes capture more detail, ideal for prints or cropping, but consume more memory card space․ Compression affects file size; higher compression reduces file size but may introduce artifacts․
The camera supports various resolutions and compression settings․ Consult the Canon XSi manual for optimal choices based on your intended use, balancing quality and storage efficiency․
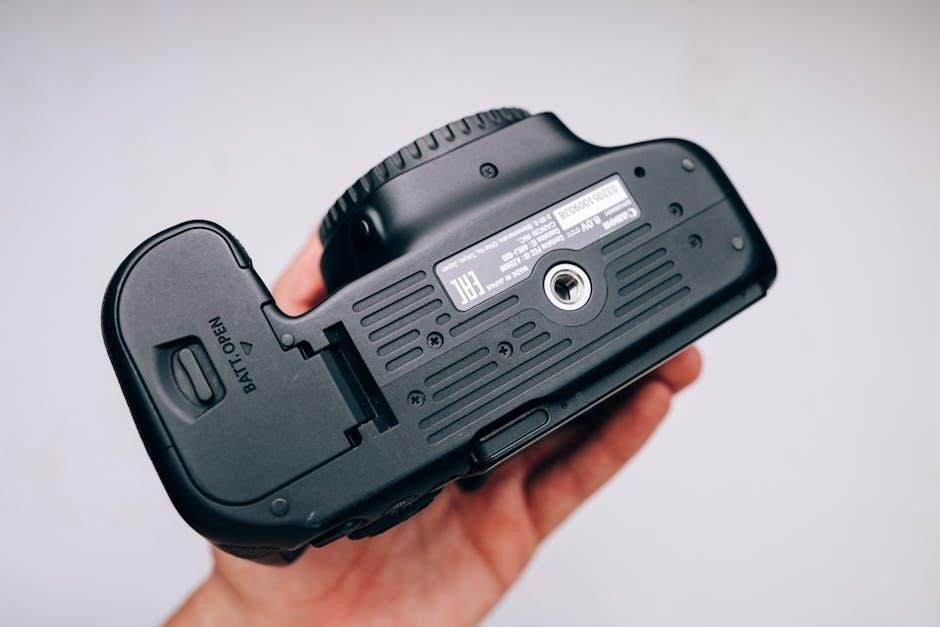
Using Memory Cards
The Canon XSi is compatible with various memory card types, including SD and SDHC cards․ Ensure your card is formatted correctly within the camera for optimal performance․ Regularly back up your images to a computer or external storage․
Proper memory card management is crucial․ Avoid deleting images directly from the card frequently; use the camera’s formatting function․ Refer to the Canon XSi manual for detailed card compatibility and care instructions․
Compatible Memory Card Types
The Canon EOS Rebel XSi/450D primarily supports SD and SDHC memory cards․ These cards offer sufficient storage capacity for numerous high-resolution photos and videos․ While older SD cards work, SDHC is recommended for capacities exceeding 2GB․
Confirm card speed class compatibility for optimal performance; Class 4 or higher is generally advised․ Avoid using non-compatible cards, as they may cause errors or damage the camera․ Consult the Canon XSi manual for a complete list․

Memory Card Management
Regularly back up photos from your Canon XSi’s memory card to a computer or external drive․ Formatting the card in-camera is recommended for optimal performance and to resolve potential errors․ Avoid abruptly removing the card during data transfer, which can corrupt files․
Organize photos into folders for easy retrieval․ Consider using card readers for faster transfer speeds․ Always safely eject the card from your computer before physically removing it․
Connecting to a Computer
Transferring photos from your Canon XSi to a computer is easily achieved via a USB cable․ Install the necessary Canon software and drivers, available on the official Canon website, for seamless connectivity․ Ensure the camera is powered off before connecting․
Follow the on-screen prompts to establish a connection and transfer images․ Alternatively, you can use a card reader for faster data transfer speeds․ Safely eject the camera after the transfer is complete․
Transferring Photos via USB
Connect your Canon XSi to your computer using a USB cable, ensuring the camera is powered off initially․ Once connected, power on the camera and follow the on-screen prompts to select USB transfer mode․ The camera will appear as a removable drive on your computer․
Simply copy and paste the desired photos from the camera’s memory card to your computer․ Remember to safely eject the camera from your computer after the transfer is finished to prevent data corruption․
Canon Software and Drivers
Canon provides essential software and drivers for your EOS Rebel XSi to enhance photo management and editing capabilities․ Visit the Canon official website to download the latest versions compatible with your operating system․
Software options include Digital Photo Professional for RAW image processing and ImageBrowser for basic organization․ Ensure you install the correct drivers for seamless communication between your camera and computer․ Regular updates are recommended for optimal performance․
Troubleshooting Common Issues
Encountering problems with your Canon EOS Rebel XSi? This section addresses frequent issues and provides solutions․ Common error messages are explained, alongside steps to resolve them․ Basic camera maintenance tips, like cleaning the sensor and lens, are also included․
Refer to the manual for detailed troubleshooting guidance and ensure proper care to prolong your camera’s lifespan․ If issues persist, consult Canon’s support resources for further assistance․
Error Messages and Solutions
The Canon XSi displays various error messages indicating potential problems․ Common errors include card errors, lens communication issues, and shutter malfunctions․ The manual details each message and offers troubleshooting steps, such as reformatting the card or checking lens connections;
Attempting basic fixes like battery replacement or resetting camera settings can often resolve these issues․ If errors persist, consult Canon’s official support website for advanced solutions and potential service options․
Basic Camera Maintenance
Regular cleaning is crucial for optimal Canon XSi performance․ Gently blow away dust from the sensor and viewfinder using a blower․ Avoid touching the sensor directly․ Clean the LCD screen with a soft, lint-free cloth․
Store the camera in a dry, dust-free environment․ Periodically check and clean the lens contacts․ Proper maintenance extends the lifespan of your Canon XSi and ensures consistent image quality․
Downloading the Canon XSi Manual (PDF)
Access the complete Canon EOS Rebel XSi/450D manual as a PDF file online․ Numerous websites host this 196-page document, offering a readily available resource․ Simply click the provided download link to open the manual in a new browser window․
This allows for offline viewing and convenient reference․ Ensure a stable internet connection during the download process․ Keep the PDF saved for future use and troubleshooting․
Resources and Support
For comprehensive support regarding your Canon EOS Rebel XSi, visit the official Canon website․ There, you’ll find the latest drivers, software downloads, and frequently updated manuals․ Explore online forums and communities dedicated to Canon photography․

These platforms offer valuable peer-to-peer assistance and troubleshooting advice․ Benefit from shared experiences and expert insights to enhance your XSi experience․ Canon provides extensive resources for its users․
Canon Official Website
The Canon official website is the primary hub for your EOS Rebel XSi support needs․ Here, you can directly download the latest software and essential drivers to ensure optimal camera performance․ Access the complete PDF manual for detailed guidance․
Find firmware updates, product information, and registration options․ Canon’s website provides a centralized location for all XSi-related resources, guaranteeing you have the tools for success․
Online Forums and Communities
Numerous online forums and communities are dedicated to Canon EOS Rebel XSi users․ These platforms offer a valuable space to ask questions, share experiences, and receive assistance from fellow photographers․ Find solutions to common issues and discover advanced techniques․
Engage with experienced XSi owners and benefit from collective knowledge․ These communities often host tutorials and provide links to helpful resources, supplementing the official manual․